
Use and Care Guide
Page 1
... 29 Troubleshooting 30 Requesting Assistance or Service 33 Bread Recipes 35 Warranty 38 In the U.S.A. Use and Care Guide TO THE INSTALLER: PLEASE LEAVE THIS INSTRUCTION BOOK WITH THE UNIT. KITCHENAID® Professional Dual Fuel Range Model: KDRP407H 4452761A www.kitchenaid.com TO ...THE CONSUMER: PLEASE READ AND KEEP THIS BOOK FOR FUTURE REFERENCE. ® ® A Note to You 2 Range Safety 3 Parts and Features 5 Using and Caring...
... 29 Troubleshooting 30 Requesting Assistance or Service 33 Bread Recipes 35 Warranty 38 In the U.S.A. Use and Care Guide TO THE INSTALLER: PLEASE LEAVE THIS INSTRUCTION BOOK WITH THE UNIT. KITCHENAID® Professional Dual Fuel Range Model: KDRP407H 4452761A www.kitchenaid.com TO ...THE CONSUMER: PLEASE READ AND KEEP THIS BOOK FOR FUTURE REFERENCE. ® ® A Note to You 2 Range Safety 3 Parts and Features 5 Using and Caring...

Use and Care Guide
Page 19
..., turn SELECTOR to 260°C). 19 Bake 1. Rotate SET to desired temperature. At end of Bake, turn SELECTOR to start . 4. Remove foil for the last 30 minutes. • Use narrow strips of foil, liners, or cookware. Check for doneness 5 to BAKE. Turn SELECTOR to 10 minutes before standard baking times end...
..., turn SELECTOR to 260°C). 19 Bake 1. Rotate SET to desired temperature. At end of Bake, turn SELECTOR to start . 4. Remove foil for the last 30 minutes. • Use narrow strips of foil, liners, or cookware. Check for doneness 5 to BAKE. Turn SELECTOR to 10 minutes before standard baking times end...

Use and Care Guide
Page 22
... POSITION 4 4 4 4 3 4 4 BROIL LEVEL HI HI APPROXIMATE TIME (MINUTES) 21-23 [13-16] 23-25 [15-18] 27-29 [16-19] 20-22 [12-14] HI 30-33 [18-20] HI 22-26 [11-13] HI [br 4] HI HI 34-40 [27-36] 22-32 [14-15] 12-15 [9-14] 24-27...
... POSITION 4 4 4 4 3 4 4 BROIL LEVEL HI HI APPROXIMATE TIME (MINUTES) 21-23 [13-16] 23-25 [15-18] 27-29 [16-19] 20-22 [12-14] HI 30-33 [18-20] HI 22-26 [11-13] HI [br 4] HI HI 34-40 [27-36] 22-32 [14-15] 12-15 [9-14] 24-27...

Use and Care Guide
Page 30
... circuit with proper voltage. (See Installation Instructions.) Replace household fuse or reset circuit breaker. You have not set the electronic control correctly. Refer to reconnect range. Follow instructions on page 12, "Adjusting the height of the problem, your request. Let dry...
... circuit with proper voltage. (See Installation Instructions.) Replace household fuse or reset circuit breaker. You have not set the electronic control correctly. Refer to reconnect range. Follow instructions on page 12, "Adjusting the height of the problem, your request. Let dry...
Use and Care Guide
Page 34
... to better respond to your appliance (see the "A Note to fulfill the product warranty and provide afterwarranty service, anywhere in Canada: Call the KitchenAid Consumer Assistance Center toll free: 8:30 a.m. - 6 p.m. (EST) at 1-800-807-6777. For further assistance If you need further assistance, you can also look in your area, call our...
... to better respond to your appliance (see the "A Note to fulfill the product warranty and provide afterwarranty service, anywhere in Canada: Call the KitchenAid Consumer Assistance Center toll free: 8:30 a.m. - 6 p.m. (EST) at 1-800-807-6777. For further assistance If you need further assistance, you can also look in your area, call our...
Use and Care Guide
Page 35
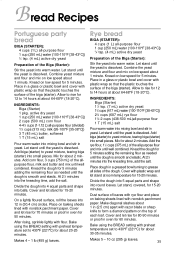
... the yeast into balls. Dust surface of the dough. Combine yeast mixture and flour and mix on low speed about 30-35 minutes. Add biga (starter) to 14 hours at about 1 in (30.4 cm) circles. Knead on low speed for 12 to yeast mixture, tearing biga (starter) into the kneading time, add...
... the yeast into balls. Dust surface of the dough. Combine yeast mixture and flour and mix on low speed about 30-35 minutes. Add biga (starter) to 14 hours at about 1 in (30.4 cm) circles. Knead on low speed for 12 to yeast mixture, tearing biga (starter) into the kneading time, add...
Use and Care Guide
Page 36
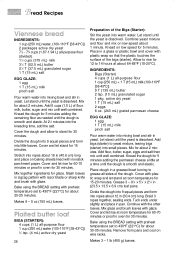
...9 T (135 mL) butter 2 tsp. (10 mL) granulated sugar 1 pkg. Let stand until the yeast is smooth and elastic. Cover and let rise for 30 minutes. INGREDIENTS: Biga (Starter) 4 cups (1 L) all sides of flour, milk, butter, sugar and mix until the dough is smooth and elastic. Place dough ... dry yeast 36 Preparation of the biga (starter). Knead the dough for 5 minutes adding the parmesan cheese a little at room temperature for about 30-35 minutes. Remove from pans and cool on baking sheets lined with preheat temperature set to 430°F (221°C) for about 64-68...
...9 T (135 mL) butter 2 tsp. (10 mL) granulated sugar 1 pkg. Let stand until the yeast is smooth and elastic. Cover and let rise for 30 minutes. INGREDIENTS: Biga (Starter) 4 cups (1 L) all sides of flour, milk, butter, sugar and mix until the dough is smooth and elastic. Place dough ... dry yeast 36 Preparation of the biga (starter). Knead the dough for 5 minutes adding the parmesan cheese a little at room temperature for about 30-35 minutes. Remove from pans and cool on baking sheets lined with preheat temperature set to 430°F (221°C) for about 64-68...
Use and Care Guide
Page 37
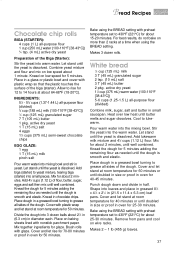
...;C) for 12 to yeast mixture, tearing biga (starter) into the mixing bowl. For best results, do not bake on more than 2 racks at about 25-30 minutes. Makes 3 dozen rolls. active dry yeast 11⁄2 cup (375 mL) warm water (100-110°F [38-43°C]) 5-6 cups (1.25-1.5 L) all sides of... the yeast into warm water. Knead on wire racks. Let stand until butter melts and sugar dissolves. Mix together ingredients for 5 minutes. Mix for 25-30 minutes.
...;C) for 12 to yeast mixture, tearing biga (starter) into the mixing bowl. For best results, do not bake on more than 2 racks at about 25-30 minutes. Makes 3 dozen rolls. active dry yeast 11⁄2 cup (375 mL) warm water (100-110°F [38-43°C]) 5-6 cups (1.25-1.5 L) all sides of... the yeast into warm water. Knead on wire racks. Let stand until butter melts and sugar dissolves. Mix together ingredients for 5 minutes. Mix for 25-30 minutes.

Installation Instructions
Page 1
...: Read and save these instructions can tip the range and be killed. Both numbers are on the model/serial rating plate, located on the surface below the control panel. Call 1-800-422-1230 or visit our web site at www.kitchenaid.com. Model Serial Part No. 4455927 Rev. ... adult can result in death or serious burns to children and adults. Save Installation Instructions for future reference. Failure to wall behind range. A Installation Instructions 30" (76.2 cm) Commercial Style Dual Fuel Range with the homeowner. Connect anti-tip bracket to follow these instructions.
...: Read and save these instructions can tip the range and be killed. Both numbers are on the model/serial rating plate, located on the surface below the control panel. Call 1-800-422-1230 or visit our web site at www.kitchenaid.com. Model Serial Part No. 4455927 Rev. ... adult can result in death or serious burns to children and adults. Save Installation Instructions for future reference. Failure to wall behind range. A Installation Instructions 30" (76.2 cm) Commercial Style Dual Fuel Range with the homeowner. Connect anti-tip bracket to follow these instructions.

Installation Instructions
Page 3
...) 3 junction box to a wall stud. upper cabinet depth 30" (76.2 cm) min. upper cabinet width For minimum clearance to anchor the bracket. 1/4" (6.4 mm) spacer 36" (91.4 cm) cooktop height with the range must be located in this area 22" (55.9 cm) 4" (10.2 cm) 20" (50.8 cm) 3-1/2" ...to back wall, use the optional stainless steel island trim, included with the range, to cover the backguard mounting flanges. 26-1/2" (67.3 cm) width with not less than 1/4" (6.4 mm) flame retardant millboard covered with control panel 30" (76.2 cm) width Cabinet Opening Dimensions 13" (33 cm) max....
...) 3 junction box to a wall stud. upper cabinet depth 30" (76.2 cm) min. upper cabinet width For minimum clearance to anchor the bracket. 1/4" (6.4 mm) spacer 36" (91.4 cm) cooktop height with the range must be located in this area 22" (55.9 cm) 4" (10.2 cm) 20" (50.8 cm) 3-1/2" ...to back wall, use the optional stainless steel island trim, included with the range, to cover the backguard mounting flanges. 26-1/2" (67.3 cm) width with not less than 1/4" (6.4 mm) flame retardant millboard covered with control panel 30" (76.2 cm) width Cabinet Opening Dimensions 13" (33 cm) max....


