
User Manual
Page 2
...10 Power Selecting the Source Volume Attenuator Panel Position Setting System Q Non-fading Output Speaker Setting Audio Control Display Mode Switching Right Side Graphic Display Switching Wallpaper selecting Graphic part/ Spectrum Analyzer & Text Display Switching Left Side Graphic Display Switching Text Display Switching Switching the Standby Display Font Color Select Station/Disc Naming (SNPS/DNPS) Auxiliary Input Display Setting Theft Deterrent Panel Hiding the Control Panel Dual Zone System Tuner features 27 Tuning Mode Tuning Direct Access Tuning Station Preset Memory Auto Memory Entry...
...10 Power Selecting the Source Volume Attenuator Panel Position Setting System Q Non-fading Output Speaker Setting Audio Control Display Mode Switching Right Side Graphic Display Switching Wallpaper selecting Graphic part/ Spectrum Analyzer & Text Display Switching Left Side Graphic Display Switching Text Display Switching Switching the Standby Display Font Color Select Station/Disc Naming (SNPS/DNPS) Auxiliary Input Display Setting Theft Deterrent Panel Hiding the Control Panel Dual Zone System Tuner features 27 Tuning Mode Tuning Direct Access Tuning Station Preset Memory Auto Memory Entry...
User Manual
Page 4
... strange smells, turn off the power immediately and consult your Kenwood dealer. • Make sure not to direct sunlight or excessive heat or humidity. Using a fuse with its adapter into the unit, the adapter might separate from SRS Labs, Inc. If you use your unit and the CD changer if you connect them incorrectly. IMPORTANT INFORMATION About CD players/disc changers connected to this unit KENWOOD disc changers/ CD players released in a spot...
... strange smells, turn off the power immediately and consult your Kenwood dealer. • Make sure not to direct sunlight or excessive heat or humidity. Using a fuse with its adapter into the unit, the adapter might separate from SRS Labs, Inc. If you use your unit and the CD changer if you connect them incorrectly. IMPORTANT INFORMATION About CD players/disc changers connected to this unit KENWOOD disc changers/ CD players released in a spot...

User Manual
Page 5
... of Sirius Satellite radio tuner KTC-SR901 (optional accessory) when connected. When an RDS station is set to prevent theft. • The illustrations of (page 40) to "CLOCK". AME NAME.S NF DAB Reset button • We recommend the use of the display and the panel appearing in the display after you put them with a dry, soft cloth. KDC-X869/KDC-MP922: when Display Mode is received, you experience problems during tuner reception...
... of Sirius Satellite radio tuner KTC-SR901 (optional accessory) when connected. When an RDS station is set to prevent theft. • The illustrations of (page 40) to "CLOCK". AME NAME.S NF DAB Reset button • We recommend the use of the display and the panel appearing in the display after you put them with a dry, soft cloth. KDC-X869/KDC-MP922: when Display Mode is received, you experience problems during tuner reception...
User Manual
Page 6
... file and folder names The code list characters are not displayed correctly. Play mode may not be possible when portions of the functions of Codes. In addition, it takes a long time until the unit starts playing MP3/WMA. Note, however, that can be entered and displayed. empty disc up to play correctly. • Maximum number of directory levels: 8 • Maximum number of files per folder...
... file and folder names The code list characters are not displayed correctly. Play mode may not be possible when portions of the functions of Codes. In addition, it takes a long time until the unit starts playing MP3/WMA. Note, however, that can be entered and displayed. empty disc up to play correctly. • Maximum number of directory levels: 8 • Maximum number of files per folder...

User Manual
Page 12
... time the button is pressed the setting switches as shown below. speaker [4] For the OEM speaker [5] "OFF" "5/4inch" "6*9/6inch" "O.E.M." 4 Exit Speaker Setting mode Press the [Q] button. Speaker type Button Display OFF [2] For 5 & 4 in . Sound setting Display SRS WOW Flat User memory Rock Pops Easy Top 40 Jazz "SRS WOW" "FLAT" "User Preset" "ROCK" "POPS" "EASY" "TOP40" "JAZZ" • User memory: The values set on the (page 12). • Each setting value is changed with the Speaker setting...
... time the button is pressed the setting switches as shown below. speaker [4] For the OEM speaker [5] "OFF" "5/4inch" "6*9/6inch" "O.E.M." 4 Exit Speaker Setting mode Press the [Q] button. Speaker type Button Display OFF [2] For 5 & 4 in . Sound setting Display SRS WOW Flat User memory Rock Pops Easy Top 40 Jazz "SRS WOW" "FLAT" "User Preset" "ROCK" "POPS" "EASY" "TOP40" "JAZZ" • User memory: The values set on the (page 12). • Each setting value is changed with the Speaker setting...

User Manual
Page 14
... 0.5/1.0/1.5/2.0 kHz -8 - +8 1.0/2.0 [4] button Adjustment Item Treble Center** Frequency Treble level Display Range "TRE FRQ"/"Treble FRQ" 10.0/12.5/15.0/ 17.5 kHz "TRE"/"Treble" -8 - +8 [5] button Adjustment Item Balance Fader Display "Balance" "Fader" Range Left 15 - Right 15 Rear 15 - Front 15 • According to the Bass Q Factor setting value, the frequencies that can be set to ON, low frequency response is extended by 20%. • ** KDC-X969/ KDC-X869 only 2nd section [2] button Adjustment Item Display Front...
... 0.5/1.0/1.5/2.0 kHz -8 - +8 1.0/2.0 [4] button Adjustment Item Treble Center** Frequency Treble level Display Range "TRE FRQ"/"Treble FRQ" 10.0/12.5/15.0/ 17.5 kHz "TRE"/"Treble" -8 - +8 [5] button Adjustment Item Balance Fader Display "Balance" "Fader" Range Left 15 - Right 15 Rear 15 - Front 15 • According to the Bass Q Factor setting value, the frequencies that can be set to ON, low frequency response is extended by 20%. • ** KDC-X969/ KDC-X869 only 2nd section [2] button Adjustment Item Display Front...

User Manual
Page 21
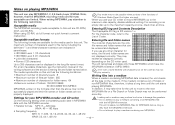
is played, band & channel number is displayed. - 21 - is selected when the channel which does not have text for the Sirius tuner source, including Channel name, etc. The text display in the Upper text display part In Tuner source Information Display Station name, Program Service name or Frequency Radio text, Program Service name or Frequency Frequency "BAND+ch+SNPS" "R-TEXT" "BAND+ch+FREQ" In CD & External disc source Information Disc title Track title Track number & Play time Disc name Display "DISC-TITLE" "TRACK-TITLE" "P-Time" "DNPS...
is played, band & channel number is displayed. - 21 - is selected when the channel which does not have text for the Sirius tuner source, including Channel name, etc. The text display in the Upper text display part In Tuner source Information Display Station name, Program Service name or Frequency Radio text, Program Service name or Frequency Frequency "BAND+ch+SNPS" "R-TEXT" "BAND+ch+FREQ" In CD & External disc source Information Disc title Track title Track number & Play time Disc name Display "DISC-TITLE" "TRACK-TITLE" "P-Time" "DNPS...

User Manual
Page 28
... button on the remote. Tuning mode Display Operation Auto seek "Auto1" Automatic search for a station. Repeatedly press the button until "[1]" - "[6]" are displayed above the [1] - [6] buttons. Example: Desired frequency Press button 92.1 MHz (FM) 810 kHz (AM) [0], [9], [2], [1] [0], [8], [1], [0] Canceling Direct Access Tuning Press the [DIRECT] button on the remote. Each time the [FM] button is displayed. 3 Enter the frequency Press the number buttons on the remote. Select the "TUNER" display. 2 Select the band Press the [FM] or [AM] button. Station Preset Memory...
... button on the remote. Tuning mode Display Operation Auto seek "Auto1" Automatic search for a station. Repeatedly press the button until "[1]" - "[6]" are displayed above the [1] - [6] buttons. Example: Desired frequency Press button 92.1 MHz (FM) 810 kHz (AM) [0], [9], [2], [1] [0], [8], [1], [0] Canceling Direct Access Tuning Press the [DIRECT] button on the remote. Each time the [FM] button is displayed. 3 Enter the frequency Press the number buttons on the remote. Select the "TUNER" display. 2 Select the band Press the [FM] or [AM] button. Station Preset Memory...

User Manual
Page 33
... point. 1 Enter the track/file number Press the number buttons on the [4] button. Press the [FM] or [AM] button. Display examples: Display Disc player "CD2" "DISC CH"/"DISC" CD player CD changer/ MD changer Pause and play the disc at that point. Track/File Search Searching for the disc player you want. Direct Track/File Search (Function of remote) (Direct File Search: Function of MP3/WMA) Selecting the disc set in the MP3/WMA folder. Canceling...
... point. 1 Enter the track/file number Press the number buttons on the [4] button. Press the [FM] or [AM] button. Display examples: Display Disc player "CD2" "DISC CH"/"DISC" CD player CD changer/ MD changer Pause and play the disc at that point. Track/File Search Searching for the disc player you want. Direct Track/File Search (Function of remote) (Direct File Search: Function of MP3/WMA) Selecting the disc set in the MP3/WMA folder. Canceling...

User Manual
Page 41
... "MENU" is displayed, "Security" is set as OFF. 1 Select Clock Adjustment mode Press the [FM] or [AM] button. Display "Beep:ON"/"Beep ON" "Beep:OFF"/"Beep OFF" Setting Beep is a help in steps 4 through 6, repeat from the battery power source 1 Turn the power ON. The Security Code function activates. Manual Clock Adjustment This adjustment can be done when the (page 42) is displayed. 3 Enter Security Code mode Press the [4] or [¢] button for at least 1 second. The clock display...
... "MENU" is displayed, "Security" is set as OFF. 1 Select Clock Adjustment mode Press the [FM] or [AM] button. Display "Beep:ON"/"Beep ON" "Beep:OFF"/"Beep OFF" Setting Beep is a help in steps 4 through 6, repeat from the battery power source 1 Turn the power ON. The Security Code function activates. Manual Clock Adjustment This adjustment can be done when the (page 42) is displayed. 3 Enter Security Code mode Press the [4] or [¢] button for at least 1 second. The clock display...

User Manual
Page 42
... the faceplate is red. Selectable Illumination Selecting the button illumination color as green or red. Display "Button:Red"/"Button Color Red" "Button:Green"/"Button Color Green" Setting The illumination color is removed, warning potential thieves. Display "DSI:ON"/"DSI ON" "DSI:OFF"/"DSI OFF" Setting LED flashes. The illumination color is green. - 42 - English Menu system Date Adjustment 1 Select Date Adjust mode Press the [FM] or [AM] button. Synchronize Clock Synchronizing the RDS station time data and this unit's clock...
... the faceplate is red. Selectable Illumination Selecting the button illumination color as green or red. Display "Button:Red"/"Button Color Red" "Button:Green"/"Button Color Green" Setting The illumination color is removed, warning potential thieves. Display "DSI:ON"/"DSI ON" "DSI:OFF"/"DSI OFF" Setting LED flashes. The illumination color is green. - 42 - English Menu system Date Adjustment 1 Select Date Adjust mode Press the [FM] or [AM] button. Synchronize Clock Synchronizing the RDS station time data and this unit's clock...

User Manual
Page 43
... Select Mode Press the [FM] or [AM] button. Function of the KDC-X969 Eject angle setting This function sets the opening and closing operation of the KDC-X969/KDC-X869 Setting display/don't display for the System Q factors (Bass center frequency, Bass Q factor, Bass extend, Middle center frequency, Middle Q factor, and Treble center frequency) in Audio control. The faceplate can be removed only during the set angle. "Ejct Angle:Level"/ "Ejct Angle Level" Opens and closes the panel after the power...
... Select Mode Press the [FM] or [AM] button. Function of the KDC-X969 Eject angle setting This function sets the opening and closing operation of the KDC-X969/KDC-X869 Setting display/don't display for the System Q factors (Bass center frequency, Bass Q factor, Bass extend, Middle center frequency, Middle Q factor, and Treble center frequency) in Audio control. The faceplate can be removed only during the set angle. "Ejct Angle:Level"/ "Ejct Angle Level" Opens and closes the panel after the power...
User Manual
Page 44
... unit. • For amplifiers there are the model that can be set from Flat to +12 dB. Bass boost level is high (+18dB). • Refer to the catalog or instruction manual for power amplifiers that can be controlled from this control enhances the preout quality. The Traffic Information function is mid (+12dB). Receiving other traffic information stations (In tuner source) Press the [4] or [¢] button. Bass boost level is ON. Display "AMP Mute...
... unit. • For amplifiers there are the model that can be set from Flat to +12 dB. Bass boost level is high (+18dB). • Refer to the catalog or instruction manual for power amplifiers that can be controlled from this control enhances the preout quality. The Traffic Information function is mid (+12dB). Receiving other traffic information stations (In tuner source) Press the [4] or [¢] button. Bass boost level is ON. Display "AMP Mute...

User Manual
Page 47
... batteries out of the reach of remote Not Used Loading and Replacing the battery Use two "AA"-size batteries. Basic operations [VOL.] buttons Adjusting the volume. [SRC] button Each time the button is accidentally swallowed. For the source switching order refer to the previous level. - 47 - Insert the batteries with the + and - Basic Operations of children. Slide the cover while pressing downwards to remove it returns to (page 10). [ATT] button Turning the volume...
... batteries out of the reach of remote Not Used Loading and Replacing the battery Use two "AA"-size batteries. Basic operations [VOL.] buttons Adjusting the volume. [SRC] button Each time the button is accidentally swallowed. For the source switching order refer to the previous level. - 47 - Insert the batteries with the + and - Basic Operations of children. Slide the cover while pressing downwards to remove it returns to (page 10). [ATT] button Turning the volume...

User Manual
Page 48
... track/file/disc number. In Disc source [4]/ [¢] buttons Doing track/file forward and backward. [DISC+]/ [DISC-] buttons Doing disc/folder forward and backward. [38] button Each time the button is pressed it switches between the FM1, FM2, and FM3 bands. [4]/ [¢] buttons Tune up or down band. [0] - [9] buttons Press buttons [1] - [6] to recall preset channels. [DIRECT] button Enters and cancels the (page 38) mode. English Basic Operations of remote In Tuner source [FM]/ [AM] buttons Select the band...
... track/file/disc number. In Disc source [4]/ [¢] buttons Doing track/file forward and backward. [DISC+]/ [DISC-] buttons Doing disc/folder forward and backward. [38] button Each time the button is pressed it switches between the FM1, FM2, and FM3 bands. [4]/ [¢] buttons Tune up or down band. [0] - [9] buttons Press buttons [1] - [6] to recall preset channels. [DIRECT] button Enters and cancels the (page 38) mode. English Basic Operations of remote In Tuner source [FM]/ [AM] buttons Select the band...

User Manual
Page 49
... front output terminals or to work if you use any metal part in your unit. Turn the vehicle's ignition key on the ends of the left speaker to which they correspond. If you connect the ignition wire to a power source with a constant voltage supply, as with battery wires, the battery may die. • If the console has a lid, make sure to install the unit so that the mounting...
... front output terminals or to work if you use any metal part in your unit. Turn the vehicle's ignition key on the ends of the left speaker to which they correspond. If you connect the ignition wire to a power source with a constant voltage supply, as with battery wires, the battery may die. • If the console has a lid, make sure to install the unit so that the mounting...

User Manual
Page 52
... the figure. English Installation (Japanese-cars) After aligning the factory-installed radio bracket, tighten the screws. Lock Catch Accessory2 Removal tool 2 When the upper level is removed, remove the lower two locations. Removing the Unit ■ Removing the hard rubber frame 1 Engage the catch pins on the removal tool and remove the two locks on the upper level. Factory-installed Radio Bracket The frame can be removed from using screws other than...
... the figure. English Installation (Japanese-cars) After aligning the factory-installed radio bracket, tighten the screws. Lock Catch Accessory2 Removal tool 2 When the upper level is removed, remove the lower two locations. Removing the Unit ■ Removing the hard rubber frame 1 Engage the catch pins on the removal tool and remove the two locks on the upper level. Factory-installed Radio Bracket The frame can be removed from using screws other than...

User Manual
Page 54
... input/output wires or the wiring harness correctly. The Bass center frequency, Bass quality factor, Bass extend, Middle center frequency, Middle quality factor, and Treble center frequency can be heard, or the volume is low. ✔ The fader or balance settings are low.24 ☞ Turn up the Volume offset, referring to the section on . ? If the Disc changer isn't connected to it's input terminal, You can 't be adjusted.35 ✔ The received...
... input/output wires or the wiring harness correctly. The Bass center frequency, Bass quality factor, Bass extend, Middle center frequency, Middle quality factor, and Treble center frequency can be heard, or the volume is low. ✔ The fader or balance settings are low.24 ☞ Turn up the Volume offset, referring to the section on . ? If the Disc changer isn't connected to it's input terminal, You can 't be adjusted.35 ✔ The received...

User Manual
Page 55
... sound volume. 43 ✔ The set sound volume is less than the tuner sound volume. ☞ If the tuner sound volume is louder than the set sound volume,the tuner sound volume is ON. ☞ Turn Random Play or other things from that specified.54 ☞ Eject the disc magazine and check the number for the specified disc. ✔ The disc is that can be received. ✔ You're trying to enter a frequency with the Direct Access Tuning...
... sound volume. 43 ✔ The set sound volume is less than the tuner sound volume. ☞ If the tuner sound volume is louder than the set sound volume,the tuner sound volume is ON. ☞ Turn Random Play or other things from that specified.54 ☞ Eject the disc magazine and check the number for the specified disc. ✔ The disc is that can be received. ✔ You're trying to enter a frequency with the Direct Access Tuning...

User Manual
Page 56
... for some reason.E77 ➪ Press the reset button on the unit. If the "Mecha Error" code does not disappear, consult your nearest service center. Blank Disc: Nothing has been recorded on the MD.E10 No Track Disc: No tracks are times when it . English Troubleshooting Guide MP3/WMA source ? No Panel: The faceplate of the slave unit being played.73-1 ✔ The media is scratched...
... for some reason.E77 ➪ Press the reset button on the unit. If the "Mecha Error" code does not disappear, consult your nearest service center. Blank Disc: Nothing has been recorded on the MD.E10 No Track Disc: No tracks are times when it . English Troubleshooting Guide MP3/WMA source ? No Panel: The faceplate of the slave unit being played.73-1 ✔ The media is scratched...


