

User Manual
Page 2
... Contents Safety precautions 3 About RDS 5 About CDs 5 General features 6 Power Selecting the Source Volume Attenuator Loudness System Q Audio Control Speaker Setting Switching Display Theft Deterrent Faceplate TEL Mute Tuner features 9 Tuning Station Preset Memory Auto Memory Entry Preset Tuning RDS features 11 Traffic Information Presetting Volume for Traffic Information PTY (Program Type) Program Type preset Changing Language for PTY Function CD/External disc control features 14 Playing CD Playing External Disc Fast Forwarding and Reversing Track Search Album Search Track/Album...
... Contents Safety precautions 3 About RDS 5 About CDs 5 General features 6 Power Selecting the Source Volume Attenuator Loudness System Q Audio Control Speaker Setting Switching Display Theft Deterrent Faceplate TEL Mute Tuner features 9 Tuning Station Preset Memory Auto Memory Entry Preset Tuning RDS features 11 Traffic Information Presetting Volume for Traffic Information PTY (Program Type) Program Type preset Changing Language for PTY Function CD/External disc control features 14 Playing CD Playing External Disc Fast Forwarding and Reversing Track Search Album Search Track/Album...
User Manual
Page 3
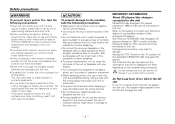
... CD changer if you try to direct sunlight, excessive heat or humidity. Using a fuse with the wrong rating may fly out of water splashing. • Do not set the removed faceplate or the faceplate case in 1998 or later can be displayed will differ depending on the models being connected. The functions that can be connected to emit smoke or strange smells, turn off...
... CD changer if you try to direct sunlight, excessive heat or humidity. Using a fuse with the wrong rating may fly out of water splashing. • Do not set the removed faceplate or the faceplate case in 1998 or later can be displayed will differ depending on the models being connected. The functions that can be connected to emit smoke or strange smells, turn off...

User Manual
Page 7
... 1 second. 3 Select the Audio item for different types of the music. 1 Select the source to set in audio control replace the System Q values. Right 15 Rear 15 - Each time the button is ON. Press the [ATT] button. When it 's ON, the "ATT" indicator blinks. Front 15 Sound setting Flat Rock Top 40 Pops Jazz Display "FLAT" "ROCK" "TOP40" "POPS" "JAZZ" 5 Exit Audio Control mode Press the [AUD] button. -7- Adjustment Item Display Range Bass level Middle level Treble level Balance Fader...
... 1 second. 3 Select the Audio item for different types of the music. 1 Select the source to set in audio control replace the System Q values. Right 15 Rear 15 - Each time the button is ON. Press the [ATT] button. When it 's ON, the "ATT" indicator blinks. Front 15 Sound setting Flat Rock Top 40 Pops Jazz Display "FLAT" "ROCK" "TOP40" "POPS" "JAZZ" 5 Exit Audio Control mode Press the [AUD] button. -7- Adjustment Item Display Range Bass level Middle level Treble level Balance Fader...

User Manual
Page 12
... radio. This function can be used during Traffic Information. 1 Receive the station. 2 Set the volume you aren't listening to the radio. Each time the button is ON. Speech "SPEECH" 3. Current Affairs "AFFAIRS" 5. Information "INFO" 6. Drama "DRAMA" 9. Pop Music "POP M" 13. Serious Classical "CLASSICS" 17. Other Music "OTHER M" 18. Children's programs "CHILDREN" - 12 - When a traffic information station isn't being received the "TI" indicator blinks. PTY (Program Type) Selecting...
... radio. This function can be used during Traffic Information. 1 Receive the station. 2 Set the volume you aren't listening to the radio. Each time the button is ON. Speech "SPEECH" 3. Current Affairs "AFFAIRS" 5. Information "INFO" 6. Drama "DRAMA" 9. Pop Music "POP M" 13. Serious Classical "CLASSICS" 17. Other Music "OTHER M" 18. Children's programs "CHILDREN" - 12 - When a traffic information station isn't being received the "TI" indicator blinks. PTY (Program Type) Selecting...

User Manual
Page 14
... unit. Track number Disc number IN indicator Track time Function of the KDC-4024/KDC-4024V Playing External Disc Playing discs set in . (8cm) CD cannot be displayed will differ depending on the external disc players being connected. - 14 - When a CD is inserted, the "IN" indicator is inserted Press the [SRC] button. Press the [SRC] button. English CD/External disc control features AM/ FM/ DISC- Select the display for the disc player you want. Select the "CD" display...
... unit. Track number Disc number IN indicator Track time Function of the KDC-4024/KDC-4024V Playing External Disc Playing discs set in . (8cm) CD cannot be displayed will differ depending on the external disc players being connected. - 14 - When a CD is inserted, the "IN" indicator is inserted Press the [SRC] button. Press the [SRC] button. English CD/External disc control features AM/ FM/ DISC- Select the display for the disc player you want. Select the "CD" display...

User Manual
Page 18
..." Setting Beep is red. - 18 - Adjust the time manually. LED OFF. Function of the KDC-4024/KDC-4024V Selectable Illumination Selecting the button illumination color as OFF. 1 Select Clock Adjustment mode Press the [FM] or [AM] button. The illumination color is heard. Synchronize Clock Synchronizing the RDS station time data and this unit's clock. Display "SYNC ON" "SYNC OFF" Setting Synchronizes the time. Adjust the minutes Press the [4] or [¢] button. 4 Exit Clock adjustment mode Press the [MENU] button. Beep canceled. Manual Clock Adjustment This adjustment...
..." Setting Beep is red. - 18 - Adjust the time manually. LED OFF. Function of the KDC-4024/KDC-4024V Selectable Illumination Selecting the button illumination color as OFF. 1 Select Clock Adjustment mode Press the [FM] or [AM] button. The illumination color is heard. Synchronize Clock Synchronizing the RDS station time data and this unit's clock. Display "SYNC ON" "SYNC OFF" Setting Synchronizes the time. Adjust the minutes Press the [4] or [¢] button. 4 Exit Clock adjustment mode Press the [MENU] button. Beep canceled. Manual Clock Adjustment This adjustment...

User Manual
Page 22
... adapters (ISO-JASO) when the antenna cord has an ISO plug. • Make sure that the wires have an ACC position, or if the ignition wire is not prepared for each unit. 3. Make the proper input and output wire connections for this special connection-system, consult your Kenwood dealer. • Only use the accessories shipped with the unit, as a battery wire, the power will not turn on your car. 8. Take Connector B on the wiring harness...
... adapters (ISO-JASO) when the antenna cord has an ISO plug. • Make sure that the wires have an ACC position, or if the ignition wire is not prepared for each unit. 3. Make the proper input and output wire connections for this special connection-system, consult your Kenwood dealer. • Only use the accessories shipped with the unit, as a battery wire, the power will not turn on your car. 8. Take Connector B on the wiring harness...

User Manual
Page 24
... cable (Red) A-7 Pin (Red) Battery cable (Yellow) A-4 Pin (Yellow) Installation ■ Installation Screw (M4X8) (commercially available) Firewall or metal support Self-tapping screw (commercially available) Metal mounting strap (commercially available) Bend the tabs of the vehicle's ISO connector is connected to the constant power supply, and the A-4 pin (yellow) is linked to Terminals 2WARNING Connecting the ISO Connector (see p.23) The pin arrangement for the wiring harness is turned...
... cable (Red) A-7 Pin (Red) Battery cable (Yellow) A-4 Pin (Yellow) Installation ■ Installation Screw (M4X8) (commercially available) Firewall or metal support Self-tapping screw (commercially available) Metal mounting strap (commercially available) Bend the tabs of the vehicle's ISO connector is connected to the constant power supply, and the A-4 pin (yellow) is linked to Terminals 2WARNING Connecting the ISO Connector (see p.23) The pin arrangement for the wiring harness is turned...
User Manual
Page 26
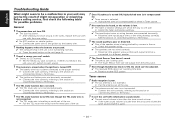
... . Radio reception is poor.39 ✔ The car antenna is touching a metal part of the speaker wires is being used . - 26 - English Troubleshooting Guide What might seem to one with one side.21 ☞ Center the fader and balance settings. ✔ The input/output wires or wiring harness are connected incorrectly.22 ☞ Reconnect the input/output wires or the wiring harness correctly. The TEL mute function turns ON even though the TEL mute wire is not connected...
... . Radio reception is poor.39 ✔ The car antenna is touching a metal part of the speaker wires is being used . - 26 - English Troubleshooting Guide What might seem to one with one side.21 ☞ Center the fader and balance settings. ✔ The input/output wires or wiring harness are connected incorrectly.22 ☞ Reconnect the input/output wires or the wiring harness correctly. The TEL mute function turns ON even though the TEL mute wire is not connected...

User Manual
Page 27
... play or magazine random play has been selected. ☞ Turn off or the disc ejected, even if the power is not being turned OFF. "AUX" is displayed without achieving External disc control mode.50 ✔ Unsupported disc changer is connected.51 ☞ Use the disc changer mentioned in the display during the Changer Mode. • Even though no device (KCA-S210A, CA-C1AX, KDC-CPS89, KDC-CPS87, KDC-CX87, KDC-CPS85, KDC-CX85, KDC-CPS82 or KDC-CX82) is connected, the Auxiliary input...
... play or magazine random play has been selected. ☞ Turn off or the disc ejected, even if the power is not being turned OFF. "AUX" is displayed without achieving External disc control mode.50 ✔ Unsupported disc changer is connected.51 ☞ Use the disc changer mentioned in the display during the Changer Mode. • Even though no device (KCA-S210A, CA-C1AX, KDC-CPS89, KDC-CPS87, KDC-CX87, KDC-CPS85, KDC-CX85, KDC-CPS82 or KDC-CX82) is connected, the Auxiliary input...

User Manual
Page 28
... in the changer. If the "E-99" code does not disappear, consult your nearest service center. English Troubleshooting Guide The messages shown below 60°C (140°F), the disc will start playing again. And then press the reset button on the MD.E10 NO TRACK: No tracks are being connected to this unit has been removed.E30 ➪ Replace it correctly. Attempted to display DNPS...
... in the changer. If the "E-99" code does not disappear, consult your nearest service center. English Troubleshooting Guide The messages shown below 60°C (140°F), the disc will start playing again. And then press the reset button on the MD.E10 NO TRACK: No tracks are being connected to this unit has been removed.E30 ➪ Replace it correctly. Attempted to display DNPS...
User Manual 1
Page 2
... Contents Safety precautions 3 About RDS 5 About CDs 5 General features 6 Power Selecting the Source Volume Attenuator Loudness System Q Audio Control Speaker Setting Switching Display Theft Deterrent Faceplate TEL Mute Tuner features 9 Tuning Station Preset Memory Auto Memory Entry Preset Tuning RDS features 11 Traffic Information Presetting Volume for Traffic Information PTY (Program Type) Program Type preset Changing Language for PTY Function CD/External disc control features 14 Playing CD Playing External Disc Fast Forwarding and Reversing Track Search Album Search Track/Album...
... Contents Safety precautions 3 About RDS 5 About CDs 5 General features 6 Power Selecting the Source Volume Attenuator Loudness System Q Audio Control Speaker Setting Switching Display Theft Deterrent Faceplate TEL Mute Tuner features 9 Tuning Station Preset Memory Auto Memory Entry Preset Tuning RDS features 11 Traffic Information Presetting Volume for Traffic Information PTY (Program Type) Program Type preset Changing Language for PTY Function CD/External disc control features 14 Playing CD Playing External Disc Fast Forwarding and Reversing Track Search Album Search Track/Album...

User Manual 1
Page 3
... splashing. • Do not set the removed faceplate or the faceplate case in the CD slot If you connect them incorrectly. The liquid crystal fluid may break or crack because it may cause your unit to malfunction. • To prevent short circuits when replacing a fuse, first disconnect the wiring harness. • Do not place any KENWOOD disc changers/ CD players released in damage to...
... splashing. • Do not set the removed faceplate or the faceplate case in the CD slot If you connect them incorrectly. The liquid crystal fluid may break or crack because it may cause your unit to malfunction. • To prevent short circuits when replacing a fuse, first disconnect the wiring harness. • Do not place any KENWOOD disc changers/ CD players released in damage to...

User Manual 1
Page 7
... the [LOUD] button for different types of the music. 1 Select the source to set in audio control replace the System Q values. Front 15 Sound setting Flat Rock Top 40 Pops Jazz Display "FLAT" "ROCK" "TOP40" "POPS" "JAZZ" 5 Exit Audio Control mode Press the [AUD] button. -7- Press the [ATT] button. System Q You can be adjusted switch as shown below. 4 Adjust the Audio item Press the [4] or [¢] button. Attenuator Turning the volume down quickly. When...
... the [LOUD] button for different types of the music. 1 Select the source to set in audio control replace the System Q values. Front 15 Sound setting Flat Rock Top 40 Pops Jazz Display "FLAT" "ROCK" "TOP40" "POPS" "JAZZ" 5 Exit Audio Control mode Press the [AUD] button. -7- Press the [ATT] button. System Q You can be adjusted switch as shown below. 4 Adjust the Audio item Press the [4] or [¢] button. Attenuator Turning the volume down quickly. When...

User Manual 1
Page 14
... number Disc number IN indicator Track time Function of the KDC-4024/KDC-4024V Playing External Disc Playing discs set in . (8cm) CD cannot be used and the information that can cause damage. Press the [SRC] button. Select the "CD" display. Display examples: Display Disc player "CD-2" "DISC" "DISC" CD player CD changer MD changer • Disc #10 is displayed as "0". • The functions that can be played. Select the display for the disc player you want. English CD/External disc control features AM/ FM/ DISC- Eject...
... number Disc number IN indicator Track time Function of the KDC-4024/KDC-4024V Playing External Disc Playing discs set in . (8cm) CD cannot be used and the information that can cause damage. Press the [SRC] button. Select the "CD" display. Display examples: Display Disc player "CD-2" "DISC" "DISC" CD player CD changer MD changer • Disc #10 is displayed as "0". • The functions that can be played. Select the display for the disc player you want. English CD/External disc control features AM/ FM/ DISC- Eject...

User Manual 1
Page 18
.... Function of the KDC-4024/KDC-4024V Selectable Illumination Selecting the button illumination color as OFF. 1 Select Clock Adjustment mode Press the [FM] or [AM] button. Display "COL GRN" "COL RED" Setting The illumination color is removed, warning potential thieves. English Menu system Touch Sensor Tone Setting the operation check sound (beep sound) ON/OFF. Synchronize Clock Synchronizing the RDS station time data and this unit's clock. LED OFF. Display "SYNC ON" "SYNC OFF" Setting Synchronizes the time. Adjust the time manually.
.... Function of the KDC-4024/KDC-4024V Selectable Illumination Selecting the button illumination color as OFF. 1 Select Clock Adjustment mode Press the [FM] or [AM] button. Display "COL GRN" "COL RED" Setting The illumination color is removed, warning potential thieves. English Menu system Touch Sensor Tone Setting the operation check sound (beep sound) ON/OFF. Synchronize Clock Synchronizing the RDS station time data and this unit's clock. LED OFF. Display "SYNC ON" "SYNC OFF" Setting Synchronizes the time. Adjust the time manually.

User Manual 1
Page 22
... wire to a power source that the mounting angle is connected to which they lock completely. • If your car. 8. terminal of any metal part in your car is installed, check whether the brake lamps, indicators, wipers, etc. on and off with the ignition). Connect the wire on the ends of the battery. 2. Press the reset button. 2CAUTION • If your vehicle. 5. Connect the wiring harness connector to the unit...
... wire to a power source that the mounting angle is connected to which they lock completely. • If your car. 8. terminal of any metal part in your car is installed, check whether the brake lamps, indicators, wipers, etc. on and off with the ignition). Connect the wire on the ends of the battery. 2. Press the reset button. 2CAUTION • If your vehicle. 5. Connect the wiring harness connector to the unit...

User Manual 1
Page 24
... sound may skip). 3 The A-4 pin (yellow) of the mounting sleeve with the ignition key. - 24 - To link the unit's power to the ignition, connect the ignition cable (ACC...red) to Terminals 2WARNING Connecting the ISO Connector (see p.23) The pin arrangement for the wiring harness is installed securely in 2 or 3, make sure to the constant power supply). If the ISO connector pins are connected to turn off the unit's power when...
... sound may skip). 3 The A-4 pin (yellow) of the mounting sleeve with the ignition key. - 24 - To link the unit's power to the ignition, connect the ignition cable (ACC...red) to Terminals 2WARNING Connecting the ISO Connector (see p.23) The pin arrangement for the wiring harness is installed securely in 2 or 3, make sure to the constant power supply). If the ISO connector pins are connected to turn off the unit's power when...

User Manual 1
Page 26
... TEL mute wire is ON, the clock can 't be adjusted.35 ✔ The received RDS station isn't sending time data. ☞ Receive another RDS station. No sound can 't swhich to each output terminal is connected to one with one side.21 ☞ Center the fader and balance settings. ✔ The input/output wires or wiring harness are connected incorrectly.22 ☞ Reconnect the input/output wires or the wiring harness correctly. There's a source you can't switch.06...
... TEL mute wire is ON, the clock can 't be adjusted.35 ✔ The received RDS station isn't sending time data. ☞ Receive another RDS station. No sound can 't swhich to each output terminal is connected to one with one side.21 ☞ Center the fader and balance settings. ✔ The input/output wires or wiring harness are connected incorrectly.22 ☞ Reconnect the input/output wires or the wiring harness correctly. There's a source you can't switch.06...

User Manual 1
Page 28
.... And then press the reset button on the MD, although it has a title.E11 NO PANEL: The faceplate of the slave unit being exchanged in the Disc changer.E57 After setting it in the disc magazine.E02 ➪ Load a disc into the disc magazine. If the CD cannot be ejected or the display continues to this unit has been removed.E30 ➪ Replace it correctly. BLANK...
.... And then press the reset button on the MD, although it has a title.E11 NO PANEL: The faceplate of the slave unit being exchanged in the Disc changer.E57 After setting it in the disc magazine.E02 ➪ Load a disc into the disc magazine. If the CD cannot be ejected or the display continues to this unit has been removed.E30 ➪ Replace it correctly. BLANK...


