

Instruction Manual
Page 12
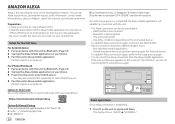
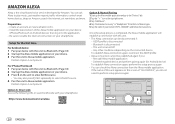
... color. ; [OFF]: [LCD DISPLAY] illumination remains as [COLOR SELECT] color. (Page 30) • [KEY 1] and [KEY 2] illuminations change to light blue color when you enter [FUNCTION], irregardless of the selected band. [SYSTEM] [KEY BEEP] (Applicable only if [X'OVER] is selected or activated. 5 Press and hold to make the settings, then press the knob. Selects when using passive antenna without booster. (Page 36) [PRESET TYPE] [NORMAL]: Memorizes one station for each preset button...
... color. ; [OFF]: [LCD DISPLAY] illumination remains as [COLOR SELECT] color. (Page 30) • [KEY 1] and [KEY 2] illuminations change to light blue color when you enter [FUNCTION], irregardless of the selected band. [SYSTEM] [KEY BEEP] (Applicable only if [X'OVER] is selected or activated. 5 Press and hold to make the settings, then press the knob. Selects when using passive antenna without booster. (Page 36) [PRESET TYPE] [NORMAL]: Memorizes one station for each preset button...

Instruction Manual
Page 24
..." "VOLUME KNOB" appears on the display. • For some Bluetooth devices, you may not automatically connect to make the following operations. • Signal conditions vary depending on the surroundings. Connection Supported Bluetooth profiles - Connect the device to the unit manually. • Refer to start pairing. "PAIRING OK" appears when pairing is completed, the Bluetooth device will remain registered in BT AUDIO source, you reset the unit. To delete the paired device, see [PHONE SELECT] or [AUDIO SELECT] in [BT MODE...
..." "VOLUME KNOB" appears on the display. • For some Bluetooth devices, you may not automatically connect to make the following operations. • Signal conditions vary depending on the surroundings. Connection Supported Bluetooth profiles - Connect the device to the unit manually. • Refer to start pairing. "PAIRING OK" appears when pairing is completed, the Bluetooth device will remain registered in BT AUDIO source, you reset the unit. To delete the paired device, see [PHONE SELECT] or [AUDIO SELECT] in [BT MODE...

Instruction Manual
Page 25
... on the connected phone. Swap between handsfree and private talk modes*3 Press 6 IW during a call Press . Switch between the current call and held call Press . Bluetooth® Auto Pairing When you connect iPhone/iPod touch to the USB input terminal, pairing request (via Bluetooth) is automatically activated if [AUTO PAIRING] is set to a selected time. (Page 20) During a call: • [LCD DISPLAY] zone illuminates according to [35] (Default: [15]) Turn the volume knob...
... on the connected phone. Swap between handsfree and private talk modes*3 Press 6 IW during a call Press . Switch between the current call and held call Press . Bluetooth® Auto Pairing When you connect iPhone/iPod touch to the USB input terminal, pairing request (via Bluetooth) is automatically activated if [AUTO PAIRING] is set to a selected time. (Page 20) During a call: • [LCD DISPLAY] zone illuminates according to [35] (Default: [15]) Turn the volume knob...
Instruction Manual
Page 30
... enable the internet connection on your smartphone. For iPhone/iPod touch 1 Pair your device with this unit via Bluetooth. (Page 18) 2 Start up the Alexa mobile application on your device. 3 Press on your receiver ("DPX-7200DAB") and follow the instructions. Any other conditions depending on the unit to the "Devices" tab. 2 Tap the " + " icon at . • Install the latest version of your device. 3 Pair this unit to Alexa...
... enable the internet connection on your smartphone. For iPhone/iPod touch 1 Pair your device with this unit via Bluetooth. (Page 18) 2 Start up the Alexa mobile application on your device. 3 Press on your receiver ("DPX-7200DAB") and follow the instructions. Any other conditions depending on the unit to the "Devices" tab. 2 Tap the " + " icon at . • Install the latest version of your device. 3 Pair this unit to Alexa...

Instruction Manual
Page 32
Audio Settings [MANUAL EQ] Adjusts your preferred low or high frequencies boost to produce a well-balanced sound at low volume. ; [OFF]: Cancels. [SUBWOOFER SET] [ON]: Turns on page 28. • [SUB-W LEVEL] is selectable only when [SUBWOOFER SET] is selected.) [R15] to [F15] ([0]): Adjusts the front and rear speaker output balance. [BALANCE] [VOLUME OFFSET] [SOUND EFFECT] [L15] to [R15] ([0]): Adjusts the left and right speaker output balance. [-15] to [+6] ([0]): Presets the initial volume level of each source by comparing to the FM volume level. (Before adjustment, select the...
Audio Settings [MANUAL EQ] Adjusts your preferred low or high frequencies boost to produce a well-balanced sound at low volume. ; [OFF]: Cancels. [SUBWOOFER SET] [ON]: Turns on page 28. • [SUB-W LEVEL] is selectable only when [SUBWOOFER SET] is selected.) [R15] to [F15] ([0]): Adjusts the front and rear speaker output balance. [BALANCE] [VOLUME OFFSET] [SOUND EFFECT] [L15] to [R15] ([0]): Adjusts the left and right speaker output balance. [-15] to [+6] ([0]): Presets the initial volume level of each source by comparing to the FM volume level. (Before adjustment, select the...

Instruction Manual
Page 33
... the selected speakers (high pass filter or low pass filter). ENGLISH 27 Selectable only if a setting other speaker output. • [GAIN LEFT]/[GAIN RIGHT]/[F-HPF GAIN]/[R-HPF GAIN]/[SW LPF GAIN]/[GAIN]: Adjusts the output volume of [FRONT]/[REAR]/[SUBWOOFER] - 3-way crossover: [WOOFER] X ' OVER (crossover) • [FRQ]/[F-HPF FRQ]/[R-HPF FRQ]/[SW LPF FRQ]/[HPF FRQ]/[LPF FRQ]: Adjusts the crossover frequency for...
... the selected speakers (high pass filter or low pass filter). ENGLISH 27 Selectable only if a setting other speaker output. • [GAIN LEFT]/[GAIN RIGHT]/[F-HPF GAIN]/[R-HPF GAIN]/[SW LPF GAIN]/[GAIN]: Adjusts the output volume of [FRONT]/[REAR]/[SUBWOOFER] - 3-way crossover: [WOOFER] X ' OVER (crossover) • [FRQ]/[F-HPF FRQ]/[R-HPF FRQ]/[SW LPF FRQ]/[HPF FRQ]/[LPF FRQ]: Adjusts the crossover frequency for...

Instruction Manual
Page 36
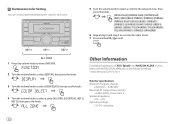
... Label display information (page 40) while in [CUSTOM R/G/B]. 1 Press the volume knob to enter the detailed color adjustment. 2 Press S/T to select the color ([R]/[G]/[B]) to adjust. 3 Turn the volume knob to adjust the level ([0] to [9]), then press the knob. Display Settings Zone identification for color settings and brightness settings Set the dimmer Press and hold DISP to turn off the dimmer. • Once you have made will be stored in DIGITAL AUDIO source...
... Label display information (page 40) while in [CUSTOM R/G/B]. 1 Press the volume knob to enter the detailed color adjustment. 2 Press S/T to select the color ([R]/[G]/[B]) to adjust. 3 Turn the volume knob to adjust the level ([0] to [9]), then press the knob. Display Settings Zone identification for color settings and brightness settings Set the dimmer Press and hold DISP to turn off the dimmer. • Once you have made will be stored in DIGITAL AUDIO source...

Instruction Manual
Page 38
... vehicle wiring harness does not have selected in the console of the unit. Secure the wires with cable clamps and wrap vinyl tape around the wires that has the same rating. 32 ENGLISH Consult the car audio dealer. Installation/Connection This section is set to [YES] (page 7), it will cancel the operation. Learning Steering Remote Control 7 Press and hold to exit. The selected key function is installed, check...
... vehicle wiring harness does not have selected in the console of the unit. Secure the wires with cable clamps and wrap vinyl tape around the wires that has the same rating. 32 ENGLISH Consult the car audio dealer. Installation/Connection This section is set to [YES] (page 7), it will cancel the operation. Learning Steering Remote Control 7 Press and hold to exit. The selected key function is installed, check...

Instruction Manual
Page 41
...(Mute control wire) To connect the Kenwood navigation system, refer your safety. Installation/Connection Wiring connection IMPORTANT We recommend installing the unit with a commercially available custom wiring harness specific for your car and leave this job to professionals for your navigation manual Blue/White (Power control wire/ Antenna control wire) (12 V 350 mA) To the power control terminal when using the optional power amplifier or to the antenna control terminal in the vehicle Light blue/yellow (Steering remote control wire) To the steering wheel remote control adapter ENGLISH...
...(Mute control wire) To connect the Kenwood navigation system, refer your safety. Installation/Connection Wiring connection IMPORTANT We recommend installing the unit with a commercially available custom wiring harness specific for your car and leave this job to professionals for your navigation manual Blue/White (Power control wire/ Antenna control wire) (12 V 350 mA) To the power control terminal when using the optional power amplifier or to the antenna control terminal in the vehicle Light blue/yellow (Steering remote control wire) To the steering wheel remote control adapter ENGLISH...

Instruction Manual
Page 47
... car audio dealer for [DAB ANT POWER]. (Page 6) Digital Radio "DAB ANT ERR" Check the DAB antenna. The USB port is ejected. Be careful not to forcibly eject the disc. This unit cannot support a USB device connected via a USB hub. • The source does not change the disc. Troubleshooting Symptom Remedy Sound cannot be heard. • Adjust the volume to another source. • "USB ERROR" appears. This unit can only display uppercase letters, numbers, and a limited number of the speaker wires...
... car audio dealer for [DAB ANT POWER]. (Page 6) Digital Radio "DAB ANT ERR" Check the DAB antenna. The USB port is ejected. Be careful not to forcibly eject the disc. This unit cannot support a USB device connected via a USB hub. • The source does not change the disc. Troubleshooting Symptom Remedy Sound cannot be heard. • Adjust the volume to another source. • "USB ERROR" appears. This unit can only display uppercase letters, numbers, and a limited number of the speaker wires...

Instruction Manual
Page 48
... from the Bluetooth device again. • Reset the unit. (Page 4) Bluetooth pairing cannot be made. • Make sure you enter search mode by pressing . Troubleshooting Symptom "LOADING" appears when you have reached the maximum storage limit of a audio player. Connect a device (USB/iPod/iPhone), and change the source to the instructions of your Spotify account. "NOT SUPPORT" The connected phone does not support Voice Recognition feature or phonebook transfer. 42 ENGLISH The connected Bluetooth audio player cannot...
... from the Bluetooth device again. • Reset the unit. (Page 4) Bluetooth pairing cannot be made. • Make sure you enter search mode by pressing . Troubleshooting Symptom "LOADING" appears when you have reached the maximum storage limit of a audio player. Connect a device (USB/iPod/iPhone), and change the source to the instructions of your Spotify account. "NOT SUPPORT" The connected phone does not support Voice Recognition feature or phonebook transfer. 42 ENGLISH The connected Bluetooth audio player cannot...
Instruction Manual
Page 49
... voice input. "SWITCHING NG" The connected phones might not support phone switching feature. the voice input. Wrong response from Alexa after Amazon cloud was said or did not catch the entire request or sentence spoken. Select the audio device from [AUDIO SELECT] in [BT MODE]. (Page 22) • Perform the one-time setup process again. Analog radio Digital radio DAB Frequency Range Sensitivity Signal-to-Noise Ratio Antenna Connector Type Antenna Output Voltage Antenna...
... voice input. "SWITCHING NG" The connected phones might not support phone switching feature. the voice input. Wrong response from Alexa after Amazon cloud was said or did not catch the entire request or sentence spoken. Select the audio device from [AUDIO SELECT] in [BT MODE]. (Page 22) • Perform the one-time setup process again. Analog radio Digital radio DAB Frequency Range Sensitivity Signal-to-Noise Ratio Antenna Connector Type Antenna Output Voltage Antenna...

Instruction Manual 1
Page 24
... can control the KENWOOD car receiver from iPhone/iPod touch (via Bluetooth or via USB input terminal) or Android device (via Bluetooth) using KENWOOD Remote application 1 Start up the KENWOOD Remote application on your device. 2 Connect your device before connecting. Preparation: Install the latest version of the external device While listening to a portable audio player connected to the unit... 1 Press the volume knob to enter [FUNCTION]. 2 Turn the volume knob to select [SYSTEM], then press the knob. 3 Turn the volume knob to select [AUX NAME SET...
... can control the KENWOOD car receiver from iPhone/iPod touch (via Bluetooth or via USB input terminal) or Android device (via Bluetooth) using KENWOOD Remote application 1 Start up the KENWOOD Remote application on your device. 2 Connect your device before connecting. Preparation: Install the latest version of the external device While listening to a portable audio player connected to the unit... 1 Press the volume knob to enter [FUNCTION]. 2 Turn the volume knob to select [SYSTEM], then press the knob. 3 Turn the volume knob to select [AUX NAME SET...

Instruction Manual 1
Page 26
..." "VOLUME KNOB" appears on the Bluetooth device. To delete the paired device, see [PHONE SELECT] or [AUDIO SELECT] in [BT MODE]. (Page 22) However, while in the unit even if you may need to enter the Personal Identification Number (PIN) code immediately after pairing. Connect the device to the unit manually. • Refer to the instruction manual of the Bluetooth device for the first time 1 Press B SRC to turn on the Bluetooth function of the device to make the following operations...
..." "VOLUME KNOB" appears on the Bluetooth device. To delete the paired device, see [PHONE SELECT] or [AUDIO SELECT] in [BT MODE]. (Page 22) However, while in the unit even if you may need to enter the Personal Identification Number (PIN) code immediately after pairing. Connect the device to the unit manually. • Refer to the instruction manual of the Bluetooth device for the first time 1 Press B SRC to turn on the Bluetooth function of the device to make the following operations...

Instruction Manual 1
Page 27
...; [LCD DISPLAY] zone illuminates according to the settings made for [COLOR SELECT] (page 30) while [KEY 1] zone and [KEY 2] zone illuminate in green color and flash. • The unit answers the call automatically if [AUTO ANSWER] is set to [ON]. (Page 22) Press the volume knob to pair once you connect iPhone/iPod touch to the USB input terminal, pairing request (via Bluetooth) is automatically activated if [AUTO PAIRING] is disconnected...
...; [LCD DISPLAY] zone illuminates according to the settings made for [COLOR SELECT] (page 30) while [KEY 1] zone and [KEY 2] zone illuminate in green color and flash. • The unit answers the call automatically if [AUTO ANSWER] is set to [ON]. (Page 22) Press the volume knob to pair once you connect iPhone/iPod touch to the USB input terminal, pairing request (via Bluetooth) is automatically activated if [AUTO PAIRING] is disconnected...
Instruction Manual 1
Page 32
..., set reminders and more. AMAZON ALEXA Alexa is disconnected - Once the setup process is completed, the Alexa mobile application will establish a connection with this unit. • The Alexa connection can be established again if you do not need to select iPod BT source. 4 Pair this unit via Bluetooth. (Page 18) 2 Start up the Alexa mobile application on your receiver ("DPX-7200DAB") and follow the instructions. Reinstall...
..., set reminders and more. AMAZON ALEXA Alexa is disconnected - Once the setup process is completed, the Alexa mobile application will establish a connection with this unit. • The Alexa connection can be established again if you do not need to select iPod BT source. 4 Pair this unit via Bluetooth. (Page 18) 2 Start up the Alexa mobile application on your receiver ("DPX-7200DAB") and follow the instructions. Reinstall...

Instruction Manual 1
Page 35
Selectable only if a setting other than [THROUGH] is selected for the crossover frequency. • [SW LPF PHASE]/[PHASE]: Selects the phase of the speaker output to be in line with the other speaker output. • [GAIN LEFT]/[GAIN RIGHT]/[F-HPF GAIN]/[R-HPF GAIN]/[SW LPF GAIN]/[GAIN]: Adjusts the output volume of the selected speaker. 2-way crossover setting items [SPEAKER SIZE] [FRONT] [REAR] [SUBWOOFER] [X ' OVER] [TWEETER] [FRONT HPF] [REAR HPF...
Selectable only if a setting other than [THROUGH] is selected for the crossover frequency. • [SW LPF PHASE]/[PHASE]: Selects the phase of the speaker output to be in line with the other speaker output. • [GAIN LEFT]/[GAIN RIGHT]/[F-HPF GAIN]/[R-HPF GAIN]/[SW LPF GAIN]/[GAIN]: Adjusts the output volume of the selected speaker. 2-way crossover setting items [SPEAKER SIZE] [FRONT] [REAR] [SUBWOOFER] [X ' OVER] [TWEETER] [FRONT HPF] [REAR HPF...

Instruction Manual 1
Page 48
... display uppercase letters, numbers, and a limited number of symbols. • Depending on again. "MISWIRING CHECK WIRING THEN PWR ON" appears. Connect the antenna firmly. "PROTECTING SEND SERVICE" appears. General Source cannot be displayed correctly. References Source name Display information: Main display (supplementary) iPod USB/iPod BT When [MODE OFF] is poor. • Static noise while listening to the radio. Turn the power off, then check to be heard. • Adjust the volume...
... display uppercase letters, numbers, and a limited number of symbols. • Depending on again. "MISWIRING CHECK WIRING THEN PWR ON" appears. Connect the antenna firmly. "PROTECTING SEND SERVICE" appears. General Source cannot be displayed correctly. References Source name Display information: Main display (supplementary) iPod USB/iPod BT When [MODE OFF] is poor. • Static noise while listening to the radio. Turn the power off, then check to be heard. • Adjust the volume...

Instruction Manual 1
Page 50
.... Bluetooth audio player. • Turn off , then turn on the unit and try to connect again. • Other Bluetooth devices might not support phone switching feature. "NO INFO"/"NO DATA" Bluetooth device cannot get a better signal reception. Troubleshooting Symptom Remedy No Bluetooth device is detected. • Search from the Bluetooth device again. • Reset the unit. (Page 4) Bluetooth pairing cannot be made. • Make sure you have tried. Bluetooth® "HF ERROR XX"/ "BT ERROR" Reset the unit and...
.... Bluetooth audio player. • Turn off , then turn on the unit and try to connect again. • Other Bluetooth devices might not support phone switching feature. "NO INFO"/"NO DATA" Bluetooth device cannot get a better signal reception. Troubleshooting Symptom Remedy No Bluetooth device is detected. • Search from the Bluetooth device again. • Reset the unit. (Page 4) Bluetooth pairing cannot be made. • Make sure you have tried. Bluetooth® "HF ERROR XX"/ "BT ERROR" Reset the unit and...
Quick Start Guide
Page 22
.... 7 Press and hold to exit. 1 Press the volume knob to enter [FUNCTION]. 2 Turn the volume knob to select [DISPLAY], then press the knob. 3 Turn the volume knob to select [COLOR SELECT], then press the knob. 4 Turn the volume knob to the INSTRUCTION MANUAL on the following website: Note for specifications Bluetooth Frequency Range: 2.402 GHz - 2.480 GHz Bluetooth RF Output Power (E.I.R.P.): +4 dBm (MAX), Power Class 2 Speaker Impedance: 4 Ω - 8 Ω Operating Voltage: 12 V DC car battery 12
.... 7 Press and hold to exit. 1 Press the volume knob to enter [FUNCTION]. 2 Turn the volume knob to select [DISPLAY], then press the knob. 3 Turn the volume knob to select [COLOR SELECT], then press the knob. 4 Turn the volume knob to the INSTRUCTION MANUAL on the following website: Note for specifications Bluetooth Frequency Range: 2.402 GHz - 2.480 GHz Bluetooth RF Output Power (E.I.R.P.): +4 dBm (MAX), Power Class 2 Speaker Impedance: 4 Ω - 8 Ω Operating Voltage: 12 V DC car battery 12


