
Instruction Manual
Page 1
Serial No. which are located on the rear of cabinet. LPT0892-001B Retain this information for future reference. Filename [XVC26U_02Cov1.fm] XVC26U_02Cov1.fm Page 1 Friday, January 30, 2004 4:49 PM DVD PLAYER & VIDEO CASSETTE RECORDER HR-XVC26U INSTRUCTIONS For Customer Use: Enter below the Model No. Model No. and Serial No.
Serial No. which are located on the rear of cabinet. LPT0892-001B Retain this information for future reference. Filename [XVC26U_02Cov1.fm] XVC26U_02Cov1.fm Page 1 Friday, January 30, 2004 4:49 PM DVD PLAYER & VIDEO CASSETTE RECORDER HR-XVC26U INSTRUCTIONS For Customer Use: Enter below the Model No. Model No. and Serial No.

Instruction Manual
Page 2
...accept any other power source. CAUTIONS CAUTION: THIS PRODUCT USES A LASER SYSTEM. Operation is subject to Part 15 of Conformity Model Number: HR-XVC26U Trade Name: JVC Responsible Party: JVC Americas Corp. ATTENTION: POUR ÉVITER LES CHOCS ÉLECTRIQUES, INTRODUIRE LA LAME LA PLUS LARGE DE LA FICHE DANS LA BORNE CORRESPONDANTE... installer's attention to Article 820-40 of electric shock to radio communications. Consult the dealer or an experienced radio/TV technician for purchasing the JVC DVD player & VHS video cassette recorder. Page 2 8 January 2004 2:53 pm
...accept any other power source. CAUTIONS CAUTION: THIS PRODUCT USES A LASER SYSTEM. Operation is subject to Part 15 of Conformity Model Number: HR-XVC26U Trade Name: JVC Responsible Party: JVC Americas Corp. ATTENTION: POUR ÉVITER LES CHOCS ÉLECTRIQUES, INTRODUIRE LA LAME LA PLUS LARGE DE LA FICHE DANS LA BORNE CORRESPONDANTE... installer's attention to Article 820-40 of electric shock to radio communications. Consult the dealer or an experienced radio/TV technician for purchasing the JVC DVD player & VHS video cassette recorder. Page 2 8 January 2004 2:53 pm

Instruction Manual
Page 6
...Disc 62 MP3 Playback 63 About JPEG Disc 65 JPEG Playback 66 CONTENTS EDITING (VCR DECK) 68 Edit From A Camcorder 68 Edit To Or From Another Video Recorder .......... 69 Dubbing (from DVD to VCR 70 EDITING (DVD DECK) 71 Digital Audio Dubbing 71 REMOTE 72 Remote Control Functions 72 Connecting To... A Dolby Digital Decoder or An Amplifier With A Built-in DTS (DVD deck only 73 SUBSIDIARY SETTINGS 74 Mode Set (VCR deck 74 Mode Set (DVD deck 77 Child Lock 80 Scan Mode Set (DVD deck 80 TROUBLESHOOTING 81 QUESTIONS AND ANSWERS 86 SPECIFICATIONS 87 LIST OF TERMS 88...
...Disc 62 MP3 Playback 63 About JPEG Disc 65 JPEG Playback 66 CONTENTS EDITING (VCR DECK) 68 Edit From A Camcorder 68 Edit To Or From Another Video Recorder .......... 69 Dubbing (from DVD to VCR 70 EDITING (DVD DECK) 71 Digital Audio Dubbing 71 REMOTE 72 Remote Control Functions 72 Connecting To... A Dolby Digital Decoder or An Amplifier With A Built-in DTS (DVD deck only 73 SUBSIDIARY SETTINGS 74 Mode Set (VCR deck 74 Mode Set (DVD deck 77 Child Lock 80 Scan Mode Set (DVD deck 80 TROUBLESHOOTING 81 QUESTIONS AND ANSWERS 86 SPECIFICATIONS 87 LIST OF TERMS 88...

Instruction Manual
Page 7
...accordance with a SVCD disc. If such discs are accidentally played back, it conforms to indicate which can be played back. • DVD-R/RW discs recorded in DVD VIDEO format and finalized • CD-R/RW discs recorded in Super Video CD, Video CD or Audio CD format and finalized. •...this unit plays back discs according to the intentions of the author of the software as indicated on this unit. Examples of double-layered DVD VIDEO discs, the image and sound may be played back using this instruction manual Allows operation with a disc including JPEG files. Allows ...
...accordance with a SVCD disc. If such discs are accidentally played back, it conforms to indicate which can be played back. • DVD-R/RW discs recorded in DVD VIDEO format and finalized • CD-R/RW discs recorded in Super Video CD, Video CD or Audio CD format and finalized. •...this unit plays back discs according to the intentions of the author of the software as indicated on this unit. Examples of double-layered DVD VIDEO discs, the image and sound may be played back using this instruction manual Allows operation with a disc including JPEG files. Allows ...

Instruction Manual
Page 8
...Track 4 NOTE: Video CD discs that you to video Mark Description Number of subtitles DISC INFORMATION (cont.) File Structure of Discs DVD VIDEO Typically, DVD VIDEO discs are made up of a disc. The decoder also outputs the original DTS 5.1 channel audio signals from the DIGITAL AUDIO ...select desired titles. Filename [XVC27U_05DiscInfo.fm] XVC27U_01.book Page 8 Wednesday, January 7, 2004 10:48 AM Masterpage:Left+ 8 EN DVD VIDEO Marks Sometimes marks are further divided into units called "chapters". The same is used to indicate information regarding the contents and ...
...Track 4 NOTE: Video CD discs that you to video Mark Description Number of subtitles DISC INFORMATION (cont.) File Structure of Discs DVD VIDEO Typically, DVD VIDEO discs are made up of a disc. The decoder also outputs the original DTS 5.1 channel audio signals from the DIGITAL AUDIO ...select desired titles. Filename [XVC27U_05DiscInfo.fm] XVC27U_01.book Page 8 Wednesday, January 7, 2004 10:48 AM Masterpage:Left+ 8 EN DVD VIDEO Marks Sometimes marks are further divided into units called "chapters". The same is used to indicate information regarding the contents and ...

Instruction Manual
Page 9
... to be played back, be sure to correctly align the disc with the label side facing up. ● Since disc size changes depending on the DVD deck to a disc, wipe with water. Never use any adhesive on it according to direct sunlight, or in the disc tray. ● Do not press...
... to be played back, be sure to correctly align the disc with the label side facing up. ● Since disc size changes depending on the DVD deck to a disc, wipe with water. Never use any adhesive on it according to direct sunlight, or in the disc tray. ● Do not press...

Instruction Manual
Page 11
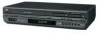
FRONT DISPLAY PANEL A Operation Mode Indicators B Channel/Clock Auxiliary Input Mode Display (F-1) (VCR deck only) Counter Display (VCR deck) Tape Speed (SP/EP) (VCR deck only) Multi-information window* (DVD deck) * The current group/title/track/chapter number(s), time and status information. Filename [...OUT) ੬ pg. 14 * These connectors are only for DVD deck. C VCR Indicator ੬ pg. 34 D Progressive Mode Indicator ੬ pg. 80 E "Timer" Indicator (VCR deck only) ੬ pg. 37 F Satellite Auto Recording Indicator (N) (VCR deck only) ੬ pg. 41 Page 11 13 January 2004...
FRONT DISPLAY PANEL A Operation Mode Indicators B Channel/Clock Auxiliary Input Mode Display (F-1) (VCR deck only) Counter Display (VCR deck) Tape Speed (SP/EP) (VCR deck only) Multi-information window* (DVD deck) * The current group/title/track/chapter number(s), time and status information. Filename [...OUT) ੬ pg. 14 * These connectors are only for DVD deck. C VCR Indicator ੬ pg. 34 D Progressive Mode Indicator ੬ pg. 80 E "Timer" Indicator (VCR deck only) ੬ pg. 37 F Satellite Auto Recording Indicator (N) (VCR deck only) ੬ pg. 41 Page 11 13 January 2004...

Instruction Manual
Page 12
...Input Indicator (F-1) L "Cassette Loaded" Mark To recall an indication A Press ON SCREEN. ● All indications corresponding to the current status are displayed for DVD deck, refer to "B" (beginning) or "E" (end) shows you where you are on the tape. Filename [XVC27U_06Index.fm] XVC27U_06Index.fm Page 12 Tuesday,... January 13, 2004 1:57 PM Masterpage:Left+ 12 EN INDEX (cont.) ON-SCREEN DISPLAY (VCR deck) If you press ON SCREEN on the Remote when "SUPERIMPOSE" is set to clear the display. ● The RECORD/PAUSE indication remains...
...Input Indicator (F-1) L "Cassette Loaded" Mark To recall an indication A Press ON SCREEN. ● All indications corresponding to the current status are displayed for DVD deck, refer to "B" (beginning) or "E" (end) shows you where you are on the tape. Filename [XVC27U_06Index.fm] XVC27U_06Index.fm Page 12 Tuesday,... January 13, 2004 1:57 PM Masterpage:Left+ 12 EN INDEX (cont.) ON-SCREEN DISPLAY (VCR deck) If you press ON SCREEN on the Remote when "SUPERIMPOSE" is set to clear the display. ● The RECORD/PAUSE indication remains...

Instruction Manual
Page 13
... on the battery compartment or on the left side of the remote control is about 8 m. The Remote can also be used to operate a JVC's TV after setting the TV/VCR/ DVD switch to the left column W Date Button (DATE +/-) ੬ pg. 36 Subtitle Button (SUB TITLE) ੬ pg. 54 Angle Button (ANGLE) &#...(TIMER) ੬ pg. 37 a Weekly Button (WEEKLY) ੬ pg. 37 b Program Check Button (PROG. Page 13 13 January 2004 11:39 am A VCR Button ੬ pg. 28, 33 B TV/VCR/DVD switch ੬ pg. 18 C Menu Button (MENU) ੬ pg. 43 D SP/EP Button ੬ pg. 33 Top Menu Button (TOP MENU) ੬...
... on the battery compartment or on the left side of the remote control is about 8 m. The Remote can also be used to operate a JVC's TV after setting the TV/VCR/ DVD switch to the left column W Date Button (DATE +/-) ੬ pg. 36 Subtitle Button (SUB TITLE) ੬ pg. 54 Angle Button (ANGLE) &#...(TIMER) ੬ pg. 37 a Weekly Button (WEEKLY) ੬ pg. 37 b Program Check Button (PROG. Page 13 13 January 2004 11:39 am A VCR Button ੬ pg. 28, 33 B TV/VCR/DVD switch ੬ pg. 18 C Menu Button (MENU) ੬ pg. 43 D SP/EP Button ੬ pg. 33 Top Menu Button (TOP MENU) ੬...

Instruction Manual
Page 14
... a TV with NO AV input connectors - AV Connection 8 To connect to "3 CH". Set to "4 CH" if the Channel 3 is turned on, then press VCR/ DVD on the unit or VCR on the rear panel of the unit and the TV's audio/video input connectors. ● Set your TV to AV mode. ● For... TV antenna cable to the instruction manual of your television. ● To obtain high-quality pictures, you use the S-VIDEO connection or Component Video Connection. (DVD deck only) (੬ pg. 15, 16) D Connect the unit to TV. C Connect the supplied RF cable between the AUDIO/VIDEO OUTPUT connectors on the ...
... a TV with NO AV input connectors - AV Connection 8 To connect to "3 CH". Set to "4 CH" if the Channel 3 is turned on, then press VCR/ DVD on the unit or VCR on the rear panel of the unit and the TV's audio/video input connectors. ● Set your TV to AV mode. ● For... TV antenna cable to the instruction manual of your television. ● To obtain high-quality pictures, you use the S-VIDEO connection or Component Video Connection. (DVD deck only) (੬ pg. 15, 16) D Connect the unit to TV. C Connect the supplied RF cable between the AUDIO/VIDEO OUTPUT connectors on the ...

Instruction Manual
Page 15
...connector. You can obtain high-quality S-VIDEO pictures. ● If your television. ● Only DVD picture is output from S-VIDEO OUTPUT connector. (VCR picture is turned on, then press VCR/ DVD on the unit or VCR on the unit.) C Set the VCR channel to off ), then press ENTER. B Press CH +/- NOTES: ● You can ...AV mode. A Connect the unit to a TV with your TV to turn off the unit, then press STOP (8) on the unit's Remote to set JVC TV to the AV mode. ● For switching the TV's mode, refer to an audio amplifier for more than 5 seconds. Antenna or Cable Coaxial ...
...connector. You can obtain high-quality S-VIDEO pictures. ● If your television. ● Only DVD picture is output from S-VIDEO OUTPUT connector. (VCR picture is turned on, then press VCR/ DVD on the unit or VCR on the unit.) C Set the VCR channel to off ), then press ENTER. B Press CH +/- NOTES: ● You can ...AV mode. A Connect the unit to a TV with your TV to turn off the unit, then press STOP (8) on the unit's Remote to set JVC TV to the AV mode. ● For switching the TV's mode, refer to an audio amplifier for more than 5 seconds. Antenna or Cable Coaxial ...

Instruction Manual
Page 16
... "- B Press CH +/- on the front display panel. You can view the images in the unit. ● Make sure the unit is turned on, then press VCR/ DVD on the unit or VCR on , the clock and tuner channels are displayed on the front display panel before turning on the unit's Remote to set... JVC TV to the AV mode. ● For switching the TV's mode, refer to the instruction manual of your TV to off. Filename [XVC27U_06Index.fm] XVC27U_06Index.fm Page 16 Tuesday, January 27, 2004 11:03 AM Masterpage:Left+ 16 EN Component Video Connection (DVD deck only) ATTENTION Be...
... "- B Press CH +/- on the front display panel. You can view the images in the unit. ● Make sure the unit is turned on, then press VCR/ DVD on the unit or VCR on , the clock and tuner channels are displayed on the front display panel before turning on the unit's Remote to set... JVC TV to the AV mode. ● For switching the TV's mode, refer to the instruction manual of your TV to off. Filename [XVC27U_06Index.fm] XVC27U_06Index.fm Page 16 Tuesday, January 27, 2004 11:03 AM Masterpage:Left+ 16 EN Component Video Connection (DVD deck only) ATTENTION Be...

Instruction Manual
Page 18
On the unit Press VCR/DVD repeatedly so that the DVD indicator lights up . B Press w e to "MONITOR TYPE", then press ENTER. TO EXIT, PRESS [SET UP]. Page 18 8 January 2004 11:22 am B Select the DVD deck. PICTURE MONITOR TYPE PICTURE SOURCE SCREEN SAVER FILE TYPE 4:3LB AUTO ON AUDIO SELECT ...ENTER USE TO SELECT, USE OK TO CONFIRM. E Select the mode setting. C Access the DVD Set Up menu screen. TO EXIT, PRESS [SET UP]. On the Remote Press DVD so that the DVD indicator lights up . Press rt to move the highlight to select " PICTURE". Press SET UP. PICTURE...
On the unit Press VCR/DVD repeatedly so that the DVD indicator lights up . B Press w e to "MONITOR TYPE", then press ENTER. TO EXIT, PRESS [SET UP]. Page 18 8 January 2004 11:22 am B Select the DVD deck. PICTURE MONITOR TYPE PICTURE SOURCE SCREEN SAVER FILE TYPE 4:3LB AUTO ON AUDIO SELECT ...ENTER USE TO SELECT, USE OK TO CONFIRM. E Select the mode setting. C Access the DVD Set Up menu screen. TO EXIT, PRESS [SET UP]. On the Remote Press DVD so that the DVD indicator lights up . Press rt to move the highlight to select " PICTURE". Press SET UP. PICTURE...

Instruction Manual
Page 19
EN 19 Pan&Scan/Letter Box In general, DVD VIDEO disc are produced for a wide-screen TV with 4:3 aspect ratio. Material with this ratio will not be shown on the top and the bottom ...
EN 19 Pan&Scan/Letter Box In general, DVD VIDEO disc are produced for a wide-screen TV with 4:3 aspect ratio. Material with this ratio will not be shown on the top and the bottom ...

Instruction Manual
Page 20
... SET UP. D Access the Initial Set screen. A Turn on the TV and select the VCR channel (or AV mode). ● Slide the TV/VCR/DVD switch to the right. Press SET UP. On the unit Press VCR/DVD repeatedly so that the VCR indicator lights up . Filename [XVC27U_06Index.fm] XVC27U_01.book Page 20 Wednesday, January 7, 2004...
... SET UP. D Access the Initial Set screen. A Turn on the TV and select the VCR channel (or AV mode). ● Slide the TV/VCR/DVD switch to the right. Press SET UP. On the unit Press VCR/DVD repeatedly so that the VCR indicator lights up . Filename [XVC27U_06Index.fm] XVC27U_01.book Page 20 Wednesday, January 7, 2004...

Instruction Manual
Page 21
... Press VCR/DVD repeatedly so that the DVD indicator lights up . E Select the mode setting. Page 21 7 January 2004 10:47 am Press POWER (1). B Select the DVD deck. D Select the mode. TO EXIT, PRESS [SET UP]. Press rt to select " LANGUAGE". On the Remote Press DVD so that the DVD indicator ...EXIT, PRESS [SET UP]. A Turn on -screen messages in 3 different languages. A Press SET UP. Press SET UP. C Access the DVD Set Up menu screen. You can change the language setting manually as required. Press rt to move the hightlight to the normal screen. LANGUAGE MENU...
... Press VCR/DVD repeatedly so that the DVD indicator lights up . E Select the mode setting. Page 21 7 January 2004 10:47 am Press POWER (1). B Select the DVD deck. D Select the mode. TO EXIT, PRESS [SET UP]. Press rt to select " LANGUAGE". On the Remote Press DVD so that the DVD indicator ...EXIT, PRESS [SET UP]. A Turn on -screen messages in 3 different languages. A Press SET UP. Press SET UP. C Access the DVD Set Up menu screen. You can change the language setting manually as required. Press rt to move the hightlight to the normal screen. LANGUAGE MENU...

Instruction Manual
Page 22
...B Select the DVD deck. LANGUAGE MENU LANGUAGE ENGLISH AUDIO LANGUAGE ENGLISH SUBTITLE OFF ON SCREEN LANGUAGE ENGLISH SELECT ENTER USE TO SELECT, USE OK TO CONFIRM. Press rt to move the hightlight to the normal screen. On the unit Press VCR/DVD repeatedly so that the DVD indicator lights up .... C Access the DVD Set Up menu screen. D Select the mode. NOTE: When the selected language is not available on the unit...
...B Select the DVD deck. LANGUAGE MENU LANGUAGE ENGLISH AUDIO LANGUAGE ENGLISH SUBTITLE OFF ON SCREEN LANGUAGE ENGLISH SELECT ENTER USE TO SELECT, USE OK TO CONFIRM. Press rt to move the hightlight to the normal screen. On the unit Press VCR/DVD repeatedly so that the DVD indicator lights up .... C Access the DVD Set Up menu screen. D Select the mode. NOTE: When the selected language is not available on the unit...

Instruction Manual
Page 24
... screen. Page 24 7 January 2004 10:47 am Preparations A Turn on the TV and select the VCR channel (or AV mode). ● Slide the TV/VCR/DVD switch to the right. On the Remote Press VCR so that the VCR indicator lights up . Press rt to move the highlight bar (arrow) to "CLOCK SET", then... [XVC27U_06Index.fm] XVC27U_01.book Page 24 Wednesday, January 7, 2004 10:48 AM Masterpage:Left+ 24 EN Clock Set ● Turn on the unit. B Select the VCR deck. INITIAL SETTINGS (cont.) Perform clock setting only if the clock has not been set correctly by the Plug&Play setting. On the unit Press...
... screen. Page 24 7 January 2004 10:47 am Preparations A Turn on the TV and select the VCR channel (or AV mode). ● Slide the TV/VCR/DVD switch to the right. On the Remote Press VCR so that the VCR indicator lights up . Press rt to move the highlight bar (arrow) to "CLOCK SET", then... [XVC27U_06Index.fm] XVC27U_01.book Page 24 Wednesday, January 7, 2004 10:48 AM Masterpage:Left+ 24 EN Clock Set ● Turn on the unit. B Select the VCR deck. INITIAL SETTINGS (cont.) Perform clock setting only if the clock has not been set correctly by the Plug&Play setting. On the unit Press...

Instruction Manual
Page 26
...POWER (1). On the unit Press VCR/DVD repeatedly so that the VCR indicator lights up . On the Remote Press VCR so that the VCR indicator lights up . Press rt to move the highlight bar (arrow) to the right. You can automatically set correctly by the Plug&Play setting. B Select the VCR deck. Press SET UP. ... have not been set the receivable channels in your area in the order of "BAND" on the TV and select the VCR channel (or AV mode). ● Slide the TV/VCR/DVD switch to "AUTO CHANNEL SET", then press ENTER or e. C Access the Main Menu screen. Press rt to move the highlight ...
...POWER (1). On the unit Press VCR/DVD repeatedly so that the VCR indicator lights up . On the Remote Press VCR so that the VCR indicator lights up . Press rt to move the highlight bar (arrow) to the right. You can automatically set correctly by the Plug&Play setting. B Select the VCR deck. Press SET UP. ... have not been set the receivable channels in your area in the order of "BAND" on the TV and select the VCR channel (or AV mode). ● Slide the TV/VCR/DVD switch to "AUTO CHANNEL SET", then press ENTER or e. C Access the Main Menu screen. Press rt to move the highlight ...

Instruction Manual
Page 27
...or e. To skip channels A Press rt or the number keys to select a channel number you want to add. Press SET UP. On the Remote Press VCR so that the VCR indicator lights up . To add channels A Press the number keys to input a channel number you want manually. B Select the... the channels you want or delete the channels you do not want to skip. D Access the Tuner Set screen. On the unit Press VCR/DVD repeatedly so that the VCR indicator lights up . E Access the Manual Channel Set screen. B Press ENTER or e to set to "TUNER SET", then press ENTER or e. Page 27...
...or e. To skip channels A Press rt or the number keys to select a channel number you want to add. Press SET UP. On the Remote Press VCR so that the VCR indicator lights up . To add channels A Press the number keys to input a channel number you want manually. B Select the... the channels you want or delete the channels you do not want to skip. D Access the Tuner Set screen. On the unit Press VCR/DVD repeatedly so that the VCR indicator lights up . E Access the Manual Channel Set screen. B Press ENTER or e to set to "TUNER SET", then press ENTER or e. Page 27...


