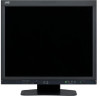
JVC LM-H171U - Professional Lcd Monitor Support and Manuals
Get Help and Manuals for this JVC item
View All Support Options Below
Free JVC LM-H171U manuals!
Problems with JVC LM-H171U?
Ask a Question
Free JVC LM-H171U manuals!
Problems with JVC LM-H171U?
Ask a Question
Popular JVC LM-H171U Manual Pages
Instruction Manual - Page 2

... Contents
Safety Precautions 2 IMPORTANT SAFEGUARDS 2 Maintenance 3
Installation 4 Daily Operations / Connections 6
Front panel 6 Rear panel 8 Available signals 9 Menu Configuration-MAIN MENU 10 Menu Configuration-SET UP MENU 11 External Control 13 About the external control 13 Using the MAKE/TRIGGER system 13 Troubleshooting 14 Specifications 15 General 15 Input/output terminals...
Instruction Manual - Page 3

...service technician has used replacement parts
specified by inserting or removing the power plug.
• When you are unable to an AC outlet as for a long time if the sound is exposed to install...service or repairs to this product for protection against it or push it with the type of the grounded plug. • This product should be mounted according to the manufacturer's instructions,...
Instruction Manual - Page 4

...for a Class B digital device, pursuant to Part 15 of electrical and electronic
equipment for the ...this product, please visit our web page www.jvc-europe.com to obtain information about
collection point...service or the shop where you wish to use a cloth and wipe it with the instructions, may cause harmful interference to which can radiate radio frequency energy and, if not installed...
Instruction Manual - Page 5

... plate into the guide holes on the monitor to align the guidelines for 144°
Attach the removed screw.
Installation
4
CAUTION • Do not rest your fingers in the moving parts.
• When...Be careful not to prevent the monitor from being damaged.
When installing the stand to the monitor, insert the guides of LM-H191. The illustration of the monitor is attached to the lower ...
Instruction Manual - Page 7

...45 6
7
8
9
p
The illustration of the monitor is of LM-H191.
1 Speaker (monaural) The speaker emits the audio signal for the... volume.
5 MENU button Displays the MAIN MENU. • To display the SET UP MENU, press button while pressing MENU button. • For the menu operations....*3 STD.: Normal picture DARK ENHANCED: Makes the dark parts of pictures may not be controlled by the MAKE system...
Instruction Manual - Page 8

... to reset.
2 Press and hold PICTURE MODE
button. Ex.: When "REMOTE SETTING" is selected
3 Press MENU button to finish the
menu operation. Setup Menu Operations
1 Press button while pressing
MENU button. Main Menu Operations
1 Press MENU button.
Selected item
Operation guide
2 Press buttons to the
previous menu. • Pressing the button again finishes...
Instruction Manual - Page 9

.../ Connections (cont.)
7 Rear panel
2 3
4
1 5
6
Security slot Install a security wire to this monitor and the equipment.
• Plugs should be...Y/C terminals are used, signals to the AC IN end of LM-H191. the power cord. Attaching the Ferrite Core
Attach the ... off all connections are completed.
• Refer also to the user manual of each piece of equipment.
1 AC IN terminal AC power input ...
Instruction Manual - Page 10

...set to "AUTO," the status is displayed for about 3 seconds in . • "Out of the current input changes - When you press the INPUT SELECT button of the current input - Specification... 7 8
Input signal T.M.D.S Data 2- Pin No. 1 2 3 4
Input signal GND (Y) GND (C) Y C
Specification of the Y/C terminal
Connect it to the S-video output terminal.
ENGLISH
9
Pin No. 1 2 3 4 5
...
Instruction Manual - Page 11

... RGB is an example for each item manually. CTI.*1, 2 Setting value: OFF, NORMAL, HARD
Adjusts the clearness of the outlines of analog RGB signals automatically. ASPECT*1 Setting value: 4:3, 16:9 Selects the aspect... size.
COLOR SYSTEM*1 Setting value: AUTO, NTSC, PAL Selects the color system. • If the picture is selected for the input:
Operation guide Shows the buttons for the...
Instruction Manual - Page 12

... the menu depending on the menu. Restore the default settings for all the items in "PICTURE SUB ADJ."
Restore the default settings for all the items in "WHITE BALANCE SET." SIZE/POSI. Menu Configuration-SET UP MENU
For the operation procedure, see page 7. Operation guide Shows the buttons for each item of the adjustments for...
Instruction Manual - Page 13

...SET UP MENU (by an external control If you try other operations, "Control lock on!"
SYNC, C.SYNC, G.ON SYNC OFF, POWER SAVE (Power Save mode), GRAY BACK (Gray Back mode) 30 sec., 5 min., 15 min.
• The C.SYNC input level is "MAKE." Operation guide... • You cannot change the functions assigned for each operation.
Setting value MAKE, TRIGGER
VIDEO 1, VIDEO 2, RGB, DVI, STD.,...
Instruction Manual - Page 14

...Picture Mode with the TRIGGER system.
When selecting "TRIGGER": Operate each pin terminal in "REMOTE SETTING."
2 Short-circuit the 7th pin terminal (ENABLE) to the 8th pin terminal (GND) ... Adjusts the size/position of the picture. Operation
1 Select the control method ("SYSTEM") in "REMOTE SETTING" (☞ "PORT F1" - Invalid
Valid
DYNAMIC
Changes the Picture Mode to "VIDEO 2." Invalid...
Instruction Manual - Page 15

... ("COLOR SYSTEM") in "WHITE BALANCE SET."
6, 11
10 11
High luminance parts of pictures are a normal characteristic of the connected component and set correctly. When you touch the monitor....problem, unplug the monitor and consult an authorized dealer or service center. Probable cause and corrective action
• Adjust the picture contrast or brightness by the MAKE
system. in the SET...
Instruction Manual - Page 16

...AC 220 - 240 V) 0.7 A (AC 120 V)/0.5 A (AC 220 - 240 V)
External dimensions (excluding protruding parts)
Width: 413 mm (16 3/8˝) 413 mm (16 3/8˝)
Height: 404.8 mm (16˝) 364 mm... stand)
Accessories
AC power cord, Ferrite core x 1
ENGLISH
15 Specifications
7 General
Model name
LM-H191
LM-H171
Type
LCD Display Monitor
Screen size
Type 19 format
Type 17 format...installation.
Instruction Manual - Page 17

...omitted or composed, and may be slightly different from sources other than JVC or JVC-authorized dealers.
7 Dimensions
LM-H191
413 (16 3/8˝)
16
29 (1 1/4˝)
1.5 ...;
G. sync:
TTL
V. Notice on sync:
0.3 V(p-p)
B, R:
0.7 V(p-p), 75 Ω
H. Specifications (cont.)
7 Input/output terminals
Model name Video
VIDEO 1 IN/OUT VIDEO 2 IN/OUT
VIDEO 1 Y/C
DVI-D RGB
Audio AUDIO INPUT ...
JVC LM-H171U Reviews
We have not received any reviews for JVC yet.