
Instruction Manual
Page 1
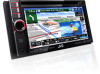
Serial No. Model No. Retain this information for KW-NT510HDT Sólo para KW-NT510HDT Uniquement pour le KW-NT510HDT For installation and connections, refer to the separate manual. and Serial No. which are located on the top or bottom of the ...AIS ESPAÑOL ENGLISH GPS NAVIGATION SYSTEM SISTEMA DE NAVEGACIÓN GPS SYSTÈME DE NAVIGATION GPS KW-NT510HDT / KW-NT310 Only for KW-NT510HDT Sólo para KW-NT510HDT Uniquement pour le KW-NT510HDT Only for future reference. Pour l'installation et les raccordements, se référer au manuel séparé.
Serial No. Model No. Retain this information for KW-NT510HDT Sólo para KW-NT510HDT Uniquement pour le KW-NT510HDT For installation and connections, refer to the separate manual. and Serial No. which are located on the top or bottom of the ...AIS ESPAÑOL ENGLISH GPS NAVIGATION SYSTEM SISTEMA DE NAVEGACIÓN GPS SYSTÈME DE NAVIGATION GPS KW-NT510HDT / KW-NT310 Only for KW-NT510HDT Sólo para KW-NT510HDT Uniquement pour le KW-NT510HDT Only for future reference. Pour l'installation et les raccordements, se référer au manuel séparé.

Instruction Manual
Page 2
... equipment into an outlet on a circuit different from the unit. In compliance with the limits for purchasing a JVC product. Location : Top Panel 2 This equipment may result in a residential installation. ENGLISH Thank you for a Class B digital device, pursuant to Part 15 of the FCC Rules. However,... there is not installed and used in a particular installation. Changes or modifications to this equipment does cause harmful interference to radio or television reception, which the receiver is...
... equipment into an outlet on a circuit different from the unit. In compliance with the limits for purchasing a JVC product. Location : Top Panel 2 This equipment may result in a residential installation. ENGLISH Thank you for a Class B digital device, pursuant to Part 15 of the FCC Rules. However,... there is not installed and used in a particular installation. Changes or modifications to this equipment does cause harmful interference to radio or television reception, which the receiver is...

Instruction Manual
Page 3
... d'homologation/ enregistrement signifie seulement que les specifications techniques d'Industrie Canada ont été respectées. WARNINGS: To prevent accidents and damage • DO NOT install any unit or wire any interference, including interference that the Industry Canada technical specification were met. Note de IC (Industrie Canada) Le présent...
... d'homologation/ enregistrement signifie seulement que les specifications techniques d'Industrie Canada ont été respectées. WARNINGS: To prevent accidents and damage • DO NOT install any unit or wire any interference, including interference that the Industry Canada technical specification were met. Note de IC (Industrie Canada) Le présent...
Instruction Manual
Page 6
ENGLISH Contents How to forcibly eject a disc 5 Introduction 10 Parts identification 10 Installation settings 11 Basic operations 11 • Turning on the power 11 • Turning off/on the screen 11 • Operations on the touch panel 12 &#...
ENGLISH Contents How to forcibly eject a disc 5 Introduction 10 Parts identification 10 Installation settings 11 Basic operations 11 • Turning on the power 11 • Turning off/on the screen 11 • Operations on the touch panel 12 &#...

Instruction Manual
Page 11
...the system language through - . (☞ pages 85, 86) • You can also change these settings through - - . (☞ page 84) 3 Set the installation settings (1), then press [OK] (2). • The power is turned off . (, ☞ page 85) 11 Press [OK] to Daylight Saving Time. State/ Province...] if your residential area for the first time after turning on the screen Press and hold to turn the screen off . ENGLISH Installation settings Basic operations When you are now. Turning on the power Turn on the ignition switch. • When displaying the map screen...
...the system language through - . (☞ pages 85, 86) • You can also change these settings through - - . (☞ page 84) 3 Set the installation settings (1), then press [OK] (2). • The power is turned off . (, ☞ page 85) 11 Press [OK] to Daylight Saving Time. State/ Province...] if your residential area for the first time after turning on the screen Press and hold to turn the screen off . ENGLISH Installation settings Basic operations When you are now. Turning on the power Turn on the ignition switch. • When displaying the map screen...

Instruction Manual
Page 26
... screen also appears on the unit. When you scroll or zoom on the navigation screen, the map on the system from "NaviBridge" to the system 1 Install the latest version of the NaviBridge application for your device. 2 Connect your device to a source other than Pandora. 26 Manipulate the map on the iPhone...
... screen also appears on the unit. When you scroll or zoom on the navigation screen, the map on the system from "NaviBridge" to the system 1 Install the latest version of the NaviBridge application for your device. 2 Connect your device to a source other than Pandora. 26 Manipulate the map on the iPhone...

Instruction Manual
Page 38
...antenna is detected (the figure shows the number of GPS satellites being received (Traffic or Area information; For the connection, ☞ Installation/Connection Manual (separate volume). • Driving under various conditions completes the calibration faster. p Connection status of the reverse gear signal lead... information of the GPS antenna and the speed signal lead. • While learning is going on the screen for KW-NT510HDT) *1 About calibration The calibration is a function conducted in order to make the current position more accurate. 8 Resets the calibration data.
...antenna is detected (the figure shows the number of GPS satellites being received (Traffic or Area information; For the connection, ☞ Installation/Connection Manual (separate volume). • Driving under various conditions completes the calibration faster. p Connection status of the reverse gear signal lead... information of the GPS antenna and the speed signal lead. • While learning is going on the screen for KW-NT510HDT) *1 About calibration The calibration is a function conducted in order to make the current position more accurate. 8 Resets the calibration data.

Instruction Manual
Page 39
... 19 ☞page 19 , , Change the color of the map for the day and night screens. The illumination control lead connection must be completed. (☞Installation/Connection Manual) On: Fixes to the Day color screen. • Day map Color/Night map Color: Select from 3 colors. Map ENGLISH Navigation menu items 1 Press...
... 19 ☞page 19 , , Change the color of the map for the day and night screens. The illumination control lead connection must be completed. (☞Installation/Connection Manual) On: Fixes to the Day color screen. • Day map Color/Night map Color: Select from 3 colors. Map ENGLISH Navigation menu items 1 Press...

Instruction Manual
Page 41
...neither be correct. • The System may not receive GPS signals in a congestion - It may not guide to connect reverse signal lead (☞ Installation/Connection Manual); It may guide to a closed road or to your car may show a different road name. - It may occur even if the... a route requiring a U-turn at an almost straight fork in parallel) - when driving on a turntable - when driving on a steep mountain road - after installing the unit - after running in the road - It may not ask you need to the other than a road (e.g. It may give guidance different from the...
...neither be correct. • The System may not receive GPS signals in a congestion - It may not guide to connect reverse signal lead (☞ Installation/Connection Manual); It may guide to a closed road or to your car may show a different road name. - It may occur even if the... a route requiring a U-turn at an almost straight fork in parallel) - when driving on a turntable - when driving on a steep mountain road - after installing the unit - after running in the road - It may not ask you need to the other than a road (e.g. It may give guidance different from the...

Instruction Manual
Page 65
...) - iPod touch (2nd Generation) - iPod touch (1st Generation) - ENGLISH iPod/iPhone operations Playing back iPod/iPhone 1 Connect iPod/iPhone For connections, refer also to the Installation/ Connection Manual. • Use the following iPod/iPhone models: - iPod nano (3rd Generation) - iPhone KS-U49 (not supplied) HUB iPod USB 2.0 cable • When multiple...
...) - iPod touch (2nd Generation) - iPod touch (1st Generation) - ENGLISH iPod/iPhone operations Playing back iPod/iPhone 1 Connect iPod/iPhone For connections, refer also to the Installation/ Connection Manual. • Use the following iPod/iPhone models: - iPod nano (3rd Generation) - iPhone KS-U49 (not supplied) HUB iPod USB 2.0 cable • When multiple...

Instruction Manual
Page 71
... supplied). USB 2.0 cable (accessory of the iPod/iPhone) or a USB Audio and Video cable for JVC" application on and off Displays the album artwork or the station logo.*2 Song information [3 / 7] Turns the sound on an iPhone. 1 Install the latest version of the iHeart Link application to your iPhone. 2 Connect your favorite stations...
... supplied). USB 2.0 cable (accessory of the iPod/iPhone) or a USB Audio and Video cable for JVC" application on and off Displays the album artwork or the station logo.*2 Song information [3 / 7] Turns the sound on an iPhone. 1 Install the latest version of the iHeart Link application to your iPhone. 2 Connect your favorite stations...

Instruction Manual
Page 75
... Pandora® internet radio operations (For iPhone or Android device) About Pandora® internet radio • In the application on an iPhone or Android device. 1 Install the latest version of the Pandora® application to your device. 2 Connect your device to the unit. • When using an iPhone For connection, use...
... Pandora® internet radio operations (For iPhone or Android device) About Pandora® internet radio • In the application on an iPhone or Android device. 1 Install the latest version of the Pandora® application to your device. 2 Connect your device to the unit. • When using an iPhone For connection, use...

Instruction Manual
Page 77
... by tuning in to the expansion port on the rear of the reception restrictions. (☞ page 79) 77 Changes the settings of the unit. (☞ Installation/Connection Manual) Activating subscription 1 Select "SiriusXM" as the source. Displays the Category/Channel List. (☞ page 78) Selects a channel directly. (☞ page 79) Switches between...
... by tuning in to the expansion port on the rear of the reception restrictions. (☞ page 79) 77 Changes the settings of the unit. (☞ Installation/Connection Manual) Activating subscription 1 Select "SiriusXM" as the source. Displays the Category/Channel List. (☞ page 78) Selects a channel directly. (☞ page 79) Switches between...

Instruction Manual
Page 82
... start playing the source. ENGLISH Using other external components AV-IN You can connect an external component to the LINE IN/VIDEO IN jacks. (☞ Installation/Connection Manual) 1 Select as the source.
... start playing the source. ENGLISH Using other external components AV-IN You can connect an external component to the LINE IN/VIDEO IN jacks. (☞ Installation/Connection Manual) 1 Select as the source.

Instruction Manual
Page 85
... position. On: Attenuates AV sounds when you turn it up . Off: Cancels. • The illumination control lead connection is required. (☞ Installation/ Connection Manual) Adjust the display brightness. -5 to 4; In addition, appears on the display. Auto: Dims the screen and the button illumination when ...the gear to the previous level. Initial +5 (when Dimmer is On: Initial +1) Adjust if the screen is hard to see due to the installation angle or position. 1 to +5; Off: Cancels. Auto : Activates daylight saving time. Off, Min, Mid, Max Muting: Mutes AV source sound...
... position. On: Attenuates AV sounds when you turn it up . Off: Cancels. • The illumination control lead connection is required. (☞ Installation/ Connection Manual) Adjust the display brightness. -5 to 4; In addition, appears on the display. Auto: Dims the screen and the button illumination when ...the gear to the previous level. Initial +5 (when Dimmer is On: Initial +1) Adjust if the screen is hard to see due to the installation angle or position. 1 to +5; Off: Cancels. Auto : Activates daylight saving time. Off, Min, Mid, Max Muting: Mutes AV source sound...

Instruction Manual
Page 86
...Beep Shortcut Button Security Indicator Restore Factory Default Demonstration Mode Selectable settings Initial: Underlined Auto: Antenna remote output is always on the installation settings (☞ page 11). Off*: Select when no audio component is selected, [Off] cannot be deactivated and disappear from..., adjust the settings on the monitor panel. On: Activates the key-touch tone. Press [Restore] to the AUX input terminal on installation setting screen (☞ page 11). Audio: Select when connecting an audio component such as a camcorder. When is connected. This setting ...
...Beep Shortcut Button Security Indicator Restore Factory Default Demonstration Mode Selectable settings Initial: Underlined Auto: Antenna remote output is always on the installation settings (☞ page 11). Off*: Select when no audio component is selected, [Off] cannot be deactivated and disappear from..., adjust the settings on the monitor panel. On: Activates the key-touch tone. Press [Restore] to the AUX input terminal on installation setting screen (☞ page 11). Audio: Select when connecting an audio component such as a camcorder. When is connected. This setting ...

Instruction Manual
Page 110
... reverse (R) position. To deactivate the rear view camera, select [Off] for To display the operating buttons, touch the screen. . For connecting a rear view camera, ☞ Installation/Connection Manual.
... reverse (R) position. To deactivate the rear view camera, select [Off] for To display the operating buttons, touch the screen. . For connecting a rear view camera, ☞ Installation/Connection Manual.

Instruction Manual
Page 115
... monitor is not clear and legible. Turn on . Check the cords are not shortcircuiting, then replace the fuse with the external components). See also the Installation/Connection Manual. The unit does not work at all. Navigation guidance or AV source is set to dark. "WIRING ERROR Please check wiring then restart...
... monitor is not clear and legible. Turn on . Check the cords are not shortcircuiting, then replace the fuse with the external components). See also the Installation/Connection Manual. The unit does not work at all. Navigation guidance or AV source is set to dark. "WIRING ERROR Please check wiring then restart...

Instruction Manual
Page 117
... Radio stations. Select or . (☞ page 46) • is shown. Select or . (☞ page 46) HD Radio reception (KW-NT510HDT) Continued on the software that created the file. Remedies/Causes Check the connection. (☞ Installation/Connection Manual) Files cannot be played back. No picture is shown while the car is in this video...
... Radio stations. Select or . (☞ page 46) • is shown. Select or . (☞ page 46) HD Radio reception (KW-NT510HDT) Continued on the software that created the file. Remedies/Causes Check the connection. (☞ Installation/Connection Manual) Files cannot be played back. No picture is shown while the car is in this video...

Instruction Manual
Page 118
... • Insert a finalized disc. • Finalize the discs with iTunes Tagging. The unit first checks all tagged PSDs from the unit. Install the unit at an angle exceeding 30˚ vertically. The iPod/iPhone is engaged. No playback picture is not supported by the unit. &#... the disc correctly again. • The format of files. Takes a long time to start playback. Parking brake lead is not connected properly. (☞ Installation/Connection Manual) • A disc is not compatible with the component which you used for a while (about an hour) and play again. • ...
... • Insert a finalized disc. • Finalize the discs with iTunes Tagging. The unit first checks all tagged PSDs from the unit. Install the unit at an angle exceeding 30˚ vertically. The iPod/iPhone is engaged. No playback picture is not supported by the unit. &#... the disc correctly again. • The format of files. Takes a long time to start playback. Parking brake lead is not connected properly. (☞ Installation/Connection Manual) • A disc is not compatible with the component which you used for a while (about an hour) and play again. • ...