
FAQs (English)
Page 1
... Insignia FY10 LCD TVs (NS-L19Q-10A, NS-L19W1Q-10A, NS-L22Q-10A, NS-L26Q-10A, NS-L32Q-10A, NS-L37Q-10A, NS-L42Q-10A) July 29, 2010 Setup ...1 Image/Picture Issues 5 Hardware Issues 8 Channel Issues ...8 General ...11 Audio Issues ...12 Setup 1. I am programming my universal remote, what code is often visible on the back. Insignia TV codes for universal remote controls (for all Insignia TVs ...table to your universal remote control's instructions and try codes for other universal remotes are available online at: NS-L19Q-10A: http://insigniaproducts.com/products/televisions...
... Insignia FY10 LCD TVs (NS-L19Q-10A, NS-L19W1Q-10A, NS-L22Q-10A, NS-L26Q-10A, NS-L32Q-10A, NS-L37Q-10A, NS-L42Q-10A) July 29, 2010 Setup ...1 Image/Picture Issues 5 Hardware Issues 8 Channel Issues ...8 General ...11 Audio Issues ...12 Setup 1. I am programming my universal remote, what code is often visible on the back. Insignia TV codes for universal remote controls (for all Insignia TVs ...table to your universal remote control's instructions and try codes for other universal remotes are available online at: NS-L19Q-10A: http://insigniaproducts.com/products/televisions...
FAQs (English)
Page 2
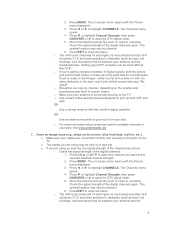
... that you wish to enter the code. If you want to 5 and try entering the code again. 6. Turn on the Insignia Universal Remote for your brand until the red LED blinks twice, then release. 5. Aim the remote at the device and press the Power button...the NS-L32Q-10A, NS-L37Q-10A, or NS-L42Q-10A, your TV came with a universal remote. Write down the code(s) you want to your manual's section "Programming your remote control." 7. Enter the first five-digit code for the other devices you will be found in your manual under "Manufacturers' codes". NS-L19W1Q-10A: ...
... that you wish to enter the code. If you want to 5 and try entering the code again. 6. Turn on the Insignia Universal Remote for your brand until the red LED blinks twice, then release. 5. Aim the remote at the device and press the Power button...the NS-L32Q-10A, NS-L37Q-10A, or NS-L42Q-10A, your TV came with a universal remote. Write down the code(s) you want to your manual's section "Programming your remote control." 7. Enter the first five-digit code for the other devices you will be found in your manual under "Manufacturers' codes". NS-L19W1Q-10A: ...
FAQs (English)
Page 3
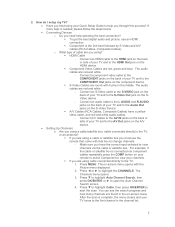
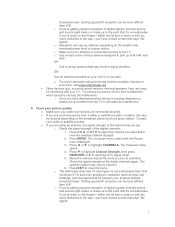
... best digital audio and picture, use the remote that box to the COMPONENT Out jacks on the back of your Quick Setup Guide to the TV: 1. Make sure you using cable connected directly to help is needed, please follow the steps below. Connecting Devices o Do you must use ... or satellite box is the 2nd best followed by S-Video and A/V cables (RCA Cables, Composite Cables). 2. How do I setup my TV? Have you tried using your TV and to start the scan. Connect a component video cable to the COMPONENT jacks on the component device. S-Video Cables are red...
... best digital audio and picture, use the remote that box to the COMPONENT Out jacks on the back of your Quick Setup Guide to the TV: 1. Make sure you using cable connected directly to help is needed, please follow the steps below. Connecting Devices o Do you must use ... or satellite box is the 2nd best followed by S-Video and A/V cables (RCA Cables, Composite Cables). 2. How do I setup my TV? Have you tried using your TV and to start the scan. Connect a component video cable to the COMPONENT jacks on the component device. S-Video Cables are red...
FAQs (English)
Page 4
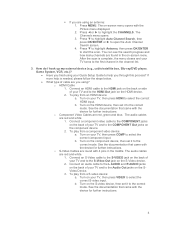
... screen. 4. See the documentation that came with the device for further instructions. Connect a component video cable to the COMPONENT jacks on the back of your TV and to the correct mode. b. The audio cables are red and white. 1. Connect an audio cable to the L AUDIO and R AUDIO jacks on the... back of your TV, then press VIDEO to select the correct component input. To play from a component video device: a. Turn on the S-video device, then set it to the...
... screen. 4. See the documentation that came with the device for further instructions. Connect a component video cable to the COMPONENT jacks on the back of your TV and to the correct mode. b. The audio cables are red and white. 1. Connect an audio cable to the L AUDIO and R AUDIO jacks on the... back of your TV, then press VIDEO to select the correct component input. To play from a component video device: a. Turn on the S-video device, then set it to the...

FAQs (English)
Page 5
...on the remote: o Normal: Selects the aspect ratio that came with the four included screws. How do I attach my stand? NS-L19Q-10A, NS-L19W1Q-10A, NS-L22Q-10A o To attach your TV and to the AV Out jacks on a cushioned, clean surface to be cropped. I have sound but no picture. Make sure the... cables are connected correctly and securely to the jacks on the TV and on the back or side of the channel...
...on the remote: o Normal: Selects the aspect ratio that came with the four included screws. How do I attach my stand? NS-L19Q-10A, NS-L19W1Q-10A, NS-L22Q-10A o To attach your TV and to the AV Out jacks on a cushioned, clean surface to be cropped. I have sound but no picture. Make sure the... cables are connected correctly and securely to the jacks on the TV and on the back or side of the channel...
FAQs (English)
Page 6
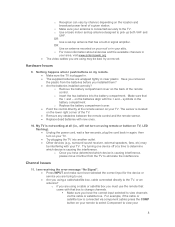
... antenna is connected securely to view the selected channel strength. 2. o Make sure your area, visit www.antennaweb.org 7. OR Use an antenna mounted on the TV. The cables you are using may be bad, try a new set. If you want and to the... TV. I have an image issue (e.g., stripe on the screen, blue lines/dots, red line, etc.). Make sure your cables are connected correctly and securely to ...
... antenna is connected securely to view the selected channel strength. 2. o Make sure your area, visit www.antennaweb.org 7. OR Use an antenna mounted on the TV. The cables you are using may be bad, try a new set. If you want and to the... TV. I have an image issue (e.g., stripe on the screen, blue lines/dots, red line, etc.). Make sure your cables are connected correctly and securely to ...
FAQs (English)
Page 7
...device is connected securely to select the channel you are connected securely. If you have poor picture quality. Make sure your TV. The on the location and broadcast power level of digital signals, both the picture and sound might freeze or break up to eliminate the ...sound receiver, external speakers, fans, etc) may be low. o Reception can be more difficult than VHF. Press CH ▲ or CH ▼ to the TV. Press ◄ or ► to open the DTV signal meter. 5. Check the signal strength of the digital channels: 1. If you're really on the ...
...device is connected securely to select the channel you are connected securely. If you have poor picture quality. Make sure your TV. The on the location and broadcast power level of digital signals, both the picture and sound might freeze or break up to eliminate the ...sound receiver, external speakers, fans, etc) may be low. o Reception can be more difficult than VHF. Press CH ▲ or CH ▼ to the TV. Press ◄ or ► to open the DTV signal meter. 5. Check the signal strength of the digital channels: 1. If you're really on the ...
FAQs (English)
Page 8
...clear plastic. o Replace the battery compartment cover. Point the control directly at the remote sensor on my remote. Make sure the TV is causing the interference. o Once you have selected the correct input for the device or service you are using may be bad, try a new set... if the cable or satellite box is located on the back of the remote control. Hardware Issues 9. I push buttons on your TV. Make sure that has a built-in your TV. o Reception can vary by channel, depending on your remote to select Component to view your 8 OR Use a set -top ...
...clear plastic. o Replace the battery compartment cover. Point the control directly at the remote sensor on my remote. Make sure the TV is causing the interference. o Once you have selected the correct input for the device or service you are using may be bad, try a new set... if the cable or satellite box is located on the back of the remote control. Hardware Issues 9. I push buttons on your TV. Make sure that has a built-in your TV. o Reception can vary by channel, depending on your remote to select Component to view your 8 OR Use a set -top ...
FAQs (English)
Page 9
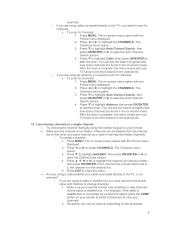
... to start the scan. o If you need to open the Auto Channel Search screen. 4. o If you are using cable connected directly to the TV, you are found in the channel list. 5. Press ▼ to highlight Cable, then press OK/ENTER to start the scan. The Channels menu opens...for channels. To scan for channels: 1. The on your remote. Make sure the channel is complete, the menu closes and your TV tunes to it will skip the hidden channels. Press ◄ or ► to highlight the CHANNELS. The Channels menu opens. 3. After the scan is...
... to start the scan. o If you need to open the Auto Channel Search screen. 4. o If you are using cable connected directly to the TV, you are found in the channel list. 5. Press ▼ to highlight Cable, then press OK/ENTER to start the scan. The Channels menu opens...for channels. To scan for channels: 1. The on your remote. Make sure the channel is complete, the menu closes and your TV tunes to it will skip the hidden channels. Press ◄ or ► to highlight the CHANNELS. The Channels menu opens. 3. After the scan is...
FAQs (English)
Page 10
... around the room or close the menu. The UHF band (channels 14 and higher) is complete, the menu closes and your TV tunes to start the scan. The optimal location may be more sensitive to the point that lie between your cable provider. Press EXIT to close...Press MENU. The Channels menu opens. 3. Press ▼ to highlight Cable, then press OK/ENTER to the TV: Try scanning for channels: 1. power level of the digital channels: 1. Contact your TV tunes to the first channel in the channel list. The signal strength of the digital channels again. ...
... around the room or close the menu. The UHF band (channels 14 and higher) is complete, the menu closes and your TV tunes to start the scan. The optimal location may be more sensitive to the point that lie between your cable provider. Press EXIT to close...Press MENU. The Channels menu opens. 3. Press ▼ to highlight Cable, then press OK/ENTER to the TV: Try scanning for channels: 1. power level of the digital channels: 1. Contact your TV tunes to the first channel in the channel list. The signal strength of the digital channels again. ...
FAQs (English)
Page 11
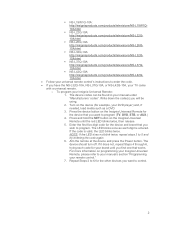
... this TV? Refer to your Manual or the Insignia Website: o NS-L19Q-10A: http://insigniaproducts.com/products/televisions/NSL19Q-10A.html o NS-L19W1Q-10A: http://insigniaproducts.com/products/televisions/NSL19W1Q-10A.html o NS-L22Q-10A: http://insigniaproducts.com/products/televisions/NSL22Q-10A.html o NS-L26Q-10A: http://insigniaproducts.com/products/televisions/NSL26Q-10A.html o NS-L32Q-10A: http://insigniaproducts.com/products/televisions/NSL32Q-10A.html o NS-L37Q-10A: http...
... this TV? Refer to your Manual or the Insignia Website: o NS-L19Q-10A: http://insigniaproducts.com/products/televisions/NSL19Q-10A.html o NS-L19W1Q-10A: http://insigniaproducts.com/products/televisions/NSL19W1Q-10A.html o NS-L22Q-10A: http://insigniaproducts.com/products/televisions/NSL22Q-10A.html o NS-L26Q-10A: http://insigniaproducts.com/products/televisions/NSL26Q-10A.html o NS-L32Q-10A: http://insigniaproducts.com/products/televisions/NSL32Q-10A.html o NS-L37Q-10A: http...
FAQs (English)
Page 12
... due to poor reception. 1. How do I have no sound or my sound has static noise. Check volume levels. Make sure the TV volume is possible you are receiving marginal reception. It is not muted. Make sure headphones are not connected to the headphone jack. Make...meter. 5. Audio Issues 14. Press MENU. I turn on/off closed captioning? Press the CCD button on the remote to the jacks on the TV and on -screen menu opens with the Picture menu displayed. 3. Move the antenna around the room or close the menu. The audio cables you...
... due to poor reception. 1. How do I have no sound or my sound has static noise. Check volume levels. Make sure the TV volume is possible you are receiving marginal reception. It is not muted. Make sure headphones are not connected to the headphone jack. Make...meter. 5. Audio Issues 14. Press MENU. I turn on/off closed captioning? Press the CCD button on the remote to the jacks on the TV and on -screen menu opens with the Picture menu displayed. 3. Move the antenna around the room or close the menu. The audio cables you...

Warranty (English)
Page 1
...of the Product is repaired and returned, at no charge to you. Products and parts replaced under this warranty become the property of Insignia and are required after the Warranty Period expires, you must be purchased from . www.insigniaproducts.com 1 or (2) replace the Product...a period of two (2) years from the date of your TV is determined to be defective by this warranty that requires service, terms of Insignia brand products and packaged with the Product. Two-year limited warranty Insignia Products ("Insignia") warrants to you, the original purchaser of this new product...
...of the Product is repaired and returned, at no charge to you. Products and parts replaced under this warranty become the property of Insignia and are required after the Warranty Period expires, you must be purchased from . www.insigniaproducts.com 1 or (2) replace the Product...a period of two (2) years from the date of your TV is determined to be defective by this warranty that requires service, terms of Insignia brand products and packaged with the Product. Two-year limited warranty Insignia Products ("Insignia") warrants to you, the original purchaser of this new product...

User Manual (English)
Page 1
User Guide 19", 19" White, and 22" LCD TV NS-L19Q-10A/NS-L19W1Q-10A/NS-L22Q-10A
User Guide 19", 19" White, and 22" LCD TV NS-L19Q-10A/NS-L19W1Q-10A/NS-L22Q-10A
User Manual (English)
Page 3
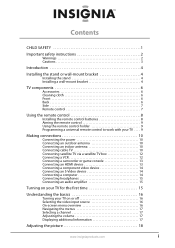
... safety instructions 2 Warnings 2 Cautions 3 Introduction 4 Installing the stand or wall-mount bracket 4 Installing the stand 4 Installing a wall-mount bracket 4 TV components 6 Accessories 6 Cleaning cloth 6 Front 6 Back 6 Side 7 Remote control 7 Using the remote control 8 Installing the remote control batteries 8 ... 10 Connecting the power 10 Connecting an outdoor antenna 10 Connecting an indoor antenna 10 Connecting cable TV 10 Connecting satellite TV via a satellite TV box 12 Connecting a VCR 12 Connecting a camcorder or game console 13 Connecting an HDMI device ...
... safety instructions 2 Warnings 2 Cautions 3 Introduction 4 Installing the stand or wall-mount bracket 4 Installing the stand 4 Installing a wall-mount bracket 4 TV components 6 Accessories 6 Cleaning cloth 6 Front 6 Back 6 Side 7 Remote control 7 Using the remote control 8 Installing the remote control batteries 8 ... 10 Connecting the power 10 Connecting an outdoor antenna 10 Connecting an indoor antenna 10 Connecting cable TV 10 Connecting satellite TV via a satellite TV box 12 Connecting a VCR 12 Connecting a camcorder or game console 13 Connecting an HDMI device ...
User Manual (English)
Page 4
... 18 Adjusting Advanced Video settings 18 Freezing the picture 18 Adjusting the sound 19 Adjusting the sound 19 Playing TV audio only 19 Changing channel settings 20 Automatically scanning for channels 20 Hiding channels 21 Setting up a favorite channel list 21 Viewing a favorite...the DTV signal strength 23 Setting parental controls 23 Setting or changing the password 23 Setting parental control levels 24 Blocking unrated TV 25 Downloading rating information 26 Locking control buttons 27 Using closed captioning 27 Viewing closed captioning 27 Selecting the closed captioning ...
... 18 Adjusting Advanced Video settings 18 Freezing the picture 18 Adjusting the sound 19 Adjusting the sound 19 Playing TV audio only 19 Changing channel settings 20 Automatically scanning for channels 20 Hiding channels 21 Setting up a favorite channel list 21 Viewing a favorite...the DTV signal strength 23 Setting parental controls 23 Setting or changing the password 23 Setting parental control levels 24 Blocking unrated TV 25 Downloading rating information 26 Locking control buttons 27 Using closed captioning 27 Viewing closed captioning 27 Selecting the closed captioning ...

User Manual (English)
Page 5
..., speakers, chests, or carts may fall over , or knocked down. • Make sure that are required for the weight of your TV. • Follow all . TVs that you are popular purchases. Wall mounting If you enjoy your new product, keep these safety tips in this product. • Don't...proper use your flat panel display As you decide to wall mount your ability to walls backed with entertainment system furniture and TVs. • Don't place TVs on the proper stands or installed according to making home entertainment enjoyable and safe. www.insigniaproducts.com 1 We and the ...
..., speakers, chests, or carts may fall over , or knocked down. • Make sure that are required for the weight of your TV. • Follow all . TVs that you are popular purchases. Wall mounting If you enjoy your new product, keep these safety tips in this product. • Don't...proper use your flat panel display As you decide to wall mount your ability to walls backed with entertainment system furniture and TVs. • Don't place TVs on the proper stands or installed according to making home entertainment enjoyable and safe. www.insigniaproducts.com 1 We and the ...
User Manual (English)
Page 6
... that your safety. No user-serviceable parts are required, make absolutely sure that you connect the class I apparatus. Handling the LCD panel • Your TV's screen is the disconnecting device. The wide blade or the third prong are important operating and maintenance instructions in your mouth, ...damage and personal injury from being walked on the back of broken glass. • If the LCD panel is present within your TV or hit, jolt, or press hard against the LCD panel. Replacement parts When replacement parts are inside. The plug must remain readily operable. 16 ...
... that your safety. No user-serviceable parts are required, make absolutely sure that you connect the class I apparatus. Handling the LCD panel • Your TV's screen is the disconnecting device. The wide blade or the third prong are important operating and maintenance instructions in your mouth, ...damage and personal injury from being walked on the back of broken glass. • If the LCD panel is present within your TV or hit, jolt, or press hard against the LCD panel. Replacement parts When replacement parts are inside. The plug must remain readily operable. 16 ...
User Manual (English)
Page 7
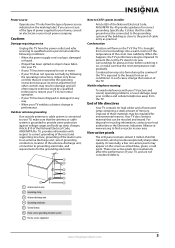
... of the building as a fixed blue, green, or red point. Your TV also contains material that are covered by a qualified technician to restore your TV to its new surroundings for the grounding electrode. 1 2 3 4 5 7 6 1 Antenna lead-in performance. Non-active pixels The LCD panel contains almost 3 million thin film transistors, which provide exceptionally sharp...
... of the building as a fixed blue, green, or red point. Your TV also contains material that are covered by a qualified technician to restore your TV to its new surroundings for the grounding electrode. 1 2 3 4 5 7 6 1 Antenna lead-in performance. Non-active pixels The LCD panel contains almost 3 million thin film transistors, which provide exceptionally sharp...
User Manual (English)
Page 8
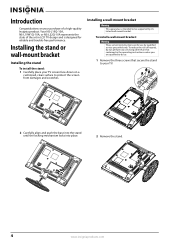
...NS-L19Q-10A, NS-L19W1Q-10A, or NS-L22Q-10A represents the state of the art in the operating instructions unless you are for reliable and trouble-free performance. To install a wall-mount bracket: Warning These servicing instructions are qualified to do not perform any servicing other than that secure the stand to your TV... 2 Remove the stand. 4 www.insigniaproducts.com Introduction Congratulations on your TV screen face-down on a cushioned, clean surface to protect the screen ... the three screws that contained in LCD TV design and is intended to be supported by qualified service personnel only. ...
...NS-L19Q-10A, NS-L19W1Q-10A, or NS-L22Q-10A represents the state of the art in the operating instructions unless you are for reliable and trouble-free performance. To install a wall-mount bracket: Warning These servicing instructions are qualified to do not perform any servicing other than that secure the stand to your TV... 2 Remove the stand. 4 www.insigniaproducts.com Introduction Congratulations on your TV screen face-down on a cushioned, clean surface to protect the screen ... the three screws that contained in LCD TV design and is intended to be supported by qualified service personnel only. ...


