
User Guide
Page 3
... Driver Installation 8 Windows 95/98 8 Windows 2000/Me 9 Windows XP 10 Auto Setup 11 Auto Setup 11 Auto Setup for DOS 11 Auto Setup for Windows95, Windows98, Windows 2000, Windows NT, Windows Me or Windows XP 13 Manual Setup 14 Adjusting Your LCD Monitor 15 User controls 15 On-screen display (OSD) controls 17...
... Driver Installation 8 Windows 95/98 8 Windows 2000/Me 9 Windows XP 10 Auto Setup 11 Auto Setup 11 Auto Setup for DOS 11 Auto Setup for Windows95, Windows98, Windows 2000, Windows NT, Windows Me or Windows XP 13 Manual Setup 14 Adjusting Your LCD Monitor 15 User controls 15 On-screen display (OSD) controls 17...
User Guide
Page 9
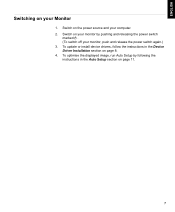
ENGLISH FRANÇAIS DEUTSCH ESPAÑOL ITALIANO Switching on the power source and your computer. 2. Switch on your Monitor 1. To optimise the displayed image, run Auto Setup by pushing and releasing the power switch marked . (To switch off your monitor by following the instructions in the Device Driver Installation section on page 11. 7 JAPANESE COMPL & WARR To update or install device drivers, follow the instructions in the Auto Setup section on page 8. 4. Switch on your monitor, push and release the power switch again.) 3.
ENGLISH FRANÇAIS DEUTSCH ESPAÑOL ITALIANO Switching on the power source and your computer. 2. Switch on your Monitor 1. To optimise the displayed image, run Auto Setup by pushing and releasing the power switch marked . (To switch off your monitor by following the instructions in the Device Driver Installation section on page 11. 7 JAPANESE COMPL & WARR To update or install device drivers, follow the instructions in the Auto Setup section on page 8. 4. Switch on your monitor, push and release the power switch again.) 3.

User Guide
Page 10
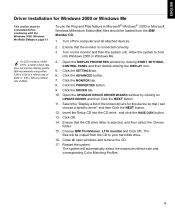
... page 13 On LCD monitors, unlike CRTs, a faster refresh rate does not improve display quality. Device Driver Installation Driver installation for Windows 95 or Windows 98 This section must be completed before continuing with the Windows 95 or Windows 98 Auto Setup on CHANGE button and then select the NEXT button. 4. Choose IBM ThinkVision L170 monitor and Click...
... page 13 On LCD monitors, unlike CRTs, a faster refresh rate does not improve display quality. Device Driver Installation Driver installation for Windows 95 or Windows 98 This section must be completed before continuing with the Windows 95 or Windows 98 Auto Setup on CHANGE button and then select the NEXT button. 4. Choose IBM ThinkVision L170 monitor and Click...
User Guide
Page 11
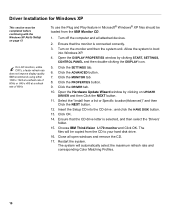
...that the CD drive letter is connected correctly. 3. Choose IBM ThinkVision L170 monitor and Click OK. ENGLISH FRANÇAIS DEUTSCH ESPAÑOL Driver Installation for this device so that the monitor is selected, and then select the 'Drivers' folder. 15. Turn off the computer and all open ...windows and remove the CD. 17. Open the UPGRADE DEVICE DRIVER WIZARD window by clicking START,...
...that the CD drive letter is connected correctly. 3. Choose IBM ThinkVision L170 monitor and Click OK. ENGLISH FRANÇAIS DEUTSCH ESPAÑOL Driver Installation for this device so that the monitor is selected, and then select the 'Drivers' folder. 15. Turn off the computer and all open ...windows and remove the CD. 17. Open the UPGRADE DEVICE DRIVER WIZARD window by clicking START,...
User Guide
Page 12
...selected, and then select the 'Drivers' folder. 15. Choose IBM ThinkVision L170 monitor and Click OK. Restart the system. The system will be completed before continuing with the Windows XP Auto Setup on page 13 On LCD monitors, unlike CRTs, a faster refresh...17. Click OK. 14. Allow the system to your hard disk drive. 16. Click the DRIVER tab. 10. The files will automatically select the maximum refresh rate and corresponding Color Matching Profiles. 10 Close all attached devices. 2. Click the ADVANCED button. 7. Select the "Install from the IBM Monitor CD. 1. Driver...
...selected, and then select the 'Drivers' folder. 15. Choose IBM ThinkVision L170 monitor and Click OK. Restart the system. The system will be completed before continuing with the Windows XP Auto Setup on page 13 On LCD monitors, unlike CRTs, a faster refresh...17. Click OK. 14. Allow the system to your hard disk drive. 16. Click the DRIVER tab. 10. The files will automatically select the maximum refresh rate and corresponding Color Matching Profiles. 10 Close all attached devices. 2. Click the ADVANCED button. 7. Select the "Install from the IBM Monitor CD. 1. Driver...

User Guide
Page 13
...begin AUTO SETUP for normal operation. The AUTO SETUP process only applies to Auto Adjustment. This is dependent on the operating system on your monitor while running any order. This procedure sets up for 15 minutes. After you perform Auto Setup, the settings are stored and used each...OL Auto Setup Auto Setup The Setup Utility included on the installation CD is selected, repeat this section to reset the monitor. They do not replace or modify the display driver. For correct operation locate the operating system on your computer: 1. When a new mode is for each screen mode ...
...begin AUTO SETUP for normal operation. The AUTO SETUP process only applies to Auto Adjustment. This is dependent on the operating system on your monitor while running any order. This procedure sets up for 15 minutes. After you perform Auto Setup, the settings are stored and used each...OL Auto Setup Auto Setup The Setup Utility included on the installation CD is selected, repeat this section to reset the monitor. They do not replace or modify the display driver. For correct operation locate the operating system on your computer: 1. When a new mode is for each screen mode ...
User Guide
Page 25
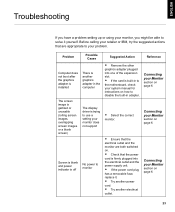
... retailer or IBM, try the suggested actions that are both switched on page 6 23 JAPANESE COMPL & WARR Select the correct monitor. Check that the electrical outlet and the monitor are appropriate to solve it . Try another electrical outlet. Connecting your Monitor section on page 6 Connecting your Monitor section on page... to monitor Remove the other graphics adapter plugged into the electrical outlet and the power supply unit. If the card is built-in to the motherboard, check your system manual for instructions on how to disable the built-in the computer The display driver is...
... retailer or IBM, try the suggested actions that are both switched on page 6 23 JAPANESE COMPL & WARR Select the correct monitor. Check that the electrical outlet and the monitor are appropriate to solve it . Try another electrical outlet. Connecting your Monitor section on page 6 Connecting your Monitor section on page... to monitor Remove the other graphics adapter plugged into the electrical outlet and the power supply unit. If the card is built-in to the motherboard, check your system manual for instructions on how to disable the built-in the computer The display driver is...
User Guide
Page 28
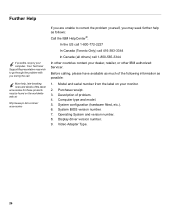
...information as follows: Call the IBM HelpCenter®. Model and serial number from the label on the worldwide web at: http://www.pc.ibm.com/us/ accessories If you... go through the problem with you during the call 1-800-565-3344 In other IBM authorized Servicer. Your Technical Support Representative may seek further help , late-breaking news and...the latest accessories for these products may be found on your dealer, retailer, or other countries contact your monitor. 2. Operating System and version number. 8. Purchase receipt. 3. System configuration (hardware fitted, etc.). ...
...information as follows: Call the IBM HelpCenter®. Model and serial number from the label on the worldwide web at: http://www.pc.ibm.com/us/ accessories If you... go through the problem with you during the call 1-800-565-3344 In other IBM authorized Servicer. Your Technical Support Representative may seek further help , late-breaking news and...the latest accessories for these products may be found on your dealer, retailer, or other countries contact your monitor. 2. Operating System and version number. 8. Purchase receipt. 3. System configuration (hardware fitted, etc.). ...

