User Manual
Page 33
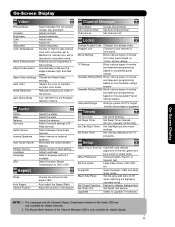
...signals in fixed setting. On-Screen Display Video Picture Mode Contrast Brightness Color Tint Sharpness Color Temperature Black Enhancement Edge Enhancement Reset Video Settings Auto Color Noise Reduction Auto Movie Mode Select between 1080i and 540p Scan mode. Adjust brightness. Eliminates the noise... various types of movies and video types based on a parental guide ratings. Upgrades Select to display dialogue/text. Choose the Reset Video settings. Set viewing reservation for TV programs. Setup Magic Focus Tune Up Automatic and manual alignment of the Channel Manager ...
...signals in fixed setting. On-Screen Display Video Picture Mode Contrast Brightness Color Tint Sharpness Color Temperature Black Enhancement Edge Enhancement Reset Video Settings Auto Color Noise Reduction Auto Movie Mode Select between 1080i and 540p Scan mode. Adjust brightness. Eliminates the noise... various types of movies and video types based on a parental guide ratings. Upgrades Select to display dialogue/text. Choose the Reset Video settings. Set viewing reservation for TV programs. Setup Magic Focus Tune Up Automatic and manual alignment of the Channel Manager ...

User Manual
Page 34
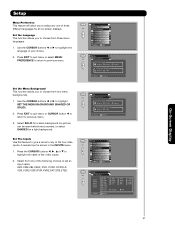
... adjust the function. Press the CURSOR buttons ̇ or ̈ to highlight and select PICTURE MODE settings. 2. Sharpness function will reset to initial conditions. You can independently customize each of the Video Inputs to your preference to optimize your TV's performance. 1. Picture Mode... re Mode Contrast Day 100% Brightness 50% Color 50% Tint Sharpness 50% Color Temperature High Black Enhancement Middle Edge Enhancement High Reset Video Settings Move SEL Return Picture Mode Next/Prev Select Day SEL Return On-Screen Display 1. Use the CURSOR buttons ̆...
... adjust the function. Press the CURSOR buttons ̇ or ̈ to highlight and select PICTURE MODE settings. 2. Sharpness function will reset to initial conditions. You can independently customize each of the Video Inputs to your preference to optimize your TV's performance. 1. Picture Mode... re Mode Contrast Day 100% Brightness 50% Color 50% Tint Sharpness 50% Color Temperature High Black Enhancement Middle Edge Enhancement High Reset Video Settings Move SEL Return Picture Mode Next/Prev Select Day SEL Return On-Screen Display 1. Use the CURSOR buttons ̆...

User Manual
Page 35
... are adjusting CONTRAST. Use the CURSOR buttons ̆ or ̄ to highlight the function to the Day VIDEO mode. 1. Reset Move SEL Return Auto Color The AUTO COLOR function automatically monitors and adjusts the color to maintain natural flesh tones while preserving fidelity of... the same manner. 2. NOTE: When using the COMPONENT VIDEO Y-PBPR input jacks. 3. Use the CURSOR button ̄ to select RESET VIDEO SETTINGS. 3. If RESET is selected in light scenes using the settings off, low, middle and high. Press the SELECT button to access other video settings....
... are adjusting CONTRAST. Use the CURSOR buttons ̆ or ̄ to highlight the function to the Day VIDEO mode. 1. Reset Move SEL Return Auto Color The AUTO COLOR function automatically monitors and adjusts the color to maintain natural flesh tones while preserving fidelity of... the same manner. 2. NOTE: When using the COMPONENT VIDEO Y-PBPR input jacks. 3. Use the CURSOR button ̄ to select RESET VIDEO SETTINGS. 3. If RESET is selected in light scenes using the settings off, low, middle and high. Press the SELECT button to access other video settings....

User Manual
Page 42
... the CURSOR buttons navigate the Channel List. 2. Press the CURSOR buttons ̇ or ̈ to select. Press the SELECT button to highlight the START or RESET option. 3. Channel List This function allows you to review which have been added to select ON or OFF on the SCAN and LOCK Columns. 3. To...
... the CURSOR buttons navigate the Channel List. 2. Press the CURSOR buttons ̇ or ̈ to select. Press the SELECT button to highlight the START or RESET option. 3. Channel List This function allows you to review which have been added to select ON or OFF on the SCAN and LOCK Columns. 3. To...
User Manual
Page 43
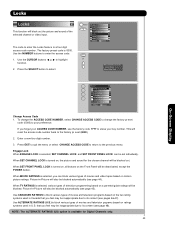
... its content (see page 45). If you feel may be inappropriate due to block various types of the selected channel or video input. This will reset the access code number back to enter the Locks featur e is selected, various types of movies and television programs based on the two rating systems...
... its content (see page 45). If you feel may be inappropriate due to block various types of the selected channel or video input. This will reset the access code number back to enter the Locks featur e is selected, various types of movies and television programs based on the two rating systems...

User Manual
Page 55
... to return to main picture. Use the CURSOR buttons to match the RED and BLUE colors to recall the factory pre-set convergence data. Select RESET to GREEN (reference color). Setup Manual Convergence Adjustment Mode (9 Point Manual Adjustment) NOTE: 1. GREEN color is still not acceptable, use the number buttons while the...
... to return to main picture. Use the CURSOR buttons to match the RED and BLUE colors to recall the factory pre-set convergence data. Select RESET to GREEN (reference color). Setup Manual Convergence Adjustment Mode (9 Point Manual Adjustment) NOTE: 1. GREEN color is still not acceptable, use the number buttons while the...

User Manual
Page 56
... you use the MANUAL ADJUSTMENT MODE. 3. GREEN color is pressed, all three colors should appear white. Use the CURSOR buttons to access menu mode. 1. Select RESET to select. On-Screen Display 56 Properly aligned, all manual adjust mode settings will change to press the following buttons: [2] up, [4] left, [5] down, [6] right. Select...
... you use the MANUAL ADJUSTMENT MODE. 3. GREEN color is pressed, all three colors should appear white. Use the CURSOR buttons to access menu mode. 1. Select RESET to select. On-Screen Display 56 Properly aligned, all manual adjust mode settings will change to press the following buttons: [2] up, [4] left, [5] down, [6] right. Select...
User Manual
Page 57
... Closed Captions Set Audio Out Upgrades Move SEL Set Setup OR Set The Inputs Rename List Input1 Input2 Input3 Input4 Input5 AVR CAM CBL CBL2 Reset Auto Link DVD DVD2 DVD3 LD PVR PVR2 SAT STB STB2 VCR VCR2 VCR3 Auto Remote Off Move SEL Return On-Screen Display 57 A named...
... Closed Captions Set Audio Out Upgrades Move SEL Set Setup OR Set The Inputs Rename List Input1 Input2 Input3 Input4 Input5 AVR CAM CBL CBL2 Reset Auto Link DVD DVD2 DVD3 LD PVR PVR2 SAT STB STB2 VCR VCR2 VCR3 Auto Remote Off Move SEL Return On-Screen Display 57 A named...

User Manual
Page 58
...processing that can cause picture noise or distortion. Setup OR Set The Inputs Rename List Input1 Input2 Input3 Input4 Input5 AVR CAM CBL CBL2 Reset Auto Link DVD DVD2 DVD3 LD PVR PVR2 SAT STB STB2 VCR VCR2 VCR3 Auto Remote Off Move SEL Return 3. However, intended ...̈ to watch 4:3 signal with your VCR and watch a movie with your home it detects a video signal to INPUT 3. 1. N O T E : VIRTUAL HD is now reset and will automatically turn on your VCR, laserdisc player or DVD player. Set Black Side Panel Next/Prev. The top/bottom gray bar will appear...
...processing that can cause picture noise or distortion. Setup OR Set The Inputs Rename List Input1 Input2 Input3 Input4 Input5 AVR CAM CBL CBL2 Reset Auto Link DVD DVD2 DVD3 LD PVR PVR2 SAT STB STB2 VCR VCR2 VCR3 Auto Remote Off Move SEL Return 3. However, intended ...̈ to watch 4:3 signal with your VCR and watch a movie with your home it detects a video signal to INPUT 3. 1. N O T E : VIRTUAL HD is now reset and will automatically turn on your VCR, laserdisc player or DVD player. Set Black Side Panel Next/Prev. The top/bottom gray bar will appear...


