
HP Client Manager 6.1
Page 3
... remotely update the BIOS on your non-HP client computers. • Health monitoring: The health monitoring capabilities of client-side events, such as a chassis intrusion, disk drive error, battery status, thermal changes, and "walking assets" such as new or missing PCs, memory, battery, disk drives, CPUs, and monitors. HPCM can be used to install or update system software on the client computers from a set of HPCM allow you to upgrade the BIOS firmware on the HPCM Server...
... remotely update the BIOS on your non-HP client computers. • Health monitoring: The health monitoring capabilities of client-side events, such as a chassis intrusion, disk drive error, battery status, thermal changes, and "walking assets" such as new or missing PCs, memory, battery, disk drives, CPUs, and monitors. HPCM can be used to install or update system software on the client computers from a set of HPCM allow you to upgrade the BIOS firmware on the HPCM Server...
HP Client Manager 6.1
Page 4
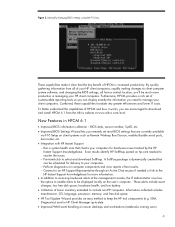
... include asset changes, low free disk space, hardware health, and low battery. • Collection of test results. - Figure 2. These capabilities make it works, you 'll be scheduled for more productive in managing your computers. - Run a system health scan that are encouraged to download and install HPCM 6.1 from a central location, you are currently available via F10 Setup on client systems such as Remote Wakeup Boot Source, enable/disable serial ports, boot order...
... include asset changes, low free disk space, hardware health, and low battery. • Collection of test results. - Figure 2. These capabilities make it works, you 'll be scheduled for more productive in managing your computers. - Run a system health scan that are encouraged to download and install HPCM 6.1 from a central location, you are currently available via F10 Setup on client systems such as Remote Wakeup Boot Source, enable/disable serial ports, boot order...
HP Client Manager 6.1
Page 14
... to monitoring the network, systems, applications and storage. Altiris Connector for HP OpenView extends and enhances HP OpenView Network Node Manager, Operations, and Service Desk. The connector enables client alerts to be imported into the Service Desk CMDB. Use the connector to: • Extend HP Systems Insight Manager by integrating client hardware and software management • Discover and monitor health of HP clients and servers within HP OpenView, providing the information needed to properly troubleshoot problems. Using...
... to monitoring the network, systems, applications and storage. Altiris Connector for HP OpenView extends and enhances HP OpenView Network Node Manager, Operations, and Service Desk. The connector enables client alerts to be imported into the Service Desk CMDB. Use the connector to: • Extend HP Systems Insight Manager by integrating client hardware and software management • Discover and monitor health of HP clients and servers within HP OpenView, providing the information needed to properly troubleshoot problems. Using...
Quick Setup and User's Guide
Page 4
... Setup Step 1: Unpack the Compaq iPAQ Desktop Personal Computer 1 Step 2: Identify Rear Panel Components and Confirm Voltage Setting 2 USB Connectors 3 Legacy Module 3 Step 3: Connect External Devices 4 Step 4: Connect the Power Cords 5 Step 5: Identify the Front Panel Components 6 Step 6: Turn On the Personal Computer and Install the Operating System. . . . . .7 Customizing the Monitor Display 7 Protecting Your Software 7 Compaq Restore CD 7 Registration 8 Turning Off the Personal Computer 8 Chapter 1 Working with the Compaq Easy Access Keyboard Programming the Easy Access Buttons...
... Setup Step 1: Unpack the Compaq iPAQ Desktop Personal Computer 1 Step 2: Identify Rear Panel Components and Confirm Voltage Setting 2 USB Connectors 3 Legacy Module 3 Step 3: Connect External Devices 4 Step 4: Connect the Power Cords 5 Step 5: Identify the Front Panel Components 6 Step 6: Turn On the Personal Computer and Install the Operating System. . . . . .7 Customizing the Monitor Display 7 Protecting Your Software 7 Compaq Restore CD 7 Registration 8 Turning Off the Personal Computer 8 Chapter 1 Working with the Compaq Easy Access Keyboard Programming the Easy Access Buttons...
Quick Setup and User's Guide
Page 5
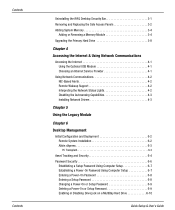
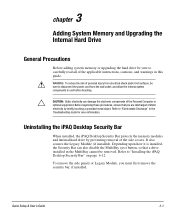
... Uninstalling the iPAQ Desktop Security Bar 3-1 Removing and Replacing the Side Access Panels 3-2 Adding System Memory 3-4 Adding or Removing a Memory Module 3-4 Upgrading the Primary Hard Drive 3-8 Chapter 4 Accessing the Internet & Using Network Communications Accessing the Internet 4-1 Using the Optional USB Modem 4-1 Choosing an Internet Service Provider 4-1 Using Network Communications 4-2 NIC-Based Alerts 4-2 Remote Wakeup Support 4-2 Interpreting the Network Status Lights 4-2 Disabling the Autosensing Capabilities 4-3 Installing Network Drivers 4-3 Chapter 5 Using the...
... Uninstalling the iPAQ Desktop Security Bar 3-1 Removing and Replacing the Side Access Panels 3-2 Adding System Memory 3-4 Adding or Removing a Memory Module 3-4 Upgrading the Primary Hard Drive 3-8 Chapter 4 Accessing the Internet & Using Network Communications Accessing the Internet 4-1 Using the Optional USB Modem 4-1 Choosing an Internet Service Provider 4-1 Using Network Communications 4-2 NIC-Based Alerts 4-2 Remote Wakeup Support 4-2 Interpreting the Network Status Lights 4-2 Disabling the Autosensing Capabilities 4-3 Installing Network Drivers 4-3 Chapter 5 Using the...
Quick Setup and User's Guide
Page 6
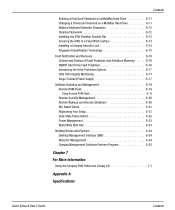
... Management 6-18 Remote ROM Flash 6-19 Using Remote ROM Flash 6-19 Remote Security Management 6-20 Remote Wakeup and Remote Shutdown 6-20 NIC-Based Alerts 6-21 Replicating Your Setup 6-21 Dual-State Power Button 6-22 Power Management 6-23 World Wide Web Site 6-23 Building Blocks and Partners 6-24 Desktop Management Interface (DMI 6-24 Wired for Management 6-24 Compaq Management Solutions Partners Program 6-25 Chapter 7 For More Information Using the Compaq iPAQ Reference Library CD 7-1 Appendix A Specifications Quick Setup & User's Guide...
... Management 6-18 Remote ROM Flash 6-19 Using Remote ROM Flash 6-19 Remote Security Management 6-20 Remote Wakeup and Remote Shutdown 6-20 NIC-Based Alerts 6-21 Replicating Your Setup 6-21 Dual-State Power Button 6-22 Power Management 6-23 World Wide Web Site 6-23 Building Blocks and Partners 6-24 Desktop Management Interface (DMI 6-24 Wired for Management 6-24 Compaq Management Solutions Partners Program 6-25 Chapter 7 For More Information Using the Compaq iPAQ Reference Library CD 7-1 Appendix A Specifications Quick Setup & User's Guide...
Quick Setup and User's Guide
Page 8
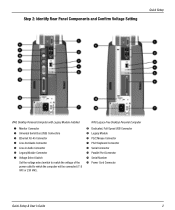
...-Speed USB Connector 9 Legacy Module - Step 2: Identify Rear Panel Components and Confirm Voltage Setting Quick Setup iPAQ Desktop Personal Computer with Legacy Module Installed 1 Monitor Connector 2 Universal Serial Bus (USB) Connectors 3 Ethernet RJ-45 Connector 4 Line-Out Audio Connector 5 Line-In Audio Connector 6 Legacy Module Connector 7 Voltage Select Switch Set the voltage select switch to match the voltage of the power outlet to which the computer will be connected (115 VAC or 230 VAC). PS/2 Mouse Connector q PS/2 Keyboard Connector w Serial Connector e Parallel Port Connector...
...-Speed USB Connector 9 Legacy Module - Step 2: Identify Rear Panel Components and Confirm Voltage Setting Quick Setup iPAQ Desktop Personal Computer with Legacy Module Installed 1 Monitor Connector 2 Universal Serial Bus (USB) Connectors 3 Ethernet RJ-45 Connector 4 Line-Out Audio Connector 5 Line-In Audio Connector 6 Legacy Module Connector 7 Voltage Select Switch Set the voltage select switch to match the voltage of the power outlet to which the computer will be connected (115 VAC or 230 VAC). PS/2 Mouse Connector q PS/2 Keyboard Connector w Serial Connector e Parallel Port Connector...
Quick Setup and User's Guide
Page 9
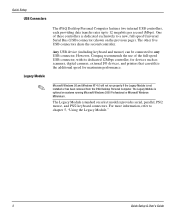
... Module is not installed or has been removed from the iPAQ Desktop Personal Computer. The other five USB connectors share the second controller. The Legacy Module (standard on systems running Microsoft Windows 2000 Professional or Microsoft Windows Millennium. Quick Setup USB Connectors Legacy Module The iPAQ Desktop Personal Computer features two internal USB controllers, each providing data transfer rates up to chapter 5, "Using the Legacy Module." 3 Quick Setup & User's Guide However, Compaq...
... Module is not installed or has been removed from the iPAQ Desktop Personal Computer. The other five USB connectors share the second controller. The Legacy Module (standard on systems running Microsoft Windows 2000 Professional or Microsoft Windows Millennium. Quick Setup USB Connectors Legacy Module The iPAQ Desktop Personal Computer features two internal USB controllers, each providing data transfer rates up to chapter 5, "Using the Legacy Module." 3 Quick Setup & User's Guide However, Compaq...
Quick Setup and User's Guide
Page 10
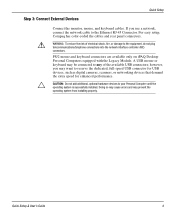
...RJ-45 Connector. Quick Setup Step 3: Connect External Devices Å Ä Connect the monitor, mouse, and keyboard cables. however, you use a network, connect the network cable to the equipment, do not plug telecommunications/telephone connections into the network interface controller (NIC) connectors. PS/2 mouse and keyboard connectors are available only on iPAQ Desktop Personal Computers equipped with the Legacy Module. A USB mouse or keyboard may prevent the operating system from installing properly. For easy setup, Compaq has color-coded the cables and rear panel connectors. If...
...RJ-45 Connector. Quick Setup Step 3: Connect External Devices Å Ä Connect the monitor, mouse, and keyboard cables. however, you use a network, connect the network cable to the equipment, do not plug telecommunications/telephone connections into the network interface controller (NIC) connectors. PS/2 mouse and keyboard connectors are available only on iPAQ Desktop Personal Computers equipped with the Legacy Module. A USB mouse or keyboard may prevent the operating system from installing properly. For easy setup, Compaq has color-coded the cables and rear panel connectors. If...
Quick Setup and User's Guide
Page 13
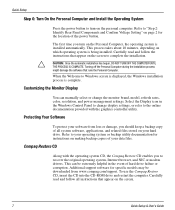
... utility documentation for instructions on the screen. 7 Quick Setup & User's Guide Compaq Restore CD Along with the graphics controller utility. Quick Setup Step 6: Turn On the Personal Computer and Install the Operating System Press the power button to turn on the personal computer. Carefully read and follow the instructions that appear on the screen to complete the installation. Select the Display icon in the event of your hard drive. This can manually select or change display settings...
... utility documentation for instructions on the screen. 7 Quick Setup & User's Guide Compaq Restore CD Along with the graphics controller utility. Quick Setup Step 6: Turn On the Personal Computer and Install the Operating System Press the power button to turn on the personal computer. Carefully read and follow the instructions that appear on the screen to complete the installation. Select the Display icon in the event of your hard drive. This can manually select or change display settings...
Quick Setup and User's Guide
Page 14
... factory-installed software. In Microsoft Windows operating systems, click Start > Shut Down. To reconfigure the power button to make selections during the system restore process. You may need to use the keyboard to work in On/Off mode, run Computer Setup. Registration establishes a record of ownership and gives you an opportunity to receive product announcements, updates, and other communications periodically, if you to conserve energy without closing software applications; Turning...
... factory-installed software. In Microsoft Windows operating systems, click Start > Shut Down. To reconfigure the power button to make selections during the system restore process. You may need to use the keyboard to work in On/Off mode, run Computer Setup. Registration establishes a record of ownership and gives you an opportunity to receive product announcements, updates, and other communications periodically, if you to conserve energy without closing software applications; Turning...
Quick Setup and User's Guide
Page 18
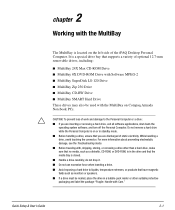
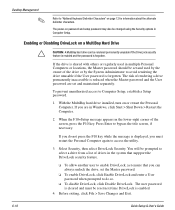
... Setup & User's Guide 2-1 do not drop it. I Avoid exposing a hard drive to the Personal Computer or a drive: I Before handling a drive, ensure that supports a variety of optional 12.7-mm removable drives, including: I MultiBay 24X Max CD-ROM Drive I MultiBay 8X DVD-ROM Drive with Software MPEG-2 I MultiBay SuperDisk LS-120 Drive I MultiBay Zip 250 Drive I MultiBay CD-RW Drive I If a drive must be used with the MultiBay on Compaq Armada Notebook PCs. I MultiBay SMART Hard Drive...
... Setup & User's Guide 2-1 do not drop it. I Avoid exposing a hard drive to the Personal Computer or a drive: I Before handling a drive, ensure that supports a variety of optional 12.7-mm removable drives, including: I MultiBay 24X Max CD-ROM Drive I MultiBay 8X DVD-ROM Drive with Software MPEG-2 I MultiBay SuperDisk LS-120 Drive I MultiBay Zip 250 Drive I MultiBay CD-RW Drive I If a drive must be used with the MultiBay on Compaq Armada Notebook PCs. I MultiBay SMART Hard Drive...
Quick Setup and User's Guide
Page 24
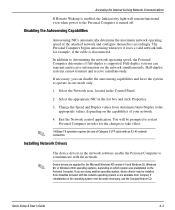
... side covers. Uninstalling the iPAQ Desktop Security Bar When installed, the iPAQ Desktop Security Bar protects the memory modules and internal hard drive by briefly touching a grounded metal object. Refer to cool before touching. Ä CAUTION: Static electricity can also disable the MultiBay eject button, so that you must first remove the security bar, if installed. Before beginning these procedures, ensure that a drive installed in the Troubleshooting Guide...
... side covers. Uninstalling the iPAQ Desktop Security Bar When installed, the iPAQ Desktop Security Bar protects the memory modules and internal hard drive by briefly touching a grounded metal object. Refer to cool before touching. Ä CAUTION: Static electricity can also disable the MultiBay eject button, so that you must first remove the security bar, if installed. Before beginning these procedures, ensure that a drive installed in the Troubleshooting Guide...
Quick Setup and User's Guide
Page 35
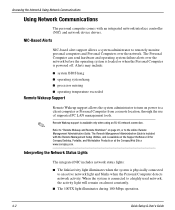
... use of supported PC LAN management tools. When the system is physically connected to an active network light and blinks when the Personal Computer detects network activity. Accessing the Internet & Using Network Communications Using Network Communications The personal computer comes with the Remote Management Setup Utilities, and is available on page 20, or to the online Remote Management Administrators Guide. The Personal Computer can send hardware and operating system failure alerts over the network. Remote Wakeup support is powered off. I operating...
... use of supported PC LAN management tools. When the system is physically connected to an active network light and blinks when the Personal Computer detects network activity. Accessing the Internet & Using Network Communications Using Network Communications The personal computer comes with the Remote Management Setup Utilities, and is available on page 20, or to the online Remote Management Administrators Guide. The Personal Computer can send hardware and operating system failure alerts over the network. Remote Wakeup support is powered off. I operating...
Quick Setup and User's Guide
Page 36
... the cable is supported. The Personal Computer begins autosensing whenever it loses a valid network link, for the changes to the appropriate values, depending on the network simultaneously. Accessing the Internet & Using Network Communications If Remote Wakeup is enabled, the link/activity light will be installed from Automatic/Auto Duplex to take effect. 100Base-TX operation requires the use the Compaq Restore CD. Device drivers are using another operating system, device drivers may...
... the cable is supported. The Personal Computer begins autosensing whenever it loses a valid network link, for the changes to the appropriate values, depending on the network simultaneously. Accessing the Internet & Using Network Communications If Remote Wakeup is enabled, the link/activity light will be installed from Automatic/Auto Duplex to take effect. 100Base-TX operation requires the use the Compaq Restore CD. Device drivers are using another operating system, device drivers may...
Quick Setup and User's Guide
Page 49
... prompted to select a drive from a list of the screen, press the F10 key. Before exiting, click File > Save Changes and Exit. 6-10 Quick Setup & User's Guide With the MultiBay hard drive installed, turn on a MultiBay Hard Drive Ä CAUTION: A MultiBay hard drive can always unlock the drive, set the Master password. ❏ To enable DriveLock, click Enable DriveLock and enter a User password when prompted to Computer Setup, establish a Setup password. 1. If you must be set and maintained separately...
... prompted to select a drive from a list of the screen, press the F10 key. Before exiting, click File > Save Changes and Exit. 6-10 Quick Setup & User's Guide With the MultiBay hard drive installed, turn on a MultiBay Hard Drive Ä CAUTION: A MultiBay hard drive can always unlock the drive, set the Master password. ❏ To enable DriveLock, click Enable DriveLock and enter a User password when prompted to Computer Setup, establish a Setup password. 1. If you must be set and maintained separately...
Quick Setup and User's Guide
Page 54
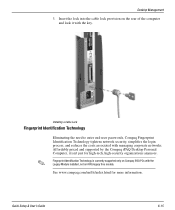
... more information. Installing a Cable Lock Fingerprint Identification Technology ✎ Eliminating the need to enter end-user passwords, Compaq Fingerprint Identification Technology tightens network security, simplifies the login process, and reduces the costs associated with the key. Quick Setup & User's Guide 6-15 Affordably priced and supported by the Compaq iPAQ Desktop Personal Computer, it with managing corporate networks. Insert the lock into the cable lock provision on iPAQ legacy free models. Desktop Management 3.
... more information. Installing a Cable Lock Fingerprint Identification Technology ✎ Eliminating the need to enter end-user passwords, Compaq Fingerprint Identification Technology tightens network security, simplifies the login process, and reduces the costs associated with the key. Quick Setup & User's Guide 6-15 Affordably priced and supported by the Compaq iPAQ Desktop Personal Computer, it with managing corporate networks. Insert the lock into the cable lock provision on iPAQ legacy free models. Desktop Management 3.
Quick Setup and User's Guide
Page 70
...) 2, 5-1 PS/2 mouse (Legacy Module) 2, 5-1 serial (Legacy Module) 2, 5-1 USB 2, 6 connector locations 2 D delimiter characters, keyboard 6-12 desktop management 6-1-6-25 disabling DriveLock 6-10 display settings 7 documentation, additional product 7-1 DriveLock password changing 6-11 entering 6-11 DriveLock security 6-5 DriveLock, enabling or disabling 6-10 drivers, installing network 4-3 dual-state power button 6, 8 DVD-ROM drive 2-1 E Easy Access Buttons 1-1 Easy Access Keyboard 1-1 easy-carry handle 2 enabling DriveLock 6-10 Ethernet RJ-45 connector 2 external devices, connecting 4 Index...
...) 2, 5-1 PS/2 mouse (Legacy Module) 2, 5-1 serial (Legacy Module) 2, 5-1 USB 2, 6 connector locations 2 D delimiter characters, keyboard 6-12 desktop management 6-1-6-25 disabling DriveLock 6-10 display settings 7 documentation, additional product 7-1 DriveLock password changing 6-11 entering 6-11 DriveLock security 6-5 DriveLock, enabling or disabling 6-10 drivers, installing network 4-3 dual-state power button 6, 8 DVD-ROM drive 2-1 E Easy Access Buttons 1-1 Easy Access Keyboard 1-1 easy-carry handle 2 enabling DriveLock 6-10 Ethernet RJ-45 connector 2 external devices, connecting 4 Index...
Quick Setup and User's Guide
Page 71
...controller (NIC) connection 4 network service boot 6-2 network status lights, interpreting 4-2 NIC-based alerts 4-2 notes Blink LED during Energy Save 6-22 calling Compaq 6-24 drive blank 2-4, 2-5 Fingerprint Identification Technology 6-15 keyboard delimiters 6-9, 6-12 language chosen during Setup 7-2 Legacy Module 5-1 memory module installation 3-7 monitor timeouts 6-23 network cables 4-2 network drivers 4-2 power button shutoff 8 power disconnection 6-20 power-on or setup password 6-9, 6-12, 6-13 Prefailure Warranty 6-16 product documentation 7-1 reconfiguring power button 8 Remote ROM Flash...
...controller (NIC) connection 4 network service boot 6-2 network status lights, interpreting 4-2 NIC-based alerts 4-2 notes Blink LED during Energy Save 6-22 calling Compaq 6-24 drive blank 2-4, 2-5 Fingerprint Identification Technology 6-15 keyboard delimiters 6-9, 6-12 language chosen during Setup 7-2 Legacy Module 5-1 memory module installation 3-7 monitor timeouts 6-23 network cables 4-2 network drivers 4-2 power button shutoff 8 power disconnection 6-20 power-on or setup password 6-9, 6-12, 6-13 Prefailure Warranty 6-16 product documentation 7-1 reconfiguring power button 8 Remote ROM Flash...
Quick Setup and User's Guide
Page 72
... 8 Remote System Installation 6-2 remote wakeup support 4-2 removable drives, optional 2-1 removable media boot control 6-5 S security cable lock provision 6-14 Fingerprint Identification Technology 6-15 iPAQ Desktop Security Bar 3-1, 6-12 mounting holes 6-13 password 6-6 security bar 6-6 serial connector (Legacy Module) 2, 4 serial interface control 6-5 serial number 2 setup password changing 6-9 deleting 6-9 entering 6-8 establishing 6-7 side access panels removing and replacing 3-1 SMART hard drive 2-1 software updating and management 6-18-6-24 specifications A-1 SuperDisk LS-120 drive...
... 8 Remote System Installation 6-2 remote wakeup support 4-2 removable drives, optional 2-1 removable media boot control 6-5 S security cable lock provision 6-14 Fingerprint Identification Technology 6-15 iPAQ Desktop Security Bar 3-1, 6-12 mounting holes 6-13 password 6-6 security bar 6-6 serial connector (Legacy Module) 2, 4 serial interface control 6-5 serial number 2 setup password changing 6-9 deleting 6-9 entering 6-8 establishing 6-7 side access panels removing and replacing 3-1 SMART hard drive 2-1 software updating and management 6-18-6-24 specifications A-1 SuperDisk LS-120 drive...


