
HP Client Manager 6.1
Page 3
... gather basic information for display. Normally, a SoftPaq would be downloaded to change the BIOS settings, such as the Storage Options or the Boot Order, as new or missing PCs, memory, battery, disk drives, CPUs, and monitors. After Microsoft Windows has booted on those client computers that match the hardware and software criteria that our customers have specified, such as the chassis serial number, computer model number, memory size, operating system, CPU identification, and many more...
... gather basic information for display. Normally, a SoftPaq would be downloaded to change the BIOS settings, such as the Storage Options or the Boot Order, as new or missing PCs, memory, battery, disk drives, CPUs, and monitors. After Microsoft Windows has booted on those client computers that match the hardware and software criteria that our customers have specified, such as the chassis serial number, computer model number, memory size, operating system, CPU identification, and many more...
HP Client Manager 6.1
Page 4
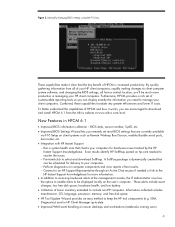
..., language, processor, memory, and free disk space. • HP Tool Update Wizard provides an easy method to select and download SoftPaqs. Manually changing BIOS settings using the F10 key. These capabilities make it works, you remotely set of your HP client computers, rapidly making changes to client computer system software, and changing the BIOS settings, all from the Altiris website at the management console, the IT Administrator now has the option to enable alerts to receiving hardware alerts...
..., language, processor, memory, and free disk space. • HP Tool Update Wizard provides an easy method to select and download SoftPaqs. Manually changing BIOS settings using the F10 key. These capabilities make it works, you remotely set of your HP client computers, rapidly making changes to client computer system software, and changing the BIOS settings, all from the Altiris website at the management console, the IT Administrator now has the option to enable alerts to receiving hardware alerts...

HP Client Manager 6.1
Page 14
... needed to resolve issues such as identifying inventory changes, image deployment, and software repair and updates. By anticipating hardware and software problems before they occur, HP OpenView optimizes system performance and availability. Detailed client inventory is made accessible from the HP OpenView console to the HP Client Management Solutions, you can automatically be forwarded to monitoring the network, systems, applications and storage. The connector integrates with HP Client Manager...
... needed to resolve issues such as identifying inventory changes, image deployment, and software repair and updates. By anticipating hardware and software problems before they occur, HP OpenView optimizes system performance and availability. Detailed client inventory is made accessible from the HP OpenView console to the HP Client Management Solutions, you can automatically be forwarded to monitoring the network, systems, applications and storage. The connector integrates with HP Client Manager...
Quick Setup and User's Guide
Page 4
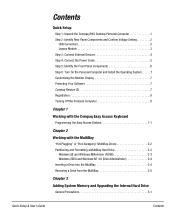
... Setup Step 1: Unpack the Compaq iPAQ Desktop Personal Computer 1 Step 2: Identify Rear Panel Components and Confirm Voltage Setting 2 USB Connectors 3 Legacy Module 3 Step 3: Connect External Devices 4 Step 4: Connect the Power Cords 5 Step 5: Identify the Front Panel Components 6 Step 6: Turn On the Personal Computer and Install the Operating System. . . . . .7 Customizing the Monitor Display 7 Protecting Your Software 7 Compaq Restore CD 7 Registration 8 Turning Off the Personal Computer 8 Chapter 1 Working with the Compaq Easy Access Keyboard Programming the Easy Access Buttons...
... Setup Step 1: Unpack the Compaq iPAQ Desktop Personal Computer 1 Step 2: Identify Rear Panel Components and Confirm Voltage Setting 2 USB Connectors 3 Legacy Module 3 Step 3: Connect External Devices 4 Step 4: Connect the Power Cords 5 Step 5: Identify the Front Panel Components 6 Step 6: Turn On the Personal Computer and Install the Operating System. . . . . .7 Customizing the Monitor Display 7 Protecting Your Software 7 Compaq Restore CD 7 Registration 8 Turning Off the Personal Computer 8 Chapter 1 Working with the Compaq Easy Access Keyboard Programming the Easy Access Buttons...
Quick Setup and User's Guide
Page 5
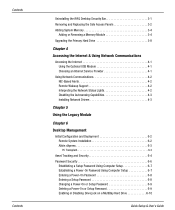
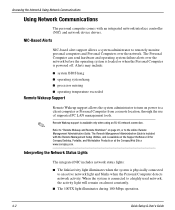
... Uninstalling the iPAQ Desktop Security Bar 3-1 Removing and Replacing the Side Access Panels 3-2 Adding System Memory 3-4 Adding or Removing a Memory Module 3-4 Upgrading the Primary Hard Drive 3-8 Chapter 4 Accessing the Internet & Using Network Communications Accessing the Internet 4-1 Using the Optional USB Modem 4-1 Choosing an Internet Service Provider 4-1 Using Network Communications 4-2 NIC-Based Alerts 4-2 Remote Wakeup Support 4-2 Interpreting the Network Status Lights 4-2 Disabling the Autosensing Capabilities 4-3 Installing Network Drivers 4-3 Chapter 5 Using the...
... Uninstalling the iPAQ Desktop Security Bar 3-1 Removing and Replacing the Side Access Panels 3-2 Adding System Memory 3-4 Adding or Removing a Memory Module 3-4 Upgrading the Primary Hard Drive 3-8 Chapter 4 Accessing the Internet & Using Network Communications Accessing the Internet 4-1 Using the Optional USB Modem 4-1 Choosing an Internet Service Provider 4-1 Using Network Communications 4-2 NIC-Based Alerts 4-2 Remote Wakeup Support 4-2 Interpreting the Network Status Lights 4-2 Disabling the Autosensing Capabilities 4-3 Installing Network Drivers 4-3 Chapter 5 Using the...
Quick Setup and User's Guide
Page 6
... Management 6-18 Remote ROM Flash 6-19 Using Remote ROM Flash 6-19 Remote Security Management 6-20 Remote Wakeup and Remote Shutdown 6-20 NIC-Based Alerts 6-21 Replicating Your Setup 6-21 Dual-State Power Button 6-22 Power Management 6-23 World Wide Web Site 6-23 Building Blocks and Partners 6-24 Desktop Management Interface (DMI 6-24 Wired for Management 6-24 Compaq Management Solutions Partners Program 6-25 Chapter 7 For More Information Using the Compaq iPAQ Reference Library CD 7-1 Appendix A Specifications Quick Setup & User's Guide...
... Management 6-18 Remote ROM Flash 6-19 Using Remote ROM Flash 6-19 Remote Security Management 6-20 Remote Wakeup and Remote Shutdown 6-20 NIC-Based Alerts 6-21 Replicating Your Setup 6-21 Dual-State Power Button 6-22 Power Management 6-23 World Wide Web Site 6-23 Building Blocks and Partners 6-24 Desktop Management Interface (DMI 6-24 Wired for Management 6-24 Compaq Management Solutions Partners Program 6-25 Chapter 7 For More Information Using the Compaq iPAQ Reference Library CD 7-1 Appendix A Specifications Quick Setup & User's Guide...
Quick Setup and User's Guide
Page 8
... Module Installed 1 Monitor Connector 2 Universal Serial Bus (USB) Connectors 3 Ethernet RJ-45 Connector 4 Line-Out Audio Connector 5 Line-In Audio Connector 6 Legacy Module Connector 7 Voltage Select Switch Set the voltage select switch to match the voltage of the power outlet to which the computer will be connected (115 VAC or 230 VAC). iPAQ Legacy-Free Desktop Personal Computer 8 Dedicated, Full-Speed USB Connector 9 Legacy Module - PS/2 Mouse Connector q PS/2 Keyboard Connector w Serial Connector e Parallel Port Connector r Serial Number t Power Cord Connector Quick Setup & User's Guide...
... Module Installed 1 Monitor Connector 2 Universal Serial Bus (USB) Connectors 3 Ethernet RJ-45 Connector 4 Line-Out Audio Connector 5 Line-In Audio Connector 6 Legacy Module Connector 7 Voltage Select Switch Set the voltage select switch to match the voltage of the power outlet to which the computer will be connected (115 VAC or 230 VAC). iPAQ Legacy-Free Desktop Personal Computer 8 Dedicated, Full-Speed USB Connector 9 Legacy Module - PS/2 Mouse Connector q PS/2 Keyboard Connector w Serial Connector e Parallel Port Connector r Serial Number t Power Cord Connector Quick Setup & User's Guide...
Quick Setup and User's Guide
Page 9
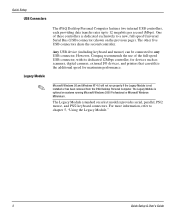
... internal USB controllers, each providing data transfer rates up to chapter 5, "Using the Legacy Module." 3 Quick Setup & User's Guide The Legacy Module (standard on the previous page). One of the full-speed USB connector, with its dedicated 12Mbps controller, for maximum performance. ✎ Microsoft Windows 98 and Windows NT 4.0 will not run properly if the Legacy Module is not installed or has been removed from the iPAQ Desktop...
... internal USB controllers, each providing data transfer rates up to chapter 5, "Using the Legacy Module." 3 Quick Setup & User's Guide The Legacy Module (standard on the previous page). One of the full-speed USB connector, with its dedicated 12Mbps controller, for maximum performance. ✎ Microsoft Windows 98 and Windows NT 4.0 will not run properly if the Legacy Module is not installed or has been removed from the iPAQ Desktop...
Quick Setup and User's Guide
Page 10
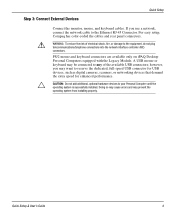
.../2 mouse and keyboard connectors are available only on iPAQ Desktop Personal Computers equipped with the Legacy Module. Quick Setup & User's Guide 4 WARNING: To reduce the risk of the available USB connectors; A USB mouse or keyboard may prevent the operating system from installing properly. For easy setup, Compaq has color-coded the cables and rear panel connectors. CAUTION: Do not add additional, optional hardware devices to the Ethernet RJ-45 Connector. Doing so may cause errors and may be connected...
.../2 mouse and keyboard connectors are available only on iPAQ Desktop Personal Computers equipped with the Legacy Module. Quick Setup & User's Guide 4 WARNING: To reduce the risk of the available USB connectors; A USB mouse or keyboard may prevent the operating system from installing properly. For easy setup, Compaq has color-coded the cables and rear panel connectors. CAUTION: Do not add additional, optional hardware devices to the Ethernet RJ-45 Connector. Doing so may cause errors and may be connected...
Quick Setup and User's Guide
Page 13
....com/support. Additional support software for specific models may be extremely helpful in the Windows Control Panel to change the monitor brand, model, refresh rates, color, resolution, and power management settings. Carefully read and follow the instructions that appear on the screen to complete the installation. Turning off the Personal Computer during the installation process might damage the software that appear on the screen. 7 Quick Setup & User's Guide Refer to your operating system or backup utility...
....com/support. Additional support software for specific models may be extremely helpful in the Windows Control Panel to change the monitor brand, model, refresh rates, color, resolution, and power management settings. Carefully read and follow the instructions that appear on the screen to complete the installation. Turning off the Personal Computer during the installation process might damage the software that appear on the screen. 7 Quick Setup & User's Guide Refer to your operating system or backup utility...
Quick Setup and User's Guide
Page 14
... files from the hard drive before using the computer immediately, without having to enter a low-power state. In Microsoft Windows operating systems, click Start > Shut Down. Ä ✎ Registration Quick Setup CAUTION: To prevent loss of data, before restoring the original operating system, Internet browser, and NIC or modem drivers. You may need to use the keyboard to back up any data loss. Turning Off the Personal...
... files from the hard drive before using the computer immediately, without having to enter a low-power state. In Microsoft Windows operating systems, click Start > Shut Down. Ä ✎ Registration Quick Setup CAUTION: To prevent loss of data, before restoring the original operating system, Internet browser, and NIC or modem drivers. You may need to use the keyboard to back up any data loss. Turning Off the Personal...
Quick Setup and User's Guide
Page 18
... the Troubleshooting Guide. do not drop it. I If you are inserting or removing a hard drive, exit all software applications, shut down the operating system software, and turn off the Personal Computer. Quick Setup & User's Guide 2-1 I Avoid exposing a hard drive to the Personal Computer or a drive: I Do not use excessive force when inserting a drive. I If a drive must be used with the MultiBay on Compaq Armada Notebook PCs. I Before handling a drive, ensure that supports...
... the Troubleshooting Guide. do not drop it. I If you are inserting or removing a hard drive, exit all software applications, shut down the operating system software, and turn off the Personal Computer. Quick Setup & User's Guide 2-1 I Avoid exposing a hard drive to the Personal Computer or a drive: I Do not use excessive force when inserting a drive. I If a drive must be used with the MultiBay on Compaq Armada Notebook PCs. I Before handling a drive, ensure that supports...
Quick Setup and User's Guide
Page 24
... by preventing removal of the side covers. Quick Setup & User's Guide 3-1 Uninstalling the iPAQ Desktop Security Bar When installed, the iPAQ Desktop Security Bar protects the memory modules and internal hard drive by briefly touching a grounded metal object. 3 chapter Adding System Memory and Upgrading the Internal Hard Drive General Precautions Å Before adding system memory or upgrading the hard drive be sure to carefully read all of the applicable instructions, cautions, and warnings in the Troubleshooting Guide for...
... by preventing removal of the side covers. Quick Setup & User's Guide 3-1 Uninstalling the iPAQ Desktop Security Bar When installed, the iPAQ Desktop Security Bar protects the memory modules and internal hard drive by briefly touching a grounded metal object. 3 chapter Adding System Memory and Upgrading the Internal Hard Drive General Precautions Å Before adding system memory or upgrading the hard drive be sure to carefully read all of the applicable instructions, cautions, and warnings in the Troubleshooting Guide for...
Quick Setup and User's Guide
Page 35
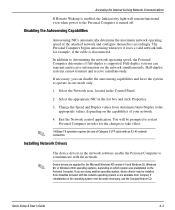
... and operating system failure alerts over the network. The Remote Management Administrators Guide is included with an integrated network interface controller (NIC) and network device drivers. Alerts may include: I system BIOS hang I operating system hang I processor missing I The 100TX light illuminates during 100-Mbps operation. 4-2 Quick Setup & User's Guide Accessing the Internet & Using Network Communications Using Network Communications The personal computer comes with the Remote Management Setup Utilities, and is available on the Support Software CD for Compaq Desktop...
... and operating system failure alerts over the network. The Remote Management Administrators Guide is included with an integrated network interface controller (NIC) and network device drivers. Alerts may include: I system BIOS hang I operating system hang I processor missing I The 100TX light illuminates during 100-Mbps operation. 4-2 Quick Setup & User's Guide Accessing the Internet & Using Network Communications Using Network Communications The personal computer comes with the Remote Management Setup Utilities, and is available on the Support Software CD for Compaq Desktop...
Quick Setup and User's Guide
Page 36
... Network icon, located in the list box and click Properties. 3. Device drivers are supplied for the changes to the Personal Computer is disconnected. Accessing the Internet & Using Network Communications If Remote Wakeup is enabled, the link/activity light will be installed from diskettes included with the network operating system or are available from Automatic/Auto Duplex to determining the network operating speed, the Personal Computer determines if full-duplex is supported. Disabling...
... Network icon, located in the list box and click Properties. 3. Device drivers are supplied for the changes to the Personal Computer is disconnected. Accessing the Internet & Using Network Communications If Remote Wakeup is enabled, the link/activity light will be installed from diskettes included with the network operating system or are available from Automatic/Auto Duplex to determining the network operating speed, the Personal Computer determines if full-duplex is supported. Disabling...
Quick Setup and User's Guide
Page 49
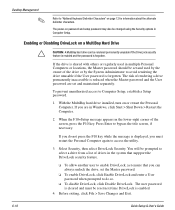
... the User password is forgotten. The power-on page 12 for information about the alternate delimiter characters. With the MultiBay hard drive installed, turn on a MultiBay Hard Drive Ä CAUTION: A MultiBay hard drive can always unlock the drive, set and maintained separately. You will be prompted to select a drive from a list of the drive or by the owner of drives in Windows, click Start > Shut Down > Restart the Computer. 2. Enabling or Disabling...
... the User password is forgotten. The power-on page 12 for information about the alternate delimiter characters. With the MultiBay hard drive installed, turn on a MultiBay Hard Drive Ä CAUTION: A MultiBay hard drive can always unlock the drive, set and maintained separately. You will be prompted to select a drive from a list of the drive or by the owner of drives in Windows, click Start > Shut Down > Restart the Computer. 2. Enabling or Disabling...
Quick Setup and User's Guide
Page 54
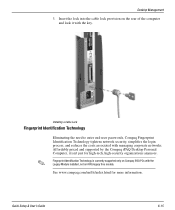
... iPAQ Desktop Personal Computer, it with the key. Fingerprint Identification Technology is currently supported only on Compaq iPAQ PCs with managing corporate networks. Quick Setup & User's Guide 6-15 Insert the lock into the cable lock provision on iPAQ legacy free models. See www.compaq.com/im/fit/index.html for high-tech, high-security organizations anymore. Installing a Cable Lock Fingerprint Identification Technology ✎ Eliminating the need to enter end-user passwords...
... iPAQ Desktop Personal Computer, it with the key. Fingerprint Identification Technology is currently supported only on Compaq iPAQ PCs with managing corporate networks. Quick Setup & User's Guide 6-15 Insert the lock into the cable lock provision on iPAQ legacy free models. See www.compaq.com/im/fit/index.html for high-tech, high-security organizations anymore. Installing a Cable Lock Fingerprint Identification Technology ✎ Eliminating the need to enter end-user passwords...

Quick Setup and User's Guide
Page 70
...) 2, 5-1 PS/2 mouse (Legacy Module) 2, 5-1 serial (Legacy Module) 2, 5-1 USB 2, 6 connector locations 2 D delimiter characters, keyboard 6-12 desktop management 6-1-6-25 disabling DriveLock 6-10 display settings 7 documentation, additional product 7-1 DriveLock password changing 6-11 entering 6-11 DriveLock security 6-5 DriveLock, enabling or disabling 6-10 drivers, installing network 4-3 dual-state power button 6, 8 DVD-ROM drive 2-1 E Easy Access Buttons 1-1 Easy Access Keyboard 1-1 easy-carry handle 2 enabling DriveLock 6-10 Ethernet RJ-45 connector 2 external devices, connecting 4 Index-i
...) 2, 5-1 PS/2 mouse (Legacy Module) 2, 5-1 serial (Legacy Module) 2, 5-1 USB 2, 6 connector locations 2 D delimiter characters, keyboard 6-12 desktop management 6-1-6-25 disabling DriveLock 6-10 display settings 7 documentation, additional product 7-1 DriveLock password changing 6-11 entering 6-11 DriveLock security 6-5 DriveLock, enabling or disabling 6-10 drivers, installing network 4-3 dual-state power button 6, 8 DVD-ROM drive 2-1 E Easy Access Buttons 1-1 Easy Access Keyboard 1-1 easy-carry handle 2 enabling DriveLock 6-10 Ethernet RJ-45 connector 2 external devices, connecting 4 Index-i
Quick Setup and User's Guide
Page 71
...controller (NIC) connection 4 network service boot 6-2 network status lights, interpreting 4-2 NIC-based alerts 4-2 notes Blink LED during Energy Save 6-22 calling Compaq 6-24 drive blank 2-4, 2-5 Fingerprint Identification Technology 6-15 keyboard delimiters 6-9, 6-12 language chosen during Setup 7-2 Legacy Module 5-1 memory module installation 3-7 monitor timeouts 6-23 network cables 4-2 network drivers 4-2 power button shutoff 8 power disconnection 6-20 power-on or setup password 6-9, 6-12, 6-13 Prefailure Warranty 6-16 product documentation 7-1 reconfiguring power button 8 Remote ROM Flash...
...controller (NIC) connection 4 network service boot 6-2 network status lights, interpreting 4-2 NIC-based alerts 4-2 notes Blink LED during Energy Save 6-22 calling Compaq 6-24 drive blank 2-4, 2-5 Fingerprint Identification Technology 6-15 keyboard delimiters 6-9, 6-12 language chosen during Setup 7-2 Legacy Module 5-1 memory module installation 3-7 monitor timeouts 6-23 network cables 4-2 network drivers 4-2 power button shutoff 8 power disconnection 6-20 power-on or setup password 6-9, 6-12, 6-13 Prefailure Warranty 6-16 product documentation 7-1 reconfiguring power button 8 Remote ROM Flash...
Quick Setup and User's Guide
Page 72
... 8 Remote System Installation 6-2 remote wakeup support 4-2 removable drives, optional 2-1 removable media boot control 6-5 S security cable lock provision 6-14 Fingerprint Identification Technology 6-15 iPAQ Desktop Security Bar 3-1, 6-12 mounting holes 6-13 password 6-6 security bar 6-6 serial connector (Legacy Module) 2, 4 serial interface control 6-5 serial number 2 setup password changing 6-9 deleting 6-9 entering 6-8 establishing 6-7 side access panels removing and replacing 3-1 SMART hard drive 2-1 software updating and management 6-18-6-24 specifications A-1 SuperDisk LS-120 drive...
... 8 Remote System Installation 6-2 remote wakeup support 4-2 removable drives, optional 2-1 removable media boot control 6-5 S security cable lock provision 6-14 Fingerprint Identification Technology 6-15 iPAQ Desktop Security Bar 3-1, 6-12 mounting holes 6-13 password 6-6 security bar 6-6 serial connector (Legacy Module) 2, 4 serial interface control 6-5 serial number 2 setup password changing 6-9 deleting 6-9 entering 6-8 establishing 6-7 side access panels removing and replacing 3-1 SMART hard drive 2-1 software updating and management 6-18-6-24 specifications A-1 SuperDisk LS-120 drive...


