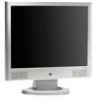
HP Pavilion Multimedia Display - (English) Hewlett Packard Limited Warranty Statement 5990-5779
Page 2
...;lvaro Obregón México, D.F. Av. Montañeses 2150 - (C1428AQH) Ciudad de Buenos Aires, Argentina Hewlett-Packard Argentina S.R.L. HP may ask you a replacement monitor. Lomas de Sta. CP 01210 Tel. (55) 5258 4531 Ciudad de Guadalajara Niños Héroes No. 2281 Col. Arcos Sur...Unit Exchange, Carry-in, Send-in, or Home Pick-up the defective monitor at one came in repair service is available, HP will charge you . You must return the defective monitor to you for the monitor, and will pick up and Delivery, DEPENDING ON YOUR LOCATION. Send-In...
HP Flat Panel Monitors - (English) Users Guide 322638 002
Page 1
User's Guide vf15/vf17, FP15/FP17, L1502/L1702, f1523/f1723, FP5315/FP7317 Flat Panel Monitors Document Part Number: 322638-002 March 2003 This guide provides information on setting up the monitor, installing drivers, using the on-screen display menu, troubleshooting and technical specifications.
HP Flat Panel Monitors - (English) Users Guide 322638 002
Page 2
© 2003 Hewlett-Packard Company © 2003 Hewlett-Packard Develoment Company, L.P. HP, Hewlett Packard, and the Hewlett-Packard logo are trademarks of Hewlett-Packard Company in the U.S. Compaq and the Compaq logo are trademarks of Hewlett-... express limited warranty statements accompanying such products. and other countries. User's Guide vf15/vf17, FP15/FP17, L1502/L1702, f1523/f1723, FP5315/FP7317 Flat Panel Monitors Second Edition (March 2003) Document Part Number: 322638-002 Microsoft, Windows, and the Windows logo are set off in this document is provided "as constituting...
HP Flat Panel Monitors - (English) Users Guide 322638 002
Page 3
... Features 2 Safety and Maintenance Guidelines Important Safety Information 2-1 Maintenance Guidelines 2-2 Cleaning the Monitor 2-4 Shipping the Monitor 2-4 3 Setting Up the Monitor Installing the Monitor Pedestal 3-1 Connecting the Monitor 3-3 Removing the Monitor Base 3-6 Mounting the Monitor 3-8 4 Operating the Monitor Installing the Information Files 4-1 Front Panel Components 4-2 Adjusting Monitor Settings 4-4 Using the On-Screen Display 4-5 Adjusting Screen Quality 4-7 Optimizing Digital Conversion 4-8 Identifying...
HP Flat Panel Monitors - (English) Users Guide 322638 002
Page 4
... Marked with FCC Logo, United States Only C-2 Canadian Notice C-3 Avis Canadien C-3 European Notice C-3 Japanese Notice C-3 Korean Notice C-4 EPA Energy Star Compliance C-4 Power Cord Set Requirements C-4 D LCD Monitor Quality and Pixel Policy User's Guide iv
HP Flat Panel Monitors - (English) Users Guide 322638 002
Page 5
1 Product Features The Flat Panel Display has an active matrix, thin-film transistor (TFT), liquid crystal display (LCD). The monitor features include: vf15, FP15, L1502, f1523, and FP5315 Models ■ 15-inch (38.1 cm) viewable area display. ■ 1024 x 768 resolution, plus full-screen support for lower resolutions. ■ Wide viewing angle to allow...
HP Flat Panel Monitors - (English) Users Guide 322638 002
Page 8
For information on the cord. When you plug the power cord into is used, use with your monitor, refer to the "Power Cord Set Requirements" section in Appendix C. Å WARNING: To reduce the risk of electric shock or damage to the equipment, unplug ... is easily accessible and located as possible. Never pull on the correct power cord set to use only a power source and connection appropriate for this monitor. This equipment is designed to be sure that is included with your...
HP Flat Panel Monitors - (English) Users Guide 322638 002
Page 9
... to service this product yourself. Disconnect the monitor by pulling the cord. ■ Turn your monitor off the monitor when not in use . Maintenance Guidelines To enhance the performance and extend the life of your monitor: ■ Do not open your HP authorized dealer, reseller, or service provider.... ■ Use only a power source and connection appropriate for this ability. You can replace your monitor by using a screen saver program and turning ...
HP Flat Panel Monitors - (English) Users Guide 322638 002
Page 10
... place it from getting scratched, defaced, or broken. Use a damp cloth for ventilation. Safety and Maintenance Guidelines ■ Unplug your monitor or the screen. If the screen requires additional cleaning, use an antistatic screen cleaner. Ä CAUTION: Do not use liquid cleaners or...outlet before cleaning. User's Guide 2-3 Never push objects of any other openings. ■ Do not drop your monitor in the cabinet are provided for cleaning. These openings must lay the monitor face down on a soft area to prevent it on the power cord. Do not use benzene, thinner, ammonia...
HP Flat Panel Monitors - (English) Users Guide 322638 002
Page 11
...the Monitor To clean the monitor, follow these steps: 1. Never use water to clean the monitor screen or cabinet. Dust the monitor by wiping the screen and the cabinet with isopropyl alcohol. Ä CAUTION: Do not use a clean cloth dampened with a soft, clean cloth. Shipping the Monitor ...Keep the original packing box in a storage area. Turn off the monitor and the computer. 2. If the screen requires additional cleaning, use benzene, thinner, ammonia, or any volatile substance...
HP Flat Panel Monitors - (English) Users Guide 322638 002
Page 12
Place the pedestal plate on your desktop or table and check to the monitor, computer system, and other mounting fixture; User's Guide 3-1 3 Setting Up the Monitor To set up the monitor, ensure that the power is facing forward. Installing the Monitor Pedestal To install the monitor pedestal: 1. Do not install the base if the monitor will be used on the underside of the plate is turned off to be sure the arrow on a wall, swing arm, or other attached devices, then follow the steps below. instead see the section on "Mounting the Monitor" in this chapter.
HP Flat Panel Monitors - (English) Users Guide 322638 002
Page 13
Make sure the pedestal base is securely locked before continuing with the setup. When the base locks, it will make a clicking sound. Inserting the Monitor into the Pedestal Base 3-2 User's Guide Setting Up the Monitor 2. Using both hands, position the monitor over the pedestal base and press down firmly to lock the pedestal base in place.
HP Flat Panel Monitors - (English) Users Guide 322638 002
Page 14
Connect the monitor signal cable on the back of the monitor to the video connector on the rear panel of the monitor, and the other end to the back of the computer. 3. Connect one end of the power cable to an electrical wall outlet. Connecting the VGA and Power Cables User's Guide 3-3 Place the monitor in a convenient, well-ventilated location near your computer. 2. Setting Up the Monitor Connecting the Monitor 1.
HP Flat Panel Monitors - (English) Users Guide 322638 002
Page 15
Setting Up the Monitor 4. Connecting the Audio Cable 3-4 User's Guide If your monitor is a multimedia model, connect one end of the audio cable to the back of the monitor, and the other end to the audio connector on the back of the computer.
HP Flat Panel Monitors - (English) Users Guide 322638 002
Page 16
User's Guide 3-5 Image retention is not in use for a prolonged period of time. Tilting the Monitor Ä CAUTION: Burn-in image damage on all LCD screens. To avoid burn-in image damage may occur on monitors that may occur on your comfort using the monitor's tilt adjustment capability. Setting Up the Monitor 5. Adjust the monitor as needed for your monitor screen, you should always activate a screen saver application or turn off the monitor when it is a condition that display the same static image on screen for a prolonged period of time.
HP Flat Panel Monitors - (English) Users Guide 322638 002
Page 17
... in the upright position. Removing the Monitor Base You can remove the monitor base to the maximum base extension. Before removing the monitor from the base, ensure that the base is set to mount the monitor on a soft area to disassemble the monitor, be sure the monitor is in injury to the user. .... Ä CAUTION: Before beginning to prevent it . Å WARNING: Do not remove the base from the monitor while the monitor is turned off and the power and signal cables are both disconnected. Setting Up the Monitor Å WARNING: To reduce the risk of electric shock or damage to your...
HP Flat Panel Monitors - (English) Users Guide 322638 002
Page 18
Removing the Monitor Base Ä CAUTION: Ensure that the bottom of the monitor base is positioned over a table or desktop before removing the base from the back of the monitor. 2. Remove the two screws 1 as shown in the following illustration. Disconnect and remove the signal and power cables from the monitor. 3. User's Guide 3-7 Remove the monitor base from the monitor. Setting Up the Monitor 1.
HP Flat Panel Monitors - (English) Users Guide 322638 002
Page 19
... a swing arm or other mounting fixture by following the instructions included with the Video Electronics Standards Association (VESA) standard for mounting purposes. Mount the monitor to be used . 3-8 User's Guide These mounting holes are spaced 75 or 100mm apart and are exposed on the... monitor back panel to "Removing the Monior Base" steps in the previous section. Refer to be used for mounting flat panel displays. The 75mm VESA hole pattern supports the 15" monitors only, and the 100mm hole pattern supports the 17...
HP Flat Panel Monitors - (English) Users Guide 322638 002
Page 20
....ICM file. ■ The .INF file defines monitor resources and provides specifications used by clicking on: http://www.hp.com/go/support and selecting the desired monitor. ■ The .ICM file provides color matching consistency from monitor screen to printer and is activated from within graphics programs... that have this monitor contains two information files to install ...
HP Flat Panel Monitors - (English) Users Guide 322638 002
Page 21
When the OSD is active, navigates in reverse through the OSD and adjusts OSD scale settings. 4-2 User's Guide Control Function 1 Speakers Audio feature for music, alarms, etc. (multimedia models only) 2 Menu button 3 - (Minus button) 4 + (Plus button) Launches the On-Screen Display (OSD) menu and selects functions. • When OSD is inactive, auto-adjusts the screen image. • When OSD is active, navigates through the OSD and adjusts OSD scale settings. Operating the Monitor Front Panel Components f1523, f1723, FP5315, and FP7317 Monitors ' No.