
Limited Warranty and Support Guide
Page 3
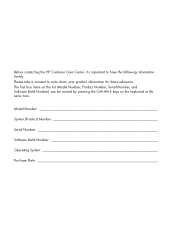
Limited Warranty and Support Guide • Warranty Statement • Safety Information • Support Information Before contacting the HP Customer Care Center, it's important to write down your product information for future reference. The first four items on the list (Model Number..., Product Number, Serial Number, and Software Build Number) can be viewed by pressing the Ctrl+Alt+S keys on the keyboard at the same time. Please take a moment to have the following information handy. Model Number System (Product) Number Serial Number Software Build Number ...
Limited Warranty and Support Guide • Warranty Statement • Safety Information • Support Information Before contacting the HP Customer Care Center, it's important to write down your product information for future reference. The first four items on the list (Model Number..., Product Number, Serial Number, and Software Build Number) can be viewed by pressing the Ctrl+Alt+S keys on the keyboard at the same time. Please take a moment to have the following information handy. Model Number System (Product) Number Serial Number Software Build Number ...
Limited Warranty and Support Guide - Refurbished
Page 4
Please take a moment to have the following information handy. Model Number System (Product) Number Serial Number Software Build Number Operating System Purchase Date Before contacting the HP Customer Care Center, it's important to write down your product information for future reference. The first four items on the list (Model Number, Product Number, Serial Number, and Software Build Number) can be viewed by pressing the Ctrl+Alt+S keys on the keyboard at the same time.
Please take a moment to have the following information handy. Model Number System (Product) Number Serial Number Software Build Number Operating System Purchase Date Before contacting the HP Customer Care Center, it's important to write down your product information for future reference. The first four items on the list (Model Number, Product Number, Serial Number, and Software Build Number) can be viewed by pressing the Ctrl+Alt+S keys on the keyboard at the same time.
Troubleshooting & Maintenance Guide
Page 3
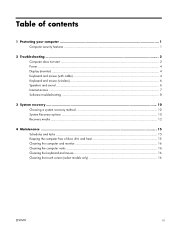
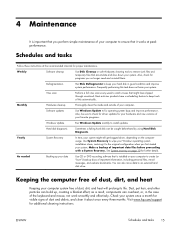
Table of contents 1 Protecting your computer 1 Computer security features ...1 2 Troubleshooting ...2 Computer does not start ...2 Power ...4 Display (monitor) ...4 Keyboard and mouse (with cable 4 Keyboard and mouse (wireless 6 Speakers and sound ...6 Internet access ...7 Software troubleshooting ...8 3 System recovery ...10 Choosing a system recovery method 10 System Recovery options ...10... free of dust, dirt, and heat 15 Cleaning the computer and monitor 16 Cleaning the computer vents ...16 Cleaning the keyboard and mouse 16 Cleaning the touch screen (select models only 16 ENWW iii
Table of contents 1 Protecting your computer 1 Computer security features ...1 2 Troubleshooting ...2 Computer does not start ...2 Power ...4 Display (monitor) ...4 Keyboard and mouse (with cable 4 Keyboard and mouse (wireless 6 Speakers and sound ...6 Internet access ...7 Software troubleshooting ...8 3 System recovery ...10 Choosing a system recovery method 10 System Recovery options ...10... free of dust, dirt, and heat 15 Cleaning the computer and monitor 16 Cleaning the computer vents ...16 Cleaning the keyboard and mouse 16 Cleaning the touch screen (select models only 16 ENWW iii

Troubleshooting & Maintenance Guide
Page 6
... product manufacturer for 5 or more information or for your computer model. Computer does not start . Contact Support, whether it on the keyboard simultaneously. 2. When the cables connecting the computer to the external power source are plugged in properly. Restart the computer. 1. Press the... Ctrl+Alt+Delete keys on . Ensure that accompanies your computer, or visit http://www.hp.com/support and search for additional troubleshooting options, see the Quick Setup Guide that the cables connecting the computer to the external ...
... product manufacturer for 5 or more information or for your computer model. Computer does not start . Contact Support, whether it on the keyboard simultaneously. 2. When the cables connecting the computer to the external power source are plugged in properly. Restart the computer. 1. Press the... Ctrl+Alt+Delete keys on . Ensure that accompanies your computer, or visit http://www.hp.com/support and search for additional troubleshooting options, see the Quick Setup Guide that the cables connecting the computer to the external ...
Troubleshooting & Maintenance Guide
Page 7
...Shut Down button, and then click Restart. Select the program that is not responding. Or, press and hold the Power button on the keyboard simultaneously. 2. Error message: Invalid system disk or Non-System disk or Disk error. Press the Ctrl+Alt+Delete keys on the... keyboard. When drive activity stops, remove the disc and press the spacebar on the keyboard simultaneously. 2. Symptom Possible solution Computer seems to close any programs not responding, or restart the computer: 1....
...Shut Down button, and then click Restart. Select the program that is not responding. Or, press and hold the Power button on the keyboard simultaneously. 2. Error message: Invalid system disk or Non-System disk or Disk error. Press the Ctrl+Alt+Delete keys on the... keyboard. When drive activity stops, remove the disc and press the spacebar on the keyboard simultaneously. 2. Symptom Possible solution Computer seems to close any programs not responding, or restart the computer: 1....
Troubleshooting & Maintenance Guide
Page 8
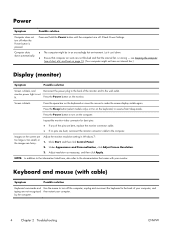
... the computer. Use the mouse to turn off the computer, unplug and reconnect the keyboard to turn on page 15. (Your computer might be in Windows 7: 1. Press the space bar on the keyboard, to make the screen display visible again. Press the Sleep button (select models only... too large or too small, or the images are bent, reconnect the monitor connector cable to the wall outlet. Keyboard and mouse (with cable) Symptom Possible solution Keyboard commands and typing are not blocked and that came with your computer. 4 Chapter 2 Troubleshooting ENWW Power Symptom Possible...
... the computer. Use the mouse to turn off the computer, unplug and reconnect the keyboard to turn on page 15. (Your computer might be in Windows 7: 1. Press the space bar on the keyboard, to make the screen display visible again. Press the Sleep button (select models only... too large or too small, or the images are bent, reconnect the monitor connector cable to the wall outlet. Keyboard and mouse (with cable) Symptom Possible solution Keyboard commands and typing are not blocked and that came with your computer. 4 Chapter 2 Troubleshooting ENWW Power Symptom Possible...
Troubleshooting & Maintenance Guide
Page 9
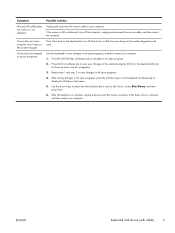
... Mouse (with cable) 5 Possible solution Unplug and reconnect the mouse cable to save your computer. Cursor does not move using the arrow keys on the keyboard to turn off Num Lock, so that is complete, unplug and reconnect the mouse connector to save changes in the selected program (Ctrl+S is the... the back of your computer, and then restart your changes in all open program. 2. Use the arrow keys to Shut Down. ENWW Keyboard and mouse (with cable) does not work or is still not detected, turn off the computer, unplug and reconnect the mouse cable, and then restart ...
... Mouse (with cable) 5 Possible solution Unplug and reconnect the mouse cable to save your computer. Cursor does not move using the arrow keys on the keyboard to turn off Num Lock, so that is complete, unplug and reconnect the mouse connector to save changes in the selected program (Ctrl+S is the... the back of your computer, and then restart your changes in all open program. 2. Use the arrow keys to Shut Down. ENWW Keyboard and mouse (with cable) does not work or is still not detected, turn off the computer, unplug and reconnect the mouse cable, and then restart ...
Troubleshooting & Maintenance Guide
Page 10
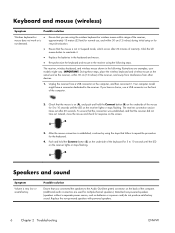
... by using the following illustrations are used for response on the underside of the computer. 2. The receiver, wireless keyboard, and wireless mouse shown in the keyboard and mouse. If you connected the speakers to the receiver using the steps that the receiver did not time out... and hold the Connect button (B) on the screen. Replace the non-powered speakers with powered speakers. 6 Chapter 2 Troubleshooting ENWW Re-synchronize the keyboard and mouse to the Audio Out (lime green) connector on the same level as batteries or a power cord) do not produce satisfactory sound. ...
... by using the following illustrations are used for response on the underside of the computer. 2. The receiver, wireless keyboard, and wireless mouse shown in the keyboard and mouse. If you connected the speakers to the receiver using the steps that the receiver did not time out... and hold the Connect button (B) on the screen. Replace the non-powered speakers with powered speakers. 6 Chapter 2 Troubleshooting ENWW Re-synchronize the keyboard and mouse to the Audio Out (lime green) connector on the same level as batteries or a power cord) do not produce satisfactory sound. ...
Troubleshooting & Maintenance Guide
Page 14
...at the factory. NOTE: The recovery image uses a portion of the original factory-shipped software. Through the hard disk drive, from HP Support. 3 System recovery System Recovery completely erases and reformats the hard disk drive, deleting all data and programs you created or ...ENWW Through recovery media that are shipped without a version of the following order: 1. see Microsoft System Restore under Software troubleshooting on the keyboard during system startup. 3. Run the System Recovery from the Windows 7 Start Menu on page 13. Back up any software programs you create...
...at the factory. NOTE: The recovery image uses a portion of the original factory-shipped software. Through the hard disk drive, from HP Support. 3 System recovery System Recovery completely erases and reformats the hard disk drive, deleting all data and programs you created or ...ENWW Through recovery media that are shipped without a version of the following order: 1. see Microsoft System Restore under Software troubleshooting on the keyboard during system startup. 3. Run the System Recovery from the Windows 7 Start Menu on page 13. Back up any software programs you create...

Troubleshooting & Maintenance Guide
Page 15
...turn on the computer. 4. Press the Power button to turn the computer back on your keyboard until the computer turns off the computer, reconnect all peripheral devices from the computer, except the monitor, keyboard, and mouse. 3. Under I need help immediately, click System Recovery. 6. ENWW System ... or USB flash drive, select Yes, and then click Next to restart the computer and run Recovery Manager from the computer except the monitor, keyboard, and mouse. 3. If using discs, insert the next system-recovery disc when prompted. 7. Under I need help immediately, select System Recovery...
...turn on the computer. 4. Press the Power button to turn the computer back on your keyboard until the computer turns off the computer, reconnect all peripheral devices from the computer, except the monitor, keyboard, and mouse. 3. Under I need help immediately, click System Recovery. 6. ENWW System ... or USB flash drive, select Yes, and then click Next to restart the computer and run Recovery Manager from the computer except the monitor, keyboard, and mouse. 3. If using discs, insert the next system-recovery disc when prompted. 7. Under I need help immediately, select System Recovery...

Troubleshooting & Maintenance Guide
Page 16
... the factory. If the computer is finished, remove all peripheral devices from the system. 12. Disconnect all recovery media from the computer except the monitor, keyboard, and mouse. 5. Under I need help immediately, click Factory Reset. 9. When the Recovery Manager is working, create a backup DVD or backup USB flash drive containing all...
... the factory. If the computer is finished, remove all peripheral devices from the system. 12. Disconnect all recovery media from the computer except the monitor, keyboard, and mouse. 5. Under I need help immediately, click Factory Reset. 9. When the Recovery Manager is working, create a backup DVD or backup USB flash drive containing all...
Troubleshooting & Maintenance Guide
Page 19
... its life. See System recovery on page 10 for programs you first started your hard disk in the case of the keyboard and mouse, not work smoothly and effectively. Visit www.hp.com/support for proper maintenance. Frequently performing this automatically. Hard disk diagnostic Sometimes a failing hard disk can also move data...
... its life. See System recovery on page 10 for programs you first started your hard disk in the case of the keyboard and mouse, not work smoothly and effectively. Visit www.hp.com/support for proper maintenance. Frequently performing this automatically. Hard disk diagnostic Sometimes a failing hard disk can also move data...

Troubleshooting & Maintenance Guide
Page 20
...a cotton swab dampened with soap and warm water. 3. Do not use isopropyl (rubbing) alcohol and a lint-free cloth. Cleaning the keyboard and mouse When cleaning the keyboard keys, use water on a battery-powered vacuum cleaner, to the touch screen. 16 Chapter 4 Maintenance ENWW Vacuum between the keys of ...the keyboard and along its edges. 3. Turn the mouse upside down, and rotate the ball-cover ring counterclockwise to the computer and the monitor. ...
...a cotton swab dampened with soap and warm water. 3. Do not use isopropyl (rubbing) alcohol and a lint-free cloth. Cleaning the keyboard and mouse When cleaning the keyboard keys, use water on a battery-powered vacuum cleaner, to the touch screen. 16 Chapter 4 Maintenance ENWW Vacuum between the keys of ...the keyboard and along its edges. 3. Turn the mouse upside down, and rotate the ball-cover ring counterclockwise to the computer and the monitor. ...
Getting Started Guide
Page 3
... computer 9 Computer orientation 10 Connecting a game console 11 HP My Display TouchSmart Edition 13 Using Beats Audio 14 Using the HP TouchSmart with safety and comfort 14 4 Troubleshooting and maintenance 16 Computer does not start 16 Power 17 Display (screen 17 Keyboard and mouse (with cable 18 Keyboard and mouse (wireless 20 Speakers and sound 21...
... computer 9 Computer orientation 10 Connecting a game console 11 HP My Display TouchSmart Edition 13 Using Beats Audio 14 Using the HP TouchSmart with safety and comfort 14 4 Troubleshooting and maintenance 16 Computer does not start 16 Power 17 Display (screen 17 Keyboard and mouse (with cable 18 Keyboard and mouse (wireless 20 Speakers and sound 21...
Getting Started Guide
Page 10
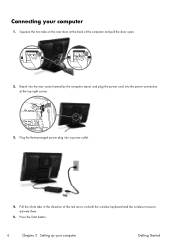
Sub IR out in the direction of the computer and pull the door open. 2. Plug the three-pronged power plug into the power connection at the back of the red arrow on the rear door at the top right corner. Connecting your computer Getting Started Reach into the rear cavity framed by the computer stand, and plug the power cord into a power outlet. 4. Press the Start button. 6 Chapter 3 Setting up your computer 1. Pull the white tabs in LAN 3. Squeeze the two tabs on both the wireless keyboard and the wireless mouse to activate them. 5.
Sub IR out in the direction of the computer and pull the door open. 2. Plug the three-pronged power plug into the power connection at the back of the red arrow on the rear door at the top right corner. Connecting your computer Getting Started Reach into the rear cavity framed by the computer stand, and plug the power cord into a power outlet. 4. Press the Start button. 6 Chapter 3 Setting up your computer 1. Pull the white tabs in LAN 3. Squeeze the two tabs on both the wireless keyboard and the wireless mouse to activate them. 5.
Getting Started Guide
Page 15
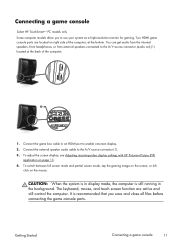
Two HDMI game console ports are active and still control the computer. The keyboard, mouse, and touch screen function are located on right side of the computer, at the back of the computer. Connect the external speaker audio cable ...to enable onscreen display. 2. To adjust the screen display, see Adjusting incoming-video display settings with HP Picture-in the background. Getting Started Connecting a game console 11 To switch between full screen mode and partial screen mode, tap the gaming image on...
Two HDMI game console ports are active and still control the computer. The keyboard, mouse, and touch screen function are located on right side of the computer, at the back of the computer. Connect the external speaker audio cable ...to enable onscreen display. 2. To adjust the screen display, see Adjusting incoming-video display settings with HP Picture-in the background. Getting Started Connecting a game console 11 To switch between full screen mode and partial screen mode, tap the gaming image on...
Getting Started Guide
Page 16
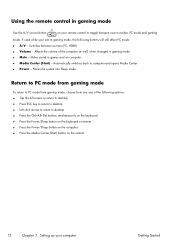
... between sources (PC, HDMI) ● Volume - Automatically switches back to desktop ● Press the Ctrl+Alt+Del buttons simultaneously on the keyboard ● Press the Power/Sleep button on the keyboard or remote ● Press the Power/Sleep button on the computer ● Press the Media Center (Start) button on the remote...
... between sources (PC, HDMI) ● Volume - Automatically switches back to desktop ● Press the Ctrl+Alt+Del buttons simultaneously on the keyboard ● Press the Power/Sleep button on the keyboard or remote ● Press the Power/Sleep button on the computer ● Press the Media Center (Start) button on the remote...
Getting Started Guide
Page 18
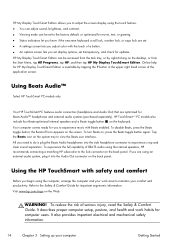
...of serious injury, read the Safety & Comfort Guide. To turn Beats on the keyboard. Tap the Beats icon on the system tray to the Sub connector on the back panel. Using the HP TouchSmart with safety and comfort Before you to maintain your comfort and productivity. It describes ... accessed from the Start Menu, tap All Programs, tap HP, and then tap HP My Display TouchSmart Edition. Refer to the factory default, or optimized for movie, text, or gaming. ● Status indicators let you know if the onscreen keyboard scroll lock, number lock, or caps lock are using...
...of serious injury, read the Safety & Comfort Guide. To turn Beats on the keyboard. Tap the Beats icon on the system tray to the Sub connector on the back panel. Using the HP TouchSmart with safety and comfort Before you to maintain your comfort and productivity. It describes ... accessed from the Start Menu, tap All Programs, tap HP, and then tap HP My Display TouchSmart Edition. Refer to the factory default, or optimized for movie, text, or gaming. ● Status indicators let you know if the onscreen keyboard scroll lock, number lock, or caps lock are using...
Getting Started Guide
Page 20
...properly. Press the Ctrl+Alt+Delete keys on the keyboard simultaneously. 2. 4 Troubleshooting and maintenance Refer to it. The following sections present some issues you might not be locked up , or using your computer and possible solutions. Contact Support: www.hp.com/support Computer will not turn on . If ...plugged in properly, and the wall outlet is not responding, and then tap End Task. Press the Ctrl+Alt+Delete keys on the keyboard simultaneously. 2. Use the Windows Task Manager to the red Shut Down button, and then tap Restart. Tap the Arrow button next to...
...properly. Press the Ctrl+Alt+Delete keys on the keyboard simultaneously. 2. 4 Troubleshooting and maintenance Refer to it. The following sections present some issues you might not be locked up , or using your computer and possible solutions. Contact Support: www.hp.com/support Computer will not turn on . If ...plugged in properly, and the wall outlet is not responding, and then tap End Task. Press the Ctrl+Alt+Delete keys on the keyboard simultaneously. 2. Use the Windows Task Manager to the red Shut Down button, and then tap Restart. Tap the Arrow button next to...
Getting Started Guide
Page 21
... free of the computer and to make the screen display visible again. Press the Sleep button (select models only), or the Esc key on the keyboard, to turn off . Images on the computer. Tap the Start button, and then tap Control Panel. 2. Under Appearance and Personalization, tap Adjust Screen ... the internal fan is blank. Check Power Settings. Adjust resolution as necessary, and then tap Apply. Press the space bar on the keyboard. Adjust the display resolution setting in an exceedingly hot environment. When drive activity stops, remove the disc, and then press the spacebar on ...
... free of the computer and to make the screen display visible again. Press the Sleep button (select models only), or the Esc key on the keyboard, to turn off . Images on the computer. Tap the Start button, and then tap Control Panel. 2. Under Appearance and Personalization, tap Adjust Screen ... the internal fan is blank. Check Power Settings. Adjust resolution as necessary, and then tap Apply. Press the space bar on the keyboard. Adjust the display resolution setting in an exceedingly hot environment. When drive activity stops, remove the disc, and then press the spacebar on ...


