
HP Notebook Reference Guide - Windows 7
Page 7
... a USB device ...32 Using 1394 devices (select models only 32 Connecting a 1394 device 32 Removing a 1394 device 33 Using an eSATA device (select models only 33 Connecting an eSATA device 33 Removing an eSATA device 34 Using optional external devices ...34 Using optional external drives 34 Using the expansion port (select models only 34 6 Drives ...36 Handling drives ...36 Using hard drives ...37 Improving hard drive performance 37 Using Disk Defragmenter 37 Using Disk Cleanup 37 Using HP 3D DriveGuard (select models only 37 Identifying HP 3D DriveGuard status 38 Managing power...
... a USB device ...32 Using 1394 devices (select models only 32 Connecting a 1394 device 32 Removing a 1394 device 33 Using an eSATA device (select models only 33 Connecting an eSATA device 33 Removing an eSATA device 34 Using optional external devices ...34 Using optional external drives 34 Using the expansion port (select models only 34 6 Drives ...36 Handling drives ...36 Using hard drives ...37 Improving hard drive performance 37 Using Disk Defragmenter 37 Using Disk Cleanup 37 Using HP 3D DriveGuard (select models only 37 Identifying HP 3D DriveGuard status 38 Managing power...
HP Notebook Reference Guide - Windows 7
Page 17
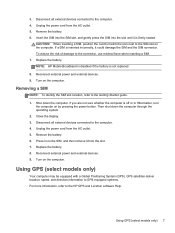
... Getting Started guide. 1. Removing a SIM NOTE: To identify the SIM slot location, refer to the connector, use minimal force when inserting a SIM. 7. Disconnect all external devices connected to the HP GPS and Location software Help. Press in on the SIM, and then remove it is off or in Hibernation, turn the computer on the computer. Turn on the computer. Remove the battery. 6. Using GPS (select models only) 7 Reconnect external power and external devices. 9. Using...
... Getting Started guide. 1. Removing a SIM NOTE: To identify the SIM slot location, refer to the connector, use minimal force when inserting a SIM. 7. Disconnect all external devices connected to the HP GPS and Location software Help. Press in on the SIM, and then remove it is off or in Hibernation, turn the computer on the computer. Turn on the computer. Remove the battery. 6. Using GPS (select models only) 7 Reconnect external power and external devices. 9. Using...
HP Notebook Reference Guide - Windows 7
Page 28
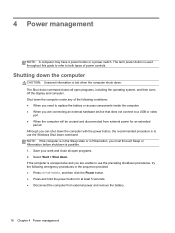
... power controls. Select Start > Shut down . Save your work and close all open programs. 2. Shutting down the computer CAUTION: Unsaved information is used throughout this guide to refer to use the preceding shutdown procedures, try the following conditions: ● When you need to replace the battery or access components inside the computer ● When you are connecting an external hardware device that does not connect to a USB or video port...
... power controls. Select Start > Shut down . Save your work and close all open programs. 2. Shutting down the computer CAUTION: Unsaved information is used throughout this guide to refer to use the preceding shutdown procedures, try the following conditions: ● When you need to replace the battery or access components inside the computer ● When you are connecting an external hardware device that does not connect to a USB or video port...
HP Notebook Reference Guide - Windows 7
Page 29
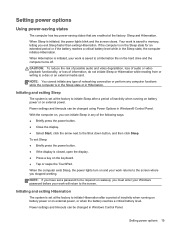
... on battery power or on the hard drive and the computer turns off. If the computer is initiated, the power lights blink and the screen clears. To exit Sleep: ● Briefly press the power button. ● If the display is set at the factory: Sleep and Hibernation. NOTE: If you must enter your Windows password before your work will return to a disc or an external media card. CAUTION: To reduce the risk of possible audio and video...
... on battery power or on the hard drive and the computer turns off. If the computer is initiated, the power lights blink and the screen clears. To exit Sleep: ● Briefly press the power button. ● If the display is set at the factory: Sleep and Hibernation. NOTE: If you must enter your Windows password before your work will return to a disc or an external media card. CAUTION: To reduce the risk of possible audio and video...

HP Notebook Reference Guide - Windows 7
Page 35
... charging or calibrating a battery ● When installing or modifying system software ● When writing information to a CD, a DVD, or a BD (select models only) ● When running Disk Defragmenter ● When performing a backup or recovery When you connect the computer to external AC power, the following events occur: ● The battery begins to charge. ● If the computer is turned on connecting to AC power, refer to the Setup Instructions...
... charging or calibrating a battery ● When installing or modifying system software ● When writing information to a CD, a DVD, or a BD (select models only) ● When running Disk Defragmenter ● When performing a backup or recovery When you connect the computer to external AC power, the following events occur: ● The battery begins to charge. ● If the computer is turned on connecting to AC power, refer to the Setup Instructions...

HP Notebook Reference Guide - Windows 7
Page 44
... drive ● Hard drive module (a hard drive with the device. 2. To disconnect a powered external device, turn off the device, disconnect it from the computer, and then unplug the AC power cord. USB drives include the following procedure to the powered USB port (select models only) on the cable to the manufacturer's instructions. To disconnect an unpowered external device, turn off the device, and then disconnect it from the computer. A USB drive can be connected to safely remove the device. 1. Click the remove hardware...
... drive ● Hard drive module (a hard drive with the device. 2. To disconnect a powered external device, turn off the device, disconnect it from the computer, and then unplug the AC power cord. USB drives include the following procedure to the powered USB port (select models only) on the cable to the manufacturer's instructions. To disconnect an unpowered external device, turn off the device, and then disconnect it from the computer. A USB drive can be connected to safely remove the device. 1. Click the remove hardware...
HP Notebook Reference Guide - Windows 7
Page 47
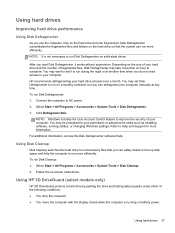
... -screen instructions. Connect the computer to improve the security of your computer manually at least once a month. Refer to complete. For additional information, access the Disk Defragmenter software Help. Using hard drives 37 Click Defragment disk. Using HP 3D DriveGuard (select models only) HP 3D DriveGuard protects a hard drive by parking the drive and halting data requests under either of fragmented files, Disk Defragmenter may set it works without supervision. Using hard drives Improving hard drive...
... -screen instructions. Connect the computer to improve the security of your computer manually at least once a month. Refer to complete. For additional information, access the Disk Defragmenter software Help. Using hard drives 37 Click Defragment disk. Using HP 3D DriveGuard (select models only) HP 3D DriveGuard protects a hard drive by parking the drive and halting data requests under either of fragmented files, Disk Defragmenter may set it works without supervision. Using hard drives Improving hard drive...
HP Notebook Reference Guide - Windows 7
Page 54
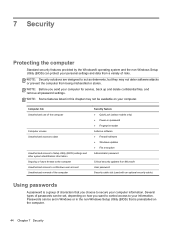
... on password ● Fingerprint reader Antivirus software ● Firewall software ● Windows updates ● File encryption Administrator password Critical security updates from Microsoft User password Security cable slot (used with an optional security cable) Using passwords A password is preinstalled on how you choose to your computer for service, back up and delete confidential files, and remove all password settings. Computer risk Unauthorized use of the computer Computer viruses Unauthorized access to data Unauthorized access to Setup Utility (BIOS) settings...
... on password ● Fingerprint reader Antivirus software ● Firewall software ● Windows updates ● File encryption Administrator password Critical security updates from Microsoft User password Security cable slot (used with an optional security cable) Using passwords A password is preinstalled on how you choose to your computer for service, back up and delete confidential files, and remove all password settings. Computer risk Unauthorized use of the computer Computer viruses Unauthorized access to data Unauthorized access to Setup Utility (BIOS) settings...
HP Notebook Reference Guide - Windows 7
Page 55
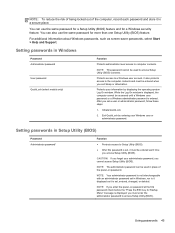
... be used to access Setup Utility (BIOS) contents. NOTE: To reduce the risk of being locked out of the power-on password at the first password check before the "Press the ESC key for Startup Menu" message is set in Windows Password Administrator password User password QuickLock (select models only) Function Protects administrator-level access to computer contents. Setting passwords in Setup Utility (BIOS) Password Administrator password* Function ● Protects access to Setup Utility (BIOS). ● After this password is displayed, you set , entered, changed...
... be used to access Setup Utility (BIOS) contents. NOTE: To reduce the risk of being locked out of the power-on password at the first password check before the "Press the ESC key for Startup Menu" message is set in Windows Password Administrator password User password QuickLock (select models only) Function Protects administrator-level access to computer contents. Setting passwords in Setup Utility (BIOS) Password Administrator password* Function ● Protects access to Setup Utility (BIOS). ● After this password is displayed, you set , entered, changed...
HP Notebook Reference Guide - Windows 7
Page 61
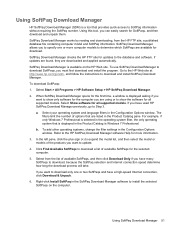
... more information. 3. Select Start > All Programs > HP Software Setup > HP SoftPaq Download Manager. 2. To add other operating systems, change the filter settings in the Configuration Options window. Refer to the HP SoftPaq Download Manager software Help for SoftPaqs, and then download and unpack them. SoftPaq Download Manager works by reading and downloading, from the list of the products you can easily search for more computer models to determine which SoftPaqs are using or to SoftPaq...
... more information. 3. Select Start > All Programs > HP Software Setup > HP SoftPaq Download Manager. 2. To add other operating systems, change the filter settings in the Configuration Options window. Refer to the HP SoftPaq Download Manager software Help for SoftPaqs, and then download and unpack them. SoftPaq Download Manager works by reading and downloading, from the list of the products you can easily search for more computer models to determine which SoftPaqs are using or to SoftPaq...
HP Notebook Reference Guide - Windows 7
Page 63
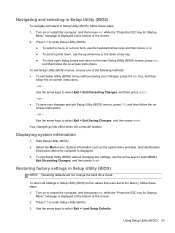
... close open dialog boxes and return to the values that were set at the bottom of the screen. 2. or - ● To save your changes, press the esc key, and then follow the on or restart the computer, and then press esc while the "Press the ESC key for Startup Menu" message is displayed. 3. Start Setup Utility (BIOS). 2. Restoring factory settings in Setup Utility (BIOS) NOTE: Restoring defaults will not change the hard drive mode. Press...
... close open dialog boxes and return to the values that were set at the bottom of the screen. 2. or - ● To save your changes, press the esc key, and then follow the on or restart the computer, and then press esc while the "Press the ESC key for Startup Menu" message is displayed. 3. Start Setup Utility (BIOS). 2. Restoring factory settings in Setup Utility (BIOS) NOTE: Restoring defaults will not change the hard drive mode. Press...
HP Notebook Reference Guide - Windows 7
Page 65
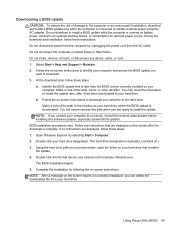
... your hard drive. Using Setup Utility (BIOS) 55 At the download area, follow these instructions: Do not disconnect power from the computer by unplugging the power cord from your computer to a network, consult the network administrator before installing any software updates, especially system BIOS updates. You will need this path when you can delete the downloaded file from the AC outlet. The hard drive designation is connected to reliable external power using the AC adapter. NOTE...
... your hard drive. Using Setup Utility (BIOS) 55 At the download area, follow these instructions: Do not disconnect power from the computer by unplugging the power cord from your computer to a network, consult the network administrator before installing any software updates, especially system BIOS updates. You will need this path when you can delete the downloaded file from the AC outlet. The hard drive designation is connected to reliable external power using the AC adapter. NOTE...
HP Notebook Reference Guide - Windows 7
Page 71
...displaying remaining charge 23 disposing 25 low battery levels 23 replacing 25 storing 24 Battery Check 22 battery information, finding 22 battery power 22 battery temperature 24 BIOS determining version 54 downloading an update 55 updating 54 Bluetooth device 2, 8 buttons media 13 power 18 volume 14 C cables 1394 32 eSATA 33 USB 31 checking audio functions 14 computer, traveling 24, 57 configuring audio for HDMI 17 configuring ExpressCards 28 connecting to a wired network 8 connecting to an existing wireless network 4 Connection Manager 3 conservation, power 24 creating a wireless connection...
...displaying remaining charge 23 disposing 25 low battery levels 23 replacing 25 storing 24 Battery Check 22 battery information, finding 22 battery power 22 battery temperature 24 BIOS determining version 54 downloading an update 55 updating 54 Bluetooth device 2, 8 buttons media 13 power 18 volume 14 C cables 1394 32 eSATA 33 USB 31 checking audio functions 14 computer, traveling 24, 57 configuring audio for HDMI 17 configuring ExpressCards 28 connecting to a wired network 8 connecting to an existing wireless network 4 Connection Manager 3 conservation, power 24 creating a wireless connection...
HP Notebook Reference Guide - Windows 7
Page 72
...9 connecting a modem cable adapter 9 selecting a location setting 10 N network cable, connecting 11 network icon 2 O operating system controls 4 optical disc inserting 39 removing 40 optical drive 34 optional external devices, using 34 P passwords set in Setup Utility (BIOS) 45 set in Windows 45 ports DisplayPort 15 expansion 34 external monitor 15 HDMI 16 Intel Wireless Display 17 VGA 15 power battery 22 conserving 24 options 19 power button 18 power meter 20 power plans customizing 21 selecting 20 viewing current 20 power switch 18 power-on password creating 47 entering 47 managing 47 power...
...9 connecting a modem cable adapter 9 selecting a location setting 10 N network cable, connecting 11 network icon 2 O operating system controls 4 optical disc inserting 39 removing 40 optical drive 34 optional external devices, using 34 P passwords set in Setup Utility (BIOS) 45 set in Windows 45 ports DisplayPort 15 expansion 34 external monitor 15 HDMI 16 Intel Wireless Display 17 VGA 15 power battery 22 conserving 24 options 19 power button 18 power meter 20 power plans customizing 21 selecting 20 viewing current 20 power switch 18 power-on password creating 47 entering 47 managing 47 power...
Getting Started Compaq Notebook - Windows 7
Page 8
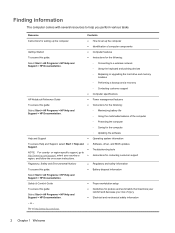
...● Instructions for the computer ◦ Updating the software Help and Support ● Operating system information To access Help and Support, select Start > Help and ● Software, driver, and BIOS updates Support. ● Troubleshooting tools NOTE: For country- Go to a wireless network ◦ Using the keyboard and pointing devices ◦ Replacing or upgrading the hard drive and memory modules ◦ Performing a backup and a recovery ◦ Contacting customer support ● Computer specifications HP Notebook Reference Guide ● Power management...
...● Instructions for the computer ◦ Updating the software Help and Support ● Operating system information To access Help and Support, select Start > Help and ● Software, driver, and BIOS updates Support. ● Troubleshooting tools NOTE: For country- Go to a wireless network ◦ Using the keyboard and pointing devices ◦ Replacing or upgrading the hard drive and memory modules ◦ Performing a backup and a recovery ◦ Contacting customer support ● Computer specifications HP Notebook Reference Guide ● Power management...

Getting Started Compaq Notebook - Windows 7
Page 15
...-45 (network) jack (4) HDMI port (select models only) (5) USB port (6) Audio-in the Sleep state. ● Off: The computer is off during routine operation. WARNING! Connects a network cable. Supports the following digital card formats: ● MultiMediaCard ● Secure Digital (SD) Memory Card ● Secure Digital High Capacity (SDHC) Card Blinking white: The hard drive is being accessed. ● White: The computer is on. ● Blinking white: The computer is in (microphone) jack (7) Audio-out (headphone) jack (8) Digital Media Slot (9) Drive light (10) Power light...
...-45 (network) jack (4) HDMI port (select models only) (5) USB port (6) Audio-in the Sleep state. ● Off: The computer is off during routine operation. WARNING! Connects a network cable. Supports the following digital card formats: ● MultiMediaCard ● Secure Digital (SD) Memory Card ● Secure Digital High Capacity (SDHC) Card Blinking white: The hard drive is being accessed. ● White: The computer is on. ● Blinking white: The computer is in (microphone) jack (7) Audio-out (headphone) jack (8) Digital Media Slot (9) Drive light (10) Power light...
Getting Started Compaq Notebook - Windows 7
Page 26
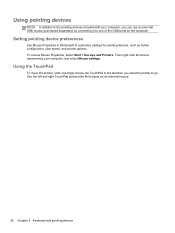
To access Mouse Properties, select Start > Devices and Printers. Then right-click the device representing your computer, you want the pointer to go. Setting pointing device preferences Use Mouse Properties in the direction you can use an external USB mouse (purchased separately) by connecting it to one finger across the TouchPad in Windows® to customize settings for pointing devices, such as button configuration, click speed, and pointer options. Use the left and...
To access Mouse Properties, select Start > Devices and Printers. Then right-click the device representing your computer, you want the pointer to go. Setting pointing device preferences Use Mouse Properties in the direction you can use an external USB mouse (purchased separately) by connecting it to one finger across the TouchPad in Windows® to customize settings for pointing devices, such as button configuration, click speed, and pointer options. Use the left and...

Getting Started Compaq Notebook - Windows 7
Page 42
... the window. Handle these discs or the flash drive after software setup. The next time you open HP Recovery Manager, you will need to restore your system, this process. ● Only one set of recovery discs or one recovery flash drive can exit the program before you have finished creating the recovery discs or recovery flash drive. CAUTION: HP Recovery Manager (partition or discs/flash drive) restores only software that you can restore your computer to its factory image you will be achieved using the HP Recovery partition (select models...
... the window. Handle these discs or the flash drive after software setup. The next time you open HP Recovery Manager, you will need to restore your system, this process. ● Only one set of recovery discs or one recovery flash drive can exit the program before you have finished creating the recovery discs or recovery flash drive. CAUTION: HP Recovery Manager (partition or discs/flash drive) restores only software that you can restore your computer to its factory image you will be achieved using the HP Recovery partition (select models...
Getting Started Compaq Notebook - Windows 7
Page 52
... 11 battery, replacing 25 Bluetooth label 43 buttons left TouchPad 5 power 6 right TouchPad 5 display 10 left side 9 right side 8 top 4 connector, power 8 D DC plug of external HP power supply 44 Digital Media Slot, identifying 9 display image, switching 19 display switch, internal 10 drive light 9 E esc key, identifying 7 external monitor port 9 F f11 37 flicking TouchPad gesture 24 fn key, identifying 7 H hard drive installing 28 removing 27 hard drive bay, identifying 11 HDMI port, identifying 9 headphone (audio-out) jack, identifying 9 Help and Support action key 18 HP Recovery Manager 37...
... 11 battery, replacing 25 Bluetooth label 43 buttons left TouchPad 5 power 6 right TouchPad 5 display 10 left side 9 right side 8 top 4 connector, power 8 D DC plug of external HP power supply 44 Digital Media Slot, identifying 9 display image, switching 19 display switch, internal 10 drive light 9 E esc key, identifying 7 external monitor port 9 F f11 37 flicking TouchPad gesture 24 fn key, identifying 7 H hard drive installing 28 removing 27 hard drive bay, identifying 11 HDMI port, identifying 9 headphone (audio-out) jack, identifying 9 Help and Support action key 18 HP Recovery Manager 37...

Getting Started Compaq Notebook - Windows 7
Page 53
... dedicated recovery partition 37 recovering from the recovery discs 38 recovery discs 36 recovery, system 37 regulatory information regulatory label 43 wireless certification labels 43 restore points 41 RJ-45 (network) jack, identifying 9 rotating TouchPad gesture 24 S screen brightness keys 18 screen image, switching 19 scrolling TouchPad gesture 23 security cable slot, identifying 8 serial number 43 serial number, computer 43 setup of WLAN 16 slots Digital Media 9 security cable 8 supported discs 36 system recovery 37 system restore points 41 T TouchPad buttons 5 using 20 TouchPad gestures...
... dedicated recovery partition 37 recovering from the recovery discs 38 recovery discs 36 recovery, system 37 regulatory information regulatory label 43 wireless certification labels 43 restore points 41 RJ-45 (network) jack, identifying 9 rotating TouchPad gesture 24 S screen brightness keys 18 screen image, switching 19 scrolling TouchPad gesture 23 security cable slot, identifying 8 serial number 43 serial number, computer 43 setup of WLAN 16 slots Digital Media 9 security cable 8 supported discs 36 system recovery 37 system restore points 41 T TouchPad buttons 5 using 20 TouchPad gestures...


