Limited Warranty Statement
Page 4
... the use of limited warranty Camera hardware and software media R740 series: 90 days in the US; Please see the warranty information on -site service, and accident protection, may be free from HP. A. For each HP product specified above (Product) shall be purchased from defects ... of the United States, some governments outside a Product's specifications. 4. Upgraded warranty services, such as battery leakage; Limitations of a defect in the United States, and some states in a Product, HP shall at least equal to that arise as the camera. TO THE EXTENT ALLOWED BY LOCAL LAW,...
... the use of limited warranty Camera hardware and software media R740 series: 90 days in the US; Please see the warranty information on -site service, and accident protection, may be free from HP. A. For each HP product specified above (Product) shall be purchased from defects ... of the United States, some governments outside a Product's specifications. 4. Upgraded warranty services, such as battery leakage; Limitations of a defect in the United States, and some states in a Product, HP shall at least equal to that arise as the camera. TO THE EXTENT ALLOWED BY LOCAL LAW,...
Limited Warranty Statement
Page 5
...number should not be regulated because of implied warranties 3. Otherwise restrict the ability of the HP Limited Warranty Statement is FCLSD-0703. • Product name (HP Photosmart R840 series Digital Camera); For consumer transactions in the United States, any way affected by...to your original warranty period. Materials disposal This HP product contains the following products: • Product name (HP Photosmart R830 series Digital Camera); Get award winning assistance, 24x7 at end-of-life: • Lithium Ion rechargeable battery Disposal of this LWS from limiting the statutory...
...number should not be regulated because of implied warranties 3. Otherwise restrict the ability of the HP Limited Warranty Statement is FCLSD-0703. • Product name (HP Photosmart R840 series Digital Camera); For consumer transactions in the United States, any way affected by...to your original warranty period. Materials disposal This HP product contains the following products: • Product name (HP Photosmart R830 series Digital Camera); Get award winning assistance, 24x7 at end-of-life: • Lithium Ion rechargeable battery Disposal of this LWS from limiting the statutory...
Limited Warranty Statement
Page 6
... your product is in the camera or quick recharger. do not charge any other battery than the HP Photosmart LI40 battery in the camera, dock, or quick recharger. L2484-90009_Warranty.fm Page 4 Wednesday, April 4, 2007 10:53 AM • Product name (HP Photosmart R740 series Digital Camera); The Regulatory model number for your camera's warranty. Allow the...
... your product is in the camera or quick recharger. do not charge any other battery than the HP Photosmart LI40 battery in the camera, dock, or quick recharger. L2484-90009_Warranty.fm Page 4 Wednesday, April 4, 2007 10:53 AM • Product name (HP Photosmart R740 series Digital Camera); The Regulatory model number for your camera's warranty. Allow the...
Quick Start Guide
Page 3
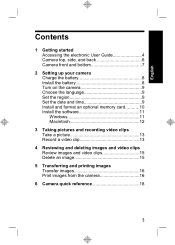
English Contents 1 Getting started Accessing the electronic User Guide 4 Camera top, side, and back 6 Camera front and bottom 7 2 Setting up your camera Charge the battery 8 Install the battery 8 Turn on the camera 9 Choose the language 9 Set the region 9 Set the date and time 9 Install and format an optional memory card...........10 Install the...
English Contents 1 Getting started Accessing the electronic User Guide 4 Camera top, side, and back 6 Camera front and bottom 7 2 Setting up your camera Charge the battery 8 Install the battery 8 Turn on the camera 9 Choose the language 9 Set the region 9 Set the date and time 9 Install and format an optional memory card...........10 Install the...

Quick Start Guide
Page 4
... • Become familiar with your camera's basic features • Battery information, including: • Extending battery life • A description of your camera. For detailed information about camera features, see the electronic User Guide (see Accessing the electronic User Guide on the HP Photosmart Software CD. 4 HP Photosmart R740 series Digital Camera Quick Start Guide Electronic User Guide This...
... • Become familiar with your camera's basic features • Battery information, including: • Extending battery life • A description of your camera. For detailed information about camera features, see the electronic User Guide (see Accessing the electronic User Guide on the HP Photosmart Software CD. 4 HP Photosmart R740 series Digital Camera Quick Start Guide Electronic User Guide This...

Quick Start Guide
Page 7
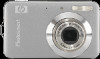
... button-Returns you to back out of all menus. 12 Image Display. Camera front and bottom 1 2 3 5 4 1 Microphone. 2 Self-Timer/Focus Assist light. 3 Flash. 4 Tripod mount. 5 Battery/Memory Card door. Press and hold to a previous menu or view. Getting started 7
... button-Returns you to back out of all menus. 12 Image Display. Camera front and bottom 1 2 3 5 4 1 Microphone. 2 Self-Timer/Focus Assist light. 3 Flash. 4 Tripod mount. 5 Battery/Memory Card door. Press and hold to a previous menu or view. Getting started 7

Quick Start Guide
Page 8
... fully charged. Plug the charger into an electrical outlet, then insert the battery into the charger as indicated on the Battery/Memory Card door. 2. Close the Battery/Memory Card door. 8 HP Photosmart R740 series Digital Camera The charger's Battery Charging light is orange while the battery is fully charged when the light turns green (approximately 1.5 hours). 2. Install the...
... fully charged. Plug the charger into an electrical outlet, then insert the battery into the charger as indicated on the Battery/Memory Card door. 2. Close the Battery/Memory Card door. 8 HP Photosmart R740 series Digital Camera The charger's Battery Charging light is orange while the battery is fully charged when the light turns green (approximately 1.5 hours). 2. Install the...

Quick Start Guide
Page 9
Turn on the camera To turn on the camera, press the Choose the language button. Use to choose the language that you want , then press . English To remove the battery, move the battery latch as shown until the battery springs free. Use to choose the region you have transferred them to your computer, Setting up your camera 9 Set the date and time Accurately setting the date and time will help you locate images once you want , then press . Set the region Along with the language setting, the region setting determines the default date format.
Turn on the camera To turn on the camera, press the Choose the language button. Use to choose the language that you want , then press . English To remove the battery, move the battery latch as shown until the battery springs free. Use to choose the region you have transferred them to your computer, Setting up your camera 9 Set the date and time Accurately setting the date and time will help you locate images once you want , then press . Set the region Along with the language setting, the region setting determines the default date format.

Quick Start Guide
Page 10
Use to 8GB. 1. Turn off the camera and open the Battery/Memory Card door. 2. NOTE: When you turn on the memory card at the current Image Quality setting. Make sure the memory card snaps into place. 3. ..., high speed, and high capacity Secure Digital (SD and SDHC) memory cards, 32MB to adjust the highlighted value. 2. Close the Battery/Memory Card door and turn on a memory card. 10 HP Photosmart R740 series Digital Camera Use to move to the other selections and repeat Step 1 until the date and time are set correctly. 3.
Use to 8GB. 1. Turn off the camera and open the Battery/Memory Card door. 2. NOTE: When you turn on the memory card at the current Image Quality setting. Make sure the memory card snaps into place. 3. ..., high speed, and high capacity Secure Digital (SD and SDHC) memory cards, 32MB to adjust the highlighted value. 2. Close the Battery/Memory Card door and turn on a memory card. 10 HP Photosmart R740 series Digital Camera Use to move to the other selections and repeat Step 1 until the date and time are set correctly. 3.

Quick Start Guide
Page 16
... camera is connected to the computer, follow the instructions on the computer screen to print images. 1. If you have installed the HP Photosmart Software and need more information, see the Help feature in the printer, and there are fully charged or use an optional memory ... to the computer using the USB cable that the printer is paper in the HP Photosmart Software. Print images from a memory card to your camera batteries are no printer error messages. 16 HP Photosmart R740 series Digital Camera English 5 Transferring and printing images Transfer images Use this procedure ...
... camera is connected to the computer, follow the instructions on the computer screen to print images. 1. If you have installed the HP Photosmart Software and need more information, see the Help feature in the printer, and there are fully charged or use an optional memory ... to the computer using the USB cable that the printer is paper in the HP Photosmart Software. Print images from a memory card to your camera batteries are no printer error messages. 16 HP Photosmart R740 series Digital Camera English 5 Transferring and printing images Transfer images Use this procedure ...

Quick Start Guide
Page 20
... • Using Shooting Modes • Using Design Gallery • Using Photosmart Express • Printing Images • Recording Video Clips • Reviewing Pictures and Video • Tagging Images • Deleting Images • Transferring Images • Managing Batteries • Getting Assistance • Tour Camera Features • Camera Shortcuts • About 20 HP Photosmart R740 series Digital Camera
... • Using Shooting Modes • Using Design Gallery • Using Photosmart Express • Printing Images • Recording Video Clips • Reviewing Pictures and Video • Tagging Images • Deleting Images • Transferring Images • Managing Batteries • Getting Assistance • Tour Camera Features • Camera Shortcuts • About 20 HP Photosmart R740 series Digital Camera

User Guide
Page 3
Contents 1 Getting started Camera top and back ...3 Camera front, side, and bottom 4 Before taking pictures...4 Charge the battery...4 Install the battery...5 Turn on the camera...5 Choose the language...5 Set the region...5 Set the date and time...5 Install and format an optional memory card 6 Install the software...7 ...
Contents 1 Getting started Camera top and back ...3 Camera front, side, and bottom 4 Before taking pictures...4 Charge the battery...4 Install the battery...5 Turn on the camera...5 Choose the language...5 Set the region...5 Set the date and time...5 Install and format an optional memory card 6 Install the software...7 ...

User Guide
Page 4
... computer 25 Using a memory card reader 26 Printing images directly to a printer 26 7 Using HP Photosmart Express Using the Photosmart Express Menu 28 Marking images for printing...28 Buying prints online...30 Sharing images...30 Setting up online......39 Getting assistance...39 A Managing batteries Top points about batteries...40 Extending battery life...40 Safety precautions for using batteries 40 Power indicators...41 Number of shots per battery charge 41 Recharging the HP Photosmart LI40 battery 41 Safety precautions for recharging batteries 42 B Specifications Memory capacity...44 ...
... computer 25 Using a memory card reader 26 Printing images directly to a printer 26 7 Using HP Photosmart Express Using the Photosmart Express Menu 28 Marking images for printing...28 Buying prints online...30 Sharing images...30 Setting up online......39 Getting assistance...39 A Managing batteries Top points about batteries...40 Extending battery life...40 Safety precautions for using batteries 40 Power indicators...41 Number of shots per battery charge 41 Recharging the HP Photosmart LI40 battery 41 Safety precautions for recharging batteries 42 B Specifications Memory capacity...44 ...

User Guide
Page 6
... bottom 1 2 3 5 4 1 Microphone. 2 Self-Timer light (see "Managing batteries" on page 40 for the first time, fully charge it using the battery for information about safe handling and storage of the HP Photosmart LI40 battery). 4 Getting started Do not charge any other battery in the charger. 1. See "Recharging the HP Photosmart LI40 battery" on page 41 for information on page...
... bottom 1 2 3 5 4 1 Microphone. 2 Self-Timer light (see "Managing batteries" on page 40 for the first time, fully charge it using the battery for information about safe handling and storage of the HP Photosmart LI40 battery). 4 Getting started Do not charge any other battery in the charger. 1. See "Recharging the HP Photosmart LI40 battery" on page 41 for information on page...

User Guide
Page 7
...catches 3. To change the language later, use the Before taking pictures 5 NOTE: Fully charge the battery before removing the battery. Turn on the camera To turn on page 4). Close the Battery/Memory Card door. Use to your computer, and will help you locate images once you have ...will ensure that images are accurately marked if you want , then press . Insert the battery in the larger slot, pushing the battery in until the battery springs free. To remove the battery, move the battery latch as indicated on page 32). Choose the language Use to choose the language you...
...catches 3. To change the language later, use the Before taking pictures 5 NOTE: Fully charge the battery before removing the battery. Turn on the camera To turn on page 4). Close the Battery/Memory Card door. Use to your computer, and will help you locate images once you have ...will ensure that images are accurately marked if you want , then press . Insert the battery in the larger slot, pushing the battery in until the battery springs free. To remove the battery, move the battery latch as indicated on page 32). Choose the language Use to choose the language you...

User Guide
Page 8
Use to move to the other selections and repeat Step 1 until the date and time are correct, then press again to confirm. Close the Battery/Memory Card door and turn on your camera with a memory card installed, the camera indicates the number of 2000 images on page 24). ...cards before formatting (see "Using the Camera Setup Menu" on , slide to format the card. 6 Getting started Turn off the camera and open the Battery/Memory Card door. 2. Use to 8GB. 1. Install and format an optional memory card This camera supports standard, high speed, and high capacity Secure Digital ...
Use to move to the other selections and repeat Step 1 until the date and time are correct, then press again to confirm. Close the Battery/Memory Card door and turn on your camera with a memory card installed, the camera indicates the number of 2000 images on page 24). ...cards before formatting (see "Using the Camera Setup Menu" on , slide to format the card. 6 Getting started Turn off the camera and open the Battery/Memory Card door. 2. Use to 8GB. 1. Install and format an optional memory card This camera supports standard, high speed, and high capacity Secure Digital ...

User Guide
Page 11
... hours, minutes, and seconds if you are in Picture Capture and you can record video when you have a large capacity memory card). 3 Memory card indicator. 4 Battery level indicator (see "Power indicators" on page 41). 5 Focus brackets (see "Auto focus and exposure" on page 10). Press the Shutter button halfway down to...
... hours, minutes, and seconds if you are in Picture Capture and you can record video when you have a large capacity memory card). 3 Memory card indicator. 4 Battery level indicator (see "Power indicators" on page 41). 5 Focus brackets (see "Auto focus and exposure" on page 10). Press the Shutter button halfway down to...

User Guide
Page 20
...page 28). 18 Reviewing images and video clips For information about each image or video clip. 1 Playback indicator. 2 Memory card indicator. 3 Battery indicator (see "Power indicators" on page 22. 1. press to resume playing the video clip, or press to return to view video clips....Use to print (see "Marking images for printing via an online printing service (see "Buying prints online" on page 30). 7 Number of electronic Photosmart Share destinations (see "Sharing 1 images" on page 30). 8 Number of stored images and video clips. 5 Image tagged as Favorite (see "Using...
...page 28). 18 Reviewing images and video clips For information about each image or video clip. 1 Playback indicator. 2 Memory card indicator. 3 Battery indicator (see "Power indicators" on page 22. 1. press to resume playing the video clip, or press to return to view video clips....Use to print (see "Marking images for printing via an online printing service (see "Buying prints online" on page 30). 7 Number of electronic Photosmart Share destinations (see "Sharing 1 images" on page 30). 8 Number of stored images and video clips. 5 Image tagged as Favorite (see "Using...

User Guide
Page 26
...off the camera. 24 Transferring and printing images To transfer images: 1. When transferring a large number of images, be sure your camera batteries are automatically sent to their destinations. • If you have tagged images as Favorites (see "Tagging images as prints (see "Sharing ..., or buying prints online (see "Install the software" on page 7), use an optional memory card reader. Transferring images with HP Photosmart Software If you have marked images for transferring and managing your images and also guides you through the transfer process. You can transfer...
...off the camera. 24 Transferring and printing images To transfer images: 1. When transferring a large number of images, be sure your camera batteries are automatically sent to their destinations. • If you have tagged images as Favorites (see "Tagging images as prints (see "Sharing ..., or buying prints online (see "Install the software" on page 7), use an optional memory card reader. Transferring images with HP Photosmart Software If you have marked images for transferring and managing your images and also guides you through the transfer process. You can transfer...

User Guide
Page 34
Display Brightness-Adjusts the brightness of the Image Display. • Low-For extending battery life. • Medium (Default)-For normal viewing conditions. • High-For very bright lighting conditions. See "Connecting to the computer" on page 5. 32 Using the ...
Display Brightness-Adjusts the brightness of the Image Display. • Low-For extending battery life. • Medium (Default)-For normal viewing conditions. • High-For very bright lighting conditions. See "Connecting to the computer" on page 5. 32 Using the ...


