
Limited Warranty and Support Guide
Page 4
... you require an HP representative to handle all component replacements, support uplift contracts are available at your HP Hardware Product to provide timely support; (d) ensure that all manufacturer's labels (such as serial numbers) are responsible for insuring any shipping charges, taxes, or duties associated with transportation of or to verify configurations, load most recent firmware, install software patches, run HP diagnostics tests, or use HP remote support solutions where applicable...
... you require an HP representative to handle all component replacements, support uplift contracts are available at your HP Hardware Product to provide timely support; (d) ensure that all manufacturer's labels (such as serial numbers) are responsible for insuring any shipping charges, taxes, or duties associated with transportation of or to verify configurations, load most recent firmware, install software patches, run HP diagnostics tests, or use HP remote support solutions where applicable...
Limited Warranty and Support Guide
Page 12
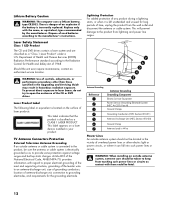
... authorized service location. Lightning Protection For added protection of overhead power lines or other than those specified in the Upgrading and Servicing Guide may result in Wire Power Lines An outside antenna or cable system is incorrectly replaced. TV Antenna Connectors Protection External Television Antenna Grounding If an outside antenna system should be taken to open the enclosure of an explosion if the battery is connected...
... authorized service location. Lightning Protection For added protection of overhead power lines or other than those specified in the Upgrading and Servicing Guide may result in Wire Power Lines An outside antenna or cable system is incorrectly replaced. TV Antenna Connectors Protection External Television Antenna Grounding If an outside antenna system should be taken to open the enclosure of an explosion if the battery is connected...
Limited Warranty and Support Guide
Page 14
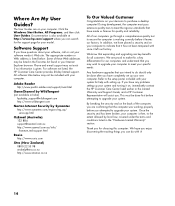
... software titles below . Any hardware upgrades that have completely set up your specific needs. Refer to the setup poster included with your system for all customers. This must pass extensive quality tests to meet the rigorous standards that you intend to meet your new computer. Where Are My User Guides? During development, the computer must be included with setting up your Internet Explorer...
... software titles below . Any hardware upgrades that have completely set up your specific needs. Refer to the setup poster included with your system for all customers. This must pass extensive quality tests to meet the rigorous standards that you intend to meet your new computer. Where Are My User Guides? During development, the computer must be included with setting up your Internet Explorer...
Warranty and Support Guide
Page 14
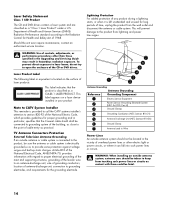
... in Wire Power Lines An outside antenna or cable system is located on a laser device installed in the vicinity of time, unplug the product from the wall outlet and disconnect the antenna or cable system. This label appears on the surface of the CD or DVD drives. Should the unit ever require maintenance, contact an authorized service location. TV Antenna Connectors Protection External Television...
... in Wire Power Lines An outside antenna or cable system is located on a laser device installed in the vicinity of time, unplug the product from the wall outlet and disconnect the antenna or cable system. This label appears on the surface of the CD or DVD drives. Should the unit ever require maintenance, contact an authorized service location. TV Antenna Connectors Protection External Television...
Start Here Guide
Page 4
... Audio System 28 Y adapter cables 28 2.1 home stereo installation 29 5.1 home audio installation 30 5.1 home audio installation procedure 30 7.1 home audio installation 32 7.1 home audio installation procedure 33 Connecting Digital Audio 34 Connecting Speakers Using the Creative Sound Blaster X-Fi Sound Card 36 Connecting the speakers 36 Connecting the FlexiJack connector 37 Connecting the Television Signal and Video Cables 39 Using TV Cables 39 Audio and Video Cables 39 Connecting the TV Signal Source 41 Connecting a dual tuner 42 Connecting the Remote Sensor 43 Connecting...
... Audio System 28 Y adapter cables 28 2.1 home stereo installation 29 5.1 home audio installation 30 5.1 home audio installation procedure 30 7.1 home audio installation 32 7.1 home audio installation procedure 33 Connecting Digital Audio 34 Connecting Speakers Using the Creative Sound Blaster X-Fi Sound Card 36 Connecting the speakers 36 Connecting the FlexiJack connector 37 Connecting the Television Signal and Video Cables 39 Using TV Cables 39 Audio and Video Cables 39 Connecting the TV Signal Source 41 Connecting a dual tuner 42 Connecting the Remote Sensor 43 Connecting...
Start Here Guide
Page 20
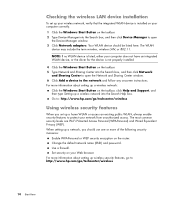
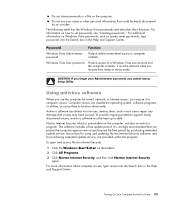
... a wireless network: Click the Windows Start Button on your Web browser. For more of the following security measures: Enable WPA-Personal or WEP security encryption on the taskbar. 5 Type Network and Sharing Center into the Search box, and then click Network and Sharing Center to open the Device Manager window. 3 Click Network adapters. Change the default network name (SSID) and password. Set security on the taskbar, click Help and Support, and then type Setting up a wireless network...
... a wireless network: Click the Windows Start Button on your Web browser. For more of the following security measures: Enable WPA-Personal or WEP security encryption on the taskbar. 5 Type Network and Sharing Center into the Search box, and then click Network and Sharing Center to open the Device Manager window. 3 Click Network adapters. Change the default network name (SSID) and password. Set security on the taskbar, click Help and Support, and then type Setting up a wireless network...
Start Here Guide
Page 26
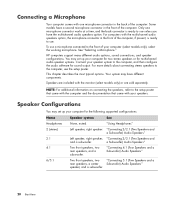
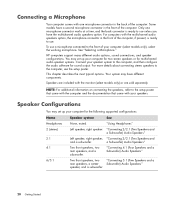
... setup poster. a Subwoofer) Audio Speakers" Two front speakers, two rear speakers, and a subwoofer. Speaker Configurations You may set up your computer for two stereo speakers or for multichannel audio speaker systems. Connect your computer for sound output. HP computers support many different audio options, sound connections, and speaker configurations. You may set up your speaker system to the computer, and then configure the audio software for the following supported configurations: Name Headphones 2 (stereo) 2.1 4.1 6/5.1 Speaker system See None, muted. "Using...
... setup poster. a Subwoofer) Audio Speakers" Two front speakers, two rear speakers, and a subwoofer. Speaker Configurations You may set up your computer for two stereo speakers or for multichannel audio speaker systems. Connect your computer for sound output. HP computers support many different audio options, sound connections, and speaker configurations. You may set up your speaker system to the computer, and then configure the audio software for the following supported configurations: Name Headphones 2 (stereo) 2.1 4.1 6/5.1 Speaker system See None, muted. "Using...

Getting Started Guide
Page 4
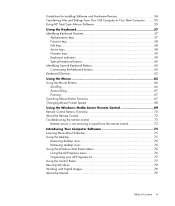
... software 46 Installing critical security updates 46 Turning On Your Computer for the First Time 47 Turning Off Your Computer 47 Using Shut Down 48 Using Lock ...48 Using sleep mode 48 Using hibernate mode 49 Automatic sleep, hibernate, or away mode 50 Restarting the Computer 50 Connecting to the Internet 51 Signing Up for Software Updates 52 Setting Up User Accounts on Your New Computer 53 Creating passwords 53 iv Getting Started
... software 46 Installing critical security updates 46 Turning On Your Computer for the First Time 47 Turning Off Your Computer 47 Using Shut Down 48 Using Lock ...48 Using sleep mode 48 Using hibernate mode 49 Automatic sleep, hibernate, or away mode 50 Restarting the Computer 50 Connecting to the Internet 51 Signing Up for Software Updates 52 Setting Up User Accounts on Your New Computer 53 Creating passwords 53 iv Getting Started
Getting Started Guide
Page 5
... Switching Mouse Button Functions 67 Changing Mouse Pointer Speed 68 Using the Windows Media Center Remote Control 69 Remote Control Buttons Overview 70 About the Remote Control 72 Troubleshooting the remote control 73 Remote sensor is not receiving a signal from the remote control 73 Introducing Your Computer Software 75 Learning More About Software 75 Using the Desktop 75 Removing desktop icons 76 Retrieving desktop icons 76 Using the Windows Start Button Menu 76 Using the All Programs menu 76 Organizing your All Programs list 77 Using the Control Panel 77 Resizing Windows...
... Switching Mouse Button Functions 67 Changing Mouse Pointer Speed 68 Using the Windows Media Center Remote Control 69 Remote Control Buttons Overview 70 About the Remote Control 72 Troubleshooting the remote control 73 Remote sensor is not receiving a signal from the remote control 73 Introducing Your Computer Software 75 Learning More About Software 75 Using the Desktop 75 Removing desktop icons 76 Retrieving desktop icons 76 Using the Windows Start Button Menu 76 Using the All Programs menu 76 Organizing your All Programs list 77 Using the Control Panel 77 Resizing Windows...

Getting Started Guide
Page 24
... Network and Sharing Center window. 6 Click Add a device to the network and follow any onscreen instructions. Go to: http://www.hp.com/go /techcenter/wireless 14 Getting Started When setting up a network, you set up your wireless network, verify that the integrated WLAN device is not properly installed. 4 Click the Windows Start Button on the taskbar. 5 Type Network and Sharing Center into the Search box, and then click Network and Sharing Center to open the Device Manager window. 3 Click Network adapters...
... Network and Sharing Center window. 6 Click Add a device to the network and follow any onscreen instructions. Go to: http://www.hp.com/go /techcenter/wireless 14 Getting Started When setting up a network, you set up your wireless network, verify that the integrated WLAN device is not properly installed. 4 Click the Windows Start Button on the taskbar. 5 Type Network and Sharing Center into the Search box, and then click Network and Sharing Center to open the Device Manager window. 3 Click Network adapters...
Getting Started Guide
Page 30
..."Connecting 2/2.1 (Two Speakers and a Subwoofer) Audio Speakers" Left speaker, right speaker, "Connecting 2/2.1 (Two Speakers and and a subwoofer. a Subwoofer) Audio Speakers" Two front speakers, two rear speakers, and a subwoofer. HP computers support many different audio options, sound connections, and speaker configurations. NOTE: For additional information on connecting the speakers, refer to the setup poster that came with the computer and the documentation that came with your speaker system to the computer, and then configure the audio software for sound output. "Using...
..."Connecting 2/2.1 (Two Speakers and a Subwoofer) Audio Speakers" Left speaker, right speaker, "Connecting 2/2.1 (Two Speakers and and a subwoofer. a Subwoofer) Audio Speakers" Two front speakers, two rear speakers, and a subwoofer. HP computers support many different audio options, sound connections, and speaker configurations. NOTE: For additional information on connecting the speakers, refer to the setup poster that came with the computer and the documentation that came with your speaker system to the computer, and then configure the audio software for sound output. "Using...
Getting Started Guide
Page 55
... on the computer. For more information about computer viruses, type viruses into the Search box in the Help and Support Center. The software includes a free update period. Do not store passwords in a file on Windows Vista passwords, such as screen saver passwords, type passwords into the Search box in the Help and Support Center. Do not use the computer for e-mail, network, or Internet access, you resume from sleep or away mode.
... on the computer. For more information about computer viruses, type viruses into the Search box in the Help and Support Center. The software includes a free update period. Do not store passwords in a file on Windows Vista passwords, such as screen saver passwords, type passwords into the Search box in the Help and Support Center. Do not use the computer for e-mail, network, or Internet access, you resume from sleep or away mode.

Getting Started Guide
Page 57
... your system memory to a remote location. Turning Off Your Computer For best results, when using Microsoft Windows Vista, do not shut down the computer, you can do not want to set up an Internet connection at this tool to protect your computer and your work to the hard disk, and then goes to make repairs, install new hardware or cards in the computer chassis, or change a battery. Sleep mode saves your work to memory so...
... your system memory to a remote location. Turning Off Your Computer For best results, when using Microsoft Windows Vista, do not shut down the computer, you can do not want to set up an Internet connection at this tool to protect your computer and your work to the hard disk, and then goes to make repairs, install new hardware or cards in the computer chassis, or change a battery. Sleep mode saves your work to memory so...

Getting Started Guide
Page 62
... Windows Start Button on the taskbar. 2 Click Control Panel. 3 Click Security. 4 Click Windows Updates. 5 Click Change Settings. 6 Select the desired configuration: Automatic (recommended) - Download updates, but let me choose whether to install them Check for updates but let me choose whether to date is not recommended. 7 Click OK. 52 Getting Started If you through a pop-up to download or install them Never check for Software Updates Microsoft continually updates the Windows Vista operating...
... Windows Start Button on the taskbar. 2 Click Control Panel. 3 Click Security. 4 Click Windows Updates. 5 Click Change Settings. 6 Select the desired configuration: Automatic (recommended) - Download updates, but let me choose whether to install them Check for updates but let me choose whether to date is not recommended. 7 Click OK. 52 Getting Started If you through a pop-up to download or install them Never check for Software Updates Microsoft continually updates the Windows Vista operating...
Getting Started Guide
Page 73
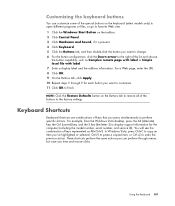
... perform specific actions. Using the Keyboard 63 NOTE: Click the Restore Defaults button on the taskbar. 2 Click Control Panel. 3 Click Hardware and Sound, if it is present. 4 Click Keyboard. 5 Click the Buttons tab, and then double-click the button you want to customize. 11 Click OK to the right of keys represented as Complex remote page with label or Simple local file with label. 7 Enter a display label...
... perform specific actions. Using the Keyboard 63 NOTE: Click the Restore Defaults button on the taskbar. 2 Click Control Panel. 3 Click Hardware and Sound, if it is present. 4 Click Keyboard. 5 Click the Buttons tab, and then double-click the button you want to customize. 11 Click OK to the right of keys represented as Complex remote page with label or Simple local file with label. 7 Enter a display label...

Getting Started Guide
Page 191
Media Center menu bars 116 navigating 117 opening with remote control 72 playing DVDs 140 resizing window 116 using with another program open 116 what you can do in Music 125 memory card reader 155 card types 99 in-use light 103 troubleshooting 104 using 99 memory card, formatting 103 microphone connector 4, 6 mini-jack 18 modem connection 15 modem connector 7 monitor adjusting 10 monitor connector 6 mouse autoscroll 67 cursor speed 68 panning 67 switching button functions 67 mouse connector 5 Music 125 copying music to...
Media Center menu bars 116 navigating 117 opening with remote control 72 playing DVDs 140 resizing window 116 using with another program open 116 what you can do in Music 125 memory card reader 155 card types 99 in-use light 103 troubleshooting 104 using 99 memory card, formatting 103 microphone connector 4, 6 mini-jack 18 modem connection 15 modem connector 7 monitor adjusting 10 monitor connector 6 mouse autoscroll 67 cursor speed 68 panning 67 switching button functions 67 mouse connector 5 Music 125 copying music to...
Important FreeDOS Operating System Information
Page 1
... the Safety & Comfort Guide. Because the Documentation and Utilities CD does not autorun on the CD, locate the appropriate language subfolder, then open the product folder to your computer provides helpful information about software technical support. Hardware Diagnostic Tools powered by entering on this CD in HP shall not be viewed by PC-Doctor either runs automatically when you must install a licensed operating system, as well...
... the Safety & Comfort Guide. Because the Documentation and Utilities CD does not autorun on the CD, locate the appropriate language subfolder, then open the product folder to your computer provides helpful information about software technical support. Hardware Diagnostic Tools powered by entering on this CD in HP shall not be viewed by PC-Doctor either runs automatically when you must install a licensed operating system, as well...

Upgrade and Service Guide
Page 3
... Upgrading and Servicing Guide 1 Safety Information 1 Opening and Closing the Computer 1 Preparing the Computer 2 Before Opening the Computer 2 After Closing the Computer 3 Removing the Side Panel 3 Replacing the Side Panel 4 Removing the Front Panel 4 Replacing the Front Panel 5 Locating Components Inside the Computer 6 Removing and Replacing Drives 7 Removing an Optical Drive 7 Adding or Replacing an Optical Drive 8 Removing the Primary Hard Disk Drive 10 Adding or Replacing the Primary Hard Disk Drive 11 Removing the Memory Card Reader 13 Adding or Replacing a Memory Card...
... Upgrading and Servicing Guide 1 Safety Information 1 Opening and Closing the Computer 1 Preparing the Computer 2 Before Opening the Computer 2 After Closing the Computer 3 Removing the Side Panel 3 Replacing the Side Panel 4 Removing the Front Panel 4 Replacing the Front Panel 5 Locating Components Inside the Computer 6 Removing and Replacing Drives 7 Removing an Optical Drive 7 Adding or Replacing an Optical Drive 8 Removing the Primary Hard Disk Drive 10 Adding or Replacing the Primary Hard Disk Drive 11 Removing the Memory Card Reader 13 Adding or Replacing a Memory Card...

Upgrade and Service Guide
Page 19
.... 6 Replace the front and side panels, and then close the computer. 5 Push the memory card reader into the chassis until the screw hole on the chassis is aligned with the screw hole on the right side of the chassis and not the open side panel. See "Opening and Closing the Computer" on page 16. 2 Attach the hard disk drive cables. A - Upgrading and Servicing Guide 15
.... 6 Replace the front and side panels, and then close the computer. 5 Push the memory card reader into the chassis until the screw hole on the chassis is aligned with the screw hole on the right side of the chassis and not the open side panel. See "Opening and Closing the Computer" on page 16. 2 Attach the hard disk drive cables. A - Upgrading and Servicing Guide 15
Upgrade and Service Guide
Page 24
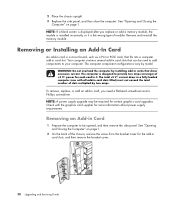
... (one with the graphics card supplier for the add-in card, you replace or add a memory module, the module is installed incorrectly, or it . NOTE: A power supply upgrade may be used to add components to your computer. Remove and reinstall the memory module. To remove, replace, or add an add-in card slots, and then remove the bracket cover. 20 Upgrading and Servicing Guide The total +5 Vv current draw in card is displayed after you need a flat-head screwdriver...
... (one with the graphics card supplier for the add-in card, you replace or add a memory module, the module is installed incorrectly, or it . NOTE: A power supply upgrade may be used to add components to your computer. Remove and reinstall the memory module. To remove, replace, or add an add-in card slots, and then remove the bracket cover. 20 Upgrading and Servicing Guide The total +5 Vv current draw in card is displayed after you need a flat-head screwdriver...


