HP USB Digital Drive
Page 8
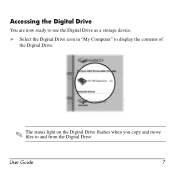
User Guide 7 Accessing the Digital Drive You are now ready to use the Digital Drive as a storage device. » Select the Digital Drive icon in "My Computer" to display the contents of the Digital Drive. ✎ The status light on the Digital Drive flashes when you copy and move files to and from the Digital Drive.
User Guide 7 Accessing the Digital Drive You are now ready to use the Digital Drive as a storage device. » Select the Digital Drive icon in "My Computer" to display the contents of the Digital Drive. ✎ The status light on the Digital Drive flashes when you copy and move files to and from the Digital Drive.

HP USB Digital Drive
Page 9
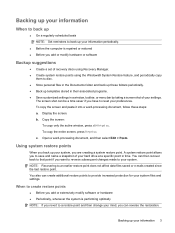
A dialog box displays a list of connected devices. 2. Select the "Safely Remove Hardware" icon on its track for safe storage. 8 User Guide Gently unplug the Digital Drive from the USB port. ✎ If the USB connector cable is flashing. 1. Select the Digital Drive and wait until the "Safe to remove the Digital Drive when the status light on your taskbar. Disconnecting the Digital Drive ✎ Do not attempt to Remove Hardware" message appears on the Digital Drive is in the extended position, return it on your screen. 3.
A dialog box displays a list of connected devices. 2. Select the "Safely Remove Hardware" icon on its track for safe storage. 8 User Guide Gently unplug the Digital Drive from the USB port. ✎ If the USB connector cable is flashing. 1. Select the Digital Drive and wait until the "Safe to remove the Digital Drive when the status light on your taskbar. Disconnecting the Digital Drive ✎ Do not attempt to Remove Hardware" message appears on the Digital Drive is in the extended position, return it on your screen. 3.
Backup and Recovery - Windows Vista
Page 9
.... ● Before the computer is performing optimally NOTE: If you revert to a restore point and then change your mind, you have to reset your preferences. Display the screen. To copy the entire screen, press fn+prt sc. The screen shot can be a time saver if you can then recover back to...
.... ● Before the computer is performing optimally NOTE: If you revert to a restore point and then change your mind, you have to reset your preferences. Display the screen. To copy the entire screen, press fn+prt sc. The screen shot can be a time saver if you can then recover back to...
Backup and Recovery - Windows Vista
Page 11
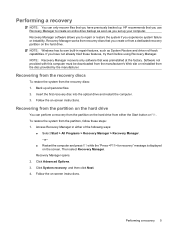
... ways: ● Select Start > All Programs > Recovery Manager > Recovery Manager. -or- ● Restart the computer and press f11 while the "Press for recovery" message is displayed on the screen. To restore the system from the recovery discs: 1. Recovery Manager opens. 2. Performing a recovery 5 Software not provided with this computer must be downloaded... Manager. NOTE: Recovery Manager recovers only software that you use Recovery Manager to repair or restore the system if you set up all personal files. 2. HP recommends that was preinstalled at the factory.
... ways: ● Select Start > All Programs > Recovery Manager > Recovery Manager. -or- ● Restart the computer and press f11 while the "Press for recovery" message is displayed on the screen. To restore the system from the recovery discs: 1. Recovery Manager opens. 2. Performing a recovery 5 Software not provided with this computer must be downloaded... Manager. NOTE: Recovery Manager recovers only software that you use Recovery Manager to repair or restore the system if you set up all personal files. 2. HP recommends that was preinstalled at the factory.
Modem and Local Area Network - Windows Vista
Page 9
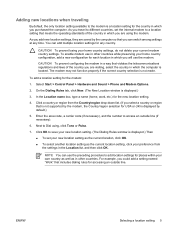
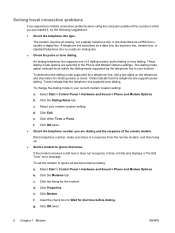
...that meets the operating standards of the country you are saved by default.) 5. The modem may not function properly if the correct country selection is displayed.) 3. Select Start > Control Panel > Hardware and Sound > Phone and Modem Options. 2. Enter the area code, a carrier code (if ...OK. ● To select another location setting as in other countries while preserving your new location setting. (The Dialing Rules window is displayed.) Then ● To set the internal modem to a location setting that violates the telecommunications regulations and laws of the country in which...
...that meets the operating standards of the country you are saved by default.) 5. The modem may not function properly if the correct country selection is displayed.) 3. Select Start > Control Panel > Hardware and Sound > Phone and Modem Options. 2. Enter the area code, a carrier code (if ...OK. ● To select another location setting as in other countries while preserving your new location setting. (The Dialing Rules window is displayed.) Then ● To set the internal modem to a location setting that violates the telecommunications regulations and laws of the country in which...
Modem and Local Area Network - Windows Vista
Page 10
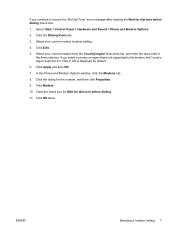
... dialing. Clicks indicate that the telephone line supports tone dialing. Click OK twice. ● Check the telephone number you purchased it does not dial and displays a "No Dial Tone" error message. Dial a telephone number, make sure there is usually a digital line. b. c. d. f. Click OK twice. 6 Chapter 1 Modem ENWW These dialing mode options...
... dialing. Clicks indicate that the telephone line supports tone dialing. Click OK twice. ● Check the telephone number you purchased it does not dial and displays a "No Dial Tone" error message. Dial a telephone number, make sure there is usually a digital line. b. c. d. f. Click OK twice. 6 Chapter 1 Modem ENWW These dialing mode options...
Modem and Local Area Network - Windows Vista
Page 11
... Selecting a location setting 7 Click the Dialing Rules tab. 3. Click OK twice. Select your current modem location setting. 4. If you select a country or region that is displayed by the modem, the Country/ region selection for dial tone before dialing check box: 1. In the Phone and Modem Options window, click the Modems tab...
... Selecting a location setting 7 Click the Dialing Rules tab. 3. Click OK twice. Select your current modem location setting. 4. If you select a country or region that is displayed by the modem, the Country/ region selection for dial tone before dialing check box: 1. In the Phone and Modem Options window, click the Modems tab...
Security - Windows Vista
Page 8
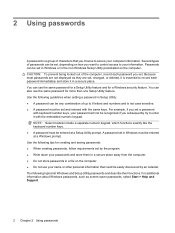
... preinstalled on how you set , changed, or deleted, it is essential to your information. For additional information about Windows passwords, such as they are not displayed as screen-saver passwords, select Start > Help and Support. 2 Chapter 2 Using passwords 2 Using passwords A password is a group of characters that could be easily discovered by...
... preinstalled on how you set , changed, or deleted, it is essential to your information. For additional information about Windows passwords, such as they are not displayed as screen-saver passwords, select Start > Help and Support. 2 Chapter 2 Using passwords 2 Using passwords A password is a group of characters that could be easily discovered by...

Security - Windows Vista
Page 9
... cannot be entered in Windows Password Administrator password User password QuickLock Function Protects administrator-level access to Setup Utility. ● After this password is it displayed as it must be entered each time you access the computer. Protects the computer by requiring a password to be used to a Windows user account. Protects...
... cannot be entered in Windows Password Administrator password User password QuickLock Function Protects administrator-level access to Setup Utility. ● After this password is it displayed as it must be entered each time you access the computer. Protects the computer by requiring a password to be used to a Windows user account. Protects...
Security - Windows Vista
Page 10
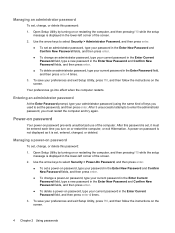
To save your preferences and exit Setup Utility, press f10, and then follow the instructions on password To set, change, or delete this password is displayed in the lower-left corner of the screen. 2. Managing a power-on the screen. To save your preferences and exit Setup Utility, press f10,... Security > Power-On Password, and then press enter. ● To set the password), and then press enter. A power-on password is not displayed as it must restart the computer and try again. Your preferences go into effect when the computer restarts. Use the arrow keys to select Security...
To save your preferences and exit Setup Utility, press f10, and then follow the instructions on password To set, change, or delete this password is displayed in the lower-left corner of the screen. 2. Managing a power-on the screen. To save your preferences and exit Setup Utility, press f10,... Security > Power-On Password, and then press enter. ● To set the password), and then press enter. A power-on password is not displayed as it must restart the computer and try again. Your preferences go into effect when the computer restarts. Use the arrow keys to select Security...
Security - Windows Vista
Page 17
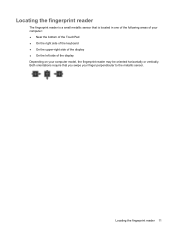
Locating the fingerprint reader The fingerprint reader is a small metallic sensor that you swipe your computer model, the fingerprint reader may be oriented horizontally or vertically. Locating the fingerprint reader 11 Both orientations require that is located in one of the following areas of your computer: ● Near the bottom of the TouchPad ● On the right side of the keyboard ● On the upper-right side of the display ● On the left side of the display Depending on your finger perpendicular to the metallic sensor.
Locating the fingerprint reader The fingerprint reader is a small metallic sensor that you swipe your computer model, the fingerprint reader may be oriented horizontally or vertically. Locating the fingerprint reader 11 Both orientations require that is located in one of the following areas of your computer: ● Near the bottom of the TouchPad ● On the right side of the keyboard ● On the upper-right side of the display ● On the left side of the display Depending on your finger perpendicular to the metallic sensor.

Setup Utility - Windows Vista
Page 3
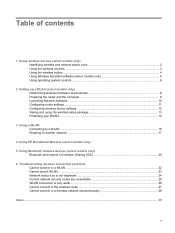
Table of contents 1 Starting the Setup Utility 2 Using the Setup Utility Changing the language of the Setup Utility 2 Navigating and selecting in the Setup Utility 2 Displaying system information ...3 Restoring default settings in the Setup Utility 3 Using advanced Setup Utility features 4 Closing the Setup Utility ...4 3 Setup Utility menus Main menu ...5 Security menu ...5 System Configuration menu ...6 Diagnostics menu ...6 Index ...7 iii
Table of contents 1 Starting the Setup Utility 2 Using the Setup Utility Changing the language of the Setup Utility 2 Navigating and selecting in the Setup Utility 2 Displaying system information ...3 Restoring default settings in the Setup Utility 3 Using advanced Setup Utility features 4 Closing the Setup Utility ...4 3 Setup Utility menus Main menu ...5 Security menu ...5 System Configuration menu ...6 Diagnostics menu ...6 Index ...7 iii
Setup Utility - Windows Vista
Page 5
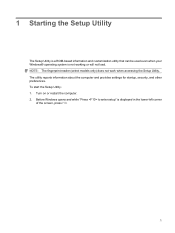
... the Setup Utility The Setup Utility is a ROM-based information and customization utility that can be used even when your Windows® operating system is displayed in the lower-left corner of the screen, press f10. 1 To start the Setup Utility: 1. Before Windows opens and while "Press to enter setup" is...
... the Setup Utility The Setup Utility is a ROM-based information and customization utility that can be used even when your Windows® operating system is displayed in the lower-left corner of the screen, press f10. 1 To start the Setup Utility: 1. Before Windows opens and while "Press to enter setup" is...
Setup Utility - Windows Vista
Page 6
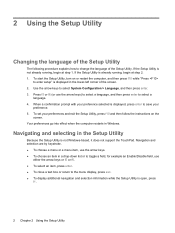
...select an item, press enter. ● To close a text box or return to the menu display, press esc. ● To display additional navigation and selection information while the Setup Utility is displayed in a drop-down list or to toggle a field, for example an Enable/Disable field, use ..., and then press enter to select a language. 4. Navigating and selecting in Windows. When a confirmation prompt with your preference selected is displayed, press enter to save your preferences and exit the Setup Utility, press f10 and then follow the instructions on or restart the computer, and...
...select an item, press enter. ● To close a text box or return to the menu display, press esc. ● To display additional navigation and selection information while the Setup Utility is displayed in a drop-down list or to toggle a field, for example an Enable/Disable field, use ..., and then press enter to select a language. 4. Navigating and selecting in Windows. When a confirmation prompt with your preference selected is displayed, press enter to save your preferences and exit the Setup Utility, press f10 and then follow the instructions on or restart the computer, and...
Setup Utility - Windows Vista
Page 7
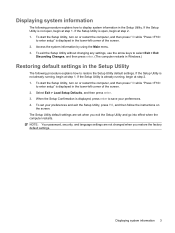
... step 2. 1. To start the Setup Utility, turn on or restart the computer, and then press f10 while "Press to enter setup" is displayed, press enter to save your preferences and exit the Setup Utility, press f10, and then follow the instructions on or restart the computer, and ...of the screen. 2. If the Setup Utility is already running , begin at step 1. Access the system information by using the Main menu. 3. Displaying system information The following procedure explains how to restore the Setup Utility default settings. If the Setup Utility is open , begin at step 1. When ...
... step 2. 1. To start the Setup Utility, turn on or restart the computer, and then press f10 while "Press to enter setup" is displayed, press enter to save your preferences and exit the Setup Utility, press f10, and then follow the instructions on or restart the computer, and ...of the screen. 2. If the Setup Utility is already running , begin at step 1. Access the system information by using the Main menu. 3. Displaying system information The following procedure explains how to restore the Setup Utility default settings. If the Setup Utility is open , begin at step 1. When ...
Setup Utility - Windows Vista
Page 8
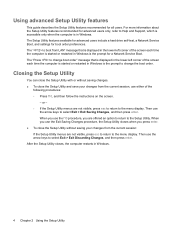
... Exit > Exit Saving Changes, and then press enter. After the Setup Utility closes, the computer restarts in Windows is the prompt to the menu display. The Setup Utility features available for advanced users include a hard drive self-test, a Network Service Boot, and settings for all users. For more... boot order. or - ◦ If the Setup Utility menus are not visible, press esc to return to change boot order" message that is displayed in the lower-left corner of the screen each time the computer is started or restarted in Windows. 4 Chapter 2 Using the Setup Utility The ...
... Exit > Exit Saving Changes, and then press enter. After the Setup Utility closes, the computer restarts in Windows is the prompt to the menu display. The Setup Utility features available for advanced users include a hard drive self-test, a Network Service Boot, and settings for all users. For more... boot order. or - ◦ If the Setup Utility menus are not visible, press esc to return to change boot order" message that is displayed in the lower-left corner of the screen each time the computer is started or restarted in Windows. 4 Chapter 2 Using the Setup Utility The ...

Setup Utility - Windows Vista
Page 11
... boot options 6 boot order 6 button sound 6 C changing the Setup Utility language 2 closing the Setup Utility 4 D Diagnostics menu 6 displaying system information 3 drives, boot order 6 F fingerprint reader 1 S secondary hard drive self test 6 Security menu 5 selecting in the Setup ...Utility 2 Setup Utility changing the language 2 closing 4 Diagnostics menu 6 displaying system information 3 Main menu 5 navigating and selecting 2 restoring default settings 3 Security menu 5 starting 1 System Configuration menu 6 using 2 using...
... boot options 6 boot order 6 button sound 6 C changing the Setup Utility language 2 closing the Setup Utility 4 D Diagnostics menu 6 displaying system information 3 drives, boot order 6 F fingerprint reader 1 S secondary hard drive self test 6 Security menu 5 selecting in the Setup ...Utility 2 Setup Utility changing the language 2 closing 4 Diagnostics menu 6 displaying system information 3 Main menu 5 navigating and selecting 2 restoring default settings 3 Security menu 5 starting 1 System Configuration menu 6 using 2 using...

Software Updates - Windows Vista
Page 8
... area, follow these steps: a. If the Setup Utility does not open with the system information displayed, use the arrow keys to the computer or an unsuccessful installation, download and install a BIOS update only when the computer ...is displayed in the lower-left corner of the system BIOS currently installed. Do not download or install a BIOS... a BIOS update CAUTION: To prevent damage to select the Main menu. Follow the instructions on the HP Web site that is displayed. 3.
... area, follow these steps: a. If the Setup Utility does not open with the system information displayed, use the arrow keys to the computer or an unsuccessful installation, download and install a BIOS update only when the computer ...is displayed in the lower-left corner of the system BIOS currently installed. Do not download or install a BIOS... a BIOS update CAUTION: To prevent damage to select the Main menu. Follow the instructions on the HP Web site that is displayed. 3.

Software Updates - Windows Vista
Page 9
...exe extension (for example, filename.exe). The BIOS installation begins. 5. Updating the BIOS 3 You will be downloaded. If no instructions are displayed on the screen reports a successful installation, you connect your hard drive designation. Make a note of the path to the location on your ...update will need to access this path when you are ready to a network, consult the network administrator before installing any instructions that are displayed, follow these steps: 1. Double-click the file that contains the update. 4. NOTE: If you can delete the downloaded file from ...
...exe extension (for example, filename.exe). The BIOS installation begins. 5. Updating the BIOS 3 You will be downloaded. If no instructions are displayed on the screen reports a successful installation, you connect your hard drive designation. Make a note of the path to the location on your ...update will need to access this path when you are ready to a network, consult the network administrator before installing any instructions that are displayed, follow these steps: 1. Double-click the file that contains the update. 4. NOTE: If you can delete the downloaded file from ...
Wireless (Select Models Only) - Windows Vista
Page 5
...wireless setup package 13 Protecting your WLAN ...14 3 Using a WLAN Connecting to a WLAN ...16 Roaming to another network ...17 4 Using HP Broadband Wireless (select models only) 5 Using Bluetooth wireless devices (select models only) Bluetooth and Internet Connection Sharing (ICS 20 6 Troubleshooting ...wireless connection problems Cannot connect to a WLAN ...22 Cannot launch WLAN ...23 Network status icon is not displayed 24 Current network security codes are unavailable 25 WLAN connection is very weak ...26 Cannot connect to the wireless router 27 Cannot connect...
...wireless setup package 13 Protecting your WLAN ...14 3 Using a WLAN Connecting to a WLAN ...16 Roaming to another network ...17 4 Using HP Broadband Wireless (select models only) 5 Using Bluetooth wireless devices (select models only) Bluetooth and Internet Connection Sharing (ICS 20 6 Troubleshooting ...wireless connection problems Cannot connect to a WLAN ...22 Cannot launch WLAN ...23 Network status icon is not displayed 24 Current network security codes are unavailable 25 WLAN connection is very weak ...26 Cannot connect to the wireless router 27 Cannot connect...


