Security - Windows Vista
Page 8
... password for a Windows security feature. Use the following guidelines when setting a password in Setup Utility: ● A password can be set by an outsider. NOTE: Select models include a separate numeric keypad, which functions exactly like the keyboard number keys. ● A password must be entered at a Setup Utility prompt. For additional information about Windows passwords, such as they are not displayed as screen-saver passwords, select Start > Help and Support. 2 Chapter 2 Using passwords CAUTION: To prevent being locked out of passwords...
... password for a Windows security feature. Use the following guidelines when setting a password in Setup Utility: ● A password can be set by an outsider. NOTE: Select models include a separate numeric keypad, which functions exactly like the keyboard number keys. ● A password must be entered at a Setup Utility prompt. For additional information about Windows passwords, such as they are not displayed as screen-saver passwords, select Start > Help and Support. 2 Chapter 2 Using passwords CAUTION: To prevent being locked out of passwords...
Setup Utility - Windows Vista
Page 8
... users include a hard drive self-test, a Network Service Boot, and settings for all users. For more information about the Setup Utility features recommended for a Network Service Boot. Closing the Setup Utility You can close the Setup Utility and save your changes from LAN" message that is started or restarted in Windows. 4 Chapter 2 Using the Setup Utility Using advanced Setup Utility features This guide describes the Setup Utility features recommended for boot order preferences. The " to select Exit > Exit Saving Changes, and then press enter...
... users include a hard drive self-test, a Network Service Boot, and settings for all users. For more information about the Setup Utility features recommended for a Network Service Boot. Closing the Setup Utility You can close the Setup Utility and save your changes from LAN" message that is started or restarted in Windows. 4 Chapter 2 Using the Setup Utility Using advanced Setup Utility features This guide describes the Setup Utility features recommended for boot order preferences. The " to select Exit > Exit Saving Changes, and then press enter...
Software Updates - Windows Vista
Page 7
... steps, which contains information regarding installing and troubleshooting the file. Some download packages contain a file named Readme.txt, which are packaged in the remainder of this guide: 1. NOTE: Windows® includes the User Account Control feature to a network, consult the network administrator before installing any software updates, especially system BIOS updates. Install the updates. 1 Access the updates on the computer. The BIOS initializes the operating system, determines how the computer...
... steps, which contains information regarding installing and troubleshooting the file. Some download packages contain a file named Readme.txt, which are packaged in the remainder of this guide: 1. NOTE: Windows® includes the User Account Control feature to a network, consult the network administrator before installing any software updates, especially system BIOS updates. Install the updates. 1 Access the updates on the computer. The BIOS initializes the operating system, determines how the computer...

Software Updates - Windows Vista
Page 8
... the Setup Utility does not open with the system information displayed, use the arrow keys to select Exit > Exit Discarding Changes, and then press enter. Follow the instructions on battery power, docked in Windows) or by unplugging the power cord from the AC outlet. Updating the BIOS To update the BIOS, first determine what BIOS version you need this information to locate the update later, after it has been downloaded to your hard drive...
... the Setup Utility does not open with the system information displayed, use the arrow keys to select Exit > Exit Discarding Changes, and then press enter. Follow the instructions on battery power, docked in Windows) or by unplugging the power cord from the AC outlet. Updating the BIOS To update the BIOS, first determine what BIOS version you need this information to locate the update later, after it has been downloaded to your hard drive...

Wireless (Select Models Only) - Windows Vista
Page 27
...: Wireless networking devices are installed for wireless connection problems include the following: ● Wireless device is not listed in this chapter to diagnose and repair a computer that device drivers are included with select computer models only. Before working your way through the sequence of the original computer package, you want to use. 21 Use the procedures in the feature list on the side of possible solutions to your network connection problem...
...: Wireless networking devices are installed for wireless connection problems include the following: ● Wireless device is not listed in this chapter to diagnose and repair a computer that device drivers are included with select computer models only. Before working your way through the sequence of the original computer package, you want to use. 21 Use the procedures in the feature list on the side of possible solutions to your network connection problem...
Wireless (Select Models Only) - Windows Vista
Page 28
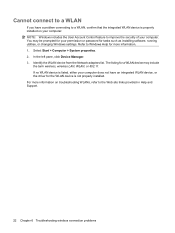
... installing software, running utilities, or changing Windows settings. Refer to Windows Help for the WLAN device is not properly installed. In the left pane, click Device Manager. 3. Cannot connect to a WLAN If you have an integrated WLAN device, or the driver for more information on your computer: NOTE: Windows includes the User Account Control feature to the Web site links provided in Help and Support. 22 Chapter 6 Troubleshooting wireless connection problems The listing...
... installing software, running utilities, or changing Windows settings. Refer to Windows Help for the WLAN device is not properly installed. In the left pane, click Device Manager. 3. Cannot connect to a WLAN If you have an integrated WLAN device, or the driver for more information on your computer: NOTE: Windows includes the User Account Control feature to the Web site links provided in Help and Support. 22 Chapter 6 Troubleshooting wireless connection problems The listing...

Pointing Devices and Keyboard - Windows Vista
Page 15
... embedded numeric keypad between their standard keyboard functions and their standard keyboard functions. When num lock on an external keypad is turned on, the num lock light on the computer is turned on the embedded numeric keypad You can be used like the arrow, page up, or page down keys. Using the embedded numeric keypad 9 Switching key functions on . Enabling and disabling the embedded numeric keypad Press fn...
... embedded numeric keypad between their standard keyboard functions and their standard keyboard functions. When num lock on an external keypad is turned on, the num lock light on the computer is turned on the embedded numeric keypad You can be used like the arrow, page up, or page down keys. Using the embedded numeric keypad 9 Switching key functions on . Enabling and disabling the embedded numeric keypad Press fn...
HP Pavilion dv3000 Entertainment PC - Maintenance and Service Guide
Page 19
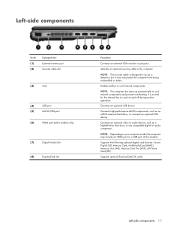
... audio component. Supports the following optional digital card formats: Secure Digital (SD) Memory Card, MultiMediaCard (MMC), Memory Stick (MS), Memory Stick Pro (MSP), xD-Picture Card (XD). Enables airflow to cool internal components and prevent overheating. NOTE: The computer fan starts up automatically to cool internal components. Connects an optional USB device. Connects an optional video or audio device, such as an eSATA external hard drive, or connects an optional USB device. NOTE: Depending on and off during routine operation. Attaches an optional security cable...
... audio component. Supports the following optional digital card formats: Secure Digital (SD) Memory Card, MultiMediaCard (MMC), Memory Stick (MS), Memory Stick Pro (MSP), xD-Picture Card (XD). Enables airflow to cool internal components and prevent overheating. NOTE: The computer fan starts up automatically to cool internal components. Connects an optional USB device. Connects an optional video or audio device, such as an eSATA external hard drive, or connects an optional USB device. NOTE: Depending on and off during routine operation. Attaches an optional security cable...

HP Pavilion dv3000 Entertainment PC - Maintenance and Service Guide
Page 127
... 2 ExpressCard slot 11 ExpressCard slot bezel 19 external media cards, product description 2 external monitor port location 11 pin assignments 107 F fan removal 71 spare part number 16, 24, 71 feet locations 32 spare part number 32 File menu 76 fingerprint reader 6, 73 fingerprint reader board removal 48 spare part number 24, 48 fingerprint reader components 5 fn key 7 front components 4, 10 function keys 7 G graphics, product description 1 grounding equipment and methods 29 H hard drive precautions 26 product description 1 removal 40 spare part numbers 17...
... 2 ExpressCard slot 11 ExpressCard slot bezel 19 external media cards, product description 2 external monitor port location 11 pin assignments 107 F fan removal 71 spare part number 16, 24, 71 feet locations 32 spare part number 32 File menu 76 fingerprint reader 6, 73 fingerprint reader board removal 48 spare part number 24, 48 fingerprint reader components 5 fn key 7 front components 4, 10 function keys 7 G graphics, product description 1 grounding equipment and methods 29 H hard drive precautions 26 product description 1 removal 40 spare part numbers 17...
HP Pavilion dv3000 Entertainment PC - Maintenance and Service Guide
Page 128
... panel 1 docking support 3 Ethernet 2 external media cards 2 graphics 1 hard drives 1 keyboard 3 memory module 1 microphone 2 modem 2 operating system 3 optical drives 2 pointing devices 3 ports 2 power requirements 3 processors 1 product name 1 security 3 serviceability 3 wireless 2 product name 1 Q QuickPlay light 8 R recovery discs 103 recovery partition, deleting 105 recovery, system 104 remote control, spare part numbers 21, 23 removal/replacement preliminaries 25 procedures 31 restore points 102 restoring Computer Setup default settings 75 right-side components 10 RJ-11 jack location...
... panel 1 docking support 3 Ethernet 2 external media cards 2 graphics 1 hard drives 1 keyboard 3 memory module 1 microphone 2 modem 2 operating system 3 optical drives 2 pointing devices 3 ports 2 power requirements 3 processors 1 product name 1 security 3 serviceability 3 wireless 2 product name 1 Q QuickPlay light 8 R recovery discs 103 recovery partition, deleting 105 recovery, system 104 remote control, spare part numbers 21, 23 removal/replacement preliminaries 25 procedures 31 restore points 102 restoring Computer Setup default settings 75 right-side components 10 RJ-11 jack location...
HP Pavilion dv3000 Entertainment PC - Maintenance and Service Guide
Page 129
...memory map 83 T thermal paste, replacement 68 tools required 25 top cover removal 45 spare part number 15, 24, 45 TouchPad components buttons 9 left button 9 light 9 on/off button 9 right button 9 scroll zone 9 TouchPad 9 transporting guidelines 28 U Universal Serial Bus (USB) port locations 10, 11 pin assignments 109 unknown password 30 V vents 11, 12 volume down light 8 volume mute button 6 volume mute light 8 volume scroll zone 6 volume up light 8 W webcam 5 webcam light 5 Windows applications key 7 Windows logo key 7 wireless antenna illustrated 18 locations 4 removal 55 spare part number...
...memory map 83 T thermal paste, replacement 68 tools required 25 top cover removal 45 spare part number 15, 24, 45 TouchPad components buttons 9 left button 9 light 9 on/off button 9 right button 9 scroll zone 9 TouchPad 9 transporting guidelines 28 U Universal Serial Bus (USB) port locations 10, 11 pin assignments 109 unknown password 30 V vents 11, 12 volume down light 8 volume mute button 6 volume mute light 8 volume scroll zone 6 volume up light 8 W webcam 5 webcam light 5 Windows applications key 7 Windows logo key 7 wireless antenna illustrated 18 locations 4 removal 55 spare part number...

Power Management - Windows Vista
Page 7
... Windows® Control Panel. Power settings and timeouts can be changed using Power Options in the Sleep state, the computer initiates Hibernation. With the computer on the hard drive and the computer turns off. You can initiate Sleep in any computer functions while the computer is in the Sleep state or in any of the following ways: ● Press the power button. ● If the display is initiated, the power lights blink...
... Windows® Control Panel. Power settings and timeouts can be changed using Power Options in the Sleep state, the computer initiates Hibernation. With the computer on the hard drive and the computer turns off. You can initiate Sleep in any computer functions while the computer is in the Sleep state or in any of the following ways: ● Press the power button. ● If the display is initiated, the power lights blink...
Power Management - Windows Vista
Page 24
... AC adapter, optional power adapter, optional expansion product, or optional docking device, and then plug the adapter or device into external power until the battery is heavily used, it after . 7. Select Start > Control Panel > System and Maintenance > Power Options. 2. Click Change advanced power settings. 6. The battery light on the computer turns on the computer turns off the display and Put the computer to sleep settings to Hibernate after the calibration. 8. It is off the display and Put the computer to sleep settings listed...
... AC adapter, optional power adapter, optional expansion product, or optional docking device, and then plug the adapter or device into external power until the battery is heavily used, it after . 7. Select Start > Control Panel > System and Maintenance > Power Options. 2. Click Change advanced power settings. 6. The battery light on the computer turns on the computer turns off the display and Put the computer to sleep settings to Hibernate after the calibration. 8. It is off the display and Put the computer to sleep settings listed...
Power Management - Windows Vista
Page 26
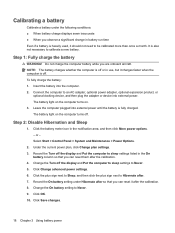
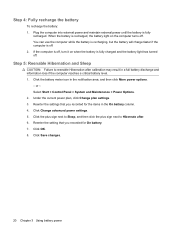
... charged and the battery light has turned off . Click Change advanced power settings. 5. Click Save changes. 20 Chapter 3 Using battery power Step 5: Reenable Hibernation and Sleep CAUTION: Failure to Hibernate after calibration may result in the notification area, and then click More power options. - or - Under the current power plan, click Change plan settings. 3. Step 4: Fully recharge the battery To recharge the battery: 1. Plug the computer into external power and maintain external power...
... charged and the battery light has turned off . Click Change advanced power settings. 5. Click Save changes. 20 Chapter 3 Using battery power Step 5: Reenable Hibernation and Sleep CAUTION: Failure to Hibernate after calibration may result in the notification area, and then click More power options. - or - Under the current power plan, click Change plan settings. 3. Step 4: Fully recharge the battery To recharge the battery: 1. Plug the computer into external power and maintain external power...
Power Management - Windows Vista
Page 31
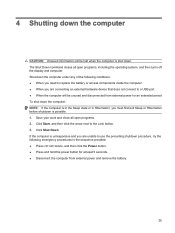
... need to replace the battery or access components inside the computer ● When you are connecting an external hardware device that does not connect to a USB port ● When the computer will be unused and disconnected from external power for at least 5 seconds. ● Disconnect the computer from external power and remove the battery. 25 The Shut Down command closes all open programs, including the operating system, and then turns...
... need to replace the battery or access components inside the computer ● When you are connecting an external hardware device that does not connect to a USB port ● When the computer will be unused and disconnected from external power for at least 5 seconds. ● Disconnect the computer from external power and remove the battery. 25 The Shut Down command closes all open programs, including the operating system, and then turns...

Drives - Windows Vista
Page 27
... the computer. 7. If you , loosen the 2 hard drive cover screws (1). 8. Shut down the computer through the operating system. Remove the battery from the AC outlet. 5. To remove the hard drive: 1. Disconnect all external devices connected to disconnect the hard drive. 21 Turn the computer upside down on by pressing the power button. Save your work. 2. Lift the hard drive cover away from the hard drive bay. 6 Replacing the hard drive CAUTION: To prevent information loss or...
... the computer. 7. If you , loosen the 2 hard drive cover screws (1). 8. Shut down the computer through the operating system. Remove the battery from the AC outlet. 5. To remove the hard drive: 1. Disconnect all external devices connected to disconnect the hard drive. 21 Turn the computer upside down on by pressing the power button. Save your work. 2. Lift the hard drive cover away from the hard drive bay. 6 Replacing the hard drive CAUTION: To prevent information loss or...

Drives - Windows Vista
Page 32
.... 6. Open your hard drive. Click Install now to the Windows operating system and other Microsoft products. When prompted, click Save and then select a storage location on -screen instructions to automatically check for and install updates for your computer operating system, programs, and hardware. 4. This Windows feature can obtain the latest Windows device drivers by User Account Control, click Continue. 5. To use Microsoft Update: 1. Obtaining the latest Windows device drivers You can be set to install Microsoft Update...
.... 6. Open your hard drive. Click Install now to the Windows operating system and other Microsoft products. When prompted, click Save and then select a storage location on -screen instructions to automatically check for and install updates for your computer operating system, programs, and hardware. 4. This Windows feature can obtain the latest Windows device drivers by User Account Control, click Continue. 5. To use Microsoft Update: 1. Obtaining the latest Windows device drivers You can be set to install Microsoft Update...
Drives - Windows Vista
Page 36
... devices 2 C CD drive 3 CD, removing 10 D Disk Cleanup software 17 Disk Defragmenter software 16 disk performance 16 drive light 19 drives caring for 2 hard 21, 22 optical 3 DVD changing region setting 15 removing 10 DVD drive 3 DVD region settings 15 DVD/CD-RW Combo Drive 4 DVD±RW and CD-RW Combo Drive with Double-Layer support 4 H hard disk drive HP 3D DriveGuard 18 installing 22 removing 21 replacing 21 hard drive HP 3D DriveGuard 18 installing 22 removing 21 replacing 21 HP 3D DriveGuard 18 L light, drive 19 M maintenance Disk Cleanup 17 Disk...
... devices 2 C CD drive 3 CD, removing 10 D Disk Cleanup software 17 Disk Defragmenter software 16 disk performance 16 drive light 19 drives caring for 2 hard 21, 22 optical 3 DVD changing region setting 15 removing 10 DVD drive 3 DVD region settings 15 DVD/CD-RW Combo Drive 4 DVD±RW and CD-RW Combo Drive with Double-Layer support 4 H hard disk drive HP 3D DriveGuard 18 installing 22 removing 21 replacing 21 hard drive HP 3D DriveGuard 18 installing 22 removing 21 replacing 21 HP 3D DriveGuard 18 L light, drive 19 M maintenance Disk Cleanup 17 Disk...
Multimedia - Windows Vista
Page 46
... your hard drive. Click Download only to save the file to do so, restart your computer operating system, programs, and hardware. 4. After the file is displayed, click an updated driver to install Microsoft Update. When prompted, click Save and then select a storage location on -screen instructions to open a window containing additional information. 6. Click the Windows Vista® operating system. 5. Obtaining the latest Windows device drivers You can be set to the Windows operating system...
... your hard drive. Click Download only to save the file to do so, restart your computer operating system, programs, and hardware. 4. After the file is displayed, click an updated driver to install Microsoft Update. When prompted, click Save and then select a storage location on -screen instructions to open a window containing additional information. 6. Click the Windows Vista® operating system. 5. Obtaining the latest Windows device drivers You can be set to the Windows operating system...

Multimedia - Windows Vista
Page 47
... drive 20 DVD changing region setting 25 inserting 23 removing 27 DVD button 4 DVD drive 20 DVD region settings 25 E earbuds 2 external audio devices, connecting 14 external monitor port 17 H headphone (audio-out) jacks 2 headphones 2 I internal microphone, identifying 2 issues, resolving 31 J jacks audio-in (microphone) 3 audio-out (headphone) 2 M media activity buttons 7 media activity hotkeys 8 media button 4 microphone, internal 2 monitor, connecting 17 movie, watching 24 multimedia components, identifying 2 multimedia software 9, 11 multimedia software, installing 12 O optical disc...
... drive 20 DVD changing region setting 25 inserting 23 removing 27 DVD button 4 DVD drive 20 DVD region settings 25 E earbuds 2 external audio devices, connecting 14 external monitor port 17 H headphone (audio-out) jacks 2 headphones 2 I internal microphone, identifying 2 issues, resolving 31 J jacks audio-in (microphone) 3 audio-out (headphone) 2 M media activity buttons 7 media activity hotkeys 8 media button 4 microphone, internal 2 monitor, connecting 17 movie, watching 24 multimedia components, identifying 2 multimedia software 9, 11 multimedia software, installing 12 O optical disc...


