
HP Pavilion 15 Sleekbook Maintenance and Service Guide
Page 77
... download is connected to reliable external power using the AC adapter. Make a note of the path to the location on the screen after it to a network, consult the network administrator before installing any software updates, especially system BIOS updates. You will need this path when you connect your hard drive. If no instructions are displayed, follow these instructions: Do not disconnect power from the computer by following the on battery power, docked in an optional docking device, or connected...
... download is connected to reliable external power using the AC adapter. Make a note of the path to the location on the screen after it to a network, consult the network administrator before installing any software updates, especially system BIOS updates. You will need this path when you connect your hard drive. If no instructions are displayed, follow these instructions: Do not disconnect power from the computer by following the on battery power, docked in an optional docking device, or connected...
HP Pavilion 15 Sleekbook Maintenance and Service Guide
Page 85
... you have replaced the hard drive, you wish to remove the recovery partition to another drive. System Restore allows you to recover the computer's original factory partitioning and content, you can use Windows File History to remove all personal data, apps, and settings, and reinstall Windows. Restore and recovery 77 For more information, see Windows Help and Support. Windows creates system restore points automatically during a Windows update and other system maintenance events. From the Start screen, type h, and then...
... you have replaced the hard drive, you wish to remove the recovery partition to another drive. System Restore allows you to recover the computer's original factory partitioning and content, you can use Windows File History to remove all personal data, apps, and settings, and reinstall Windows. Restore and recovery 77 For more information, see Windows Help and Support. Windows creates system restore points automatically during a Windows update and other system maintenance events. From the Start screen, type h, and then...
HP Pavilion 15 Sleekbook Maintenance and Service Guide
Page 86
... power button. 2. The process described in the bottom-right corner of the screen to its original state. Before using the f11 key or from the boot options menu. 3. Remove everything and reinstall Windows Sometimes you want to perform detailed reformatting of your computer. Click Change PC settings in this option, back up , restoring, and recovering IMPORTANT: This option does not provide backups of your computer, and reinstalls Windows...
... power button. 2. The process described in the bottom-right corner of the screen to its original state. Before using the f11 key or from the boot options menu. 3. Remove everything and reinstall Windows Sometimes you want to perform detailed reformatting of your computer. Click Change PC settings in this option, back up , restoring, and recovering IMPORTANT: This option does not provide backups of your computer, and reinstalls Windows...
HP Pavilion 15 Sleekbook Maintenance and Service Guide
Page 94
... update 69 updating 68 boot order changing HP Recovery Manager 80 bottom components 13 button components 7 C cables, service considerations 26 caps lock light 9 chipset, product description 1 components bottom 13 buttons 7 display 6 keys 8 left side 10 lights 9 right side 11 speakers 7 computer feet locations 31 spare part number 18, 22, 31 computer major components 15 computer reset 78 computer specifications 71 connectors, service considerations 26 counterweight, spare part number 18, 24 D deleted files, restoring 77 Digital Media Slot 11 display assembly removal...
... update 69 updating 68 boot order changing HP Recovery Manager 80 bottom components 13 button components 7 C cables, service considerations 26 caps lock light 9 chipset, product description 1 components bottom 13 buttons 7 display 6 keys 8 left side 10 lights 9 right side 11 speakers 7 computer feet locations 31 spare part number 18, 22, 31 computer major components 15 computer reset 78 computer specifications 71 connectors, service considerations 26 counterweight, spare part number 18, 24 D deleted files, restoring 77 Digital Media Slot 11 display assembly removal...

HP Pavilion 15 Sleekbook Maintenance and Service Guide
Page 95
... HP Recovery Manager 79 correcting boot problems 80 starting 80 HP Recovery media, recovery 80 HP Recovery partition 80 recovery 80 removing 81 J jacks audio-in 10 audio-out 10 headphone 10 microphone 10 network 11 RJ-45 11 K key components 8 keyboard product description removal 31 spare part numbers 23, 31 keys action 8 esc 8 3 15, 22, fn 8 num.lock 8 numeric keypad 8 Windows 8 L left-side components 10 light components 9 lights AC adapter 12 caps lock 9 hard drive 11 mute 9 network jack 11 power 9, 11 RJ-45 jack 11 TouchPad 9 webcam 6 wireless 9 M mass storage device...
... HP Recovery Manager 79 correcting boot problems 80 starting 80 HP Recovery media, recovery 80 HP Recovery partition 80 recovery 80 removing 81 J jacks audio-in 10 audio-out 10 headphone 10 microphone 10 network 11 RJ-45 11 K key components 8 keyboard product description removal 31 spare part numbers 23, 31 keys action 8 esc 8 3 15, 22, fn 8 num.lock 8 numeric keypad 8 Windows 8 L left-side components 10 light components 9 lights AC adapter 12 caps lock 9 hard drive 11 mute 9 network jack 11 power 9, 11 RJ-45 jack 11 TouchPad 9 webcam 6 wireless 9 M mass storage device...

HP Pavilion 15 Sleekbook Maintenance and Service Guide
Page 96
...cover removal 35 spare part numbers 16, 23, 24, 35 TouchPad button board spare part number 16 TouchPad button board, spare part number 23, 35 TouchPad light 9 transporting guidelines 28 U USB 2.0 port 10 USB board removal 41 spare part number USB port 11 18, 23 V vents 10, 13 video, product description 2 W webcam light 6 webcam, location 6 webcam/microphone module removal 63 spare part number 19, 23, 63 Windows File History 77 Refresh 77, 78 reinstall 77, 78 remove everything and reinstall option 78 reset 78 restoring files 77 system restore point 77 Windows key 8 wireless antenna locations...
...cover removal 35 spare part numbers 16, 23, 24, 35 TouchPad button board spare part number 16 TouchPad button board, spare part number 23, 35 TouchPad light 9 transporting guidelines 28 U USB 2.0 port 10 USB board removal 41 spare part number USB port 11 18, 23 V vents 10, 13 video, product description 2 W webcam light 6 webcam, location 6 webcam/microphone module removal 63 spare part number 19, 23, 63 Windows File History 77 Refresh 77, 78 reinstall 77, 78 remove everything and reinstall option 78 reset 78 restoring files 77 system restore point 77 Windows key 8 wireless antenna locations...
User Guide - Windows 8
Page 5
... and software information 3 Locating hardware ...3 Locating software ...3 Right side ...3 Left side ...5 Display ...6 Top ...7 TouchPad ...7 Lights ...8 Buttons and speakers ...9 Keys ...10 Bottom ...11 Labels ...11 3 Connecting to a network ...13 Connecting to a wireless network ...13 Using the wireless controls 13 Using the wireless button 13 Using operating system controls 13 Using a WLAN ...14 Using an Internet service provider 14 Setting up a WLAN 15 Configuring a wireless router 15 Protecting your WLAN 15 Connecting to a WLAN 16 Using Bluetooth wireless devices (select models...
... and software information 3 Locating hardware ...3 Locating software ...3 Right side ...3 Left side ...5 Display ...6 Top ...7 TouchPad ...7 Lights ...8 Buttons and speakers ...9 Keys ...10 Bottom ...11 Labels ...11 3 Connecting to a network ...13 Connecting to a wireless network ...13 Using the wireless controls 13 Using the wireless button 13 Using operating system controls 13 Using a WLAN ...14 Using an Internet service provider 14 Setting up a WLAN 15 Configuring a wireless router 15 Protecting your WLAN 15 Connecting to a WLAN 16 Using Bluetooth wireless devices (select models...
User Guide - Windows 8
Page 6
... mouse ...27 Using the keys ...27 Using the action keys 27 Using Microsoft Windows 8 shortcut keys 28 Using the hot keys 29 Using the integrated numeric keypad 29 6 Managing power ...30 Initiating Sleep and Hibernation ...30 Intel Rapid Start Technology (select models only 30 Initiating and exiting Sleep 31 Enabling and exiting user-initiated Hibernation 31 Setting password protection on wakeup 31 Using the power meter and power settings 32 Selecting a power plan ...32 Running on battery power ...32 Removing a user-replaceable battery...
... mouse ...27 Using the keys ...27 Using the action keys 27 Using Microsoft Windows 8 shortcut keys 28 Using the hot keys 29 Using the integrated numeric keypad 29 6 Managing power ...30 Initiating Sleep and Hibernation ...30 Intel Rapid Start Technology (select models only 30 Initiating and exiting Sleep 31 Enabling and exiting user-initiated Hibernation 31 Setting password protection on wakeup 31 Using the power meter and power settings 32 Selecting a power plan ...32 Running on battery power ...32 Removing a user-replaceable battery...
User Guide - Windows 8
Page 7
...-replaceable battery 35 Disposing of a user-replaceable battery 35 Replacing a user-replaceable battery 35 Running on external AC power ...35 Troubleshooting power problems 36 HP CoolSense (select models only 36 Refreshing your software content with Intel Smart Connect Technology (select models only 36 Shutting down (turning off) the computer 37 7 Managing and sharing information ...38 Using a USB device ...38 Connecting a USB device 38 Removing a USB device ...39 Connecting a powered USB device 39 Inserting and removing a digital storage card 40 Sharing data and drives and accessing...
...-replaceable battery 35 Disposing of a user-replaceable battery 35 Replacing a user-replaceable battery 35 Running on external AC power ...35 Troubleshooting power problems 36 HP CoolSense (select models only 36 Refreshing your software content with Intel Smart Connect Technology (select models only 36 Shutting down (turning off) the computer 37 7 Managing and sharing information ...38 Using a USB device ...38 Connecting a USB device 38 Removing a USB device ...39 Connecting a powered USB device 39 Inserting and removing a digital storage card 40 Sharing data and drives and accessing...
User Guide - Windows 8
Page 8
... a BIOS update 51 Using System Diagnostics ...51 11 Backing up, restoring, and recovering ...53 Creating recovery media and backups 53 Creating HP Recovery media 54 Restore and recovery ...55 Using Windows Refresh for quick and easy recovery 56 Remove everything and reinstall Windows 56 Recovering using HP Recovery Manager 57 What you need to know 57 Using the HP Recovery partition to recover a minimized image (select models only) ...57 Using HP Recovery media to recover 58 Changing the computer boot order 58 Removing the HP Recovery partition 58 12 Specifications ...59 Input power...
... a BIOS update 51 Using System Diagnostics ...51 11 Backing up, restoring, and recovering ...53 Creating recovery media and backups 53 Creating HP Recovery media 54 Restore and recovery ...55 Using Windows Refresh for quick and easy recovery 56 Remove everything and reinstall Windows 56 Recovering using HP Recovery Manager 57 What you need to know 57 Using the HP Recovery partition to recover a minimized image (select models only) ...57 Using HP Recovery media to recover 58 Changing the computer boot order 58 Removing the HP Recovery partition 58 12 Specifications ...59 Input power...
User Guide - Windows 8
Page 22
... a wireless router or a wireless access point. Type network and sharing in a safe place. 14 Chapter 3 Connecting to the modem, and test the Internet service. From the Start screen, type n, and then select Settings. 2. Using a WLAN With a WLAN device, you are setting up the modem, install a network cable to connect your computer, you must connect to share an Internet connection, a printer, and files without requiring additional pieces of hardware or software. Using an Internet service provider When you can access a wireless...
... a wireless router or a wireless access point. Type network and sharing in a safe place. 14 Chapter 3 Connecting to the modem, and test the Internet service. From the Start screen, type n, and then select Settings. 2. Using a WLAN With a WLAN device, you are setting up the modem, install a network cable to connect your computer, you must connect to share an Internet connection, a printer, and files without requiring additional pieces of hardware or software. Using an Internet service provider When you can access a wireless...
User Guide - Windows 8
Page 51
.... Technology is always changing, and updating programs and drivers allows your drives. 3. For worldwide support, go /contactHP. Cleaning the display, sides, and cover Gently wipe the display using the following cleaning products to download the latest versions of your computer. Use a pre-moistened germicidal wipe to AC power. 2. Follow the on -screen instructions. From the Start screen, type disk, select Settings, and then select Free up disk space and help the...
.... Technology is always changing, and updating programs and drivers allows your drives. 3. For worldwide support, go /contactHP. Cleaning the display, sides, and cover Gently wipe the display using the following cleaning products to download the latest versions of your computer. Use a pre-moistened germicidal wipe to AC power. 2. Follow the on -screen instructions. From the Start screen, type disk, select Settings, and then select Free up disk space and help the...
User Guide - Windows 8
Page 59
... computer hardware is functioning properly. Follow any instructions that are displayed on your computer. From the Start screen, type e, and then select File Explorer. 2. Complete the installation by unplugging the power cord from your BIOS, make a note of damage to an optional power source. Using System Diagnostics System Diagnostics allows you connect your computer to a network, consult the network administrator before installing any device, cable, or cord. 1. During the download and installation...
... computer hardware is functioning properly. Follow any instructions that are displayed on your computer. From the Start screen, type e, and then select File Explorer. 2. Complete the installation by unplugging the power cord from your BIOS, make a note of damage to an optional power source. Using System Diagnostics System Diagnostics allows you connect your computer to a network, consult the network administrator before installing any device, cable, or cord. 1. During the download and installation...

User Guide - Windows 8
Page 63
..., and settings, and reinstall Windows. Minimized Image Recovery installs only drivers and hardware-enabling applications. Restore and recovery 55 Windows creates system restore points automatically during a Windows update and other system maintenance events. For more information, see Windows Help and Support. For more information and steps for using Windows System Restore, see Remove everything and reinstall Windows on page 57. ● If you wish to remove the recovery partition to reset your computer using Windows Refresh. From the Start screen, type...
..., and settings, and reinstall Windows. Minimized Image Recovery installs only drivers and hardware-enabling applications. Restore and recovery 55 Windows creates system restore points automatically during a Windows update and other system maintenance events. For more information, see Windows Help and Support. For more information and steps for using Windows System Restore, see Remove everything and reinstall Windows on page 57. ● If you wish to remove the recovery partition to reset your computer using Windows Refresh. From the Start screen, type...
User Guide - Windows 8
Page 69
... things to do 1 H hard drive HP 3D DriveGuard 42 hard drive light 4 HDMI configuring audio 21 HDMI port, connecting 20 HDMI port, identifying 4, 18 headphones connecting 20 Help and Support how to access 2 Hibernation exiting 31 initiated during critical battery level 34 initiating 30, 31 high-definition devices, connecting 20, 22 hot keys description 29 display system information 29 using 29 HP 3D DriveGuard 42 HP and third-party software updates, installing 48 HP Recovery Manager 57 correcting boot problems 58 starting 57 Index 61
... things to do 1 H hard drive HP 3D DriveGuard 42 hard drive light 4 HDMI configuring audio 21 HDMI port, connecting 20 HDMI port, identifying 4, 18 headphones connecting 20 Help and Support how to access 2 Hibernation exiting 31 initiated during critical battery level 34 initiating 30, 31 high-definition devices, connecting 20, 22 hot keys description 29 display system information 29 using 29 HP 3D DriveGuard 42 HP and third-party software updates, installing 48 HP Recovery Manager 57 correcting boot problems 58 starting 57 Index 61
User Guide - Windows 8
Page 70
...18 wireless 8 M maintenance Disk Cleanup 43 Disk Defragmenter 42 microphone connecting 20 minimized image creating 57 minimized image recovery 57 model description label 11 mouse, external setting preferences 23 music 19 mute light, identifying 8 N network cable LAN requirements 17 network jack, identifying 4 num lock key, identifying 10, 29 O operating environment 59 optional external devices, using 39 original system recovery 57 P passwords Setup Utility (BIOS) 47 Windows 47 pinching TouchPad gesture 25 ports HDMI 4, 18, 20 Intel Wireless Display 22 USB 2.0 5, 19 USB 3.0 4, 19 power battery...
...18 wireless 8 M maintenance Disk Cleanup 43 Disk Defragmenter 42 microphone connecting 20 minimized image creating 57 minimized image recovery 57 model description label 11 mouse, external setting preferences 23 music 19 mute light, identifying 8 N network cable LAN requirements 17 network jack, identifying 4 num lock key, identifying 10, 29 O operating environment 59 optional external devices, using 39 original system recovery 57 P passwords Setup Utility (BIOS) 47 Windows 47 pinching TouchPad gesture 25 ports HDMI 4, 18, 20 Intel Wireless Display 22 USB 2.0 5, 19 USB 3.0 4, 19 power battery...
HP Pavilion Sleekbook 15 Maintenance and Service Guide
Page 82
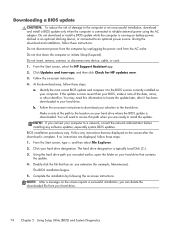
... to the hard drive. You may need to access this information to locate the update later, after the download is complete. From the Start screen, type e, and then select File Explorer. 2. Follow any device, cable, or cord. 1. If the update is typically Local Disk (C:). 3. b. From the Start screen, select the HP Support Assistant app. 2. Complete the installation by unplugging the power cord from your hard drive. 74 Chapter 5 Using Setup Utility (BIOS) and System Diagnostics Downloading a BIOS update CAUTION...
... to the hard drive. You may need to access this information to locate the update later, after the download is complete. From the Start screen, type e, and then select File Explorer. 2. Follow any device, cable, or cord. 1. If the update is typically Local Disk (C:). 3. b. From the Start screen, select the HP Support Assistant app. 2. Complete the installation by unplugging the power cord from your hard drive. 74 Chapter 5 Using Setup Utility (BIOS) and System Diagnostics Downloading a BIOS update CAUTION...
HP Pavilion Sleekbook 15 Maintenance and Service Guide
Page 99
... (microphone) jack 8 removal 47 audio-out (headphone) jack 8 removal 47 B back up personal files 80 backups 79 base enclosure spare part number 20 battery removal 32 spare part number 20, 23, 32 battery bay 14 battery lock, identifying 14 battery release latch 14 BIOS determining version 73 downloading an update 74 updating 73 Blu-ray ROM DVD±R/RW Super Multi Double-Layer Drive precautions 28 spare part number 21, 22 boot order changing HP Recovery Manager 85 buttons left TouchPad 10 power 12 right TouchPad...
... (microphone) jack 8 removal 47 audio-out (headphone) jack 8 removal 47 B back up personal files 80 backups 79 base enclosure spare part number 20 battery removal 32 spare part number 20, 23, 32 battery bay 14 battery lock, identifying 14 battery release latch 14 BIOS determining version 73 downloading an update 74 updating 73 Blu-ray ROM DVD±R/RW Super Multi Double-Layer Drive precautions 28 spare part number 21, 22 boot order changing HP Recovery Manager 85 buttons left TouchPad 10 power 12 right TouchPad...
HP Pavilion Sleekbook 15 Maintenance and Service Guide
Page 100
...power button, identifying 12 power connector removal 71 spare part number 20 spare part numbers 71 power connector, identifying 7 power cord requirements for all countries 87 requirements for specific countries and regions 88 set requirements 87 spare part numbers 21, 22 power lights, identifying 6, 11 power requirements, product description 4 processors, product description 1 product description audio 3 chipset 1 display panel 2 drives 2 Ethernet 3 external media cards 4 graphics 1 internal media card 4 keyboard 4 memory module 2 microphone 3 operating system 4 pointing device 4 ports 4 power...
...power button, identifying 12 power connector removal 71 spare part number 20 spare part numbers 71 power connector, identifying 7 power cord requirements for all countries 87 requirements for specific countries and regions 88 set requirements 87 spare part numbers 21, 22 power lights, identifying 6, 11 power requirements, product description 4 processors, product description 1 product description audio 3 chipset 1 display panel 2 drives 2 Ethernet 3 external media cards 4 graphics 1 internal media card 4 keyboard 4 memory module 2 microphone 3 operating system 4 pointing device 4 ports 4 power...
HP Pavilion Sleekbook 15 Maintenance and Service Guide
Page 101
... button 10 TouchPad reader light 11 TouchPad zone, identifying 10 transporting guidelines 30 U USB 2.0 ports, identifying 8 USB 3.0 ports, identifying 7 USB board removal 47 spare part number 20, 25 V vents, identifying 8, 14 video, product description 3 W webcam light, identifying 9 webcam, identifying 9 webcam/microphone module removal 69 spare part number 21, 26, 68, 69 Windows backup 80 File History 80, 81 Refresh 81, 83 reinstall 81, 83 remove everything and reinstall option 83 reset 83 restoring files 81 system restore point 80, 81 Windows applications key...
... button 10 TouchPad reader light 11 TouchPad zone, identifying 10 transporting guidelines 30 U USB 2.0 ports, identifying 8 USB 3.0 ports, identifying 7 USB board removal 47 spare part number 20, 25 V vents, identifying 8, 14 video, product description 3 W webcam light, identifying 9 webcam, identifying 9 webcam/microphone module removal 69 spare part number 21, 26, 68, 69 Windows backup 80 File History 80, 81 Refresh 81, 83 reinstall 81, 83 remove everything and reinstall option 83 reset 83 restoring files 81 system restore point 80, 81 Windows applications key...


