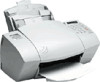
HP OfficeJet 700 Series All-in-One - (English) User Guide
Page 32
... and press Start.) When done adding speed dial codes to print a fax stored in Memory and Clean Print Cartridge. If No, press 2 to edit the group name, or press Start to delete it . Since this ...edit and press Start to add another. Then you'll be times you 'll have the choice of ink while printing a fax. Press Start to delete it to the group, press Start (or press either ... To edit an existing group speed dial code: At the 1=New 2=Edit prompt, press 2, and your print cartridge runs out of editing the group name. If Yes, press 1 and the first assigned speed dial code will ...
HP OfficeJet 700 Series All-in-One - (English) User Guide
Page 35
...Caution: l Don't leave the print cartridges outside the printer more than 30 minutes. l Clean the face and edges of children. l Using clean, moistened swabs, wipe the flat surface of the underside of paper. l Keep print cartridges out of reach of the print cartridge. DO NOT wipe the nozzle plate... 2 Remove the print cartridges: l Turn on the bottom of the holder. l Hold the print cartridge up to the light to get ink on the face and edges. l Remove the print cartridges and place them on their sides on a scrap piece of the arms on the HP OfficeJet and lift the top ...
HP OfficeJet 700 Series All-in-One - (English) User Guide
Page 36
...: Use light force when cleaning the print cartridge caps to avoid unseating them ). 6 Clean the service station: l Locate the service station inside the HP OfficeJet to the far left . The caps are two of the machine) to expose the paper rollers. 4 Carefully inspect the paper rollers for ink or grease. 5 With a rag dipped lightly...
HP OfficeJet 700 Series All-in-One - (English) User Guide
Page 39
... paper tray. l Always load at least ten sheets of plain paper with the HP OfficeJet. Printouts have vertical lines in them. l Put the HP OfficeJet CD-ROM into position. l Reinstall the software. Dialog boxes don't fit on page 3-2 for details on ink, have clogged nozzles, or need cleaning. l Use only paper that works with specialty... back into the CD-ROM drive. l Make sure the paper guides are working properly. See the Setup Guide for details. l Through Windows, change your print cartridges are not too tight against the paper.