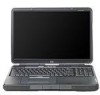
End User License Agreement
Page 1
... the Software Product on those computers. You may load the Software ON THE CONDITION THAT YOU Product into the local memory or storage device of Rights. Freeware. HP grants you the following rights provided you comply with your use of using the Software INSTALLING, COPYING, Product. You... do not have Software Product into Your Computer's AGREE TO ALL TERMS AND temporary memory (RAM) for use on more than one computer. Reservation of the HP Product. IF YOU DO NOT ACCEPT THESE LICENSE TERMS, YOUR SOLE REMEDY IS TO RETURN THE ENTIRE UNUSED...
HP USB Digital Drive
Page 2
An SD memory card 2 may not be used with any HP authorized reseller. User Guide 1 The Digital Drive can purchase one (in various storage capacities) from any computer that is a pocket-sized SD (Secure Digital) memory drive for storing and transferring files such as digital pictures, music, video, and data. However, you will need an SD memory card to operate the Digital Drive. You can be included. The HP USB Digital Drive 1 is running Microsoft Windows XP Home, Windows XP Pro, or Windows 2000.
HP USB Digital Drive
Page 3
Insert the SD memory card into the SD slot 2 with the notched corner positioned on the lower left as shown. Remove the cap 1 of the Digital Drive. 2. Installing the SD Memory Card 1. If the SD memory card does not slide in properly, gently pull it out and reinsert it. 2 User Guide
HP USB Digital Drive
Page 10
Removing the SD Memory Card ✎ Do not attempt to pull the SD memory card out when the status light on the Digital Drive is flashing. » After you disconnect the Digital Drive from your computer, gently pull the SD memory card from the Digital Drive. User Guide 9
HP Pavilion zd8000 Notebook PC - Maintenance and Service Guide
Page 4
Contents 5 Removal and Replacement Procedures 5.1 Serial Number 5-2 5.2 Disassembly Sequence Chart 5-3 5.3 Preparing the Notebook for Disassembly 5-5 5.4 Notebook Feet 5-11 5.5 Optical Drive 5-12 5.6 Memory Module 5-14 5.7 Mini PCI Communications Card 5-16 5.8 Switch Cover 5-18 5.9 LED Board 5-20 5.10 Keyboard 5-22 5.11 Display Assembly 5-26 5.12 Top Cover 5-30 5.13 ...
HP Pavilion zd8000 Notebook PC - Maintenance and Service Guide
Page 10
Product Description The external components on the right side of the notebook are shown below and described in Table 1-2. ExpressCard slot Supports an optional ExpressCard. 1394 port Connects an optional 1394a device such as a scanner, digital camera, ... and Service Guide Right-Side Components Item 1 2 3 Table 1-2 Right-Side Components Component Function Digital Media Slot Supports the following optional digital media: Secure Digital (SD) Memory Card, Secure Digital Input/Output (SD I/O), Memory Stick, Memory Stick Pro, MultiMediaCard, xD-Picture Card, and SmartMedia card.
HP Pavilion zd8000 Notebook PC - Maintenance and Service Guide
Page 21
... airflow to block airflow. If you install a device and then receive a warning message, remove the device to restore notebook functionality. Memory module compartment Contains two memory slots that regulates wireless devices in your notebook by notebook model. Hard drive bay Mini PCI compartment Holds the internal hard drive. Battery pack release latch Releases a battery pack...
HP Pavilion zd8000 Notebook PC - Maintenance and Service Guide
Page 22
... applications. The system board provides the following device connections: ■ Memory module ■ Mini PCI communications devices ■ Hard drive ■ Display ■ Keyboard and TouchPad ■ Audio ■ Intel Pentium 4 processors ■ PC Card Ä CAUTION: To properly ventilate the notebook, allow at least a 7.6--cm (3-inch) clearance on the left side...
HP Pavilion zd8000 Notebook PC - Maintenance and Service Guide
Page 24
... System Information Table 2-1 Main Menu To Do This ■ Change the system time and system date. ■ View identification information about the notebook. ■ View specification information about the processor, memory and cache size, and system ROM. 2-2 Maintenance and Service Guide When you are prompted to confirm your action, press f10. or...
HP Pavilion zd8000 Notebook PC - Maintenance and Service Guide
Page 26
...Menu Select Hard Drive Self Test Table 2-4 Tools Menu To Do This Run a quick comprehensive self test on the notebook. Selecting from the Advanced Menu Select Language Boot Order Accessibility Options Video Memory Table 2-3 Advanced Menu To Do This Change the Computer Setup language. Enable/disable MultiBoot, which sets a startup ... support the test features. 2-4 Maintenance and Service Guide Allows electronic and information technology to be accessible to people with varying ranges of video memory available on hard drives in the system. Displays the amount of abilities.
HP Pavilion zd8000 Notebook PC - Maintenance and Service Guide
Page 55
... 802.11a/b/g combination card, for use in the United States 373047-001 373048-001 376650-001 Infrared board (includes cable) 374760-001 Memory modules (400-MHz DDR2) 1024 MB 512 MB 256 MB 374726-001 374725-001 374724-001 USB digital drive board 374759-001 Miscellaneous... Plastics Kit 374746-001 Includes: Hard drive cover (includes 4 captive screws) Memory module compartment cover (includes 2 captive screws) Not illustrated: Notebook feet SD Card slot space saver PC Card slot space saver Battery pack, 12-cell, 2.2-AHr 374762-001 ...
HP Pavilion zd8000 Notebook PC - Maintenance and Service Guide
Page 56
Illustrated Parts Catalog 3.3 Miscellaneous Plastics Kit Table 3-2 Spare Part Number 374746-001 Item 1 2 3 4 5 Description Spare Part Number Hard drive cover (includes 4 captive screws) Memory module compartment cover (includes 2 captive screws) Notebook feet (7) SD Card slot space saver PC Card slot space saver 3-8 Maintenance and Service Guide
HP Pavilion zd8000 Notebook PC - Maintenance and Service Guide
Page 65
... boards and cables Display assembly, 17.0-inch, WSXGA+WVA with Brightview, includes wireless antenna boards and cables 256-MB memory module, 400 MHz DDR2 512-MB memory module, 400 MHz DDR2 1024-MB memory module, 400 MHz DDR2 4200-rpm, 60-GB hard drive, includes frame and connector 4200-rpm, 80-GB hard...
HP Pavilion zd8000 Notebook PC - Maintenance and Service Guide
Page 79
...drive 0 4 to remove hard drive cover 0 to remove hard drive 4 to disassemble hard drive Notebook feet 0 Optical drive 1 Memory module 1 loosened Mini PCI communications card 4 to restore notebook functionality. Then contact Customer Care. If you install a device and then receive a warning message, ...prevent an unresponsive system and the display of a warning message, install only a Mini PCI device authorized for use in your notebook by the governmental agency that regulates wireless devices in your country. Removal and Replacement Procedures 5.2 Disassembly Sequence Chart Use the ...
HP Pavilion zd8000 Notebook PC - Maintenance and Service Guide
Page 90
Lift the left edge of the cover up and swing it to the notebook. 3. Removal and Replacement Procedures 5.6 Memory Module Spare Part Number Information 1024-MB, 400 MHz DDR2 512-MB, 400 MHz DDR2 256-MB, 400 MHz DDR2 ... the PM2.0×5.0 screw 1 that secures the memory module compartment cover to the right 2. 4. Prepare the notebook for disassembly (refer to Section 5.3). 2. Removing the Memory Module Compartment Cover 5-14 Maintenance and Service Guide Remove the memory module compartment cover. ✎ The memory module compartment cover is included in the Miscellaneous Plastics...
HP Pavilion zd8000 Notebook PC - Maintenance and Service Guide
Page 91
Slide the module away from the notebook.) 6. Remove the memory module board. ✎ Note that memory modules are slotted to install a memory module. Spread the retaining tabs 1 on each side of the memory module socket to release the memory module board. (The back edge side of the board rises away from the socket at an angle 2. 7. Removing the Memory Module Reverse the above procedure to prevent incorrect installation into the memory module socket. Maintenance and Service Guide 5-15 Removal and Replacement Procedures 5.
HP Pavilion zd8000 Notebook PC - Maintenance and Service Guide
Page 102
Removal and Replacement Procedures 5.11 Display Assembly Spare Part Number Information 17.0-inch, WSXGA+WVA with Brightview 17.0-inch, WXGA+WVA with Brightview 17.0-inch, WXGA+WVA 374723-001 374722-001 374721-001 1. Optical drive (refer to Section 5.10) 5-26 Maintenance and Service Guide Keyboard (refer to Section 5.5) b. Memory module compartment (refer to Section 5.7) d. Mini PCI compartment cover (refer to Section 5.6) c. Switch cover (refer to Section 5.3) and remove the following components: a. Prepare the notebook for disassembly (refer to Section 5.8) e.
HP Pavilion zd8000 Notebook PC - Maintenance and Service Guide
Page 106
... drive (refer to Section 5.7) d. Mini PCI compartment cover (refer to Section 5.5) b. Switch cover (refer to Section 5.10) f. Keyboard (refer to Section 5.8) e. Memory module compartment (refer to Section 5.6) c. Turn the notebook upside down with the rear panel toward you. 5-30 Maintenance and Service Guide Removal and Replacement Procedures 5.12 Top Cover Spare Part...
HP Pavilion zd8000 Notebook PC - Maintenance and Service Guide
Page 110
Top cover (refer to Section 5.3) and remove the following components: a. Prepare the notebook for disassembly (refer to Section 5.12) 5-34 Maintenance and Service Guide Memory module compartment (refer to Section 5.11) g. Display assembly (refer to Section 5.6) c. Mini PCI compartment cover (refer to Section 5.10) f. Removal and Replacement Procedures 5.13 Infrared Board Spare Part Number Information Infrared board with cable 374760-001 1. Keyboard (refer to Section 5.7) d. Optical drive (refer to Section 5.8) e. Switch cover (refer to Section 5.5) b.
HP Pavilion zd8000 Notebook PC - Maintenance and Service Guide
Page 112
Memory module compartment (refer to Section 5.8) e. Switch cover (refer to Section 5.6) c. Keyboard (refer to Section 5.11) g. Display assembly (refer to Section 5.10) f. Removal and Replacement Procedures 5....) h. Top cover (refer to Section 5.5) b. Mini PCI compartment cover (refer to Section 5.13) 5-36 Maintenance and Service Guide Infrared board (refer to Section 5.7) d. Prepare the notebook for disassembly (refer to Section 5.3) and remove the following components: a.