Limited Warranty and Technical Support
Page 1
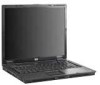
.... LIMITED WARRANTY AND TECHNICAL SUPPORT Your HP Limited Warranty consists of the repair or replacement of the product 1 HP will not alter form, fit, or function of defective parts, including hard drives identified by HP Intelligent Manageability software as "HP") with "1 YR," "2 YR," ...or "3 YR" marked on the serial number label located on the back of the unit Included HP accessories, digital writing pen, and batteries Duration of...
.... LIMITED WARRANTY AND TECHNICAL SUPPORT Your HP Limited Warranty consists of the repair or replacement of the product 1 HP will not alter form, fit, or function of defective parts, including hard drives identified by HP Intelligent Manageability software as "HP") with "1 YR," "2 YR," ...or "3 YR" marked on the serial number label located on the back of the unit Included HP accessories, digital writing pen, and batteries Duration of...
Limited Warranty and Technical Support
Page 2
...they are free from HP. During the Limited Warranty Period, HP will repair or replace the defective component parts or the hardware product. This is your proof of receiving warranty service. YOU SHOULD MAKE PERIODIC BACKUP COPIES OF THE DATA STORED ON YOUR HARD DRIVE OR OTHER STORAGE DEVICES... AS A PRECAUTION AGAINST POSSIBLE FAILURES, ALTERATION, OR LOSS OF THE DATA. to make it was never intended to function for legal or regulatory reasons. HP warrants that you a refund of your HP product has a recurring failure, HP, at its ...
...they are free from HP. During the Limited Warranty Period, HP will repair or replace the defective component parts or the hardware product. This is your proof of receiving warranty service. YOU SHOULD MAKE PERIODIC BACKUP COPIES OF THE DATA STORED ON YOUR HARD DRIVE OR OTHER STORAGE DEVICES... AS A PRECAUTION AGAINST POSSIBLE FAILURES, ALTERATION, OR LOSS OF THE DATA. to make it was never intended to function for legal or regulatory reasons. HP warrants that you a refund of your HP product has a recurring failure, HP, at its ...

Hardware and Software Guide
Page 6
... Models Only 4-19 Setting Tiling Preferences 4-21 Setting Advanced Preferences 4-22 Info Center (Select Models Only 4-24 5 Hardware Components Drives 5-1 Caring for Drives 5-1 Adding a Drive to the System 5-3 Identifying the IDE Drive Light 5-4 Replacing the Hard Drive 5-5 Inserting and Removing Optical Discs (Select Models Only 5-9 Displaying Optical Disc Contents (Select Models Only 5-13 Avoiding Standby or...
... Models Only 4-19 Setting Tiling Preferences 4-21 Setting Advanced Preferences 4-22 Info Center (Select Models Only 4-24 5 Hardware Components Drives 5-1 Caring for Drives 5-1 Adding a Drive to the System 5-3 Identifying the IDE Drive Light 5-4 Replacing the Hard Drive 5-5 Inserting and Removing Optical Discs (Select Models Only 5-9 Displaying Optical Disc Contents (Select Models Only 5-13 Avoiding Standby or...

Hardware and Software Guide
Page 13
... external power source, the light is connected to full charge capacity. Off: If the notebook is turned off until the battery reaches a low-battery condition. Blinking: The hard drive or optical drive (select models only) is on. Blinking green: The notebook is the only available power source has reached a low-battery condition. Blinking amber: A battery...
... external power source, the light is connected to full charge capacity. Off: If the notebook is turned off until the battery reaches a low-battery condition. Blinking: The hard drive or optical drive (select models only) is on. Blinking green: The notebook is the only available power source has reached a low-battery condition. Blinking amber: A battery...

Hardware and Software Guide
Page 15
... The hard drive or optical drive (select models only) is the only available power source has reached a low-battery condition. When the battery reaches a critical low-battery condition, the battery light begins blinking more quickly. Hardware and Software Guide 1-5 Off: If the notebook is ...battery condition. Green: A battery pack is charging. If the notebook is not connected to an external power source, the light is on . Component 4 Battery light 5 IDE drive light 6 Num lock light 7 Caps lock light Notebook Features Description Amber: A battery pack is close to full charge...
... The hard drive or optical drive (select models only) is the only available power source has reached a low-battery condition. When the battery reaches a critical low-battery condition, the battery light begins blinking more quickly. Hardware and Software Guide 1-5 Off: If the notebook is ...battery condition. Green: A battery pack is charging. If the notebook is not connected to an external power source, the light is on . Component 4 Battery light 5 IDE drive light 6 Num lock light 7 Caps lock light Notebook Features Description Amber: A battery pack is close to full charge...

Hardware and Software Guide
Page 34
Connect the notebook to cool internal components. Ä To prevent overheating, do not obstruct vents. Using the notebook on a soft surface, such as a pillow, blanket, rug, or thick clothing, may block airflow. Notebook Features Component 5 Hard drive bay 6 Vents (4) 7 Docking connector Description Holds the hard drive. Enable airflow to an optional docking device. 1-24 Hardware and Software Guide
Connect the notebook to cool internal components. Ä To prevent overheating, do not obstruct vents. Using the notebook on a soft surface, such as a pillow, blanket, rug, or thick clothing, may block airflow. Notebook Features Component 5 Hard drive bay 6 Vents (4) 7 Docking connector Description Holds the hard drive. Enable airflow to an optional docking device. 1-24 Hardware and Software Guide

Hardware and Software Guide
Page 35
... battery pack from the battery bay. Hardware and Software Guide 1-25 Enable airflow to cool internal components. Ä To prevent overheating, do not obstruct vents. Notebook Features Component 1 Primary battery bay 2 Primary battery release latches (2) 3 Travel battery connector 4 Expansion memory module compartment 5 Hard drive bay 6 Vents (4) Description Holds the primary battery pack.
... battery pack from the battery bay. Hardware and Software Guide 1-25 Enable airflow to cool internal components. Ä To prevent overheating, do not obstruct vents. Notebook Features Component 1 Primary battery bay 2 Primary battery release latches (2) 3 Travel battery connector 4 Expansion memory module compartment 5 Hard drive bay 6 Vents (4) Description Holds the primary battery pack.

Hardware and Software Guide
Page 43
...is not displayed as an option if it in hibernation: ■ Do not dock the notebook or undock the notebook from hibernation, your work while power is on the hard drive, and then shuts down the notebook. Use Power Options in the System hibernates list. 2-6 Hardware and Software Guide Make sure... that the Enable hibernation check box is in the Power Options window. Click one of the notebook is disabled and the system reaches...
...is not displayed as an option if it in hibernation: ■ Do not dock the notebook or undock the notebook from hibernation, your work while power is on the hard drive, and then shuts down the notebook. Use Power Options in the System hibernates list. 2-6 Hardware and Software Guide Make sure... that the Enable hibernation check box is in the Power Options window. Click one of the notebook is disabled and the system reaches...

Hardware and Software Guide
Page 44
... you resume from external power for an extended period. For details on . When the notebook is in standby or hibernation. Hardware and Software Guide 2-7 Your work to the hard drive. Power Initiating Standby, Hibernation or Shutdown The following sections explain when to initiate standby or... hibernation and when to shut down the notebook and removing the battery pack is recommended to extend the life...
... you resume from external power for an extended period. For details on . When the notebook is in standby or hibernation. Hardware and Software Guide 2-7 Your work to the hard drive. Power Initiating Standby, Hibernation or Shutdown The following sections explain when to initiate standby or... hibernation and when to shut down the notebook and removing the battery pack is recommended to extend the life...

Hardware and Software Guide
Page 53
... Click Apply. To set a power scheme: 1. You can also set a power scheme that initiates standby or turns off the display or hard drive after a time interval that prompts you for password when computer resumes from hibernation. Click the Power Schemes tab. 3. Using a Security Password You...notification area, and then click Adjust Power Properties. 2. Click the Advanced tab. 3. You can assign different schemes depending on whether the notebook is turned on, resumes from standby, or restores from standby check box. 4. For more information about using security passwords, refer to ...
... Click Apply. To set a power scheme: 1. You can also set a power scheme that initiates standby or turns off the display or hard drive after a time interval that prompts you for password when computer resumes from hibernation. Click the Power Schemes tab. 3. Using a Security Password You...notification area, and then click Adjust Power Properties. 2. Click the Advanced tab. 3. You can assign different schemes depending on whether the notebook is turned on, resumes from standby, or restores from standby check box. 4. For more information about using security passwords, refer to ...

Hardware and Software Guide
Page 67
... performance from your system during the discharge process: ❏ The monitor will not turn off automatically. ❏ Hard drive speed will not decrease automatically while the notebook is being discharged. To disable hibernation: 1. Select Apply. The notebook must remain on while the battery pack is idle. ❏ System-initiated standby will not occur. 2-30...
... performance from your system during the discharge process: ❏ The monitor will not turn off automatically. ❏ Hard drive speed will not decrease automatically while the notebook is being discharged. To disable hibernation: 1. Select Apply. The notebook must remain on while the battery pack is idle. ❏ System-initiated standby will not occur. 2-30...

Hardware and Software Guide
Page 100
... displayed when you must change the region setting on creating data and audio CDs and DVDs, refer to a hard drive, and create personalized audio CDs. DVD region settings can be used to create backups of data or audio CDs or DVDs, transfer audio files from ... or through some DVD players. capabilities and instruction on your DVD drive. If the region code on a DVD does not match the region setting on your drive, a "Playback Of Content From This Region Is Not Permitted" message is preinstalled on your notebook. RecordNow! Hardware and Software Guide 4-13 can play the DVD, ...
... displayed when you must change the region setting on creating data and audio CDs and DVDs, refer to a hard drive, and create personalized audio CDs. DVD region settings can be used to create backups of data or audio CDs or DVDs, transfer audio files from ... or through some DVD players. capabilities and instruction on your DVD drive. If the region code on a DVD does not match the region setting on your drive, a "Playback Of Content From This Region Is Not Permitted" message is preinstalled on your notebook. RecordNow! Hardware and Software Guide 4-13 can play the DVD, ...

Hardware and Software Guide
Page 112
Caring for Drives Drives are included with care. Hardware and Software Guide 5-1 5 Hardware Components Drives The following cautions apply to all drives. The following sections identify and describe the hard drive, and explain how to use hard drives and optical disc drives (select models only). Additional cautions are fragile notebook components that must be handled with the procedures to which they apply.
Caring for Drives Drives are included with care. Hardware and Software Guide 5-1 5 Hardware Components Drives The following cautions apply to all drives. The following sections identify and describe the hard drive, and explain how to use hard drives and optical disc drives (select models only). Additional cautions are fragile notebook components that must be handled with the procedures to which they apply.

Hardware and Software Guide
Page 113
... of power, ensure that check carry-on luggage, such as conveyor belts, use excessive force when inserting a drive into a drive bay. ■ Do not type on the keyboard or move a notebook or external hard drive from the drive bay, or traveling with magnetic fields include airport walk-through the operating system. ■ Do not use x-rays...
... of power, ensure that check carry-on luggage, such as conveyor belts, use excessive force when inserting a drive into a drive bay. ■ Do not type on the keyboard or move a notebook or external hard drive from the drive bay, or traveling with magnetic fields include airport walk-through the operating system. ■ Do not use x-rays...

Hardware and Software Guide
Page 114
... information about connecting a USB drive, refer to a USB port on the notebook or optional docking device (select models only). The notebook has 2 drive bays: ■ The hard drive bay supports only a hard drive. ■ The optical drive (select models only) supports the following optical devices: ❏ CD-ROM drive ❏ DVD-ROM drive ❏ DVD/CD-RW Combo drive ❏ DVD±...
... information about connecting a USB drive, refer to a USB port on the notebook or optional docking device (select models only). The notebook has 2 drive bays: ■ The hard drive bay supports only a hard drive. ■ The optical drive (select models only) supports the following optical devices: ❏ CD-ROM drive ❏ DVD-ROM drive ❏ DVD/CD-RW Combo drive ❏ DVD±...

Hardware and Software Guide
Page 115
Hardware Components Identifying the IDE Drive Light The IDE drive light blinks when either the hard drive or optical drive (select models only) is being accessed. ✎ Your notebook may look slightly different from the illustration in this section. 5-4 Hardware and Software Guide
Hardware Components Identifying the IDE Drive Light The IDE drive light blinks when either the hard drive or optical drive (select models only) is being accessed. ✎ Your notebook may look slightly different from the illustration in this section. 5-4 Hardware and Software Guide

Hardware and Software Guide
Page 116
To remove the hard drive: 1. Lift the hard drive cover away from the hard drive bay. Hardware and Software Guide 5-5 Do not remove the hard drive while the notebook is on, in standby, or in hibernation, turn the notebook on by pressing the power/standby button. Save your work. 2. Hardware Components Replacing the Hard Drive Ä CAUTION: To prevent system lockup and loss...
To remove the hard drive: 1. Lift the hard drive cover away from the hard drive bay. Hardware and Software Guide 5-5 Do not remove the hard drive while the notebook is on, in standby, or in hibernation, turn the notebook on by pressing the power/standby button. Save your work. 2. Hardware Components Replacing the Hard Drive Ä CAUTION: To prevent system lockup and loss...

Hardware and Software Guide
Page 117
Pull the hard drive tab 2 to the right to disconnect the hard drive. 8. Lift the hard drive 3 from the notebook. 5-6 Hardware and Software Guide Loosen the hard drive screw 1. 7. Hardware Components 6.
Pull the hard drive tab 2 to the right to disconnect the hard drive. 8. Lift the hard drive 3 from the notebook. 5-6 Hardware and Software Guide Loosen the hard drive screw 1. 7. Hardware Components 6.

Hardware and Software Guide
Page 118
Hardware and Software Guide 5-7 Pull the hard drive tab 2 to the left to connect the hard drive. 3. Hardware Components To install a hard drive: 1. Insert the hard drive into the hard drive bay on the bottom of the notebook 1. 2. Tighten the hard drive screw 3.
Hardware and Software Guide 5-7 Pull the hard drive tab 2 to the left to connect the hard drive. 3. Hardware Components To install a hard drive: 1. Insert the hard drive into the hard drive bay on the bottom of the notebook 1. 2. Tighten the hard drive screw 3.

Hardware and Software Guide
Page 119
Close the cover 2. 6. Tighten the hard drive cover screws 3. 5-8 Hardware and Software Guide Align the tab 1 on the hard drive cover on the notebook. 5. Hardware Components 4.
Close the cover 2. 6. Tighten the hard drive cover screws 3. 5-8 Hardware and Software Guide Align the tab 1 on the hard drive cover on the notebook. 5. Hardware Components 4.

