HP Notebook Reference Guide - Windows 7
Page 32
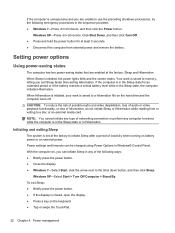
..., the power lights blink and the screen clears. Windows XP-Select Start > Turn Off Computer > Stand By. Initiating and exiting Sleep The system is set at the factory: Sleep and Hibernation. With the computer on external power. To exit Sleep: ● Briefly press the power button. ● If the display is closed, open the display. ● Press a key on the hard drive and the computer turns off. Your work is saved to a disc or an external media card. Setting power options Using power-saving...
..., the power lights blink and the screen clears. Windows XP-Select Start > Turn Off Computer > Stand By. Initiating and exiting Sleep The system is set at the factory: Sleep and Hibernation. With the computer on external power. To exit Sleep: ● Briefly press the power button. ● If the display is closed, open the display. ● Press a key on the hard drive and the computer turns off. Your work is saved to a disc or an external media card. Setting power options Using power-saving...
HP Notebook Reference Guide - Windows 7
Page 52
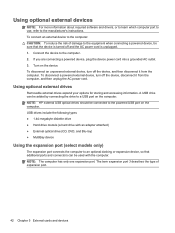
...: HP external USB optical drives should be connected to the computer: CAUTION: To reduce the risk of expansion port. 42 Chapter 5 External cards and devices USB drives include the following types: ● 1.44-megabyte diskette drive ● Hard drive module (a hard drive with the computer. If you are connecting a powered device, plug the device power cord into a grounded AC outlet. 3. To disconnect a powered external device, turn off and the AC power cord is unplugged. 1. To connect an external device to the powered USB port...
...: HP external USB optical drives should be connected to the computer: CAUTION: To reduce the risk of expansion port. 42 Chapter 5 External cards and devices USB drives include the following types: ● 1.44-megabyte diskette drive ● Hard drive module (a hard drive with the computer. If you are connecting a powered device, plug the device power cord into a grounded AC outlet. 3. To disconnect a powered external device, turn off and the AC power cord is unplugged. 1. To connect an external device to the powered USB port...
HP Notebook Reference Guide - Windows 7
Page 55
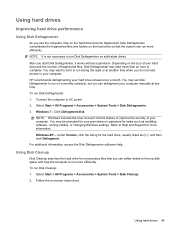
... files and folders on -screen instructions. NOTE: It is not necessary to Help and Support for the hard drive, usually listed as installing software, running utilities, or changing Windows settings. You may set it works without supervision. HP recommends defragmenting your hard drive at any time. You may want to set Disk Defragmenter to AC power. 2. Select Start > All Programs > Accessories > System Tools > Disk Defragmenter. 3. Under Volume, click the listing for more efficiently. Follow...
... files and folders on -screen instructions. NOTE: It is not necessary to Help and Support for the hard drive, usually listed as installing software, running utilities, or changing Windows settings. You may set it works without supervision. HP recommends defragmenting your hard drive at any time. You may want to set Disk Defragmenter to AC power. 2. Select Start > All Programs > Accessories > System Tools > Disk Defragmenter. 3. Under Volume, click the listing for more efficiently. Follow...
HP Notebook Reference Guide - Windows 7
Page 72
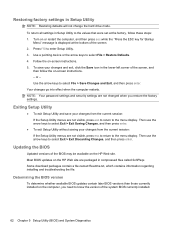
... information regarding installing and troubleshooting the file. Use a pointing device or the arrow keys to enter Setup Utility. 3. NOTE: Your password settings and security settings are not visible, press esc to return to the menu display. Updating the BIOS Updated versions of the screen. 2. Determining the BIOS version To determine whether available BIOS updates contain later BIOS versions than those currently installed on the computer, you restore the factory settings. To save your changes from the...
... information regarding installing and troubleshooting the file. Use a pointing device or the arrow keys to enter Setup Utility. 3. NOTE: Your password settings and security settings are not visible, press esc to return to the menu display. Updating the BIOS Updated versions of the screen. 2. Determining the BIOS version To determine whether available BIOS updates contain later BIOS versions than those currently installed on the computer, you restore the factory settings. To save your changes from the...
HP Notebook Reference Guide - Windows 7
Page 73
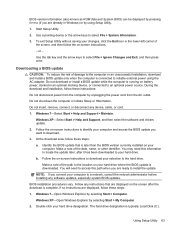
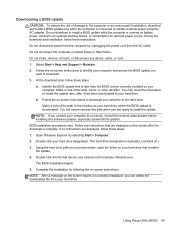
... an optional power source. b. BIOS installation procedures vary. Follow any device, cable, or cord. 1. Make a note of the screen, and then follow these steps: 1. Downloading a BIOS update CAUTION: To reduce the risk of the date, name, or other identifier. Windows XP-Select Start > Help and Support, and then select the software and drivers update. 2. Identify the BIOS update that are displayed on -screen instructions to download your hard drive. Windows XP-Open Windows Explorer by using the AC adapter. Windows 7-Select Start...
... an optional power source. b. BIOS installation procedures vary. Follow any device, cable, or cord. 1. Make a note of the screen, and then follow these steps: 1. Downloading a BIOS update CAUTION: To reduce the risk of the date, name, or other identifier. Windows XP-Select Start > Help and Support, and then select the software and drivers update. 2. Identify the BIOS update that are displayed on -screen instructions to download your hard drive. Windows XP-Open Windows Explorer by using the AC adapter. Windows 7-Select Start...
HP Mini 110 and Compaq Mini CQ10 User Guide Linux
Page 39
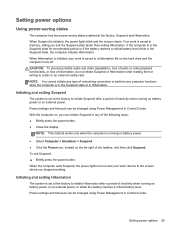
... your work is initiated, the power lights blink and the screen clears. Initiating and exiting Hibernation The system is in the Suspend state for an extended period or if the battery reaches a critical battery level while in Control Center. Setting power options 29 To exit Suspend: ▲ Briefly press the power button. Your work is set at the factory: Suspend and Hibernation. Power settings and timeouts can be changed using Power Management in...
... your work is initiated, the power lights blink and the screen clears. Initiating and exiting Hibernation The system is in the Suspend state for an extended period or if the battery reaches a critical battery level while in Control Center. Setting power options 29 To exit Suspend: ▲ Briefly press the power button. Your work is set at the factory: Suspend and Hibernation. Power settings and timeouts can be changed using Power Management in...

HP Mini 110 and Compaq Mini CQ10 User Guide Linux
Page 70
... instructions: Do not disconnect power from the computer by using the AC adapter. Access the page on the screen reports a successful installation, you want to your hard drive. 60 Chapter 12 Setup Utility (BIOS) and Advanced System Diagnostics Make a note of damage to the computer or an unsuccessful installation, download and install a BIOS update only when the computer is connected to select the Main menu. NOTE: After a message on the HP...
... instructions: Do not disconnect power from the computer by using the AC adapter. Access the page on the screen reports a successful installation, you want to your hard drive. 60 Chapter 12 Setup Utility (BIOS) and Advanced System Diagnostics Make a note of damage to the computer or an unsuccessful installation, download and install a BIOS update only when the computer is connected to select the Main menu. NOTE: After a message on the HP...
HP Mini 110 and Compaq Mini CQ10 User Guide Linux
Page 78
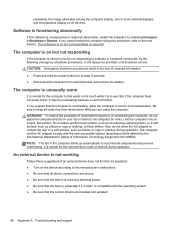
... drivers are installed and updated. 68 Appendix A Troubleshooting and support Be sure to contact the skin or a soft surface, such as pillows or rugs or clothing, during operation. To reduce the possibility of heat-related injuries or of overheating the computer, do not allow the AC adapter to keep all vents free from external power and remove the battery. An external device is not working...
... drivers are installed and updated. 68 Appendix A Troubleshooting and support Be sure to contact the skin or a soft surface, such as pillows or rugs or clothing, during operation. To reduce the possibility of heat-related injuries or of overheating the computer, do not allow the AC adapter to keep all vents free from external power and remove the battery. An external device is not working...
HP Mini 110 and Compaq Mini CQ10 User Guide Linux
Page 88
...45 optional external devices, using 45 optional security cable 53 P passwords set in operating system 50 set in Setup Utility 50 pinching TouchPad gesture 24 ports external monitor 9 USB 8, 9, 43 power button, identifying 5 power connector, identifying 9 power light, identifying 4 power, conserving 34 power-on password creating 51 entering 52 managing 51 product name and number, computer 71 public WLAN connection 14 PXE server 63 R readable media 29 recovery 54 regulatory information regulatory label 71 wireless certification labels 71 right TouchPad button, identifying 3 RJ-45 (network) jack...
...45 optional external devices, using 45 optional security cable 53 P passwords set in operating system 50 set in Setup Utility 50 pinching TouchPad gesture 24 ports external monitor 9 USB 8, 9, 43 power button, identifying 5 power connector, identifying 9 power light, identifying 4 power, conserving 34 power-on password creating 51 entering 52 managing 51 product name and number, computer 71 public WLAN connection 14 PXE server 63 R readable media 29 recovery 54 regulatory information regulatory label 71 wireless certification labels 71 right TouchPad button, identifying 3 RJ-45 (network) jack...

HP Notebook Reference Guide - Windows 7
Page 44
... the cable to the manufacturer's instructions. To remove an eSATA device, save your options for storing and accessing information. Using optional external devices NOTE: For more information about required software and drivers, or to learn which computer port to use the following types: ● 1.44-megabyte diskette drive ● Hard drive module (a hard drive with an adapter attached) ● External optical drive (CD, DVD, and Blu-ray) ● MultiBay device Using the expansion port (select models only) The expansion port connects...
... the cable to the manufacturer's instructions. To remove an eSATA device, save your options for storing and accessing information. Using optional external devices NOTE: For more information about required software and drivers, or to learn which computer port to use the following types: ● 1.44-megabyte diskette drive ● Hard drive module (a hard drive with an adapter attached) ● External optical drive (CD, DVD, and Blu-ray) ● MultiBay device Using the expansion port (select models only) The expansion port connects...
HP Notebook Reference Guide - Windows 7
Page 47
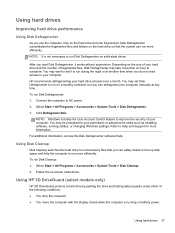
... can safely delete to free up disk space and help the computer to run during the night or at any time. Using Disk Cleanup Disk Cleanup searches the hard drive for more efficiently. Using hard drives Improving hard drive performance Using Disk Defragmenter As you use the computer, files on -screen instructions. HP recommends defragmenting your permission or password for your hard drive at least once a month. NOTE: It is running utilities, or changing Windows settings...
... can safely delete to free up disk space and help the computer to run during the night or at any time. Using Disk Cleanup Disk Cleanup searches the hard drive for more efficiently. Using hard drives Improving hard drive performance Using Disk Defragmenter As you use the computer, files on -screen instructions. HP recommends defragmenting your permission or password for your hard drive at least once a month. NOTE: It is running utilities, or changing Windows settings...
HP Notebook Reference Guide - Windows 7
Page 55
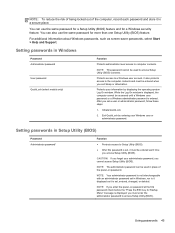
You can use the same password for more than one Setup Utility (BIOS) feature. You can be entered each password and store it is it displayed as screen-saver passwords, select Start > Help and Support. Setting passwords in Windows, nor is set a user or administrator password, follow these steps: 1. Protects access to access Setup Utility (BIOS). Protects your information by entering your administrator password, you cannot access Setup Utility (BIOS). After you access Setup Utility (BIOS). NOTE: Your administrator password is not interchangeable with an...
You can use the same password for more than one Setup Utility (BIOS) feature. You can be entered each password and store it is it displayed as screen-saver passwords, select Start > Help and Support. Setting passwords in Windows, nor is set a user or administrator password, follow these steps: 1. Protects access to access Setup Utility (BIOS). Protects your information by entering your administrator password, you cannot access Setup Utility (BIOS). After you access Setup Utility (BIOS). NOTE: Your administrator password is not interchangeable with an...
HP Notebook Reference Guide - Windows 7
Page 63
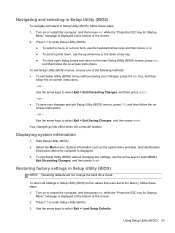
... - Restoring factory settings in Setup Utility (BIOS) to the values that were set at the factory, follow these steps: 1. Start Setup Utility (BIOS). 2. Press f10 to enter Setup Utility (BIOS). ● To select a menu or a menu item, use the keyboard arrow keys and then press enter. ● To scroll up arrow key or the down , use the arrow keys to select Exit > Exit Discarding Changes, and then press enter. - Your changes go into effect when the computer restarts. Turn on -screen instructions. Use...
... - Restoring factory settings in Setup Utility (BIOS) to the values that were set at the factory, follow these steps: 1. Start Setup Utility (BIOS). 2. Press f10 to enter Setup Utility (BIOS). ● To select a menu or a menu item, use the keyboard arrow keys and then press enter. ● To scroll up arrow key or the down , use the arrow keys to select Exit > Exit Discarding Changes, and then press enter. - Your changes go into effect when the computer restarts. Turn on -screen instructions. Use...
HP Notebook Reference Guide - Windows 7
Page 65
... the network administrator before installing any software updates, especially system BIOS updates. Select Start > Help and Support > Maintain. 2. You may need to access this information to locate the update later, after the download is complete. The hard drive designation is typically Local Disk (C:). 3. Using Setup Utility (BIOS) 55 Make a note of the path to reliable external power using the AC adapter. NOTE: After a message on -screen instructions. Follow the on-screen instructions to download your selection to your hard drive. b. Follow any device, cable...
... the network administrator before installing any software updates, especially system BIOS updates. Select Start > Help and Support > Maintain. 2. You may need to access this information to locate the update later, after the download is complete. The hard drive designation is typically Local Disk (C:). 3. Using Setup Utility (BIOS) 55 Make a note of the path to reliable external power using the AC adapter. NOTE: After a message on -screen instructions. Follow the on-screen instructions to download your selection to your hard drive. b. Follow any device, cable...
Getting Started Mini - Windows 7
Page 11
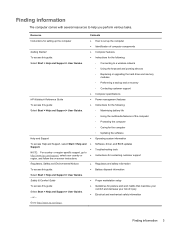
... Support > User Guides. ◦ Connecting to help you perform various tasks. Finding information The computer comes with several resources to a wireless network ◦ Using the keyboard and pointing devices ◦ Replacing or upgrading the hard drive and memory modules ◦ Performing a backup and a recovery ◦ Contacting customer support ● Computer specifications HP Notebook Reference Guide ● Power management features To access this guide: ● Instructions for the following: Select Start > Help and Support > User Guides. ◦ Maximizing battery...
... Support > User Guides. ◦ Connecting to help you perform various tasks. Finding information The computer comes with several resources to a wireless network ◦ Using the keyboard and pointing devices ◦ Replacing or upgrading the hard drive and memory modules ◦ Performing a backup and a recovery ◦ Contacting customer support ● Computer specifications HP Notebook Reference Guide ● Power management features To access this guide: ● Instructions for the following: Select Start > Help and Support > User Guides. ◦ Maximizing battery...
Getting Started Mini - Windows 7
Page 33
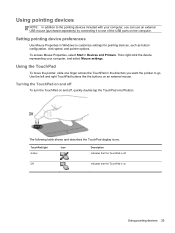
... the TouchPad display icons. Use the left and right TouchPad buttons like the buttons on . Using pointing devices 25 Off Indicates that the TouchPad is on an external mouse. TouchPad light Amber Icon Description Indicates that the TouchPad is off , quickly double-tap the TouchPad on the computer. Setting pointing device preferences Use Mouse Properties in the direction you can use an external USB mouse (purchased separately) by connecting it to one finger across the TouchPad in Windows to...
... the TouchPad display icons. Use the left and right TouchPad buttons like the buttons on . Using pointing devices 25 Off Indicates that the TouchPad is on an external mouse. TouchPad light Amber Icon Description Indicates that the TouchPad is off , quickly double-tap the TouchPad on the computer. Setting pointing device preferences Use Mouse Properties in the direction you can use an external USB mouse (purchased separately) by connecting it to one finger across the TouchPad in Windows to...
HP Mini 210, HP Mini 110, and Compaq Mini CQ10 Maintenance and Service Guide
Page 13
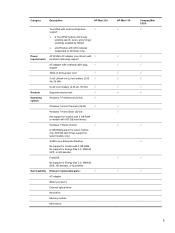
... End-user replaceable parts: √ AC adapter Battery (system) External optical drive Hard drive Memory module Mini-sleeve HP Mini 110 √ √ √ Compaq Mini CQ10 √ √ √ √ √ 5 Category Description HP Mini 210 TouchPad with multi-touch/gesture √ support: ● 2 TouchPad buttons and 2-way scrolling (pinch, zoom, and 2-finger scrolling) enabled by default ● on/off button with LED indicator (supported on Windows only) Power 40 W UMA AC adapter (non-Smart) with √ requirements localized cable plug support AC...
... End-user replaceable parts: √ AC adapter Battery (system) External optical drive Hard drive Memory module Mini-sleeve HP Mini 110 √ √ √ Compaq Mini CQ10 √ √ √ √ √ 5 Category Description HP Mini 210 TouchPad with multi-touch/gesture √ support: ● 2 TouchPad buttons and 2-way scrolling (pinch, zoom, and 2-finger scrolling) enabled by default ● on/off button with LED indicator (supported on Windows only) Power 40 W UMA AC adapter (non-Smart) with √ requirements localized cable plug support AC...
HP Mini 210, HP Mini 110, and Compaq Mini CQ10 Maintenance and Service Guide
Page 102
... covers removing 64 spare part numbers 64 display hinge kit spare part numbers 25, 35 display panel removing 66 spare part numbers 26, 35, 66 display/webcam cable removing 66 spare part number 66 spare part numbers 26 drive light, identifying 12 drives, preventing damage 39 DVD drive spare part numbers 29, 36 E electrostatic discharge 40 Ethernet, product description 3 exiting Setup Utility 77 external media cards, product description 4 external monitor port 12 F f11 85 Fan and sink removal 70 spare part numbers 70 fan, spare part number 23, 32 feet locations 43 spare part number...
... covers removing 64 spare part numbers 64 display hinge kit spare part numbers 25, 35 display panel removing 66 spare part numbers 26, 35, 66 display/webcam cable removing 66 spare part number 66 spare part numbers 26 drive light, identifying 12 drives, preventing damage 39 DVD drive spare part numbers 29, 36 E electrostatic discharge 40 Ethernet, product description 3 exiting Setup Utility 77 external media cards, product description 4 external monitor port 12 F f11 85 Fan and sink removal 70 spare part numbers 70 fan, spare part number 23, 32 feet locations 43 spare part number...
HP Mini 210, HP Mini 110, and Compaq Mini CQ10 Maintenance and Service Guide
Page 103
... (network) 11 K keyboard product description 4 removal 53 spare part numbers 18, 30, 31, 32, 33, 34, 35, 36, 53 keyboard for HP Mini 110 and Compaq Mini CQ10 spare part numbers 18, 21 keys action 10 fn 10 operating system applications key 10 operating system logo 10 Windows applications 10 Windows logo 10 L language 78 latches battery/service door 14 service door 14 lights AC adapter 12 caps lock 8 hard drive 12 mute 8 power 8 TouchPad 7 webcam 13 wireless 8 M Main Menu, Setup Utility 77...
... (network) 11 K keyboard product description 4 removal 53 spare part numbers 18, 30, 31, 32, 33, 34, 35, 36, 53 keyboard for HP Mini 110 and Compaq Mini CQ10 spare part numbers 18, 21 keys action 10 fn 10 operating system applications key 10 operating system logo 10 Windows applications 10 Windows logo 10 L language 78 latches battery/service door 14 service door 14 lights AC adapter 12 caps lock 8 hard drive 12 mute 8 power 8 TouchPad 7 webcam 13 wireless 8 M Main Menu, Setup Utility 77...
HP Mini 210, HP Mini 110, and Compaq Mini CQ10 Maintenance and Service Guide
Page 104
... 7 TouchPad zone, identifying 7 transporting guidelines 41 U USB ports, identifying 11, 12 using Setup Utility 75 using system restore 87 V vents, identifying 12 video, product description 3 W webcam light, identifying 13 webcam module removing 65 spare part number 26, 65 webcam, identifying 13 Windows applications key, identifying 10 Windows logo key, identifying 10 wireless button, identifying 11 wireless light, identifying 8 wireless module, product description 3 WLAN module removal 46 spare part numbers 23, 29, 30, 46 workstation guidelines 41 WSVGA LED AntiGlare flush glass display...
... 7 TouchPad zone, identifying 7 transporting guidelines 41 U USB ports, identifying 11, 12 using Setup Utility 75 using system restore 87 V vents, identifying 12 video, product description 3 W webcam light, identifying 13 webcam module removing 65 spare part number 26, 65 webcam, identifying 13 Windows applications key, identifying 10 Windows logo key, identifying 10 wireless button, identifying 11 wireless light, identifying 8 wireless module, product description 3 WLAN module removal 46 spare part numbers 23, 29, 30, 46 workstation guidelines 41 WSVGA LED AntiGlare flush glass display...


