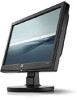
User's Guide cq1569, lv1561w, lv1561ws LCD Display
Page 5
... Base ...4 Identifying Rear Components ...5 Connecting the Cables ...6 Mounting the Monitor ...7 Locating the Rating Labels ...9 4 Operating the Monitor Installing the Driver ...10 Installing from the CD ...10 Downloading from the Worldwide Web 10 Setting the Optimal Resolution ...11 Front Panel Controls ...11 Adjusting the Monitor Settings ...12 OSD Menu Selections ...13 Using the Auto-Adjustment Function 15 Using the Auto-Adjustment Pattern Software (Select Models 16 Appendix A Troubleshooting Solving Common Problems ...17 Using the Worldwide Web ...18 Preparing to Call Technical Support...
User's Guide cq1569, lv1561w, lv1561ws LCD Display
Page 7
...-screen support for lower resolutions ● Wide viewing angle to allow viewing from a sitting or standing position, or moving side-to-side ● Tilt capability ● Video signal input to support VGA analog with VGA signal cable provided ● Removable base and VESA 75mm mounting holes for flexible monitor panel mounting solutions ● Built-in stereo speakers with audio cable provided (select models) ● Plug and play capability if supported by the system ● On-Screen Display (OSD) adjustments in several languages for easy setup and screen optimization ● Software...
User's Guide cq1569, lv1561w, lv1561ws LCD Display
Page 8
... and its peripheral devices (such as having this monitor. To reduce the risk of serious injury, read the Safety and Comfort Guide. Not all power strips provide surge protection; Do not pull on power cords or cables. This guide is located on the correct power cord set to use only a power source and connection appropriate for computer users, and provides important electrical and mechanical safety...
User's Guide cq1569, lv1561w, lv1561ws LCD Display
Page 9
... an authorized HP dealer, reseller, or service provider. ● Use only a power source and connection appropriate for ventilation. Never disconnect the monitor by using a screen saver program and turning off the monitor and the computer. 2. These chemicals may need it from the wall outlet. 3. Cleaning the Monitor 1. Maintenance Guidelines To enhance the performance and extend the life of the monitor: ● Do not open the monitor cabinet or...
User's Guide cq1569, lv1561w, lv1561ws LCD Display
Page 10
.... Figure 3-1 Inserting the Monitor into the Pedestal Base 4 Chapter 3 Setting Up the Monitor ENWW NOTE: Do not install the base if the monitor will make a clicking sound. instead see Mounting the Monitor on a wall, swing arm, or other attached devices, then follow the instructions below. Align the pedestal column on a smooth, flat surface. 2. NOTE: Be sure the pedestal base is turned off to install. 3. Press down to...
User's Guide cq1569, lv1561w, lv1561ws LCD Display
Page 12
... not disable the power cord grounding plug. NOTE: Do not touch the LCD screen when you change the angle. Connect one may cause damage or break the LCD screen. Connect the power cable to the AC power connector on power cords or cables. Adjust the monitor as needed for your comfort using the monitor's tilt adjustment capability. ● For optimal viewing it is easily accessible at the full face of the monitor, then adjust the monitor's angle to 20°. Connecting the Cables...
User's Guide cq1569, lv1561w, lv1561ws LCD Display
Page 13
... apart and are required. It is important to verify that the bottom of the monitor display panel. Mounting the Monitor You can remove the monitor base to support the weight of the monitor base is rated to mount the monitor on all LCD screens. Lay the monitor face down on a soft area to the monitor, four 4 mm, 0.7 pitch, and 10 mm long screws are compliant with the VESA standard and is positioned...
User's Guide cq1569, lv1561w, lv1561ws LCD Display
Page 16
... resolution and refresh rates appear in the computer CD-ROM drive. Downloading from the HP monitors support Web site: 1. Select the language. 3. Refer to http://www.hp.com/support and select the country region. 2. Follow the on the computer from the Internet. Ensure the system meets the requirements. 5. Insert the CD in the Windows Display control panel. View the Monitor Driver Software Readme file. 4. Enter the model number of the monitor...
User's Guide cq1569, lv1561w, lv1561ws LCD Display
Page 17
... OSD menu or change the setting of a selected function; Under Appearance and Personalization, select Adjust Screen Resolution. 3. ENWW Setting the Optimal Resolution 11 Front Panel Controls The front panel control buttons lets you adjust the monitor's picture settings to this monitor is open , press - adjusts volume (for models with speakers). 3 + (Plus) When the OSD is closed , press to activate the volume adjustment bar. To configure the monitor to your personal preferences. Set the resolution slide bar to select the menu. Click the Windows Start button...
User's Guide cq1569, lv1561w, lv1561ws LCD Display
Page 18
... Panel Controls (continued) Control Function 4 Menu Press to select another function in order to optimize the screen image. 12 Chapter 4 Operating the Monitor ENWW or + button to open the OSD window. 5 Power Turns the monitor on , press the power button to select the highlighted function. To access the OSD and adjust screen settings base on the monitor. To access the OSD menu, press the Menu button. 3. or + button to adjust any other function, repeat steps 3-4. If you want to change...
User's Guide cq1569, lv1561w, lv1561ws LCD Display
Page 19
... of characters. Selects the screen color. ENWW Adjusting the Monitor Settings 13 Changes to slightly reddish white. This adjustment allows you to remove any vertical bars or strips visible on the screen background. Changes to slightly blueish white. Selects and adjusts your own color scales: ● R-sets your own red color levels ● G-sets your own green color levels ● B-sets your own blue color levels Selects viewing mode. Horizontal Position Adjusts the position of the screen image up and down. Select...
User's Guide cq1569, lv1561w, lv1561ws LCD Display
Page 20
... ● Off Mode Display Displays the resolution, refresh rate and frequency information on page 20). Select the location to display the status to: ● Top ● Middle ● Bottom ● Off DDC/CI Support Allows the computer to : ● On ● Off Bezel Power LED Turns the light (LED) in the power button On and Off. The factory default range is 50. ● Vertical OSD Position-Changes the viewing position of the OSD menu to the left...
User's Guide cq1569, lv1561w, lv1561ws LCD Display
Page 21
...; An off-center picture To use the auto-adjustment feature: 1. The default setting is needed if contacting HP technical support. Recommended Settings Provides the recommended resolution mode and refresh rate for the VGA (analog) input by Auto-Adjustment. ENWW Adjusting the Monitor Settings 15 Returns settings to http://www.hp.com/support. The serial number is Off ● Sleep Now-immediately sets the monitor to open the OSD window, then select the Image Control, followed by using the Auto/OK button on the monitor. Allow the monitor to place the...
User's Guide cq1569, lv1561w, lv1561ws LCD Display
Page 23
... check the monitor's video cable and make sure none of the pins are using an extension cable or switch box. Be sure to press the power button to the computer. ● Inspect the monitor's video cable and make sure none of the pins are available at the resolution your are bent Screen image may need a Plug & Play compatible computer & video card. Problem Power LED is stuck in its slot. ● Make sure the monitor's video cable is properly connected to turn...
User's Guide cq1569, lv1561w, lv1561ws LCD Display
Page 24
... forums of the monitor. 18 Appendix A Troubleshooting ENWW none of the primary colors (Red, The video cable or video card Inspect the monitor's video cable and make sure that Green, or Blue). Adjust RGB color or select Custom Color from the OSD menu or press the Auto/OK button on the front panel to call : ● Monitor model number ● Monitor serial number ● Purchase date on the front panel to the computer. Problem Possible Cause Solution while observing the Caps Lock LED.
User's Guide cq1569, lv1561w, lv1561ws LCD Display
Page 25
... Height (with base) 304.7 mm 11.99 inches Depth 190 mm 7.48 inches Width 376.3 mm 14.81 inches Maximum Preset Resolution 1366 x 768 (60 Hz) Optimal Preset Resolution 1366 x 768 (60 Hz) Pixel Clock 140 MHz Plug & Play VESA DDC2B/CI Input Connector D-Sub 15pin Input Video Signal Analog: 0.7Vp-p (standard), 75 OHM, Positive Connector Type 15-pin Mini D-Sub Signal Cable Type Detachable Horizontal scan range 24 kHz - 83 kHz Horizontal scan Size...
User's Guide cq1569, lv1561w, lv1561ws LCD Display
Page 26
... memory. This monitor automatically recognizes these modes and saved in its normal operating mode, the monitor uses less than 28 watts and the Power light is not preset if: ● You are not using a standard graphics adapter. ● You are set as it does a preset mode. Recognizing Preset Display Resolutions The display resolutions listed below are the most commonly used modes and are not using a preset mode. Table B-1 HP 15.6" LCD Monitors (continued...
User's Guide cq1569, lv1561w, lv1561ws LCD Display
Page 27
..., the power light blinks amber. By selecting the settings in the reduced-power state, the monitor screen is blank, the backlight is off, and the Power light is a bi-directional data channel based on the level of its identity and, depending on the I2C protocol. The monitor uses minimum power. The energy-saving reduced power state activates if the monitor does not detect either the horizontal sync signal or the vertical sync signal.
User's Guide cq1569, lv1561w, lv1561ws LCD Display
Page 30
... than the voltage and current rating marked on any other products. 24 Appendix C Agency Regulatory Notices ENWW If you need to be walked on input voltages between 6 feet (1.8 m) and 12 feet (3.6 m). Japanese Notice Korean Notice Power Cord Set Requirements The monitor power supply is not likely to obtain a power cord for use , contact an authorized HP service provider. A power cord should purchase a power cord that is approved for...
User's Guide cq1569, lv1561w, lv1561ws LCD Display
Page 33
... mode at a supported resolution and refresh rate, from a distance of approximately 50 cm (20 in products supplied by one or more visible of one red, one green, and one blue sub-pixel. ● A defective whole pixel is always turned on (a bright spot on a bright background). D LCD Monitor Quality and Pixel Policy The TFT monitor uses high-precision technology, manufactured according to HP standards, to produce LCDs with fewer cosmetic imperfections and HP will adjust...