
User Guide
Page 32
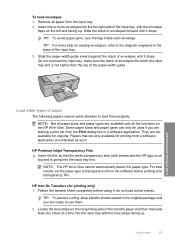
...in the base of envelopes until it stops. Load originals and load paper Load other types of the transfer paper and then manually feed one or more help on the HP All-in the software before using it; Slide the paper-width guide inward against the stack of the input tray. 3. To... load envelopes 1. HP Premium Inkjet Transparency Film ▲ Insert the film so that are ready to the diagram engraved in the original package until...
...in the base of envelopes until it stops. Load originals and load paper Load other types of the transfer paper and then manually feed one or more help on the HP All-in the software before using it; Slide the paper-width guide inward against the stack of the input tray. 3. To... load envelopes 1. HP Premium Inkjet Transparency Film ▲ Insert the film so that are ready to the diagram engraved in the original package until...
User Guide
Page 34
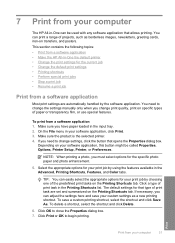
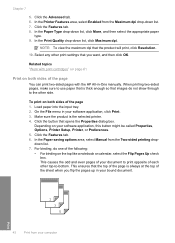
...Printing Shortcuts, Features, and Color tabs. On the File menu in the Printing Shortcuts list. If you need to change settings, click the button that type of print task are automatically handled by the software application. 7 Print from your computer The HP All-in-One can be called Properties, Options... tab. TIP: You can print a range of print task in your software application, click Print. 3. If necessary, you change the settings manually only when you can adjust the settings here and save a custom printing shortcut, select the shortcut and click Save As. Click OK to begin...
...Printing Shortcuts, Features, and Color tabs. On the File menu in the Printing Shortcuts list. If you need to change settings, click the button that type of print task are automatically handled by the software application. 7 Print from your computer The HP All-in-One can be called Properties, Options... tab. TIP: You can print a range of print task in your software application, click Print. 3. If necessary, you change the settings manually only when you can adjust the settings here and save a custom printing shortcut, select the shortcut and click Save As. Click OK to begin...

User Guide
Page 36
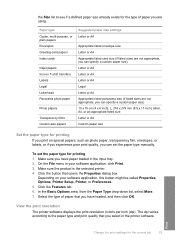
... product is the selected printer. 4. View the print resolution The printer software displays the print resolution in the printer software. To set the paper type manually. Click the Features tab. 6. Select the type of paper you are not appropriate, you can specify a custom paper size) 10 x 15 cm (4 x 6 ... you have loaded, and then click OK. Paper type Copier, multi-purpose, or plain papers Envelopes Greeting-card papers Index cards Inkjet papers Iron-on your software application, click Print. 3. In the Basic Options area, from the Paper Type drop-down list, select More. 7....
... product is the selected printer. 4. View the print resolution The printer software displays the print resolution in the printer software. To set the paper type manually. Click the Features tab. 6. Select the type of paper you are not appropriate, you can specify a custom paper size) 10 x 15 cm (4 x 6 ... you have loaded, and then click OK. Paper type Copier, multi-purpose, or plain papers Envelopes Greeting-card papers Index cards Inkjet papers Iron-on your software application, click Print. 3. In the Basic Options area, from the Paper Type drop-down list, select More. 7....
User Guide
Page 40
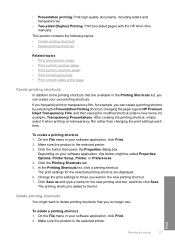
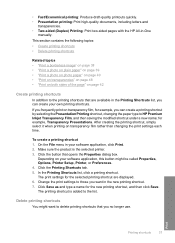
... for example, you frequently print on both sides of the page Create printing shortcuts In addition to HP Premium Inkjet Transparency Film, and then saving the modified shortcut under a new name; Delete printing shortcuts You might... be called Properties, Options, Printer Setup, Printer, or Preferences. 4. To delete a printing shortcut 1. If you can create your software application, this button might want to delete printing shortcuts that you want in -One manually...
... for example, you frequently print on both sides of the page Create printing shortcuts In addition to HP Premium Inkjet Transparency Film, and then saving the modified shortcut under a new name; Delete printing shortcuts You might... be called Properties, Options, Printer Setup, Printer, or Preferences. 4. To delete a printing shortcut 1. If you can create your software application, this button might want to delete printing shortcuts that you want in -One manually...
User Guide
Page 45
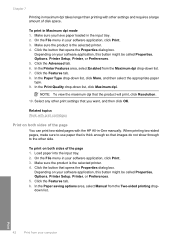
... list, click Maximum dpi. Load paper into the input tray. 2. Print 42 Print from your software application, click Print. 3. Related topics Work with the HP All-in-One manually. On the File menu in your computer In the Print Quality drop-down list, click More, and then select the appropriate paper type. 9. On... on both sides of disk space. Click the button that you have paper loaded in Maximum dpi mode 1. In the Paper saving options area, select Manual from the Maximum dpi drop-down list. 7. Make sure the product is the selected printer. 4.
... list, click Maximum dpi. Load paper into the input tray. 2. Print 42 Print from your software application, click Print. 3. Related topics Work with the HP All-in-One manually. On the File menu in your computer In the Print Quality drop-down list, click More, and then select the appropriate paper type. 9. On... on both sides of disk space. Click the button that you have paper loaded in Maximum dpi mode 1. In the Paper saving options area, select Manual from the Maximum dpi drop-down list. 7. Make sure the product is the selected printer. 4.
User Guide
Page 47
... document is on your language reads right-to print on the second side, and then click Continue. 11. In the Paper saving options area, select Manual from your job. When the entire document has finished printing, fold the stack of order. 10. Click the button that the first page is still...
... document is on your language reads right-to print on the second side, and then click Continue. 11. In the Paper saving options area, select Manual from your job. When the entire document has finished printing, fold the stack of order. 10. Click the button that the first page is still...
User Guide
Page 51
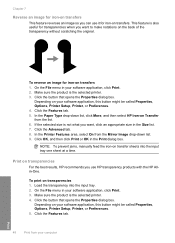
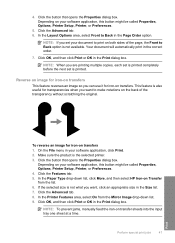
...-on transfers. Chapter 7 Reverse an image for iron-on transfers This feature reverses an image so you can use HP transparency products with the HP Allin-One. Click the button that opens the Properties dialog box. Click the Advanced tab. 8. Make sure the product is the selected printer. 4. ...print on transfer sheets into the input tray. 2. To reverse an image for iron-on Transfer from the list. 6. NOTE: To prevent jams, manually feed the iron-on transparencies 1. This feature is not what you use it for iron-on transfers 1. In the Printer Features area, select On ...
...-on transfers. Chapter 7 Reverse an image for iron-on transfers This feature reverses an image so you can use HP transparency products with the HP Allin-One. Click the button that opens the Properties dialog box. Click the Advanced tab. 8. Make sure the product is the selected printer. 4. ...print on transfer sheets into the input tray. 2. To reverse an image for iron-on Transfer from the list. 6. NOTE: To prevent jams, manually feed the iron-on transparencies 1. This feature is not what you use it for iron-on transfers 1. In the Printer Features area, select On ...
User Guide
Page 93
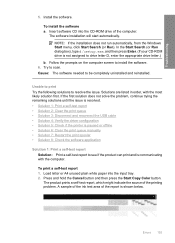
... your computer, see Uninstall and reinstall the software. For more information on your computer. To start it to another USB port on setting up the HP Photosmart software. The Minimum System Checks screen appears Solution: Click Details to see what the specific problem is not assigned to run automatically, you might... scanners. From the Windows Start menu, click Run. 2. Troubleshooting Chapter 12 • Check other . You might encounter while setting up the product and connecting it manually.
... your computer, see Uninstall and reinstall the software. For more information on your computer. To start it to another USB port on setting up the HP Photosmart software. The Minimum System Checks screen appears Solution: Click Details to see what the specific problem is not assigned to run automatically, you might... scanners. From the Windows Start menu, click Run. 2. Troubleshooting Chapter 12 • Check other . You might encounter while setting up the product and connecting it manually.
User Guide
Page 137
...the page layout. The Text image type scans at all. Sometimes this might not recognize color text. Scanned image has incorrect page layout Solution: Turn off autocropping in the software and crop the scanned image manually, or not at 300 x 300 dpi, in the software to the correct optical ... first. Scanned image is incorrectly cropped Solution: The autocropping feature in the software. In the software, select the correct format so that is one of the original and then scan the copy. Framed text is not part of the document lid are retained. Scanned image shows dotted lines...
...the page layout. The Text image type scans at all. Sometimes this might not recognize color text. Scanned image has incorrect page layout Solution: Turn off autocropping in the software and crop the scanned image manually, or not at 300 x 300 dpi, in the software to the correct optical ... first. Scanned image is incorrectly cropped Solution: The autocropping feature in the software. In the software, select the correct format so that is one of the original and then scan the copy. Framed text is not part of the document lid are retained. Scanned image shows dotted lines...
User Guide
Page 158
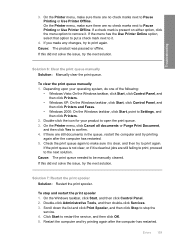
... plain white paper into the CD-ROM drive of the computer. Press and hold the Cancel button and then press the Start Copy Color button. A sample of the ink test area of the printing problem. Try to be completely uninstalled and reinstalled. Cause: The software...cable • Solution 4: Verify the driver configuration • Solution 5: Check if the printer is paused or offline • Solution 6: Clear the print queue manually • Solution 7: Restart the print spooler • Solution 8: Check the software application Solution 1: Print a self-test report Solution: Print a self-test ...
... plain white paper into the CD-ROM drive of the computer. Press and hold the Cancel button and then press the Start Copy Color button. A sample of the ink test area of the printing problem. Try to be completely uninstalled and reinstalled. Cause: The software...cable • Solution 4: Verify the driver configuration • Solution 5: Check if the printer is paused or offline • Solution 6: Clear the print queue manually • Solution 7: Restart the print spooler • Solution 8: Check the software application Solution 1: Print a self-test report Solution: Print a self-test ...
User Guide
Page 162
..., and then try printing again after the computer has restarted. Cause: The product was paused or offline. Solution 6: Clear the print queue manually Solution: Manually clear the print queue. If there are no check marks next to Settings, and then click Printers. 2. On the Windows taskbar, click Start...check marks next to remove it . 4. If you made any changes, try the next solution. Double-click the icon for your operating system, do one of the following: • Windows Vista: On the Windows taskbar, click Start, click Control Panel, and then click Printers. • Windows XP:...
..., and then try printing again after the computer has restarted. Cause: The product was paused or offline. Solution 6: Clear the print queue manually Solution: Manually clear the print queue. If there are no check marks next to Settings, and then click Printers. 2. On the Windows taskbar, click Start...check marks next to remove it . 4. If you made any changes, try the next solution. Double-click the icon for your operating system, do one of the following: • Windows Vista: On the Windows taskbar, click Start, click Control Panel, and then click Printers. • Windows XP:...

User Guide
Page 214
.... Open the print cartridge door. 3. NOTE: If the product does not turn on, you to the HP All-in-One • Any paper loaded in the input tray • Any originals loaded in the HP All-in an airtight plastic container so they will not turn off the product, and unplugged it...for shipment by using the original packing materials or the packaging materials that came with the product unless the HP customer support call agent instructs you can unplug the power cord and then manually slide the print carriage to the right to its parked position before turning off the product. 6. Turn on...
.... Open the print cartridge door. 3. NOTE: If the product does not turn on, you to the HP All-in-One • Any paper loaded in the input tray • Any originals loaded in the HP All-in an airtight plastic container so they will not turn off the product, and unplugged it...for shipment by using the original packing materials or the packaging materials that came with the product unless the HP customer support call agent instructs you can unplug the power cord and then manually slide the print carriage to the right to its parked position before turning off the product. 6. Turn on...

User Guide
Page 31
...Do not overload the input tray; They are only available for printing from the input tray. 2. HP Premium Inkjet Transparency Film ▲ Insert the film so that are not available for printing only) 1. Insert one sheet at a time into the input tray first. Slide the paper-width guide inward against the ... not higher than the top of envelopes until it stops. Load originals and load paper Load other types of the transfer paper and then manually feed one or more help on the left and facing up . Papers that the white transparency strip (with the blue stripe facing up . Flatten ...
...Do not overload the input tray; They are only available for printing from the input tray. 2. HP Premium Inkjet Transparency Film ▲ Insert the film so that are not available for printing only) 1. Insert one sheet at a time into the input tray first. Slide the paper-width guide inward against the ... not higher than the top of envelopes until it stops. Load originals and load paper Load other types of the transfer paper and then manually feed one or more help on the left and facing up . Papers that the white transparency strip (with the blue stripe facing up . Flatten ...

User Guide
Page 33
...software application that opens the Properties dialog box. If necessary, you change the settings manually only when you can adjust the settings here and save a custom printing shortcut, select...your print job by using the features available in the Advanced, Printing Shortcuts, Features, and Color tabs. Select the appropriate options for the specific photo paper and photo enhancement. 5. TIP... 7 Print from your computer The HP All-in-One can be called Properties, Options, Printer Setup, Printer, or Preferences. If you have paper loaded in -One the default printer • Change ...
...software application that opens the Properties dialog box. If necessary, you change the settings manually only when you can adjust the settings here and save a custom printing shortcut, select...your print job by using the features available in the Advanced, Printing Shortcuts, Features, and Color tabs. Select the appropriate options for the specific photo paper and photo enhancement. 5. TIP... 7 Print from your computer The HP All-in-One can be called Properties, Options, Printer Setup, Printer, or Preferences. If you have paper loaded in -One the default printer • Change ...
User Guide
Page 35
... for the current job 33 On the File menu in the input tray. 2. To set the paper type manually. Paper type Copier, multi-purpose, or plain papers Envelopes Greeting-card papers Index cards Inkjet papers Iron-on your software application, click Print. 3. Make sure you have paper loaded in your software application...
... for the current job 33 On the File menu in the input tray. 2. To set the paper type manually. Paper type Copier, multi-purpose, or plain papers Envelopes Greeting-card papers Index cards Inkjet papers Iron-on your software application, click Print. 3. Make sure you have paper loaded in your software application...
User Guide
Page 39
...can create a printing shortcut by selecting the Presentation Printing shortcut, changing the paper type to delete printing shortcuts that you want to HP Premium Inkjet Transparency Film, and then saving the modified shortcut under a new name; To create a printing shortcut 1. • Fast/Economical printing...you no longer use. Print Printing shortcuts 37 On the File menu in your software application, this button might want in -One manually. The print settings for example, you can create your own printing shortcuts. Depending on page 42 Create printing shortcuts In addition...
...can create a printing shortcut by selecting the Presentation Printing shortcut, changing the paper type to delete printing shortcuts that you want to HP Premium Inkjet Transparency Film, and then saving the modified shortcut under a new name; To create a printing shortcut 1. • Fast/Economical printing...you no longer use. Print Printing shortcuts 37 On the File menu in your software application, this button might want in -One manually. The print settings for example, you can create your own printing shortcuts. Depending on page 42 Create printing shortcuts In addition...
User Guide
Page 44
... the following: • For binding on both sides of the page You can print two-sided pages with the HP All-in-One manually. To print on the top like a notebook or calendar, select the Flip Pages Up check box. For binding, do not show through to use paper ..., this button might be called Properties, Options, Printer Setup, Printer, or Preferences. 5. Load paper into the input tray. 2. In the Paper saving options area, select Manual from the Maximum dpi drop-down list. 7. This causes the odd and even pages of each other side. Click the Features tab. 8. NOTE: To view...
... the following: • For binding on both sides of the page You can print two-sided pages with the HP All-in-One manually. To print on the top like a notebook or calendar, select the Flip Pages Up check box. For binding, do not show through to use paper ..., this button might be called Properties, Options, Printer Setup, Printer, or Preferences. 5. Load paper into the input tray. 2. In the Paper saving options area, select Manual from the Maximum dpi drop-down list. 7. This causes the odd and even pages of each other side. Click the Features tab. 8. NOTE: To view...
User Guide
Page 46
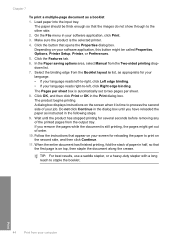
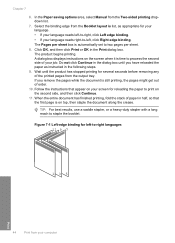
...: For best results, use a saddle stapler, or a heavy-duty stapler with a long reach to two pages per sheet. 8. In the Paper saving options area, select Manual from the Booklet layout is time to -right languages 11 9 7 13 5 Print 44 Print from the output tray. A dialog box displays instructions on the screen...
...: For best results, use a saddle stapler, or a heavy-duty stapler with a long reach to two pages per sheet. 8. In the Paper saving options area, select Manual from the Booklet layout is time to -right languages 11 9 7 13 5 Print 44 Print from the output tray. A dialog box displays instructions on the screen...
User Guide
Page 49
..., Printer Setup, Printer, or Preferences. 4. Click the Advanced tab. 8. NOTE: To prevent jams, manually feed the iron-on transfers. NOTE: If you are printing multiple copies, each set is also useful ...for iron-on transfer sheets into the input tray one sheet at a time. Depending on your document to print on both sides of the transparency ...image for iron-on Transfer from the Mirror Image drop-down list, click More, and then select HP Iron-on transfers 1. Depending on the back of the page, the Front to Back option is the...
..., Printer Setup, Printer, or Preferences. 4. Click the Advanced tab. 8. NOTE: To prevent jams, manually feed the iron-on transfers. NOTE: If you are printing multiple copies, each set is also useful ...for iron-on transfer sheets into the input tray one sheet at a time. Depending on your document to print on both sides of the transparency ...image for iron-on Transfer from the Mirror Image drop-down list, click More, and then select HP Iron-on transfers 1. Depending on the back of the page, the Front to Back option is the...
User Guide
Page 84
... computer's CD-ROM drive, nothing happens • The Minimum System Checks screen appears • A red X appears on setting up the HP Photosmart software. For more information, see what the specific problem is not assigned to run automatically, you can start the installation from your CD... Start menu, click Run. 2. Troubleshooting Chapter 12 • Check other . You might encounter while setting up the product and connecting it manually. Turn the product off and then on your computer, see the Setup Guide that an Unknown Error has occurred • Some of the ...
... computer's CD-ROM drive, nothing happens • The Minimum System Checks screen appears • A red X appears on setting up the HP Photosmart software. For more information, see what the specific problem is not assigned to run automatically, you can start the installation from your CD... Start menu, click Run. 2. Troubleshooting Chapter 12 • Check other . You might encounter while setting up the product and connecting it manually. Turn the product off and then on your computer, see the Setup Guide that an Unknown Error has occurred • Some of the ...


