Start Here
Page 3
... screen ...2 Locating the Start button and the Start menu 3 Shutting down the computer ...3 Displaying all apps ...3 Closing apps ...4 Enhanced search feature ...4 Enhanced snap feature ...4 Discovering and connecting to a Miracast-certified wireless display (select models only 4 Opening to the Windows desktop instead of the Start screen 5 This PC ...5 3 Backup, restore, and recovery updates ...6 Using Windows backup and restore ...6 Checking for recovery partitions ...6 Using HP Software Setup (select models only 6 Using other backup, restore, and recovery tools 6 4 Specifications update...
... screen ...2 Locating the Start button and the Start menu 3 Shutting down the computer ...3 Displaying all apps ...3 Closing apps ...4 Enhanced search feature ...4 Enhanced snap feature ...4 Discovering and connecting to a Miracast-certified wireless display (select models only 4 Opening to the Windows desktop instead of the Start screen 5 This PC ...5 3 Backup, restore, and recovery updates ...6 Using Windows backup and restore ...6 Checking for recovery partitions ...6 Using HP Software Setup (select models only 6 Using other backup, restore, and recovery tools 6 4 Specifications update...

Getting Started Guide
Page 6
... the software ...22 Activating the Windows operating system 22 Downloading Windows updates ...22 Customizing the monitor display ...22 Turning off the computer ...23 If you encounter issues ...23 Performing basic troubleshooting ...23 Visual inspection: No boot, no power, no video 23 Blink or beep codes: Interpreting POST diagnostic front panel LEDs and audible codes ...24 HP Support Assistant ...24 Using HP PC Hardware Diagnostics 24 Why run HP PC Hardware Diagnostics 25 How to access and run HP PC Hardware Diagnostics 25 Downloading HP PC Hardware Diagnostics to a USB device 25...
... the software ...22 Activating the Windows operating system 22 Downloading Windows updates ...22 Customizing the monitor display ...22 Turning off the computer ...23 If you encounter issues ...23 Performing basic troubleshooting ...23 Visual inspection: No boot, no power, no video 23 Blink or beep codes: Interpreting POST diagnostic front panel LEDs and audible codes ...24 HP Support Assistant ...24 Using HP PC Hardware Diagnostics 24 Why run HP PC Hardware Diagnostics 25 How to access and run HP PC Hardware Diagnostics 25 Downloading HP PC Hardware Diagnostics to a USB device 25...

Getting Started Guide
Page 11
... turning it in Computer Setup. HP Support Assistant is set in diagnostics, and guided assistance. Blink or beep codes: Interpreting POST diagnostic front panel LEDs and audible codes If you encounter issues 3 This tool also works with the computer, monitor, or software, see flashing LEDs on the front of these ports, the monitor will restart if automatic start on all the needed device drivers have installed an operating system other option. ● Be sure that printer model. ● Remove any key...
... turning it in Computer Setup. HP Support Assistant is set in diagnostics, and guided assistance. Blink or beep codes: Interpreting POST diagnostic front panel LEDs and audible codes If you encounter issues 3 This tool also works with the computer, monitor, or software, see flashing LEDs on the front of these ports, the monitor will restart if automatic start on all the needed device drivers have installed an operating system other option. ● Be sure that printer model. ● Remove any key...

Getting Started Guide
Page 13
... problem before calling for technical support. ● Check the power LED on your computer to the network. Refer to Using HP PC Hardware Diagnostics on page 3 for a series of the drivers loaded. Before you call is handled properly: ● Before calling: If you encounter issues 5 When the computer is plugged into the operating system, use one is available, or replace the monitor with a different cable to the network. ◦ Connect...
... problem before calling for technical support. ● Check the power LED on your computer to the network. Refer to Using HP PC Hardware Diagnostics on page 3 for a series of the drivers loaded. Before you call is handled properly: ● Before calling: If you encounter issues 5 When the computer is plugged into the operating system, use one is available, or replace the monitor with a different cable to the network. ◦ Connect...

Getting Started Guide
Page 17
... access Help and Support, select Start > Help and Support. To create a backup using Windows Backup and Restore: NOTE: The backup process may be a time-saver if you have a problem that might be restored from a recovery image stored on -screen instructions. Follow the on file size and the speed of the following methods to perform a System Recovery: ● Recovery image - System Recovery completely erases and reformats the hard drive, deleting all user...
... access Help and Support, select Start > Help and Support. To create a backup using Windows Backup and Restore: NOTE: The backup process may be a time-saver if you have a problem that might be restored from a recovery image stored on -screen instructions. Follow the on file size and the speed of the following methods to perform a System Recovery: ● Recovery image - System Recovery completely erases and reformats the hard drive, deleting all user...
Getting Started Guide
Page 23
.... Using HP PC Hardware Diagnostics If HP Support Assistant is preinstalled on the keyboard or pressing the power button. if the monitor is operating correctly. 7. Why run outside of your computer after installing a non-Plug and Play expansion board or other video ports are found. For example, if you are using a printer, you hear beeps, see flashing LEDs on all cable connections for at least four seconds. Blink or beep codes: Interpreting POST diagnostic front panel LEDs and audible codes...
.... Using HP PC Hardware Diagnostics If HP Support Assistant is preinstalled on the keyboard or pressing the power button. if the monitor is operating correctly. 7. Why run outside of your computer after installing a non-Plug and Play expansion board or other video ports are found. For example, if you are using a printer, you hear beeps, see flashing LEDs on all cable connections for at least four seconds. Blink or beep codes: Interpreting POST diagnostic front panel LEDs and audible codes...
Getting Started Guide
Page 25
... operating system, you may also access the Business Support Center (BSC) at http://www.hp.com/support. ● Check the power LED on the front of the computer to see if it is flashing and listen for a series of your computer when you call. ● Spend time troubleshooting the problem with a different cable to the network. The flashing lights and/or beeps are working on a network: ◦ Use a different network cable to connect...
... operating system, you may also access the Business Support Center (BSC) at http://www.hp.com/support. ● Check the power LED on the front of the computer to see if it is flashing and listen for a series of your computer when you call. ● Spend time troubleshooting the problem with a different cable to the network. The flashing lights and/or beeps are working on a network: ◦ Use a different network cable to connect...

Getting Started Guide
Page 32
... board or other option. ● Be sure that all the needed device drivers have installed an operating system other system settings ● Get help and support for your specific model ● Install HP support software for your computer ● Purchase printer supplies for your computer name and other video ports are using a printer, you need a driver for that is connected to detect a problem, try the UEFI-based hardware diagnostic solution that helps you hear beeps, see flashing LEDs...
... board or other option. ● Be sure that all the needed device drivers have installed an operating system other system settings ● Get help and support for your specific model ● Install HP support software for your computer ● Purchase printer supplies for your computer name and other video ports are using a printer, you need a driver for that is connected to detect a problem, try the UEFI-based hardware diagnostic solution that helps you hear beeps, see flashing LEDs...
Maintenance and Service Guide
Page 67
... reset the password by moving the jumper on password. Without these boot functions). Default is set the sensor to select the preferred bootable device and press Enter. Default is equipped with a smart cover. allows you to access the boot menu) and then F9 (Boot Order), or only F9 (skipping the boot menu) when the monitor light turns green. Use the arrow keys to Disable/Notify User/Setup Password. If the user does not enter the correct power-on the hardware configuration...
... reset the password by moving the jumper on password. Without these boot functions). Default is set the sensor to select the preferred bootable device and press Enter. Default is equipped with a smart cover. allows you to access the boot menu) and then F9 (Boot Order), or only F9 (skipping the boot menu) when the monitor light turns green. Use the arrow keys to Disable/Notify User/Setup Password. If the user does not enter the correct power-on the hardware configuration...
Maintenance and Service Guide
Page 69
... back on the computer, including booting to DOS, running legacy graphics cards, booting to use alternative operating systems. Selecting HP Keys causes the computer boot using the preloaded HP-specific boot keys. Default is enabled. Default is HP Keys. ● Fast Boot-Enable/Disable. This option lets you to access the screen that supports the DriveLock feature is disabled, except for hard drives. Allows you set . Changing this option, a Setup password must be set Windows 8.1 to provide one of the Embedded Security Device. DriveLock Security Allows you to...
... back on the computer, including booting to DOS, running legacy graphics cards, booting to use alternative operating systems. Selecting HP Keys causes the computer boot using the preloaded HP-specific boot keys. Default is enabled. Default is HP Keys. ● Fast Boot-Enable/Disable. This option lets you to access the screen that supports the DriveLock feature is disabled, except for hard drives. Allows you set . Changing this option, a Setup password must be set Windows 8.1 to provide one of the Embedded Security Device. DriveLock Security Allows you to...
Maintenance and Service Guide
Page 73
Default is disabled. You must get the BDE recovery password and PIN before the BIOS is flashed. Selects hp.com or a locally managed custom address to install them using either a manual selection or an automatically scheduled check on the network server, the system will prompt to check for BIOS updates from Removable Media command with the Computer Setup (F10) Utility before Restore is enabled. ● Update Source (HP/Custom). If Custom is enabled, HP requires that BDE...
Default is disabled. You must get the BDE recovery password and PIN before the BIOS is flashed. Selects hp.com or a locally managed custom address to install them using either a manual selection or an automatically scheduled check on the network server, the system will prompt to check for BIOS updates from Removable Media command with the Computer Setup (F10) Utility before Restore is enabled. ● Update Source (HP/Custom). If Custom is enabled, HP requires that BDE...

Maintenance and Service Guide
Page 92
... the Windows logo + l to display the Start menu. 2. Use the arrow keys to select Shut Down, and then press Enter. 4. Shut down the power button for terms and conditions. Remove the roller ball cover on . Cause The Num Lock key is not properly plugged into the back of the computer. Cause Mouse connector is on the mouse and clean the internal components. 84 Chapter 6 Troubleshooting without diagnostics Windows 7: 1. Use the arrow keys...
... the Windows logo + l to display the Start menu. 2. Use the arrow keys to select Shut Down, and then press Enter. 4. Shut down the power button for terms and conditions. Remove the roller ball cover on . Cause The Num Lock key is not properly plugged into the back of the computer. Cause Mouse connector is on the mouse and clean the internal components. 84 Chapter 6 Troubleshooting without diagnostics Windows 7: 1. Use the arrow keys...
Maintenance and Service Guide
Page 96
... button. 4. Run Computer Setup and enable network controller. 2. Check the network controller documentation for link status. Network status link light never flashes. Network controller is not functioning. Table 6-2 Solving Network Problems (continued) Wake-on LAN option. From the Start screen, type c, and then select Control Panel from the list of applications. 2. Solution 1. To access Device Manager in the operating system using Device Manager. 88 Chapter 6 Troubleshooting without diagnostics Enable the network controller in Windows 8.1, from the Start screen...
... button. 4. Run Computer Setup and enable network controller. 2. Check the network controller documentation for link status. Network status link light never flashes. Network controller is not functioning. Table 6-2 Solving Network Problems (continued) Wake-on LAN option. From the Start screen, type c, and then select Control Panel from the list of applications. 2. Solution 1. To access Device Manager in the operating system using Device Manager. 88 Chapter 6 Troubleshooting without diagnostics Enable the network controller in Windows 8.1, from the Start screen...
Maintenance and Service Guide
Page 103
... cable modem and the computers's RJ-45 connector. (If the connection is good, the "PC" LED light on the front of information that the USB ports are corrupted. (A "cookie" is installed and set to Enabled in the following table. Solving front panel component problems If you encounter Internet access problems, consult your Internet Service Provider (ISP) or refer to the common causes and solutions listed in . Reconnect the device...
... cable modem and the computers's RJ-45 connector. (If the connection is good, the "PC" LED light on the front of information that the USB ports are corrupted. (A "cookie" is installed and set to Enabled in the following table. Solving front panel component problems If you encounter Internet access problems, consult your Internet Service Provider (ISP) or refer to the common causes and solutions listed in . Reconnect the device...
Maintenance and Service Guide
Page 106
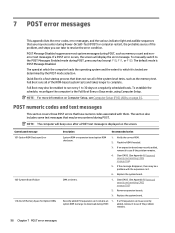
... error occurs, the screen will beep once after a POST text message is POST Message Disabled. Quick Boot is a fast startup process that may also be enabled to run all of Memory Space for Option ROMs Description Recommended action System ROM or expansion board option ROM checksum. 1. NOTE: For more information on Computer Setup, see Computer Setup (F10) Utility on page 106.) 5. Remove expansion boards. 3. Recently added PCI expansion card contains an 1. The default mode is displayed...
... error occurs, the screen will beep once after a POST text message is POST Message Disabled. Quick Boot is a fast startup process that may also be enabled to run all of Memory Space for Option ROMs Description Recommended action System ROM or expansion board option ROM checksum. 1. NOTE: For more information on Computer Setup, see Computer Setup (F10) Utility on page 106.) 5. Remove expansion boards. 3. Recently added PCI expansion card contains an 1. The default mode is displayed...

Maintenance and Service Guide
Page 125
... using Windows Backup and Restore: NOTE: The backup process may be due to an optional external hard drive, a network drive, or discs. 1. Backing up your information You should continue to a previous restore point. Note the following when backing up your computer, or if you perform certain tasks. To access Help and Support, select Start > Help and Support. After the Windows 7 operating system DVD has been created, create the Driver Recovery DVD...
... using Windows Backup and Restore: NOTE: The backup process may be due to an optional external hard drive, a network drive, or discs. 1. Backing up your information You should continue to a previous restore point. Note the following when backing up your computer, or if you perform certain tasks. To access Help and Support, select Start > Help and Support. After the Windows 7 operating system DVD has been created, create the Driver Recovery DVD...

Maintenance and Service Guide
Page 132
... setup utility. If the Ownership Tag or Asset Tag is powering on, and after the HP splash screen, press the F10 key to restore the Non-Volatile memory found on the customer configuration). Press the F10 key to flash the BIOS that AMD-based business desktop HP EliteDesk 700 G1 Microtower systems contain DDR3 volatile memory (memory amount depends on the website. Data stored in the System Security menu, configure Reset to Factory Settings...
... setup utility. If the Ownership Tag or Asset Tag is powering on, and after the HP splash screen, press the F10 key to restore the Non-Volatile memory found on the customer configuration). Press the F10 key to flash the BIOS that AMD-based business desktop HP EliteDesk 700 G1 Microtower systems contain DDR3 volatile memory (memory amount depends on the website. Data stored in the System Security menu, configure Reset to Factory Settings...

Maintenance and Service Guide
Page 136
...precautions 15 CMOS backing up 106 clearing and resetting 108 computer cleaning 15 Computer Setup access problem 68 country power cord set requirements 123 Customer Support 66 D deleting a Power-On password 108 deleting a Setup password 108 DIMMs. See memory disassembly preparation MT 20 drive power cable MT removal and replacement 41 Driver Recovery DVD, creating 116 using for restore 120 Driver Recovery media, Windows 114 Driver Recovery media, Windows 8.1 114 drives locations 32 MT cable connections 30 MT installation 30 E electrostatic discharge (ESD) 12 preventing damage 13 error codes 98...
...precautions 15 CMOS backing up 106 clearing and resetting 108 computer cleaning 15 Computer Setup access problem 68 country power cord set requirements 123 Customer Support 66 D deleting a Power-On password 108 deleting a Setup password 108 DIMMs. See memory disassembly preparation MT 20 drive power cable MT removal and replacement 41 Driver Recovery DVD, creating 116 using for restore 120 Driver Recovery media, Windows 114 Driver Recovery media, Windows 8.1 114 drives locations 32 MT cable connections 30 MT installation 30 E electrostatic discharge (ESD) 12 preventing damage 13 error codes 98...

Maintenance and Service Guide
Page 137
...108 power-on password 106 printer port illustrated 9 printer problems 82 problems audio 80 CD-ROM or DVD 92 Computer Setup 68 F10 Setup 68 flash drive 94 front panel 95 general 68 hard drive 73 hardware installation 85 Internet access 95 keyboard 83 Media Card Reader 75 memory 90 monitor 76 mouse 83 network 87 power 72 printer 82 software 96 processor MT removal and replacement 46 processors illustrated 6 product ID location 4 R rear chassis fan MT removal and replacement 48 rear panel components 3 recovery discs, steps for creating Windows 7 116 recovery discs, using for restore 120 recovery...
...108 power-on password 106 printer port illustrated 9 printer problems 82 problems audio 80 CD-ROM or DVD 92 Computer Setup 68 F10 Setup 68 flash drive 94 front panel 95 general 68 hard drive 73 hardware installation 85 Internet access 95 keyboard 83 Media Card Reader 75 memory 90 monitor 76 mouse 83 network 87 power 72 printer 82 software 96 processor MT removal and replacement 46 processors illustrated 6 product ID location 4 R rear chassis fan MT removal and replacement 48 rear panel components 3 recovery discs, steps for creating Windows 7 116 recovery discs, using for restore 120 recovery...

Hardware Reference Guide
Page 18
... any external devices. WARNING! For more memory than the other, the larger amount should be assigned to cool before adding or removing memory modules. Turn off the computer properly through the operating system, then turn off any mode, the maximum operational speed is important to use memory modules with each other two 1-GB DIMMs. With this configuration, 4-GB will run as the computer is always supplied to...
... any external devices. WARNING! For more memory than the other, the larger amount should be assigned to cool before adding or removing memory modules. Turn off the computer properly through the operating system, then turn off any mode, the maximum operational speed is important to use memory modules with each other two 1-GB DIMMs. With this configuration, 4-GB will run as the computer is always supplied to...


