
HP Notebook Hard Drives & Solid State Drives Identifying, Preventing, Diagnosing and Recovering from Drive Failures Care and Mai
Page 6
...://bizsupport2.austin.hp.com/bc/docs/support/SupportManual/c01600726/c01600726.pdf. Updates to the Intel Matrix Storage Manager driver are configured with Intel® Application Accelerator drivers. Intel Matrix Storage Manager Driver provides support for adding SATA drivers to RIS (Remote Installation Service) installation points include: Adding SATA drivers to installation CDs, building an image, and switching to SATA AHCI mode Using Sysprep with Serial ATA hard disk drives. The latest device driver versions...
...://bizsupport2.austin.hp.com/bc/docs/support/SupportManual/c01600726/c01600726.pdf. Updates to the Intel Matrix Storage Manager driver are configured with Intel® Application Accelerator drivers. Intel Matrix Storage Manager Driver provides support for adding SATA drivers to RIS (Remote Installation Service) installation points include: Adding SATA drivers to installation CDs, building an image, and switching to SATA AHCI mode Using Sysprep with Serial ATA hard disk drives. The latest device driver versions...
User Guide - Windows 8
Page 5
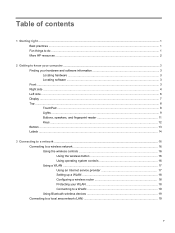
... Locating hardware ...3 Locating software ...3 Front ...3 Right side ...4 Left side ...6 Display ...7 Top ...8 TouchPad ...8 Lights ...9 Buttons, speakers, and fingerprint reader 11 Keys ...12 Bottom ...13 Labels ...14 3 Connecting to a network ...16 Connecting to a wireless network ...16 Using the wireless controls 16 Using the wireless button 16 Using operating system controls 16 Using a WLAN ...17 Using an Internet service provider 17 Setting up a WLAN 18 Configuring a wireless router 18 Protecting your WLAN 18 Connecting to a WLAN 19 Using Bluetooth wireless devices 19 Connecting...
... Locating hardware ...3 Locating software ...3 Front ...3 Right side ...4 Left side ...6 Display ...7 Top ...8 TouchPad ...8 Lights ...9 Buttons, speakers, and fingerprint reader 11 Keys ...12 Bottom ...13 Labels ...14 3 Connecting to a network ...16 Connecting to a wireless network ...16 Using the wireless controls 16 Using the wireless button 16 Using operating system controls 16 Using a WLAN ...17 Using an Internet service provider 17 Setting up a WLAN 18 Configuring a wireless router 18 Protecting your WLAN 18 Connecting to a WLAN 19 Using Bluetooth wireless devices 19 Connecting...
User Guide - Windows 8
Page 8
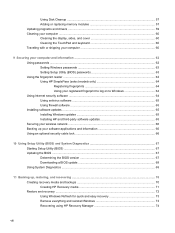
... ...65 Installing software updates ...65 Installing Windows updates 65 Installing HP and third-party software updates 65 Securing your wireless network ...66 Backing up your software applications and information 66 Using an optional security cable lock 66 10 Using Setup Utility (BIOS) and System Diagnostics 67 Starting Setup Utility (BIOS) ...67 Updating the BIOS ...67 Determining the BIOS version 67 Downloading a BIOS update 68 Using System Diagnostics ...69 11 Backing up, restoring, and recovering ...70 Creating recovery media and backups 70 Creating HP Recovery media 71 Restore and...
... ...65 Installing software updates ...65 Installing Windows updates 65 Installing HP and third-party software updates 65 Securing your wireless network ...66 Backing up your software applications and information 66 Using an optional security cable lock 66 10 Using Setup Utility (BIOS) and System Diagnostics 67 Starting Setup Utility (BIOS) ...67 Updating the BIOS ...67 Determining the BIOS version 67 Downloading a BIOS update 68 Using System Diagnostics ...69 11 Backing up, restoring, and recovering ...70 Creating recovery media and backups 70 Creating HP Recovery media 71 Restore and...
User Guide - Windows 8
Page 12
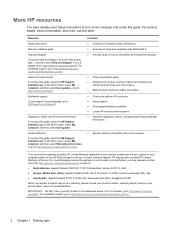
... already used Setup Instructions to turn on the computer and locate this guide, select the HP Support Assistant app on the Start screen, select My computer, and then select User guides. IMPORTANT: Do NOT return your language, go /orderdocuments or write to the addresses above. Resource Setup Instructions Windows 8 Basics guide Help and Support To access Help and Support, from http://www.hp.com/go to http://www.hp.com/support. Worldwide support...
... already used Setup Instructions to turn on the computer and locate this guide, select the HP Support Assistant app on the Start screen, select My computer, and then select User guides. IMPORTANT: Do NOT return your language, go /orderdocuments or write to the addresses above. Resource Setup Instructions Windows 8 Basics guide Help and Support To access Help and Support, from http://www.hp.com/go to http://www.hp.com/support. Worldwide support...
User Guide - Windows 8
Page 29
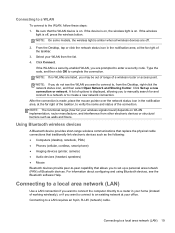
... options is a security-enabled WLAN, you want to connect to -peer capability that traditionally link electronic devices such as walls and floors. Using Bluetooth wireless devices A Bluetooth device provides short-range wireless communications that replace the physical cable connections that allows you do not see the Bluetooth software Help. Click Set up a personal area network (PAN) of working wirelessly), or if you are off , press the wireless button. If the WLAN is displayed...
... options is a security-enabled WLAN, you want to connect to -peer capability that traditionally link electronic devices such as walls and floors. Using Bluetooth wireless devices A Bluetooth device provides short-range wireless communications that replace the physical cable connections that allows you do not see the Bluetooth software Help. Click Set up a personal area network (PAN) of working wirelessly), or if you are off , press the wireless button. If the WLAN is displayed...
User Guide - Windows 8
Page 32
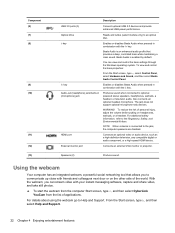
... optical disc. NOTE: When a device is enabled by default. WARNING! For additional safety information, refer to Help and Support. To view and control the bass properties: From the Start screen, type c, select Control Panel, select Hardware and Sound, and then select Beats Audio Control Panel. The jack does not support optional microphone-only devices. Speakers (2) Produce sound. For details about using the webcam go to the Regulatory, Safety, and Environmental Notices. External monitor port Connects an external VGA monitor or...
... optical disc. NOTE: When a device is enabled by default. WARNING! For additional safety information, refer to Help and Support. To view and control the bass properties: From the Start screen, type c, select Control Panel, select Hardware and Sound, and then select Beats Audio Control Panel. The jack does not support optional microphone-only devices. Speakers (2) Produce sound. For details about using the webcam go to the Regulatory, Safety, and Environmental Notices. External monitor port Connects an external VGA monitor or...
User Guide - Windows 8
Page 53
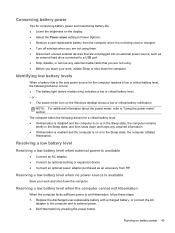
... external power is on the display. ● Select the Power saver setting in Power Options. ● Remove a user-replaceable battery from HP. Running on the Windows desktop shows a low or critical battery notification. Resolving a low battery level when the computer cannot exit Hibernation When the computer lacks sufficient power to a USB port. ● Stop, disable, or remove any unsaved information. ● If Hibernation is enabled and the computer is available ● Connect...
... external power is on the display. ● Select the Power saver setting in Power Options. ● Remove a user-replaceable battery from HP. Running on the Windows desktop shows a low or critical battery notification. Resolving a low battery level when the computer cannot exit Hibernation When the computer lacks sufficient power to a USB port. ● Stop, disable, or remove any unsaved information. ● If Hibernation is enabled and the computer is available ● Connect...
User Guide - Windows 8
Page 57
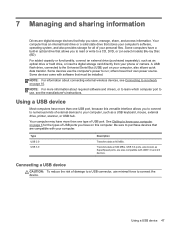
... computer. Using a USB device 47 Some computers have a built-in optical drive that help you have more information about connecting external wireless devices, see the manufacturer's instructions. Type USB 2.0 USB 3.0 Description Transfers data at 640 MB/s. Some devices use the computer's power to a network on page 16. NOTE: For information about required software and drivers, or to learn which computer port to use minimal force to connect the device. A USB flash drive, connected to a CD, DVD, or...
... computer. Using a USB device 47 Some computers have a built-in optical drive that help you have more information about connecting external wireless devices, see the manufacturer's instructions. Type USB 2.0 USB 3.0 Description Transfers data at 640 MB/s. Some devices use the computer's power to a network on page 16. NOTE: For information about required software and drivers, or to learn which computer port to use minimal force to connect the device. A USB flash drive, connected to a CD, DVD, or...
User Guide - Windows 8
Page 60
... CyberLink PowerDVD program will request an update to support playback of new BD movie releases. To resolve the issue, close any open applications and turn off your optical drive: ● When the battery is the only source of power, be sure the battery is sufficiently charged before writing to media. ● Do not type on the keyboard or move the computer while an...
... CyberLink PowerDVD program will request an update to support playback of new BD movie releases. To resolve the issue, close any open applications and turn off your optical drive: ● When the battery is the only source of power, be sure the battery is sufficiently charged before writing to media. ● Do not type on the keyboard or move the computer while an...
User Guide - Windows 8
Page 67
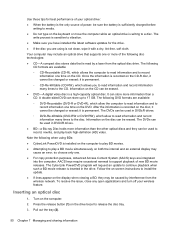
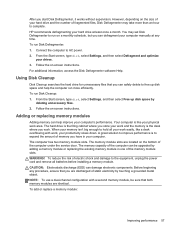
... service door. To run Disk Defragmenter: 1. The memory module slots are discharged of static electricity by deleting unnecessary files. 2. From the Start screen, type disk, select Settings, and then select Defragment and optimize your hard drive at any procedure, ensure that you are located on the size of your hard drive and the number of electric shock and damage to hold all batteries before installing a memory module. Adding or replacing memory modules Adding memory...
... service door. To run Disk Defragmenter: 1. The memory module slots are discharged of static electricity by deleting unnecessary files. 2. From the Start screen, type disk, select Settings, and then select Defragment and optimize your hard drive at any procedure, ensure that you are located on the size of your hard drive and the number of electric shock and damage to hold all batteries before installing a memory module. Adding or replacing memory modules Adding memory...
User Guide - Windows 8
Page 78
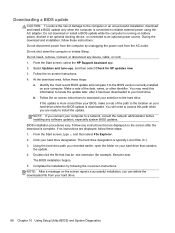
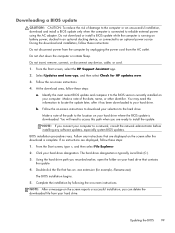
... your hard drive. 68 Chapter 10 Using Setup Utility (BIOS) and System Diagnostics BIOS installation procedures vary. Click your selection to reliable external power using the AC adapter. Double-click the file that are ready to a network, consult the network administrator before installing any software updates, especially system BIOS updates. Follow the on your hard drive. If the update is connected to the hard drive. From the Start screen, type e, and then select File Explorer. 2. During the download and installation...
... your hard drive. 68 Chapter 10 Using Setup Utility (BIOS) and System Diagnostics BIOS installation procedures vary. Click your selection to reliable external power using the AC adapter. Double-click the file that are ready to a network, consult the network administrator before installing any software updates, especially system BIOS updates. Follow the on your hard drive. If the update is connected to the hard drive. From the Start screen, type e, and then select File Explorer. 2. During the download and installation...
User Guide - Windows 8
Page 82
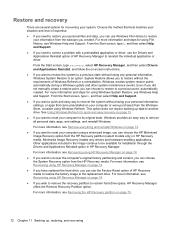
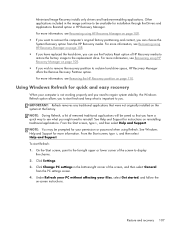
... Start screen, type recovery, select HP Recovery Manager, and then select Drivers and Applications Reinstall, and follow the on-screen instructions. ● If you to restore without the requirements of Windows Refresh or a reinstallation. This option does not require backing up , restoring, and recovering Minimized Image Recovery installs only drivers and hardware-enabling applications. For more information, see Removing the HP Recovery partition on page 74. ● If you have replaced the hard drive, you need to correct a problem...
... Start screen, type recovery, select HP Recovery Manager, and then select Drivers and Applications Reinstall, and follow the on-screen instructions. ● If you to restore without the requirements of Windows Refresh or a reinstallation. This option does not require backing up , restoring, and recovering Minimized Image Recovery installs only drivers and hardware-enabling applications. For more information, see Removing the HP Recovery partition on page 74. ● If you have replaced the hard drive, you need to correct a problem...
User Guide - Windows 8
Page 90
... 13 battery temperature 44 Beats Audio 12, 22, 23, 37 Beats Audio Control Panel 23 Beats Audio hot key 23 best practices 1 BIOS determining version 67 downloading an update 68 updating 67 Bluetooth device 16, 19 Bluetooth label 15 boot order changing HP Recovery Manager 75 buttons left TouchPad 8 optical drive eject 4 power 11 right TouchPad 8 TouchPad on/off 8 C cables USB 48 caps lock light, identifying 9 caring for your computer 60 checking audio functions 24 cleaning your computer 60 components bottom 13 display 7 front...
... 13 battery temperature 44 Beats Audio 12, 22, 23, 37 Beats Audio Control Panel 23 Beats Audio hot key 23 best practices 1 BIOS determining version 67 downloading an update 68 updating 67 Bluetooth device 16, 19 Bluetooth label 15 boot order changing HP Recovery Manager 75 buttons left TouchPad 8 optical drive eject 4 power 11 right TouchPad 8 TouchPad on/off 8 C cables USB 48 caps lock light, identifying 9 caring for your computer 60 checking audio functions 24 cleaning your computer 60 components bottom 13 display 7 front...
User Guide - Windows 8
Page 91
...WLAN 15 latch, battery release 13 lights AC adapter 5 caps lock 9 fingerprint reader 10 hard drive 4 mute 9 optical drive 4 power 4, 9 RJ-45 (network) jack 6 TouchPad 8, 10 webcam 7, 21 wireless 9 low battery level 43 M maintenance Disk Cleanup 57 Disk Defragmenter 56 memory module inserting 59 removing 58 replacing 57 memory module compartment, identifying 14 minimized image creating 74 minimized image recovery 75 mouse, external setting preferences 28 mute light, identifying 9 N network jack, identifying 6 num lock key, identifying 12, 38 O operating environment 77 optical disc inserting 50...
...WLAN 15 latch, battery release 13 lights AC adapter 5 caps lock 9 fingerprint reader 10 hard drive 4 mute 9 optical drive 4 power 4, 9 RJ-45 (network) jack 6 TouchPad 8, 10 webcam 7, 21 wireless 9 low battery level 43 M maintenance Disk Cleanup 57 Disk Defragmenter 56 memory module inserting 59 removing 58 replacing 57 memory module compartment, identifying 14 minimized image creating 74 minimized image recovery 75 mouse, external setting preferences 28 mute light, identifying 9 N network jack, identifying 6 num lock key, identifying 12, 38 O operating environment 77 optical disc inserting 50...
HP ENVY m6 Notebook PC Maintenance and Service Guide
Page 30
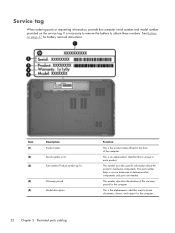
... alphanumeric identifier used to obtain these numbers. This is unique to determine what components and parts are needed. It is the product name affixed to the front of the warranty period for battery removal instructions. See Battery on the service tag. Item (1) (2) (3) Description Product name Serial number (s/n) Part number/Product number (p/n) (4) Warranty period (5) Model description Function This is necessary to remove the battery to locate documents, drivers, and support for the...
... alphanumeric identifier used to obtain these numbers. This is unique to determine what components and parts are needed. It is the product name affixed to the front of the warranty period for battery removal instructions. See Battery on the service tag. Item (1) (2) (3) Description Product name Serial number (s/n) Part number/Product number (p/n) (4) Warranty period (5) Model description Function This is necessary to remove the battery to locate documents, drivers, and support for the...
HP ENVY m6 Notebook PC Maintenance and Service Guide
Page 107
..., open the folder on -screen instructions to an optional power source. BIOS installation procedures vary. From the Start screen, type e, and then select File Explorer. 2. The hard drive designation is running on -screen instructions. Using the hard drive path you connect your hard drive that contains the update. 4. At the download area, follow these instructions: Do not disconnect power from the computer by following the on battery power, docked in an optional docking device, or connected to download your computer. Make...
..., open the folder on -screen instructions to an optional power source. BIOS installation procedures vary. From the Start screen, type e, and then select File Explorer. 2. The hard drive designation is running on -screen instructions. Using the hard drive path you connect your hard drive that contains the update. 4. At the download area, follow these instructions: Do not disconnect power from the computer by following the on battery power, docked in an optional docking device, or connected to download your computer. Make...
HP ENVY m6 Notebook PC Maintenance and Service Guide
Page 115
... have replaced the hard drive, you wish to remove the recovery partition to reinstall. From the Start screen, type h, and then select Help and Support. From the Start screen, type h, and then select Help and Support. On the Start screen, point to the far-right upper or lower corner of HP Recovery media to restore the factory image to display the charms. 2. Click Settings. 3. See Help and Support for instructions on -screen instructions. For more information, see Recovering using HP Recovery Manager...
... have replaced the hard drive, you wish to remove the recovery partition to reinstall. From the Start screen, type h, and then select Help and Support. From the Start screen, type h, and then select Help and Support. On the Start screen, point to the far-right upper or lower corner of HP Recovery media to restore the factory image to display the charms. 2. Click Settings. 3. See Help and Support for instructions on -screen instructions. For more information, see Recovering using HP Recovery Manager...

HP ENVY m6 Notebook PC Maintenance and Service Guide
Page 122
... 18 power 12 TouchPad 15 TouchPad on/off 15 C cables, service considerations 42 caps lock light 14 chipset, product description 2 components bottom 19 button 12 display 11 fingerprint reader 12 front 16 keys 13 left-side 17 lights 14 right-side 18 speakers 12 TouchPad 15 computer major components 23 computer part number 46 computer specifications 101 connectors, service considerations 42 D Digital Media Slot, location 16 display components 11 specifications 102 display assembly removal...
... 18 power 12 TouchPad 15 TouchPad on/off 15 C cables, service considerations 42 caps lock light 14 chipset, product description 2 components bottom 19 button 12 display 11 fingerprint reader 12 front 16 keys 13 left-side 17 lights 14 right-side 18 speakers 12 TouchPad 15 computer major components 23 computer part number 46 computer specifications 101 connectors, service considerations 42 D Digital Media Slot, location 16 display components 11 specifications 102 display assembly removal...

HP ENVY m6 Notebook PC Maintenance and Service Guide
Page 123
... lights AC adapter 19 caps lock 14 fingerprint reader 15 hard drive 18 mute 14 network jack 17 optical drive 18 power 14, 18 RJ-45 jack 17 TouchPad 15 webcam 11 wireless 14 M mass storage device precautions 42 spare part numbers 30 memory module product description 4 removal 55 spare part numbers 28, 34, 55 microphone location 11 product description 5 microphone jack 17 model description 47 model name 1 monitor port 17 mute light 14 N network jack lights 17 location 17 num lock key 13 numeric keypad 13 O operating...
... lights AC adapter 19 caps lock 14 fingerprint reader 15 hard drive 18 mute 14 network jack 17 optical drive 18 power 14, 18 RJ-45 jack 17 TouchPad 15 webcam 11 wireless 14 M mass storage device precautions 42 spare part numbers 30 memory module product description 4 removal 55 spare part numbers 28, 34, 55 microphone location 11 product description 5 microphone jack 17 model description 47 model name 1 monitor port 17 mute light 14 N network jack lights 17 location 17 num lock key 13 numeric keypad 13 O operating...

HP ENVY m6 Notebook PC Maintenance and Service Guide
Page 124
... module 4 microphone 5 operating system 9 optical drive 5 pointing device 8 ports 7 power requirements 8 processors 1 product name 1 security 8 serviceability 9 solid-state drive 5 video 5 wireless 6 product name 1, 46 product number 46 R removal/replacement preliminaries 41 procedures 46 right-side components RJ-45 jack lights 17 location 17 RTC battery removal 51 spare part number 18 28, 34, 51 S Screw Kit, spare part number 32, 36 security cable slot 19 security, product description 8 serial number 46 service considerations cables 42 connectors 42 plastic parts 41 service cover location...
... module 4 microphone 5 operating system 9 optical drive 5 pointing device 8 ports 7 power requirements 8 processors 1 product name 1 security 8 serviceability 9 solid-state drive 5 video 5 wireless 6 product name 1, 46 product number 46 R removal/replacement preliminaries 41 procedures 46 right-side components RJ-45 jack lights 17 location 17 RTC battery removal 51 spare part number 18 28, 34, 51 S Screw Kit, spare part number 32, 36 security cable slot 19 security, product description 8 serial number 46 service considerations cables 42 connectors 42 plastic parts 41 service cover location...


