
HP Notebook Hard Drives & Solid State Drives Identifying, Preventing, Diagnosing and Recovering from Drive Failures Care and Mai
Page 6
... as support for notebook PC models that could affect hard disk drive performance and reliability. Procedures for adding SATA drivers to RIS (Remote Installation Service) installation points include: Adding SATA drivers to installation CDs, building an image, and switching to 150MB/sec transfer rate for the SATA Advanced Host Controller (AHCI) Interface. Page 6 Intel Matrix Storage Manager Driver provides support for disk traffic, and provides link power management with...
... as support for notebook PC models that could affect hard disk drive performance and reliability. Procedures for adding SATA drivers to RIS (Remote Installation Service) installation points include: Adding SATA drivers to installation CDs, building an image, and switching to 150MB/sec transfer rate for the SATA Advanced Host Controller (AHCI) Interface. Page 6 Intel Matrix Storage Manager Driver provides support for disk traffic, and provides link power management with...
User Guide - Windows 8
Page 5
... 1 Starting right ...1 Best practices ...1 Fun things to do ...2 More HP resources ...3 2 Getting to know your computer ...4 Finding your hardware and software information 4 Locating hardware ...4 Locating software ...4 Right side ...5 Left side ...6 Display ...8 Top ...9 TouchPad ...9 Lights ...10 Buttons and speakers ...11 Keys ...13 Bottom ...14 Labels ...16 3 Connecting to a network ...17 Connecting to a wireless network ...17 Using the wireless controls 17 Using the wireless button 17 Using operating system controls 18 Using a WLAN ...18 Using an Internet service provider 18 Setting...
... 1 Starting right ...1 Best practices ...1 Fun things to do ...2 More HP resources ...3 2 Getting to know your computer ...4 Finding your hardware and software information 4 Locating hardware ...4 Locating software ...4 Right side ...5 Left side ...6 Display ...8 Top ...9 TouchPad ...9 Lights ...10 Buttons and speakers ...11 Keys ...13 Bottom ...14 Labels ...16 3 Connecting to a network ...17 Connecting to a wireless network ...17 Using the wireless controls 17 Using the wireless button 17 Using operating system controls 18 Using a WLAN ...18 Using an Internet service provider 18 Setting...

User Guide - Windows 8
Page 7
... keyboard and mouse ...39 Using the keys ...40 Using the action keys 40 Using Microsoft Windows 8 shortcut keys 41 Using the hot keys (select models only 42 Using the integrated numeric keypad 42 6 Managing power ...43 Initiating Sleep and Hibernation ...43 Intel Rapid Start Technology (select models only 43 Initiating and exiting Sleep 44 Enabling and exiting user-initiated hibernation 44 Setting password protection on wakeup 45 Using the power meter and power settings 45 Running on battery power ...45 Removing a user-replaceable battery...
... keyboard and mouse ...39 Using the keys ...40 Using the action keys 40 Using Microsoft Windows 8 shortcut keys 41 Using the hot keys (select models only 42 Using the integrated numeric keypad 42 6 Managing power ...43 Initiating Sleep and Hibernation ...43 Intel Rapid Start Technology (select models only 43 Initiating and exiting Sleep 44 Enabling and exiting user-initiated hibernation 44 Setting password protection on wakeup 45 Using the power meter and power settings 45 Running on battery power ...45 Removing a user-replaceable battery...
User Guide - Windows 8
Page 8
... hard drive 60 Replacing the secondary hard drive (select models only 62 Using HP 3D DriveGuard (select models only 64 Using Disk Defragmenter 64 Using Disk Cleanup ...65 Adding or replacing memory modules 65 Updating programs and drivers ...69 Cleaning your computer ...69 Cleaning the display, sides, and cover 69 Cleaning the TouchPad and keyboard 69 Traveling with or shipping your computer 70 9 Securing your computer and information 71 Using passwords ...71 Setting Windows passwords 72 Setting Setup Utility (BIOS) passwords 72 Using...
... hard drive 60 Replacing the secondary hard drive (select models only 62 Using HP 3D DriveGuard (select models only 64 Using Disk Defragmenter 64 Using Disk Cleanup ...65 Adding or replacing memory modules 65 Updating programs and drivers ...69 Cleaning your computer ...69 Cleaning the display, sides, and cover 69 Cleaning the TouchPad and keyboard 69 Traveling with or shipping your computer 70 9 Securing your computer and information 71 Using passwords ...71 Setting Windows passwords 72 Setting Setup Utility (BIOS) passwords 72 Using...

User Guide - Windows 8
Page 28
... a user ID and a password to turn on or turn off the wireless devices simultaneously. NOTE: Your ISP will help set up a connection or network, connect to a network, manage wireless networks, and diagnose and repair network problems. To use the wireless button to use the WLAN device in your computer, you must establish an account with an Internet service provider (ISP). To use for Internet access. Because the wireless devices are enabled at the factory, you can use operating system controls: Mode Steps 1. Using operating system controls The Network and...
... a user ID and a password to turn on or turn off the wireless devices simultaneously. NOTE: Your ISP will help set up a connection or network, connect to a network, manage wireless networks, and diagnose and repair network problems. To use the wireless button to use the WLAN device in your computer, you must establish an account with an Internet service provider (ISP). To use for Internet access. Because the wireless devices are enabled at the factory, you can use operating system controls: Mode Steps 1. Using operating system controls The Network and...

User Guide - Windows 8
Page 39
... USB ports on a external mouse. From the Start screen, type c to activate the demonstration. TIP: Use the left and right buttons on the TouchPad as you would use the corresponding buttons on the computer. Select a gesture to reveal the Apps list. Some computer models may also have special action keys or hot key functions on a touch screen (select models only). You can be connected to the keyboard and mouse. Select Control Panel, and then select Hardware and Sound. Under Devices...
... USB ports on a external mouse. From the Start screen, type c to activate the demonstration. TIP: Use the left and right buttons on the TouchPad as you would use the corresponding buttons on the computer. Select a gesture to reveal the Apps list. Some computer models may also have special action keys or hot key functions on a touch screen (select models only). You can be connected to the keyboard and mouse. Select Control Panel, and then select Hardware and Sound. Under Devices...
User Guide - Windows 8
Page 50
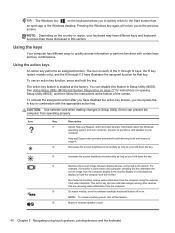
...: Use extreme care when making changes in Setup Utility (BIOS). Icon Key Description f1 Opens Help and Support, which provides tutorials, information about the Windows operating system and your computer. f2 Decreases the screen brightness incrementally as long as you hold down the key. This action key can disable this section. TIP: The Windows key on the keyboard allows you to quickly return to the system. f4 Switches the screen image between display devices connected...
...: Use extreme care when making changes in Setup Utility (BIOS). Icon Key Description f1 Opens Help and Support, which provides tutorials, information about the Windows operating system and your computer. f2 Decreases the screen brightness incrementally as long as you hold down the key. This action key can disable this section. TIP: The Windows key on the keyboard allows you to quickly return to the system. f4 Switches the screen image between display devices connected...

User Guide - Windows 8
Page 54
... the keyboard dock, open the display. ● Press a key on page 44. Click Save changes. From the Start screen, type power, select Settings, and then select Power Options from the right edge of the TouchPad or touch screen (select models only) to the screen where you stopped working . The power lights turn on and the computer returns to display the charms, tap Settings, tap the Power icon, and then tap Sleep. - See Enabling and exiting user-initiated...
... the keyboard dock, open the display. ● Press a key on page 44. Click Save changes. From the Start screen, type power, select Settings, and then select Power Options from the right edge of the TouchPad or touch screen (select models only) to the screen where you stopped working . The power lights turn on and the computer returns to display the charms, tap Settings, tap the Power icon, and then tap Sleep. - See Enabling and exiting user-initiated...
User Guide - Windows 8
Page 56
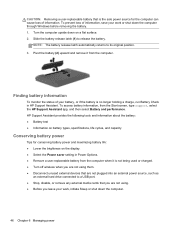
... not being used or charged. ● Turn off wireless when you are not using them. ● Disconnect unused external devices that are not plugged into an external power source, such as an external hard drive connected to a USB port. ● Stop, disable, or remove any external media cards that is the sole power source for conserving battery power and maximizing battery life: ● Lower the brightness on the display. ● Select the Power saver setting in HP Support Assistant. HP Support Assistant...
... not being used or charged. ● Turn off wireless when you are not using them. ● Disconnect unused external devices that are not plugged into an external power source, such as an external hard drive connected to a USB port. ● Stop, disable, or remove any external media cards that is the sole power source for conserving battery power and maximizing battery life: ● Lower the brightness on the display. ● Select the Power saver setting in HP Support Assistant. HP Support Assistant...

User Guide - Windows 8
Page 61
... computer's software, operating system, and also provides storage for the types of external devices-such as a USB powered port) allows you have more information about connecting external wireless devices, see Connecting to use a powered port. Be sure to know your phone or camera. Standard USB ports will not charge all of cell phones and MP3 players, even when the computer is off. Connects an optional USB device. USB 3.0 ports, also known as an optical drive or hard drive, or...
... computer's software, operating system, and also provides storage for the types of external devices-such as a USB powered port) allows you have more information about connecting external wireless devices, see Connecting to use a powered port. Be sure to know your phone or camera. Standard USB ports will not charge all of cell phones and MP3 players, even when the computer is off. Connects an optional USB device. USB 3.0 ports, also known as an optical drive or hard drive, or...

User Guide - Windows 8
Page 75
...: Electrostatic discharge (ESD) can be upgraded by deleting unnecessary files. 2. From the Start screen, type d, and then type disk in the search box. Select Settings, and then select Free up disk space and help improve your hard drive and the number of the memory module slots. Adding or replacing memory modules Adding memory can defragment your hard drive at any procedure, ensure that you start Disk Defragmenter, it works without supervision. Your computer is...
...: Electrostatic discharge (ESD) can be upgraded by deleting unnecessary files. 2. From the Start screen, type d, and then type disk in the search box. Select Settings, and then select Free up disk space and help improve your hard drive and the number of the memory module slots. Adding or replacing memory modules Adding memory can defragment your hard drive at any procedure, ensure that you start Disk Defragmenter, it works without supervision. Your computer is...
User Guide - Windows 8
Page 82
...; Change your passwords at the first password check, you must enter the administrator password to access Setup Utility (BIOS). ● Must be entered each time you turn on or restart the computer. ● If you forget your power-on password, you cannot turn on password. NOTE: This password cannot be used to access Setup Utility (BIOS) contents. For additional information about Windows passwords, such as screen-saver passwords, from the Start screen, type support, and then select the HP Support Assistant...
...; Change your passwords at the first password check, you must enter the administrator password to access Setup Utility (BIOS). ● Must be entered each time you turn on or restart the computer. ● If you forget your power-on password, you cannot turn on password. NOTE: This password cannot be used to access Setup Utility (BIOS) contents. For additional information about Windows passwords, such as screen-saver passwords, from the Start screen, type support, and then select the HP Support Assistant...

User Guide - Windows 8
Page 85
... viruses, install all critical updates from the Start screen, type c, and then select Control Panel. Securing your wireless network When you set up your software applications and information to protect them from the illustration in this location, you purchased your computer, regularly update the software. Security cable locks are installed automatically. The security cable slot on -screen instructions. To change the settings, from Microsoft as soon as you regularly update the software and drivers that should...
... viruses, install all critical updates from the Start screen, type c, and then select Control Panel. Securing your wireless network When you set up your software applications and information to protect them from the illustration in this location, you purchased your computer, regularly update the software. Security cable locks are installed automatically. The security cable slot on -screen instructions. To change the settings, from Microsoft as soon as you regularly update the software and drivers that should...
User Guide - Windows 8
Page 88
... on-screen instructions. 4. BIOS installation procedures vary. Follow any device, cable, or cord. 1. From the Start screen, type support, and then select the HP Support Assistant app. 2. Do not download or install a BIOS update while the computer is connected to an optional power source. During the download and installation, follow these steps: 1. Complete the installation by unplugging the power cord from your BIOS, make a note of the path to the location on your hard drive where the BIOS update is...
... on-screen instructions. 4. BIOS installation procedures vary. Follow any device, cable, or cord. 1. From the Start screen, type support, and then select the HP Support Assistant app. 2. Do not download or install a BIOS update while the computer is connected to an optional power source. During the download and installation, follow these steps: 1. Complete the installation by unplugging the power cord from your BIOS, make a note of the path to the location on your hard drive where the BIOS update is...
User Guide - Windows 8
Page 92
... the HP Recovery partition (select models only) or HP Recovery media. Minimized Image Recovery installs only drivers and hardware-enabling applications. From the Start screen, type h, and then select Help and Support. ● If you can take up data to another drive. For more . The next time you start HP Recovery Manager, you will be prompted to continue, and the remaining discs will finish burning the current DVD. Windows creates system restore points automatically during a Windows update and...
... the HP Recovery partition (select models only) or HP Recovery media. Minimized Image Recovery installs only drivers and hardware-enabling applications. From the Start screen, type h, and then select Help and Support. ● If you can take up data to another drive. For more . The next time you start HP Recovery Manager, you will be prompted to continue, and the remaining discs will finish burning the current DVD. Windows creates system restore points automatically during a Windows update and...
User Guide - Windows 8
Page 93
... have replaced the hard drive, you can use the Factory Reset option of the screen, and then select General from your files, select Get started, and then follow the on page 84. ● If you have a quick way to see Recovering using the f11 key or from the HP Recovery media. The process described in the bottom-right corner of HP Recovery media to restore the factory image to the replacement drive. Remove everything...
... have replaced the hard drive, you can use the Factory Reset option of the screen, and then select General from your files, select Get started, and then follow the on page 84. ● If you have a quick way to see Recovering using the f11 key or from the HP Recovery media. The process described in the bottom-right corner of HP Recovery media to restore the factory image to the replacement drive. Remove everything...
User Guide - Windows 8
Page 94
... HP Recovery Manager should be used if the computer hard drive fails. ● To use the Factory Reset or System Recovery options, you must be used as you press the power button. 2. Under Remove everything and reinstall Windows, select Get started, and follow the on-screen instructions. Then it reinstalls the operating system and the software that was installed at the factory. Select Troubleshoot from the PC settings screen. 4. For U.S. or - Select Reset your system from the hard drive...
... HP Recovery Manager should be used if the computer hard drive fails. ● To use the Factory Reset or System Recovery options, you must be used as you press the power button. 2. Under Remove everything and reinstall Windows, select Get started, and follow the on-screen instructions. Then it reinstalls the operating system and the software that was installed at the factory. Select Troubleshoot from the PC settings screen. 4. For U.S. or - Select Reset your system from the hard drive...

User Guide - Windows 8
Page 100
... keyboard 40 switch screen image 40 volume down 41 volume mute 40 volume up 41 wireless 41 airport security devices 59 antivirus software, using 74 audio functions, checking 26 audio-out (headphone) jacks 5, 23 battery power 45 battery release latch 14 battery temperature 47 battery, identifying 14 Beats Audio 25, 42 hot key 25 Beats Audio Control Panel 25 BIOS determining version 77 downloading an update 78 updating 77 Bluetooth device 17 label 16 Bluetooth device 20 boot order changing HP Recovery Manager 85 bottom 16 buttons left TouchPad 9 optical drive eject 5 power...
... keyboard 40 switch screen image 40 volume down 41 volume mute 40 volume up 41 wireless 41 airport security devices 59 antivirus software, using 74 audio functions, checking 26 audio-out (headphone) jacks 5, 23 battery power 45 battery release latch 14 battery temperature 47 battery, identifying 14 Beats Audio 25, 42 hot key 25 Beats Audio Control Panel 25 BIOS determining version 77 downloading an update 78 updating 77 Bluetooth device 17 label 16 Bluetooth device 20 boot order changing HP Recovery Manager 85 bottom 16 buttons left TouchPad 9 optical drive eject 5 power...

User Guide - Windows 8
Page 101
... removing 66 replacing 65 memory module service door, removing 66 microphone, connecting 25 minimized image creating 84 recovery 85 mouse, external setting preferences 29 mute light, identifying 10 N network jack, identifying 6 num lock key, identifying 42 O operating environment 88 optical disc inserting 55 removing 55 optical drive eject button, identifying 5 optical drive, identifying 5 optional external devices, using 52 original system recovery 84 P passwords Setup Utility (BIOS) 72 Windows 72 pinching touch screen gesture 36 TouchPad gesture 31 ports HDMI 6, 24, 27 Intel Wireless Display...
... removing 66 replacing 65 memory module service door, removing 66 microphone, connecting 25 minimized image creating 84 recovery 85 mouse, external setting preferences 29 mute light, identifying 10 N network jack, identifying 6 num lock key, identifying 42 O operating environment 88 optical disc inserting 55 removing 55 optical drive eject button, identifying 5 optical drive, identifying 5 optional external devices, using 52 original system recovery 84 P passwords Setup Utility (BIOS) 72 Windows 72 pinching touch screen gesture 36 TouchPad gesture 31 ports HDMI 6, 24, 27 Intel Wireless Display...

User Guide - Windows 8
Page 102
... restore, Windows File History 82 right-edge swipe 37 RJ-45 (network) jack, identifying 6 rotating TouchPad gesture 32 S scrolling TouchPad gesture 31 security cable lock, installing 75 security cable slot, identifying 6 security, wireless 19 serial number 16 service labels, locating 16 setting password protection on wakeup 45 setup of WLAN 19 Setup Utility (BIOS) passwords 72 shipping the computer 70 shutdown 50 Sleep exiting 44 initiating 44 slots memory card 6 security cable 6 software critical updates 75 CyberLink PowerDVD 28 Disk Cleanup 65 Disk...
... restore, Windows File History 82 right-edge swipe 37 RJ-45 (network) jack, identifying 6 rotating TouchPad gesture 32 S scrolling TouchPad gesture 31 security cable lock, installing 75 security cable slot, identifying 6 security, wireless 19 serial number 16 service labels, locating 16 setting password protection on wakeup 45 setup of WLAN 19 Setup Utility (BIOS) passwords 72 shipping the computer 70 shutdown 50 Sleep exiting 44 initiating 44 slots memory card 6 security cable 6 software critical updates 75 CyberLink PowerDVD 28 Disk Cleanup 65 Disk...


