User Guide
Page 3
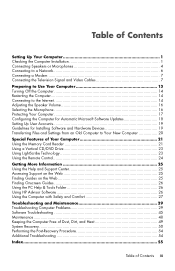
... Devices 19 Transferring Files and Settings from an Old Computer to Your New Computer 20 Special Features of Your Computer 21 Using the Memory Card Reader 21 Using a Vertical CD/DVD Drive 23 Using LightScribe Technology 23 Using the Remote Control 24 Getting More Information 25 ...Support on the Web 25 Finding Guides on the Web 25 Finding Onscreen Guides 26 Using the PC Help & Tools Folder 26 Using HP Advisor Software 26 Using the Computer with Safety and Comfort 27 Troubleshooting and Maintenance 29 Troubleshooting Computer Problems 29 Software Troubleshooting 45 Maintenance ...
... Devices 19 Transferring Files and Settings from an Old Computer to Your New Computer 20 Special Features of Your Computer 21 Using the Memory Card Reader 21 Using a Vertical CD/DVD Drive 23 Using LightScribe Technology 23 Using the Remote Control 24 Getting More Information 25 ...Support on the Web 25 Finding Guides on the Web 25 Finding Onscreen Guides 26 Using the PC Help & Tools Folder 26 Using HP Advisor Software 26 Using the Computer with Safety and Comfort 27 Troubleshooting and Maintenance 29 Troubleshooting Computer Problems 29 Software Troubleshooting 45 Maintenance ...
User Guide
Page 18
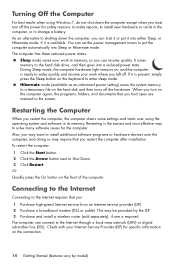
... area network (LAN) or digital subscriber line (DSL). Also, you restart the computer, the computer clears some settings and starts over using Windows 7, do not shut down the computer, you restart the computer after installation. This may require that you left off the hardware. It saves... Provider (ISP) for specific information on the front of the computer. Hibernate mode (available as an advanced power setting) saves the system memory to the Internet requires that you can connect to install additional software programs or hardware devices onto the computer, and doing so may be ...
... area network (LAN) or digital subscriber line (DSL). Also, you restart the computer, the computer clears some settings and starts over using Windows 7, do not shut down the computer, you restart the computer after installation. This may require that you left off the hardware. It saves... Provider (ISP) for specific information on the front of the computer. Hibernate mode (available as an advanced power setting) saves the system memory to the Internet requires that you can connect to install additional software programs or hardware devices onto the computer, and doing so may be ...
User Guide
Page 23
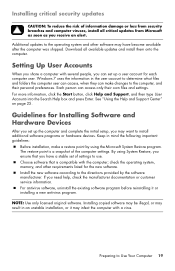
...and complete the initial setup, you may want to install additional software programs or hardware devices. By using the Microsoft System Restore program. Windows 7 uses the information in the user account to the computer, and their own files and settings. If you need help, check ... or it or installing a new antivirus program. See "Using the Help and Support Center" on page 25. check the operating system, memory, and other software may infect the computer with the computer; Download all critical updates from security breaches and computer viruses, install all available ...
...and complete the initial setup, you may want to install additional software programs or hardware devices. By using the Microsoft System Restore program. Windows 7 uses the information in the user account to the computer, and their own files and settings. If you need help, check ... or it or installing a new antivirus program. See "Using the Help and Support Center" on page 25. check the operating system, memory, and other software may infect the computer with the computer; Download all critical updates from security breaches and computer viruses, install all available ...
User Guide
Page 24
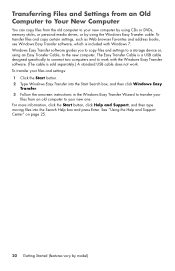
...or, using an Easy Transfer Cable, to your new computer by using the Windows Easy Transfer cable. See "Using the Help and Support Center" on page 25. 20 Getting Started (features vary by using CDs or DVDs, memory sticks, or personal media drives, or by model) For more information, ...click the Start button, click Help and Support, and then type moving files into the Start Search box, and then click Windows Easy Transfer. 3 Follow the onscreen instructions in the...
...or, using an Easy Transfer Cable, to your new computer by using the Windows Easy Transfer cable. See "Using the Help and Support Center" on page 25. 20 Getting Started (features vary by using CDs or DVDs, memory sticks, or personal media drives, or by model) For more information, ...click the Start button, click Help and Support, and then type moving files into the Start Search box, and then click Windows Easy Transfer. 3 Follow the onscreen instructions in the...

User Guide
Page 25
... its own drive letter and icon. Doing so removes the operating system recognition of the memory card reader from and write to read from your computer, and you open the Safely Remove Hardware window by mistake, click Close. Special Features of media in a slot at one time. ... IBM Microdrive disk drive. When you insert media, the Safely Remove Hardware window may come with the USB Mass Storage Device selected. The memory card reader can place media in the Safely Remove Hardware window with a multi-format memory card reader (optional, select models only). You can read or write....
... its own drive letter and icon. Doing so removes the operating system recognition of the memory card reader from and write to read from your computer, and you open the Safely Remove Hardware window by mistake, click Close. Special Features of media in a slot at one time. ... IBM Microdrive disk drive. When you insert media, the Safely Remove Hardware window may come with the USB Mass Storage Device selected. The memory card reader can place media in the Safely Remove Hardware window with a multi-format memory card reader (optional, select models only). You can read or write....

User Guide
Page 26
...corner on the media. To use SM and xD media in the memory card reader at the same time. NOTE: You must insert media...memory cards, such as CF Ultra/III, are keyed and cannot be inserted incorrectly. Insert the receptacle edge (holes) of this media into the card slot until it stops. Or If the AutoPlay window... does not open the Help and Support Center or refer to the media. see "Getting More Information" on or off, but not blinking, and then remove the media. CAUTION: Do not try to remove media when the activity light is inserted. 2 Select a program to display the files on the memory...
...corner on the media. To use SM and xD media in the memory card reader at the same time. NOTE: You must insert media...memory cards, such as CF Ultra/III, are keyed and cannot be inserted incorrectly. Insert the receptacle edge (holes) of this media into the card slot until it stops. Or If the AutoPlay window... does not open the Help and Support Center or refer to the media. see "Getting More Information" on or off, but not blinking, and then remove the media. CAUTION: Do not try to remove media when the activity light is inserted. 2 Select a program to display the files on the memory...
User Guide
Page 33
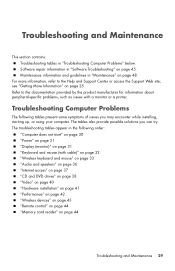
... page 38 "Video" on page 40 "Hardware installation" on page 41 "Performance" on page 42 "Wireless devices" on page 43 "Remote control" on page 44 "Memory card reader" on page 31 "Keyboard and mouse (with a monitor or a printer. The troubleshooting tables appear in "Troubleshooting Computer Problems" below. Maintenance information and guidelines...
... page 38 "Video" on page 40 "Hardware installation" on page 41 "Performance" on page 42 "Wireless devices" on page 43 "Remote control" on page 44 "Memory card reader" on page 31 "Keyboard and mouse (with a monitor or a printer. The troubleshooting tables appear in "Troubleshooting Computer Problems" below. Maintenance information and guidelines...

User Guide
Page 48
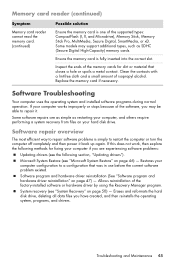
...an external sensor with a USB connector, try enabling the IR connection by model) Possible solution Do not insert or remove memory cards when the in the Device Manager window. Ensure the amount of stored data does not exceed the storage limit of the USB cable on the remote sensor from ...the remote control. Connect other USB devices, leaving the remote sensor connected, and then restart the computer. Some memory cards have a Read/Write...
...an external sensor with a USB connector, try enabling the IR connection by model) Possible solution Do not insert or remove memory cards when the in the Device Manager window. Ensure the amount of stored data does not exceed the storage limit of the USB cable on the remote sensor from ...the remote control. Connect other USB devices, leaving the remote sensor connected, and then restart the computer. Some memory cards have a Read/Write...
User Guide
Page 49
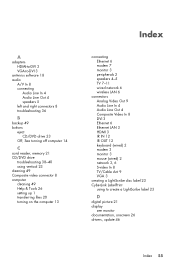
... 45 Erases and reformats the hard disk drive, deleting all data files you are as simple as SDHC (Secure Digital High-Capacity) memory cards. Software repair overview The most efficient way to repair software problems is one of the software, you may support additional types, such...to repair it back up again. If your computer works improperly or stops because of the supported types: CompactFlash (I, II, and Microdrive), Memory Stick, Memory Stick Pro, MultiMedia, Secure Digital, SmartMedia, or xD. System recovery (see the following methods for dirt or material that was in ...
... 45 Erases and reformats the hard disk drive, deleting all data files you are as simple as SDHC (Secure Digital High-Capacity) memory cards. Software repair overview The most efficient way to repair software problems is one of the software, you may support additional types, such...to repair it back up again. If your computer works improperly or stops because of the supported types: CompactFlash (I, II, and Microdrive), Memory Stick, Memory Stick Pro, MultiMedia, Secure Digital, SmartMedia, or xD. System recovery (see the following methods for dirt or material that was in ...
User Guide
Page 59
... Line Out 4 speakers 5 left and right connectors 8 troubleshooting 36 B backup 49 buttons eject CD/DVD drive 23 Off, See turning off computer 14 C card reader, memory 21 CD/DVD drive troubleshooting 38-40 using vertical 23 cleaning 49 Composite video connector 8 computer cleaning 49 Help & Tools 26 setting up 1 transferring files...
... Line Out 4 speakers 5 left and right connectors 8 troubleshooting 36 B backup 49 buttons eject CD/DVD drive 23 Off, See turning off computer 14 C card reader, memory 21 CD/DVD drive troubleshooting 38-40 using vertical 23 cleaning 49 Composite video connector 8 computer cleaning 49 Help & Tools 26 setting up 1 transferring files...
User Guide
Page 60
...firewall 18 H hardware troubleshooting installation 41-42 HDMI-to-DVI 3 headphones connecting 5 Help and Support 25 Hibernate mode 14 HP Advisor 26 I Internet connection 6-7 security 18 troubleshooting 37-38 IR blaster 12 connection, enable 44 receiver 12 K keyboard ... device 6 setting up 6 LightScribe 23 locking the computer 14 M maintenance tasks 48 memory card reader troubleshooting 44 memory card reader, using 21 microphone adjusting recording levels 16 connecting 5 selecting in Windows 16 modem connection 3, 7 monitor connector 3 troubleshooting 31 mouse wired connecting 2 troubleshooting ...
...firewall 18 H hardware troubleshooting installation 41-42 HDMI-to-DVI 3 headphones connecting 5 Help and Support 25 Hibernate mode 14 HP Advisor 26 I Internet connection 6-7 security 18 troubleshooting 37-38 IR blaster 12 connection, enable 44 receiver 12 K keyboard ... device 6 setting up 6 LightScribe 23 locking the computer 14 M maintenance tasks 48 memory card reader troubleshooting 44 memory card reader, using 21 microphone adjusting recording levels 16 connecting 5 selecting in Windows 16 modem connection 3, 7 monitor connector 3 troubleshooting 31 mouse wired connecting 2 troubleshooting ...
User Guide
Page 61
... audio 36 CD/DVD drive 38-40 hardware installation 41-42 Internet connection 37-38 keyboard (wired) 32 keyboard (wireless) 33-35 memory card reader 44 monitor 31 mouse (wired) 32 mouse (wireless) 33-35 power 31 remote control 44 speakers 36 startup 30 system ...wireless devices 43 turning off computer 14 TV connecting to computer 7-11 U updating drivers 46 system 18 Windows 7 18 V VGA-to-DVI 3 video troubleshooting 40 volume, adjusting audio 16 W Windows Update 18 wired network 6 wireless devices troubleshooting 43 wireless LAN checking installation 37 connection 6 network device 37...
... audio 36 CD/DVD drive 38-40 hardware installation 41-42 Internet connection 37-38 keyboard (wired) 32 keyboard (wireless) 33-35 memory card reader 44 monitor 31 mouse (wired) 32 mouse (wireless) 33-35 power 31 remote control 44 speakers 36 startup 30 system ...wireless devices 43 turning off computer 14 TV connecting to computer 7-11 U updating drivers 46 system 18 Windows 7 18 V VGA-to-DVI 3 video troubleshooting 40 volume, adjusting audio 16 W Windows Update 18 wired network 6 wireless devices troubleshooting 43 wireless LAN checking installation 37 connection 6 network device 37...

Upgrade and Service
Page 35
Removing and Replacing Memory
Removing and Replacing Memory

Upgrade and Service
Page 36
... already have the maximum amount of the computer. Observe the following screw (Torque screw). Avoid touching sharp edges inside the computer. Removing and Replacing Memory 30-45 minutes Before You Begin Use the product specification for your model to find the correct type of DIMM (dual in-line... memory module) for your computer or be needed. CAUTION: Static electricity can use a flathead screwdriver with the power cord attached or power applied. NOTE: Computer ...
... already have the maximum amount of the computer. Observe the following screw (Torque screw). Avoid touching sharp edges inside the computer. Removing and Replacing Memory 30-45 minutes Before You Begin Use the product specification for your model to find the correct type of DIMM (dual in-line... memory module) for your computer or be needed. CAUTION: Static electricity can use a flathead screwdriver with the power cord attached or power applied. NOTE: Computer ...

Upgrade and Service
Page 37
Pull each of the tabs out slightly, away from the computer. 5 Grasp the handle, and pull the side panel about 2.5 cm (1 inch) toward the back of the side panel, and then lift the panel from the computer, to the computer. Removing and Replacing Memory 3 4 Loosen the side panel thumbscrew on the back of the computer. 6 Tilt out the top of the computer to release it. 7 Locate the three tabs that secure the front panel to release the panel. 537500-001 -
Pull each of the tabs out slightly, away from the computer. 5 Grasp the handle, and pull the side panel about 2.5 cm (1 inch) toward the back of the side panel, and then lift the panel from the computer, to the computer. Removing and Replacing Memory 3 4 Loosen the side panel thumbscrew on the back of the computer. 6 Tilt out the top of the computer to release it. 7 Locate the three tabs that secure the front panel to release the panel. 537500-001 -

Upgrade and Service
Page 38
You must remove the cage to access memory. 4 537500-001 - Removing and Replacing Memory 8 Swing the front panel open toward the left, and then lift it off the computer. 11 Squeeze the top and bottom of the PMD connector and remove it from the top cage. 9 Lay the computer on the side. 12 Remove the two screws that secure the drive cage in the computer. 10 Locate the hard disk drive cage inside the computer.
You must remove the cage to access memory. 4 537500-001 - Removing and Replacing Memory 8 Swing the front panel open toward the left, and then lift it off the computer. 11 Squeeze the top and bottom of the PMD connector and remove it from the top cage. 9 Lay the computer on the side. 12 Remove the two screws that secure the drive cage in the computer. 10 Locate the hard disk drive cage inside the computer.

Upgrade and Service
Page 39
13 Insert a long screwdriver into the opening in the cage. 15 Slide the cage toward the top of the computer to release it. 14 Using the screwdriver, press the latch for the drive cage inside the computer. 16 Lift the cage partway out of the computer. 537500-001 - Removing and Replacing Memory 5
13 Insert a long screwdriver into the opening in the cage. 15 Slide the cage toward the top of the computer to release it. 14 Using the screwdriver, press the latch for the drive cage inside the computer. 16 Lift the cage partway out of the computer. 537500-001 - Removing and Replacing Memory 5

Upgrade and Service
Page 40
... the motherboard model in your computer motherboard. This illustration shows two memory modules installed in the socket closest to release the memory module. 13 4 2 6 537500-001 - NOTE: The location and number of the memory socket to the processor (1) on the drive. 17 Disconnect the cables... cage: IMPORTANT: Recording the plug locations when there are filled first, starting with the connector on the motherboard. Removing and Replacing Memory The blue sockets are multiple drives helps ensure you correctly replace the connections. MASTER SLAVE To CPU For plugs with a latch, ...
... the motherboard model in your computer motherboard. This illustration shows two memory modules installed in the socket closest to release the memory module. 13 4 2 6 537500-001 - NOTE: The location and number of the memory socket to the processor (1) on the drive. 17 Disconnect the cables... cage: IMPORTANT: Recording the plug locations when there are filled first, starting with the connector on the motherboard. Removing and Replacing Memory The blue sockets are multiple drives helps ensure you correctly replace the connections. MASTER SLAVE To CPU For plugs with a latch, ...
Upgrade and Service
Page 41
...that matches the notch on the motherboard. 1 Touching only the top edge of the socket. Incompatible memory modules cannot be installed in the socket closest to different manufacturers or models. Replacing Memory IMPORTANT: The new (replacement) part may not look the same as the original part, due to... the processor on the memory module. 537500-001 - NOTE: Install the memory modules into the blue sockets first, starting with the largest capacity module placed in the memory socket. 2 Look at the memory module socket for the tab that meet or exceed your ...
...that matches the notch on the motherboard. 1 Touching only the top edge of the socket. Incompatible memory modules cannot be installed in the socket closest to different manufacturers or models. Replacing Memory IMPORTANT: The new (replacement) part may not look the same as the original part, due to... the processor on the memory module. 537500-001 - NOTE: Install the memory modules into the blue sockets first, starting with the largest capacity module placed in the memory socket. 2 Look at the memory module socket for the tab that meet or exceed your ...

Upgrade and Service
Page 42
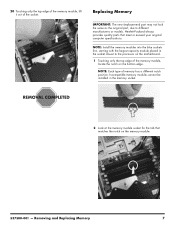
Removing and Replacing Memory 3 Position the memory module over the socket, aligning the notch with the tab in the socket, and then firmly press the module down into the socket... 4 Tip up the hard disk drive cage, and locate the four tabs on the bottom. ...until the retaining clips at the ends of the socket lock the module into place. 5 Locate the four slots inside the computer that match the tabs on the bottom of the hard disk drive cage. 8 537500-001 -
Removing and Replacing Memory 3 Position the memory module over the socket, aligning the notch with the tab in the socket, and then firmly press the module down into the socket... 4 Tip up the hard disk drive cage, and locate the four tabs on the bottom. ...until the retaining clips at the ends of the socket lock the module into place. 5 Locate the four slots inside the computer that match the tabs on the bottom of the hard disk drive cage. 8 537500-001 -


