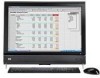
Dx9000 Memory - HP TouchSmart 4 GB RAM
Related Manual Pages


Similar Questions

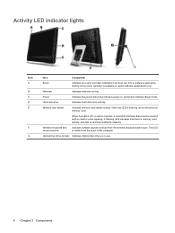
Where Is The Memory Card Slot Located?
where is the memory card slot located?
where is the memory card slot located?
(Posted by Anonymous-150409 9 years ago)

Where Are The Memory Slots To Put My Memory Card To Install My Photos?
I can't find where I put my memory card into the computer. Are there slots or do I need to use somet...
I can't find where I put my memory card into the computer. Are there slots or do I need to use somet...
(Posted by normafgerber 9 years ago)

Memory Upgrade
I have the HP s3200n - Pavilion - Slimline. What is the max RAM this computer can take? What memor...
I have the HP s3200n - Pavilion - Slimline. What is the max RAM this computer can take? What memor...
(Posted by photos 12 years ago)