
Bluetooth Wireless Technology Basics
Page 7
... the lower-right part of the connection (Table 1). Enable BWT functionality. 3. The logo will appear in the Windows System Tray located in the same box as follows: 1. For specific instructions about discovering and connecting to other BWT-enabled devices, refer to begin the configuration process. The following 3 steps activate your notebook user documentation if you need help locating the wireless button and light. Then you can use the Bluetooth Setup wizard to white...
... the lower-right part of the connection (Table 1). Enable BWT functionality. 3. The logo will appear in the Windows System Tray located in the same box as follows: 1. For specific instructions about discovering and connecting to other BWT-enabled devices, refer to begin the configuration process. The following 3 steps activate your notebook user documentation if you need help locating the wireless button and light. Then you can use the Bluetooth Setup wizard to white...

Bluetooth Wireless Technology Basics
Page 8
... Menu > Connect > Bluetooth. Table 2 describes some models of the BWT profiles built into HP notebook PCs, iPAQ Pocket PCs, and printers. iPAQ Pocket PCs Certain h1900, h3800, h3900, and all h2200, h4000, h5000 Series iPAQ Pocket PCs are services that is attached to the HP wireless product portfolio. Cellular phones Activating BWT functionality on your notebook, select Start > My Programs > My Bluetooth Places to manage and change...
... Menu > Connect > Bluetooth. Table 2 describes some models of the BWT profiles built into HP notebook PCs, iPAQ Pocket PCs, and printers. iPAQ Pocket PCs Certain h1900, h3800, h3900, and all h2200, h4000, h5000 Series iPAQ Pocket PCs are services that is attached to the HP wireless product portfolio. Cellular phones Activating BWT functionality on your notebook, select Start > My Programs > My Bluetooth Places to manage and change...
Software Update - Windows Vista
Page 7
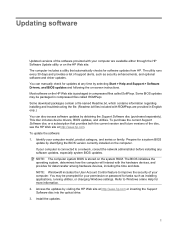
... the Support Software disc into the optical drive. 3. Prepare for tasks such as security enhancements, and optional software and driver updates. The BIOS initializes the operating system, determines how the computer will interact with the hardware devices, and provides for updates at any software updates, especially system BIOS updates. Access the updates by visiting the HP Web site at http://www.hp.com. Install the updates. 1 You can also access software updates by obtaining the Support Software disc (purchased...
... the Support Software disc into the optical drive. 3. Prepare for tasks such as security enhancements, and optional software and driver updates. The BIOS initializes the operating system, determines how the computer will interact with the hardware devices, and provides for updates at any software updates, especially system BIOS updates. Access the updates by visiting the HP Web site at http://www.hp.com. Install the updates. 1 You can also access software updates by obtaining the Support Software disc (purchased...
Software Update - Windows Vista
Page 9
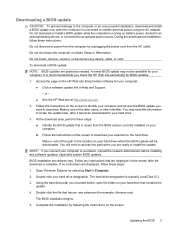
... the instructions on battery power, docked in Help and Support. - Make a note of the date, name, or other identifier. Follow any instructions that has an .exe extension (for your selection to locate the update later, after the download is complete. Double-click your computer to download. The hard drive designation is typically Local Disk (C:). 3. Do not insert, remove, connect, or disconnect any software updates, especially system BIOS updates. NOTE...
... the instructions on battery power, docked in Help and Support. - Make a note of the date, name, or other identifier. Follow any instructions that has an .exe extension (for your selection to locate the update later, after the download is complete. Double-click your computer to download. The hard drive designation is typically Local Disk (C:). 3. Do not insert, remove, connect, or disconnect any software updates, especially system BIOS updates. NOTE...
HP Business Notebook PC - Getting Started Guide - Enhanced for Accessibility
Page 4
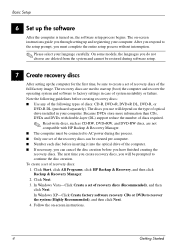
... -screen instructions guide you use will be prompted to factory settings in your computer. Follow the on , the software setup process begins. In Windows Vista-Click Create a set of discs: CD-R, DVD+R, DVD+R DL, DVD-R, or DVD-R DL (purchased separately). After you respond to the setup prompt, you must be connected to AC power during software setup. 7 Create recovery discs After setting up the computer for the first time, be created per computer. ■ Number each disc before creating recovery discs: ■ Use...
... -screen instructions guide you use will be prompted to factory settings in your computer. Follow the on , the software setup process begins. In Windows Vista-Click Create a set of discs: CD-R, DVD+R, DVD+R DL, DVD-R, or DVD-R DL (purchased separately). After you respond to the setup prompt, you must be connected to AC power during software setup. 7 Create recovery discs After setting up the computer for the first time, be created per computer. ■ Number each disc before creating recovery discs: ■ Use...

ProtectTools - Windows Vista and Windows XP
Page 12
... administrators and users. HP ProtectTools password Set in this HP ProtectTools Function module Credential Manager logon password Credential Manager Credential Manager recovery file Credential Manager, by IT password administrator This password offers 2 options: ● It can be customized by the same person. Basic User Key password Embedded Security NOTE: Also known as: Embedded Security password Used to access Embedded Security features, such as Java™ Cards, biometric readers, or USB tokens. The passwords that are indicated in...
... administrators and users. HP ProtectTools password Set in this HP ProtectTools Function module Credential Manager logon password Credential Manager Credential Manager recovery file Credential Manager, by IT password administrator This password offers 2 options: ● It can be customized by the same person. Basic User Key password Embedded Security NOTE: Also known as: Embedded Security password Used to access Embedded Security features, such as Java™ Cards, biometric readers, or USB tokens. The passwords that are indicated in...
ProtectTools - Windows Vista and Windows XP
Page 55
... and then click OK. 4. Enabling and disabling Automatic DriveLock hard drive protection When this password is set, it must first disable them before opening the BIOS Configuration portion of HP ProtectTools. Managing Computer Setup passwords You can use . The power-on and setup passwords in Computer Setup. Under Embedded Security, click Enable next to manage various password settings. The option to access Computer Setup. Type your notebook from unauthorized use BIOS Configuration to set and change the power-on password can set a setup password, you will not be...
... and then click OK. 4. Enabling and disabling Automatic DriveLock hard drive protection When this password is set, it must first disable them before opening the BIOS Configuration portion of HP ProtectTools. Managing Computer Setup passwords You can use . The power-on and setup passwords in Computer Setup. Under Embedded Security, click Enable next to manage various password settings. The option to access Computer Setup. Type your notebook from unauthorized use BIOS Configuration to set and change the power-on password can set a setup password, you will not be...
ProtectTools - Windows Vista and Windows XP
Page 79
... installed. firmware utility for the new firmware to a timing dependency on the HP Web site at http://www.hp.com. Be sure that Microsoft .NET Framework 1.1 is always recommended after the reboot. Click Control Panel. NOTE: A reboot is listed. Check the hardware and software configuration: a. If the FW version does not match 2.18, download and update the TPM firmware. The Security Manager software must exist, since the upgrade requires owner authorization. b. The firmware upgrade...
... installed. firmware utility for the new firmware to a timing dependency on the HP Web site at http://www.hp.com. Be sure that Microsoft .NET Framework 1.1 is always recommended after the reboot. Click Control Panel. NOTE: A reboot is listed. Check the hardware and software configuration: a. If the FW version does not match 2.18, download and update the TPM firmware. The Security Manager software must exist, since the upgrade requires owner authorization. b. The firmware upgrade...
ProtectTools - Windows Vista and Windows XP
Page 80
... ROM SoftPaq offerings. 74 Chapter 8 Troubleshooting ENWW HP is set to default using the Embedded Security Device option Reset to complete its load time (services). The Reset to make TPM BIOS authentication work. Manager. HP ProtectTools- these plug-ins to make TPM BIOS authentication work after reenabling Embedded Security Device, Power-on authentication support). The user has to change his TPM user PIN to other Embedded Security options (including Power-on authentication support remains enabled. By default, Power-on authentication support is working...
... ROM SoftPaq offerings. 74 Chapter 8 Troubleshooting ENWW HP is set to default using the Embedded Security Device option Reset to complete its load time (services). The Reset to make TPM BIOS authentication work. Manager. HP ProtectTools- these plug-ins to make TPM BIOS authentication work after reenabling Embedded Security Device, Power-on authentication support). The user has to change his TPM user PIN to other Embedded Security options (including Power-on authentication support remains enabled. By default, Power-on authentication support is working...
ProtectTools - Windows Vista and Windows XP
Page 85
...51 power-on password, changing 50 power-on password, setting 50 setup password, changing 51 setup password, setting 50 smart card power-on authentication 47 stringent security 51 system configuration options 45 BIOS setup password changing 51 setting 50 boot options 44 B background service, Device Access Manager 54 backing up and restoring certification information 33 Embedded Security 33 HP ProtectTools modules 8 Single Sign On data 20 basic user account 30 Basic User Key password changing 32 setting 30 biometric readers 14 BIOS administrator password 7 BIOS Configuration for HP ProtectTools...
...51 power-on password, changing 50 power-on password, setting 50 setup password, changing 51 setup password, setting 50 smart card power-on authentication 47 stringent security 51 system configuration options 45 BIOS setup password changing 51 setting 50 boot options 44 B background service, Device Access Manager 54 backing up and restoring certification information 33 Embedded Security 33 HP ProtectTools modules 8 Single Sign On data 20 basic user account 30 Basic User Key password changing 32 setting 30 biometric readers 14 BIOS administrator password 7 BIOS Configuration for HP ProtectTools...
ProtectTools - Windows Vista and Windows XP
Page 87
... password changing 34 definition 7 setting 29 P password Basic User Key 32 changing owner 34 changing power-on 50 changing setup 51 Computer Setup, managing 49 emergency recovery token 29 guidelines 8 HP ProtectTools 6 managing 6 owner 29 policies, creating 5 resetting user 34 secure, creating 8 setting options 51 setting power-on 50 setting setup 50 Windows logon 15 personal secure drive (PSD) 31 power-on authentication enabling and disabling 47 on Windows restart 51 power-on password definition 7 setting and changing 50 properties application 19 authentication 23 credential 24 R recovering...
... password changing 34 definition 7 setting 29 P password Basic User Key 32 changing owner 34 changing power-on 50 changing setup 51 Computer Setup, managing 49 emergency recovery token 29 guidelines 8 HP ProtectTools 6 managing 6 owner 29 policies, creating 5 resetting user 34 secure, creating 8 setting options 51 setting power-on 50 setting setup 50 Windows logon 15 personal secure drive (PSD) 31 power-on authentication enabling and disabling 47 on Windows restart 51 power-on password definition 7 setting and changing 50 properties application 19 authentication 23 credential 24 R recovering...

Computer Setup - Windows Vista
Page 15
... menu NOTE: Some of the listed System Configuration options may not be supported by a USB port to an AC outlet. ● Enable/disable Data Execution Prevention. Select Language (or press f2) Boot Options Device Configurations Built-In Device Options Port Options To do this Change the Computer Setup language. ● Set an f9, f10, and f12 delay when starting up. ● Enable/disable CD-ROM boot. ● Enable/disable floppy boot. ● Enable/disable internal network adapter boot and set the boot mode (PXE). ● Enable/disable MultiBoot, which sets a boot order...
... menu NOTE: Some of the listed System Configuration options may not be supported by a USB port to an AC outlet. ● Enable/disable Data Execution Prevention. Select Language (or press f2) Boot Options Device Configurations Built-In Device Options Port Options To do this Change the Computer Setup language. ● Set an f9, f10, and f12 delay when starting up. ● Enable/disable CD-ROM boot. ● Enable/disable floppy boot. ● Enable/disable internal network adapter boot and set the boot mode (PXE). ● Enable/disable MultiBoot, which sets a boot order...
Power Management - Windows Vista
Page 9
... command closes all open programs, including the operating system, and then turns off the display and computer. Click Start, and then click the arrow next to use the preceding shutdown procedures, try the following conditions: ● When you need to replace the battery or access components inside the computer ● When you are connecting an external hardware device that does not connect to a USB port ● When...
... command closes all open programs, including the operating system, and then turns off the display and computer. Click Start, and then click the arrow next to use the preceding shutdown procedures, try the following conditions: ● When you need to replace the battery or access components inside the computer ● When you are connecting an external hardware device that does not connect to a USB port ● When...
Power Management - Windows Vista
Page 22
... into external power until the battery is heavily used, it should not need to Never. 9. Click the battery meter icon in battery run time Even if a battery is fully charged. Select Start > Control Panel > System and Maintenance > Power Options. 2. Click the plus sign next to Sleep, and then click the plus sign next to an AC adapter or optional power adapter, and then plug the adapter into the computer. 2. Change the On battery setting...
... into external power until the battery is heavily used, it should not need to Never. 9. Click the battery meter icon in battery run time Even if a battery is fully charged. Select Start > Control Panel > System and Maintenance > Power Options. 2. Click the plus sign next to Sleep, and then click the plus sign next to an AC adapter or optional power adapter, and then plug the adapter into the computer. 2. Change the On battery setting...
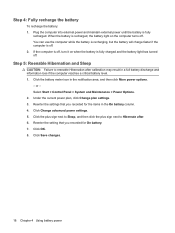
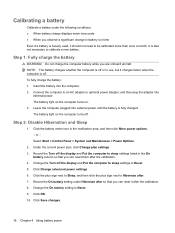
Power Management - Windows Vista
Page 24
... use the computer while the battery is recharging, but the battery will charge faster if the computer is fully charged and the battery light has turned off. or - Under the current power plan, click Change plan settings. 3. Click Change advanced power settings. 5. Click Save changes. 18 Chapter 4 Using battery power When the battery is recharged, the battery light on when the battery is off . If the computer is fully recharged. Reenter the setting...
... use the computer while the battery is recharging, but the battery will charge faster if the computer is fully charged and the battery light has turned off. or - Under the current power plan, click Change plan settings. 3. Click Change advanced power settings. 5. Click Save changes. 18 Chapter 4 Using battery power When the battery is recharged, the battery light on when the battery is off . If the computer is fully recharged. Reenter the setting...

Pointing Devices and Keyboard - Windows Vista
Page 18
... off. (Num lock is turned off , most keypad keys type numbers. ● When num lock is connected to type in the upper-right corner of the key. NOTE: The embedded numeric keypad will not function while an external keyboard or numeric keypad is off at the factory.) For example: ● When num lock is on, most keypad keys function like the keys on an external keypad. Using the embedded...
... off. (Num lock is turned off , most keypad keys type numbers. ● When num lock is connected to type in the upper-right corner of the key. NOTE: The embedded numeric keypad will not function while an external keyboard or numeric keypad is off at the factory.) For example: ● When num lock is on, most keypad keys function like the keys on an external keypad. Using the embedded...
HP Notebook PC - Getting Started - Vista - Enhanced for Accessibility
Page 35
...devices may not be overheating because a vent is blocked. Drivers may be powered by the International Standard for Safety of overheating the computer, do not allow another hard surface, such as an adjoining optional printer, or a soft surface, such as instructed in the device user guide. If you are installed and updated...operation. But if the computer feels unusually warm, it is an older one, is turned on a hard, flat surface. NOTE: The fan in use. Do not allow the AC adapter to room temperature. For more information about updating drivers, refer to Help and Support...
...devices may not be overheating because a vent is blocked. Drivers may be powered by the International Standard for Safety of overheating the computer, do not allow another hard surface, such as an adjoining optional printer, or a soft surface, such as instructed in the device user guide. If you are installed and updated...operation. But if the computer feels unusually warm, it is an older one, is turned on a hard, flat surface. NOTE: The fan in use. Do not allow the AC adapter to room temperature. For more information about updating drivers, refer to Help and Support...

HP Compaq 6720s Notebook PC - Maintenance and Service Guide
Page 92
.... ● Enable/disable fan always on while connected to improve computer security. ● Enable/disable LAN Power Save. When enabled, USB legacy support allows the following: ◦ Use of a USB keyboard, mouse, and hub in Computer Setup even when a Windows operating system is not running. ◦ Startup from bootable USB devices, including a hard drive, diskette drive, or optical drive connected by turning off the LAN when not in seconds. ● Set the boot order. ● Swap the functions of the listed System Configuration options may...
.... ● Enable/disable fan always on while connected to improve computer security. ● Enable/disable LAN Power Save. When enabled, USB legacy support allows the following: ◦ Use of a USB keyboard, mouse, and hub in Computer Setup even when a Windows operating system is not running. ◦ Startup from bootable USB devices, including a hard drive, diskette drive, or optical drive connected by turning off the LAN when not in seconds. ● Set the boot order. ● Swap the functions of the listed System Configuration options may...
HP Compaq 6720s Notebook PC - Maintenance and Service Guide
Page 152
... 8 keyboard product description 4 removal 50 spare part numbers 15, 28, 50 keypad keys 8 keys esc 8 fn 8 function 8 keypad 8 Windows applications 8 Windows logo 8 L LAN Power Save 84 language, changing in Computer Setup 84 left-side components 11 legacy support, Universal Serial Bus (USB) 80, 84 light components 7 lights battery 11 caps lock 7 optical drive 10 power 8 wireless 7 Logo Kit, spare part number 24, 28 M mass storage devices, spare part numbers 23 memory check 83 memory map specifications 95 memory module product description 2 removal 45 spare part numbers...
... 8 keyboard product description 4 removal 50 spare part numbers 15, 28, 50 keypad keys 8 keys esc 8 fn 8 function 8 keypad 8 Windows applications 8 Windows logo 8 L LAN Power Save 84 language, changing in Computer Setup 84 left-side components 11 legacy support, Universal Serial Bus (USB) 80, 84 light components 7 lights battery 11 caps lock 7 optical drive 10 power 8 wireless 7 Logo Kit, spare part number 24, 28 M mass storage devices, spare part numbers 23 memory check 83 memory map specifications 95 memory module product description 2 removal 45 spare part numbers...
HP Compaq 6720s Notebook PC - Maintenance and Service Guide
Page 153
... description 1 removal 73 spare part numbers 16, 27, 29, 30, 73 product description audio 3 chipset 2 diskette drive 3 display panel 2 Ethernet 4 external media cards 4 graphics 2 hard drives 3 keyboard 4 memory module 2 modem module 3 operating system 5 optical drives 3 pointing devices 4 ports 4 power requirements 5 processors 1 product name 1 security 5 serviceability 5 wireless 4 product name 1 R recovery discs creating 118 using 122, 128 recovery partition 123, 130 recovery points 121, 127 removal/replacement preliminaries 31 procedures 37 restoring Computer Setup factory settings 81...
... description 1 removal 73 spare part numbers 16, 27, 29, 30, 73 product description audio 3 chipset 2 diskette drive 3 display panel 2 Ethernet 4 external media cards 4 graphics 2 hard drives 3 keyboard 4 memory module 2 modem module 3 operating system 5 optical drives 3 pointing devices 4 ports 4 power requirements 5 processors 1 product name 1 security 5 serviceability 5 wireless 4 product name 1 R recovery discs creating 118 using 122, 128 recovery partition 123, 130 recovery points 121, 127 removal/replacement preliminaries 31 procedures 37 restoring Computer Setup factory settings 81...


