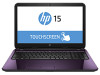

HP 15 Notebook PC Compaq 15 Notebook PC Maintenance and Service Guide
Page 89
... ESC key for Startup Menu" message is displayed at the bottom of the screen. 2. To start Computer Setup, follow these steps: 1. Turn on -screen instructions. Press f10 to enter Computer Setup. Turn on the system (such as disk drives, display, keyboard, mouse, and printer). To exit Computer Setup menus, choose one of system and extended memory. NOTE: Use extreme care when making changes in SUSE Linux Computer Setup, or Basic Input/Output System (BIOS), controls communication...
... ESC key for Startup Menu" message is displayed at the bottom of the screen. 2. To start Computer Setup, follow these steps: 1. Turn on -screen instructions. Press f10 to enter Computer Setup. Turn on the system (such as disk drives, display, keyboard, mouse, and printer). To exit Computer Setup menus, choose one of system and extended memory. NOTE: Use extreme care when making changes in SUSE Linux Computer Setup, or Basic Input/Output System (BIOS), controls communication...
HP 15 Notebook PC Compaq 15 Notebook PC Maintenance and Service Guide
Page 91
... download and installation, follow the on -screen instructions to identify your changes, click the Exit icon in an optional docking device, or connected to an optional power source. support, go to http://www.hp.com/go to reliable external power using the AC adapter. Follow the on -screen instructions. - Click your specific product from your computer model number in test-This test repeats the start-up test and checks for software and driver downloads, type your hard drive. Using...
... download and installation, follow the on -screen instructions to identify your changes, click the Exit icon in an optional docking device, or connected to an optional power source. support, go to http://www.hp.com/go to reliable external power using the AC adapter. Follow the on -screen instructions. - Click your specific product from your computer model number in test-This test repeats the start-up test and checks for software and driver downloads, type your hard drive. Using...

HP 15 Notebook PC Compaq 15 Notebook PC Maintenance and Service Guide
Page 105
...: ● Select Start and type recovery in HP Recovery Manager, change the boot order for recovery discs: 1. To check for advanced users only. ● If the recovery media do not work, you to restore your system without the need for a recovery flash drive: Restore and recovery 97 or - Changing the computer boot order To change the computer boot order. Do not interrupt the process until it is listed in the HP Recovery Manager window. 3. All hardware-related drivers and software are re-installed, but other software applications are...
...: ● Select Start and type recovery in HP Recovery Manager, change the boot order for recovery discs: 1. To check for advanced users only. ● If the recovery media do not work, you to restore your system without the need for a recovery flash drive: Restore and recovery 97 or - Changing the computer boot order To change the computer boot order. Do not interrupt the process until it is listed in the HP Recovery Manager window. 3. All hardware-related drivers and software are re-installed, but other software applications are...
HP 15 Notebook PC Compaq 15 Notebook PC Maintenance and Service Guide
Page 119
... boot order changing 97 changing HP Recovery Manager 92 bottom 14 buttons left TouchPad 8 power 10 right TouchPad 8 C cables, service considerations 29 caps lock light, identifying 9 chipset, product description 1 components bottom 12 display 5 front side 6 left side 7 right side 6 top 8 computer major components, illustrated 15 Computer Setup navigating and selecting 81 restoring factory settings 82 computer specifications 85 connector, power 7 connectors, service considerations 29 D deleted files restoring 90, 96 display assembly illustrated 16 removing 34, 66 spare part numbers...
... boot order changing 97 changing HP Recovery Manager 92 bottom 14 buttons left TouchPad 8 power 10 right TouchPad 8 C cables, service considerations 29 caps lock light, identifying 9 chipset, product description 1 components bottom 12 display 5 front side 6 left side 7 right side 6 top 8 computer major components, illustrated 15 Computer Setup navigating and selecting 81 restoring factory settings 82 computer specifications 85 connector, power 7 connectors, service considerations 29 D deleted files restoring 90, 96 display assembly illustrated 16 removing 34, 66 spare part numbers...
HP 15 Notebook PC Compaq 15 Notebook PC Maintenance and Service Guide
Page 120
... Windows 11 L labels Bluetooth 14 regulatory 14 serial number 13 service 13 wireless certification 14 WLAN 14 latch, battery release 12 left cover illustrated 22 legacy support, USB 81 lights AC adapter 7 caps lock 9 hard drive 8 mute 9 power 8, 9 RJ-45 (network) status 7 wireless 9 M mass storage devices illustrated 21 precautions 30 memory card reader, identifying 6 memory module illustrated 18 product description 1 removing 65 spare part number 24 microphone product description 2 minimized image creating 91 minimized image recovery 91 model name 1 mute light, identifying 9 N network jack...
... Windows 11 L labels Bluetooth 14 regulatory 14 serial number 13 service 13 wireless certification 14 WLAN 14 latch, battery release 12 left cover illustrated 22 legacy support, USB 81 lights AC adapter 7 caps lock 9 hard drive 8 mute 9 power 8, 9 RJ-45 (network) status 7 wireless 9 M mass storage devices illustrated 21 precautions 30 memory card reader, identifying 6 memory module illustrated 18 product description 1 removing 65 spare part number 24 microphone product description 2 minimized image creating 91 minimized image recovery 91 model name 1 mute light, identifying 9 N network jack...
HP 15 Notebook PC Compaq 15 Notebook PC Maintenance and Service Guide
Page 121
optical drive 2 pointing device 3 ports 3 power requirements 3 processor 1 product name 1 security 3 serviceability 3 video 2 wireless 2 product name 1 product name and number, computer 13 R recovering from the recovery discs 97 recovering the original system 96 recovery 96, 99 discs 89, 92 HP Recovery Manager 91, 96 media 92 options 90 starting 91 supported discs 89 system 91 USB flash drive 92 using HP Recovery media 90 recovery discs 93 recovery media 93 creating 89 creating using HP Recovery Manager 90 recovery partition removing 92 recovery, system 96 regulatory information regulatory ...
optical drive 2 pointing device 3 ports 3 power requirements 3 processor 1 product name 1 security 3 serviceability 3 video 2 wireless 2 product name 1 product name and number, computer 13 R recovering from the recovery discs 97 recovering the original system 96 recovery 96, 99 discs 89, 92 HP Recovery Manager 91, 96 media 92 options 90 starting 91 supported discs 89 system 91 USB flash drive 92 using HP Recovery media 90 recovery discs 93 recovery media 93 creating 89 creating using HP Recovery Manager 90 recovery partition removing 92 recovery, system 96 regulatory information regulatory ...

User Guide - Windows 7
Page 5
...software information 3 Front ...3 Right side ...4 Left side ...5 Display ...7 Top ...8 TouchPad ...8 Lights ...9 Button ...10 Keys ...11 Bottom ...12 Labels ...13 3 Connecting to a network ...14 Connecting to a wireless network ...14 Using the wireless controls 14 Using the wireless button 14 Using operating system controls 14 Using a WLAN ...15 Using an Internet service provider 15 Setting up a WLAN 15 Configuring a wireless router 16 Protecting your WLAN 16 Connecting to a WLAN 16 Using Bluetooth wireless devices (select models only 17 Connecting to a wired network ...17 Connecting...
...software information 3 Front ...3 Right side ...4 Left side ...5 Display ...7 Top ...8 TouchPad ...8 Lights ...9 Button ...10 Keys ...11 Bottom ...12 Labels ...13 3 Connecting to a network ...14 Connecting to a wireless network ...14 Using the wireless controls 14 Using the wireless button 14 Using operating system controls 14 Using a WLAN ...15 Using an Internet service provider 15 Setting up a WLAN 15 Configuring a wireless router 16 Protecting your WLAN 16 Connecting to a WLAN 16 Using Bluetooth wireless devices (select models only 17 Connecting to a wired network ...17 Connecting...

User Guide - Windows 7
Page 6
Using the webcam ...20 Using audio ...20 Connecting speakers ...20 Connecting headphones and microphones 21 Checking the sound ...21 Using video ...22 Connecting a VGA monitor or projector (select models only 22 Connecting an HDMI device 22 Configuring HDMI audio settings 23 Managing your audio and video files (select models only 24 5 Using the keyboard and pointing devices ...25 Using the keyboard ...25 Using ALT GR key combinations 25 Using the action keys ...25 Using the hot keys ...26 Using the keypad ...26 Using the integrated numeric keypad 26 Using the...
Using the webcam ...20 Using audio ...20 Connecting speakers ...20 Connecting headphones and microphones 21 Checking the sound ...21 Using video ...22 Connecting a VGA monitor or projector (select models only 22 Connecting an HDMI device 22 Configuring HDMI audio settings 23 Managing your audio and video files (select models only 24 5 Using the keyboard and pointing devices ...25 Using the keyboard ...25 Using ALT GR key combinations 25 Using the action keys ...25 Using the hot keys ...26 Using the keypad ...26 Using the integrated numeric keypad 26 Using the...
User Guide - Windows 7
Page 55
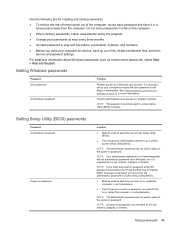
.... Setting Setup Utility (BIOS) passwords Password Administrator password Power-on password Function ● Must be used in a file on the computer. ● When creating passwords, follow requirements set , entered, changed , or deleted. NOTE: If you enter the power-on password at least every three months. ● An ideal password is set by the program. ● Change your passwords at the first password check before the "Press the ESC key for Startup Menu" message is displayed, you must enter the...
.... Setting Setup Utility (BIOS) passwords Password Administrator password Power-on password Function ● Must be used in a file on the computer. ● When creating passwords, follow requirements set , entered, changed , or deleted. NOTE: If you enter the power-on password at least every three months. ● An ideal password is set by the program. ● Change your passwords at the first password check before the "Press the ESC key for Startup Menu" message is displayed, you must enter the...
User Guide - Windows 7
Page 56
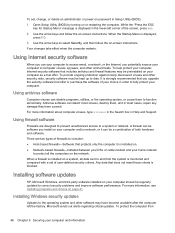
... all data sent to date. Open Setup Utility (BIOS) by turning on password in order to the operating system and other online threats. When the Startup Menu is installed on a system, all the computers on -screen instructions. Your changes take effect when the computer restarts. To set of user-defined security criteria. To help protect your computer. Using firewall software Firewalls are two types of firewalls to consider: ●...
... all data sent to date. Open Setup Utility (BIOS) by turning on password in order to the operating system and other online threats. When the Startup Menu is installed on a system, all the computers on -screen instructions. Your changes take effect when the computer restarts. To set of user-defined security criteria. To help protect your computer. Using firewall software Firewalls are two types of firewalls to consider: ●...
User Guide - Windows 7
Page 76
... system creating recovery media 52 RJ-45 (network) jack, identifying 5 S scrolling TouchPad gesture 29 security cable lock, installing 47 security cable slot, identifying 5 security, wireless 16 serial number, computer 13 service labels, locating 13 setting password protection on wakeup 31 setup of WLAN 15 Setup Utility (BIOS) passwords 45 shipping the computer 42 shutdown 35 Sleep exiting 30 initiating 30 slots memory card 3 security cable 5 software CyberLink PowerDVD 24 Disk Cleanup 41 Disk Defragmenter 40 software updates, installing 46 speaker openings, identifying 12 speakers connecting...
... system creating recovery media 52 RJ-45 (network) jack, identifying 5 S scrolling TouchPad gesture 29 security cable lock, installing 47 security cable slot, identifying 5 security, wireless 16 serial number, computer 13 service labels, locating 13 setting password protection on wakeup 31 setup of WLAN 15 Setup Utility (BIOS) passwords 45 shipping the computer 42 shutdown 35 Sleep exiting 30 initiating 30 slots memory card 3 security cable 5 software CyberLink PowerDVD 24 Disk Cleanup 41 Disk Defragmenter 40 software updates, installing 46 speaker openings, identifying 12 speakers connecting...
User Guide - Ubuntu
Page 22
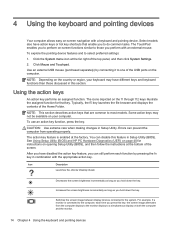
... making changes in Setup Utility (BIOS). The action key feature is connected to the computer, each function by connecting it to the system. Switches the screen image between display devices connected to one of the Home Folder. Decreases the screen brightness incrementally as long as you hold down the key. 4 Using the keyboard and pointing devices Your computer allows easy on-screen navigation with the appropriate action key. Click Mouse and Touchpad. Using the action keys...
... making changes in Setup Utility (BIOS). The action key feature is connected to the computer, each function by connecting it to the system. Switches the screen image between display devices connected to one of the Home Folder. Decreases the screen brightness incrementally as long as you hold down the key. 4 Using the keyboard and pointing devices Your computer allows easy on-screen navigation with the appropriate action key. Click Mouse and Touchpad. Using the action keys...
User Guide - Ubuntu
Page 28
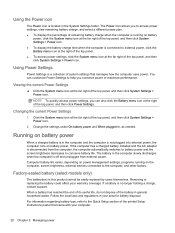
... computer, the computer automatically switches to battery power and the screen brightness decreases to the Quick Setup section of the top panel, and then click System Settings > Power icon. 2. Using the Power icon The Power icon is disconnected from external power. Viewing the current Power Settings ▲ Click the System menu icon at the far right of the printed Setup Instructions poster that manages how the computer uses power. Follow the local laws...
... computer, the computer automatically switches to battery power and the screen brightness decreases to the Quick Setup section of the top panel, and then click System Settings > Power icon. 2. Using the Power icon The Power icon is disconnected from external power. Viewing the current Power Settings ▲ Click the System menu icon at the far right of the printed Setup Instructions poster that manages how the computer uses power. Follow the local laws...
User Guide - Ubuntu
Page 59
... 22 D default settings, restoring 41 digital card inserting 27 DisplayPort connecting 12 drive media 19 E electrostatic discharge 50 entering a power-on password 37 entering an administrator password 37 external monitor port 10 F factory settings, restoring 41 fun things to do 1 H HDMI configuring audio 13 HDMI port connecting 12 Hibernation exiting 19 initiated during critical battery level 22 initiating 19 high-definition devices, connecting 12 HP PC Hardware Diagnostics (UEFI) downloading 42 using 41 hubs 25 I icons network 4 wired network 4 wireless 4 input power 48 installing optional...
... 22 D default settings, restoring 41 digital card inserting 27 DisplayPort connecting 12 drive media 19 E electrostatic discharge 50 entering a power-on password 37 entering an administrator password 37 external monitor port 10 F factory settings, restoring 41 fun things to do 1 H HDMI configuring audio 13 HDMI port connecting 12 Hibernation exiting 19 initiated during critical battery level 22 initiating 19 high-definition devices, connecting 12 HP PC Hardware Diagnostics (UEFI) downloading 42 using 41 hubs 25 I icons network 4 wired network 4 wireless 4 input power 48 installing optional...
User Guide - Windows 8.1
Page 7
... 5 Locating hardware ...5 Locating software ...5 Front ...5 Right side ...6 Left side ...7 Display ...9 Top ...10 TouchPad ...10 Lights ...11 Button ...12 Keys ...13 Bottom ...14 Labels ...15 3 Connecting to a network ...16 Connecting to a wireless network ...16 Using the wireless controls 16 Using the wireless button 16 Using operating system controls 17 Sharing data and drives and accessing software 17 Using a WLAN ...17 Using an Internet service provider 18 Setting up a WLAN 18 Configuring a wireless router 18 Protecting your WLAN 18 Connecting to a WLAN 19 Using HP Mobile...
... 5 Locating hardware ...5 Locating software ...5 Front ...5 Right side ...6 Left side ...7 Display ...9 Top ...10 TouchPad ...10 Lights ...11 Button ...12 Keys ...13 Bottom ...14 Labels ...15 3 Connecting to a network ...16 Connecting to a wireless network ...16 Using the wireless controls 16 Using the wireless button 16 Using operating system controls 17 Sharing data and drives and accessing software 17 Using a WLAN ...17 Using an Internet service provider 18 Setting up a WLAN 18 Configuring a wireless router 18 Protecting your WLAN 18 Connecting to a WLAN 19 Using HP Mobile...
User Guide - Windows 8.1
Page 10
... the BIOS version 56 Downloading a BIOS update 57 Using HP PC Hardware Diagnostics (UEFI 57 Downloading HP PC Hardware Diagnostics (UEFI) to a USB device 58 10 Backing up, restoring, and recovering ...59 Creating recovery media and backups 59 Creating HP Recovery media 59 Restore and recovery ...60 Recovering using HP Recovery Manager 61 What you need to know 61 Using the HP Recovery partition (select models only 61 Using HP Recovery media to recover 62 Changing the computer boot order 62 Removing the HP Recovery partition (select models only 62 11 Specifications ...63 Input power...
... the BIOS version 56 Downloading a BIOS update 57 Using HP PC Hardware Diagnostics (UEFI 57 Downloading HP PC Hardware Diagnostics (UEFI) to a USB device 58 10 Backing up, restoring, and recovering ...59 Creating recovery media and backups 59 Creating HP Recovery media 59 Restore and recovery ...60 Recovering using HP Recovery Manager 61 What you need to know 61 Using the HP Recovery partition (select models only 61 Using HP Recovery media to recover 62 Changing the computer boot order 62 Removing the HP Recovery partition (select models only 62 11 Specifications ...63 Input power...
User Guide - Windows 8.1
Page 77
... Graphics 46 H hard drive light 8 HDMI configuring audio 26 HDMI port connecting 25 identifying 7, 23 headphones and microphones, connecting 24 headphones, connecting 24 Hibernation exiting 40 initiated during critical battery level 43 initiating 40 high-definition devices, connecting 25, 26 hot keys description 38 using 38 HP and third-party software updates, installing 54 HP PC Hardware Diagnostics (UEFI) downloading 58 using 57 HP Recovery Manager correcting boot problems 62 starting 62 HP Recovery media creating 59 recovery 62 HP Recovery partition recovery 61 removing 62 Hybrid Graphics...
... Graphics 46 H hard drive light 8 HDMI configuring audio 26 HDMI port connecting 25 identifying 7, 23 headphones and microphones, connecting 24 headphones, connecting 24 Hibernation exiting 40 initiated during critical battery level 43 initiating 40 high-definition devices, connecting 25, 26 hot keys description 38 using 38 HP and third-party software updates, installing 54 HP PC Hardware Diagnostics (UEFI) downloading 58 using 57 HP Recovery Manager correcting boot problems 62 starting 62 HP Recovery media creating 59 recovery 62 HP Recovery partition recovery 61 removing 62 Hybrid Graphics...
User Guide - Windows 8.1
Page 78
...Disk Defragmenter 48 memory card reader, identifying 5 microphone, connecting 24 minimized image creating 61 minimized image recovery 61 Miracast-compatible wireless displays 26 mouse, external setting preferences 27 mute light, identifying 11 N network jack, identifying 7 num lock key, identifying 13, 38 O operating environment 63 optical drive, identifying 6, 22 original system recovery 61 P passwords Setup Utility (BIOS) 53 Windows 53 pinching touch screen gesture 34 pinching TouchPad gesture 29 ports charging (powered) 23 HDMI 7, 23, 25 USB 2.0 6 USB 3.0 7, 23 power battery 41 power button...
...Disk Defragmenter 48 memory card reader, identifying 5 microphone, connecting 24 minimized image creating 61 minimized image recovery 61 Miracast-compatible wireless displays 26 mouse, external setting preferences 27 mute light, identifying 11 N network jack, identifying 7 num lock key, identifying 13, 38 O operating environment 63 optical drive, identifying 6, 22 original system recovery 61 P passwords Setup Utility (BIOS) 53 Windows 53 pinching touch screen gesture 34 pinching TouchPad gesture 29 ports charging (powered) 23 HDMI 7, 23, 25 USB 2.0 6 USB 3.0 7, 23 power battery 41 power button...
HP 15 Notebook PC HP 15 TouchSmart Notebook PC Compaq 15 Notebook PC Compaq 15 TouchSmart Notebook PC Maintenance and Service Gu
Page 95
... screen, or use either a pointing device (TouchPad, pointing stick, or USB mouse) or the keyboard to the main Computer Setup screen, press esc, and then follow these steps: 1. Computer Setup includes settings for Startup Menu" message is enabled. NOTE: You can use the up arrow or the down arrow key. ● To close open dialog boxes and return to navigate and make selections in Computer Setup, follow the on -screen instructions...
... screen, or use either a pointing device (TouchPad, pointing stick, or USB mouse) or the keyboard to the main Computer Setup screen, press esc, and then follow these steps: 1. Computer Setup includes settings for Startup Menu" message is enabled. NOTE: You can use the up arrow or the down arrow key. ● To close open dialog boxes and return to navigate and make selections in Computer Setup, follow the on -screen instructions...

HP 15 Notebook PC HP 15 TouchSmart Notebook PC Compaq 15 Notebook PC Compaq 15 TouchSmart Notebook PC Maintenance and Service Gu
Page 120
... Windows 11 L labels Bluetooth 14 regulatory 14 serial number 13 service 13 wireless certification 14 WLAN 14 latch, battery release 12 left cover illustrated 23 legacy support, USB 87 lights AC adapter 7 caps lock 9 hard drive 8 mute 9 power 8, 9 RJ-45 (network) status 7 wireless 9 M mass storage devices illustrated 22 precautions 36 memory card reader, identifying 6 memory module illustrated 18 product description 2 removing 74 spare part number 25 microphone product description 2 minimized image creating 97 minimized image recovery 97 model name 1 mute light, identifying 9 N network jack...
... Windows 11 L labels Bluetooth 14 regulatory 14 serial number 13 service 13 wireless certification 14 WLAN 14 latch, battery release 12 left cover illustrated 23 legacy support, USB 87 lights AC adapter 7 caps lock 9 hard drive 8 mute 9 power 8, 9 RJ-45 (network) status 7 wireless 9 M mass storage devices illustrated 22 precautions 36 memory card reader, identifying 6 memory module illustrated 18 product description 2 removing 74 spare part number 25 microphone product description 2 minimized image creating 97 minimized image recovery 97 model name 1 mute light, identifying 9 N network jack...


