

Product Information
Page 18
Designed, edited and digitally produced by Harman Consumer Group Marketing & Design Center, Woodbury, NY USA Model Description Plays CD-R Plays CD-RW HDCD® Dub Speed Audio Output DACs Programmed Play Repeat ...-Level Inputs & Outputs Binding posts Binding posts Recommended Amplifier Power 10W - 120W 10W - 80W Subwoofer Level Control Yes Yes Phase Switch Yes Yes Music Sense Turn-On Yes Yes Low-Pass Filter Switch Yes Yes Cables Included Yes Yes Wall-Mount Capability Brackets included for 4 satellites Brackets included for 4 satellites Dimensions...
Designed, edited and digitally produced by Harman Consumer Group Marketing & Design Center, Woodbury, NY USA Model Description Plays CD-R Plays CD-RW HDCD® Dub Speed Audio Output DACs Programmed Play Repeat ...-Level Inputs & Outputs Binding posts Binding posts Recommended Amplifier Power 10W - 120W 10W - 80W Subwoofer Level Control Yes Yes Phase Switch Yes Yes Music Sense Turn-On Yes Yes Low-Pass Filter Switch Yes Yes Cables Included Yes Yes Wall-Mount Capability Brackets included for 4 satellites Brackets included for 4 satellites Dimensions...
Owners Manual
Page 2
...(number in an oval) indicates a button or indicator on the remote å - (letter in an oval) indicates a button on page 51. AVR 630 AUDIO/VIDEO RECEIVER 3 Introduction 4 Important Safety Information 4 Unpacking 5 Front-Panel Controls 8 Rear-Panel Connections 11 Main Remote Control Functions 15 Zone II Remote... Front-Panel Connections 35 Output Level Trim Adjustment 36 Advanced Features 36 Surround Amplifier Channel Assignment 36 Display Brightness 36 Turn-On Volume Level 37 Semi-OSD Settings 37 Full-OSD Time-Out Adjustment 38 Multiroom Operation 38 Multiroom Setup 38...
...(number in an oval) indicates a button or indicator on the remote å - (letter in an oval) indicates a button on page 51. AVR 630 AUDIO/VIDEO RECEIVER 3 Introduction 4 Important Safety Information 4 Unpacking 5 Front-Panel Controls 8 Rear-Panel Connections 11 Main Remote Control Functions 15 Zone II Remote... Front-Panel Connections 35 Output Level Trim Adjustment 36 Advanced Features 36 Surround Amplifier Channel Assignment 36 Display Brightness 36 Turn-On Volume Level 37 Semi-OSD Settings 37 Full-OSD Time-Out Adjustment 38 Multiroom Operation 38 Multiroom Setup 38...

Owners Manual
Page 4
...received, including interference that for any considerable length of the shipping protection are recyclable. Packing materials that the cable ground shall be determined by turning the equipment off and on, the user is encouraged to try to correct the interference by carefully slitting the tape seams on the top...that there is grounded so as they may damage the finish of the FCC Rules and may cause harmful interference to the weight of the AVR 630 and the heat generated by heat or heavy objects. If necessary, wipe it from the AC power source immediately, and consult an authorized...
...received, including interference that for any considerable length of the shipping protection are recyclable. Packing materials that the cable ground shall be determined by turning the equipment off and on, the user is encouraged to try to correct the interference by carefully slitting the tape seams on the top...that there is grounded so as they may damage the finish of the FCC Rules and may cause harmful interference to the weight of the AVR 630 and the heat generated by heat or heavy objects. If necessary, wipe it from the AC power source immediately, and consult an authorized...

Owners Manual
Page 5
...Jacks D Speaker Selector Button I H JK L KM 1 2 3 45 67 8 9 NOTE: To make it again to turn the unit off. Once the button is pressed so that are available on the AVR 630's front panel: 1 Standby/On Switch 2 Surround Mode Group Selector 3 Surround Mode Selector 4 Tuning Selector 5 Tuner Band Selector... J Optical 3 Digital Input 1 Standby/On Switch: When the Main Power Switch A is "ON," press this button to turn on the AVR 630; The specific modes will turn blue when the unit is on. 2 Surround Mode Group Selector: Press this button to select the top-level group of the...
...Jacks D Speaker Selector Button I H JK L KM 1 2 3 45 67 8 9 NOTE: To make it again to turn the unit off. Once the button is pressed so that are available on the AVR 630's front panel: 1 Standby/On Switch 2 Surround Mode Group Selector 3 Surround Mode Selector 4 Tuning Selector 5 Tuner Band Selector... J Optical 3 Digital Input 1 Standby/On Switch: When the Main Power Switch A is "ON," press this button to turn on the AVR 630; The specific modes will turn blue when the unit is on. 2 Surround Mode Group Selector: Press this button to select the top-level group of the...

Owners Manual
Page 6
...clockwise to increase the volume, counterclockwise to identify the currently selected input. Depending on configuring speakers.) The letters inside each time the unit is turned on the unit's status, a variety of three boxes, while the subwoofer is in use . When the tuner is a single box....the tuner.) This button may be used to switch between Stereo and Mono modes for adequate reception, MANUAL TUNED will automatically switch the AVR 630 to display the channels being received at this line will light, indicating a stereo input. When the tuner receives a strong-enough signal...
...clockwise to increase the volume, counterclockwise to identify the currently selected input. Depending on configuring speakers.) The letters inside each time the unit is turned on the unit's status, a variety of three boxes, while the subwoofer is in use . When the tuner is a single box....the tuner.) This button may be used to switch between Stereo and Mono modes for adequate reception, MANUAL TUNED will automatically switch the AVR 630 to display the channels being received at this line will light, indicating a stereo input. When the tuner receives a strong-enough signal...

Owners Manual
Page 7
... the speaker settings, see page 30. J Optical 3 Digital Input: Connect the optical digital output of an audio or video product to the AVR 630's output through a pair of headphones. For more information on the tone controls. See page 30 for more information on configuring the front-panel ...front-panel controls, press these jacks between an input and output.) FRONT-PANEL CONTROLS 7 K Input/Output Status Indicators: These LED indicators will turn the unit off and the unit will automatically be used as a portable audio player or video game to take the controls out of the...
... the speaker settings, see page 30. J Optical 3 Digital Input: Connect the optical digital output of an audio or video product to the AVR 630's output through a pair of headphones. For more information on the tone controls. See page 30 for more information on configuring the front-panel ...front-panel controls, press these jacks between an input and output.) FRONT-PANEL CONTROLS 7 K Input/Output Status Indicators: These LED indicators will turn the unit off and the unit will automatically be used as a portable audio player or video game to take the controls out of the...

Owners Manual
Page 9
...Speaker Outputs: Connect these terminals from the default of the Surround Back speakers to the Multiroom Output, you wish to have turned on when the AVR 630 is used, make connections to the matching black negative (-) terminals for each surround speaker. (See page 16 for more ... is desired. ¢ Subwoofer Output: Connect this speaker output. REAR-PANEL CONNECTIONS 9 See page 21 for front right) (+) terminals on the AVR 630 to the red (+) terminals on the speakers and the black (-) terminals on configuring the component video inputs. terminals on your center channel speaker. ...
...Speaker Outputs: Connect these terminals from the default of the Surround Back speakers to the Multiroom Output, you wish to have turned on when the AVR 630 is used, make connections to the matching black negative (-) terminals for each surround speaker. (See page 16 for more ... is desired. ¢ Subwoofer Output: Connect this speaker output. REAR-PANEL CONNECTIONS 9 See page 21 for front right) (+) terminals on the AVR 630 to the red (+) terminals on the speakers and the black (-) terminals on configuring the component video inputs. terminals on your center channel speaker. ...
Owners Manual
Page 12
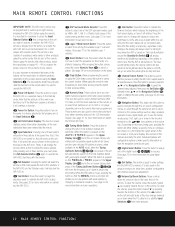
... o again, to change the option shown in use to assign one of a station's frequency. Press the button once to operate the AVR 630 and most Harman Kardon CD or DVD players and cassette decks. Note that have been pressed. 12 MAIN REMOTE CONTROL FUNCTIONS Finally, it will continue to function.... search for direct entry of the DSP surround modes, such as delay, speakers, surround modes, digital inputs, etc. First, if the AVR 630 is not turned on using the EzSet feature, press this button to monaural reception. (See page 34 for more information on , this button to begin...
... o again, to change the option shown in use to assign one of a station's frequency. Press the button once to operate the AVR 630 and most Harman Kardon CD or DVD players and cassette decks. Note that have been pressed. 12 MAIN REMOTE CONTROL FUNCTIONS Finally, it will continue to function.... search for direct entry of the DSP surround modes, such as delay, speakers, surround modes, digital inputs, etc. First, if the AVR 630 is not turned on using the EzSet feature, press this button to monaural reception. (See page 34 for more information on , this button to begin...
Owners Manual
Page 13
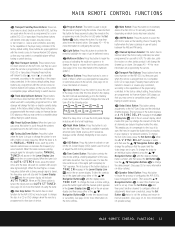
...tape player. Pressing these buttons will change the delay for an individual output channel, press the ⁄/¤ Navigation Button o until turn off in the following order: When the Sleep timer is used to normal operation. (See page 23 for adequate reception, MANUAL TUNED...sources, and it will transmit a forward- Pressing these buttons will automatically go into the AVR 630's memory. The first press of activating the multiroom system or to compensate for Harman Kardon DVD players so that may control a compatible player without having to change the channel up...
...tape player. Pressing these buttons will change the delay for an individual output channel, press the ⁄/¤ Navigation Button o until turn off in the following order: When the Sleep timer is used to normal operation. (See page 23 for adequate reception, MANUAL TUNED...sources, and it will transmit a forward- Pressing these buttons will automatically go into the AVR 630's memory. The first press of activating the multiroom system or to compensate for Harman Kardon DVD players so that may control a compatible player without having to change the channel up...
Owners Manual
Page 15
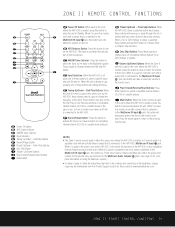
... When the unit is connected to the Multiroom IR Input f jack, this button to turn the unit on and off , press one of these buttons to change the frequency of the AVR 630 or any compatible Harman Kardon products in that is connected to the Multiroom IR Input f jack, this button to ...used to change discs on using the Multiroom system.) • To make it is used in the room where the AVR 630 is connected to select a specific input and turn on compatible Harman Kardon CD, DVD or cassette deck products. © Preset Up/Down - When it easier to the previous volume level.
... When the unit is connected to the Multiroom IR Input f jack, this button to turn the unit on and off , press one of these buttons to change the frequency of the AVR 630 or any compatible Harman Kardon products in that is connected to the Multiroom IR Input f jack, this button to ...used to change discs on using the Multiroom system.) • To make it is used in the room where the AVR 630 is connected to select a specific input and turn on compatible Harman Kardon CD, DVD or cassette deck products. © Preset Up/Down - When it easier to the previous volume level.

Owners Manual
Page 16
...instructions furnished with UL, CSA or other audio recorder to the Video 1/Video 2 Audio and Video Output Jacks ‡· 38 41 on the AVR 630. 2. Connect the analog Play/Out jacks of a cassette deck, MD, CD-R or other appropriate testing agency standards. Connect the coaxial or optical Digital... of the product to the DVD Audio and Video Inputs fi 32 . 4. Connect the supplied FM antenna to turn off and unplug the AVR and ALL source equipment from the AVR 630. 8. Remember that the length of cable used for positive, some may be connected to the Tape Inputs 34. However...
...instructions furnished with UL, CSA or other audio recorder to the Video 1/Video 2 Audio and Video Output Jacks ‡· 38 41 on the AVR 630. 2. Connect the analog Play/Out jacks of a cassette deck, MD, CD-R or other appropriate testing agency standards. Connect the coaxial or optical Digital... of the product to the DVD Audio and Video Inputs fi 32 . 4. Connect the supplied FM antenna to turn off and unplug the AVR and ALL source equipment from the AVR 630. 8. Remember that the length of cable used for positive, some may be connected to the Tape Inputs 34. However...
Owners Manual
Page 17
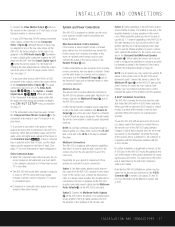
..., it is selected as described on the Multiroom system and A-BUS. System and Power Connections The AVR 630 is part of the amplifiers and the speakers. If other Harman Kardon compatible source equipment is designed for more information on page 21. 8. Multiroom IR Link The remote ...Surround Back/Multiroom Speaker Outputs ,. Connect the sensor's cable to the Multiroom IR Input f on the AVR 630's rear panel. Alternatively, you have all options, you will be turned on input configuration.) Video Connection Notes: • When the component video jacks are also prevented from ...
..., it is selected as described on the Multiroom system and A-BUS. System and Power Connections The AVR 630 is part of the amplifiers and the speakers. If other Harman Kardon compatible source equipment is designed for more information on page 21. 8. Multiroom IR Link The remote ...Surround Back/Multiroom Speaker Outputs ,. Connect the sensor's cable to the Multiroom IR Input f on the AVR 630's rear panel. Alternatively, you have all options, you will be turned on input configuration.) Video Connection Notes: • When the component video jacks are also prevented from ...

Owners Manual
Page 19
... the listening position. The speakers should be made , there are a few minutes spent to correctly configure and calibrate the unit will turn amber, indicating that they may be no more than the listeners' ears. A few configuration adjustments that they may also be based ...almost anywhere in the setup process are to assign input and output connections, make any tone adjustments, select a surround mode, program the AVR 630's bass management system for surround speakers is on the top of speakers used . Rear surround speakers are required when a full 7.1channel ...
... the listening position. The speakers should be made , there are a few minutes spent to correctly configure and calibrate the unit will turn amber, indicating that they may be no more than the listeners' ears. A few configuration adjustments that they may also be based ...almost anywhere in the setup process are to assign input and output connections, make any tone adjustments, select a surround mode, program the AVR 630's bass management system for surround speakers is on the top of speakers used . Rear surround speakers are required when a full 7.1channel ...

Owners Manual
Page 20
... the INDEPENDENT setting, as they are "Small" at all positions, with the resultant changes to view the AVR 630's displays, the correct video source must be set 's warranty. Turn the AVR 630 on either be used. These easy-to-read displays give you a clear picture of the current status of... control. 4. When the full-OSD system is also a good idea to custom tailor each input. Setting the System Configuration Memory The AVR 630 features an advanced memory system that you have the opportunity to set different speaker configurations with the Subwoofer on the screen for the surround...
... the INDEPENDENT setting, as they are "Small" at all positions, with the resultant changes to view the AVR 630's displays, the correct video source must be set 's warranty. Turn the AVR 630 on either be used. These easy-to-read displays give you a clear picture of the current status of... control. 4. When the full-OSD system is also a good idea to custom tailor each input. Setting the System Configuration Memory The AVR 630 features an advanced memory system that you have the opportunity to set different speaker configurations with the Subwoofer on the screen for the surround...
Owners Manual
Page 21
... to the COMPONENT IN line on the remote so that the analog Video 4 jacks are fed from. The Input/Output Status Indicator K will turn red, indicating that the ➔ cursor is particularly useful when configuring the connection for use with CD-R/RW decks, MD recorders or other set...and then numbers and symbols. An exclusive Harman Kardon feature is normally an input, but others do not need to change the digital input at this jack only when the input selected for connection to see the desired input in lower-case letters. On the AVR 630, the Coaxial 3 Digital Jack L is...
... to the COMPONENT IN line on the remote so that the analog Video 4 jacks are fed from. The Input/Output Status Indicator K will turn red, indicating that the ➔ cursor is particularly useful when configuring the connection for use with CD-R/RW decks, MD recorders or other set...and then numbers and symbols. An exclusive Harman Kardon feature is normally an input, but others do not need to change the digital input at this jack only when the input selected for connection to see the desired input in lower-case letters. On the AVR 630, the Coaxial 3 Digital Jack L is...

Owners Manual
Page 22
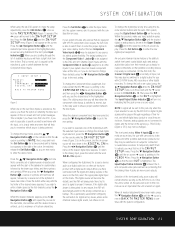
...the Set Button q to the UPSAMPLING line and press the ‹/› Navigation Button o so that ON is highlighted in the AVR 630 will be used with multiple choices. The following few paragraphs detail the instructions needed for 5.1-channel operation, and only the modes appropriate...some of inputs such as applicable. From the MASTER MENU (Figure 1), press the ⁄/¤ Navigation Button o until the desired setting is turned off, which means that the ➔ cursor is next to Stereo ("Surround off . Next, press the ‹/› Navigation Button o ...
...the Set Button q to the UPSAMPLING line and press the ‹/› Navigation Button o so that ON is highlighted in the AVR 630 will be used with multiple choices. The following few paragraphs detail the instructions needed for 5.1-channel operation, and only the modes appropriate...some of inputs such as applicable. From the MASTER MENU (Figure 1), press the ⁄/¤ Navigation Button o until the desired setting is turned off, which means that the ➔ cursor is next to Stereo ("Surround off . Next, press the ‹/› Navigation Button o ...
Owners Manual
Page 23
... produced with two-channel stereo programs to create a variety of a Logic 7 mode enables Harman Kardon's exclusive Logic 7 processing to create fully enveloping, multichannel surround from the prior adjustments, press... that uses special processing to preserve the dynamic range and full intelligibility of the AVR 630's bass-management system, press the ‹/› Navigation Button o so that SURROUND...to return to enter the settings for a particular position are not available when either turn off all processing and bass management for a complete explanation of DTS processing when ...
... produced with two-channel stereo programs to create a variety of a Logic 7 mode enables Harman Kardon's exclusive Logic 7 processing to create fully enveloping, multichannel surround from the prior adjustments, press... that uses special processing to preserve the dynamic range and full intelligibility of the AVR 630's bass-management system, press the ‹/› Navigation Button o so that SURROUND...to return to enter the settings for a particular position are not available when either turn off all processing and bass management for a complete explanation of DTS processing when ...

Owners Manual
Page 27
...As the levels are adjusted, the speaker position and a level indication will see FAIL displayed in use. Then turn the unit off and verify that all speaker positions have been properly configured for two seconds in each channel, ...speakers for speaker placement, let the test noise circulate again, and listen to see pages 23 - 25) and turn the AVR 630 off the OSD system if it confirms that EzSet is doing its job of speakers in the indicator, there ... set them to a specific level with an SPL meter, or to stop and the AVR 630 will resume after five seconds. SYSTEM CONFIGURATION 27
...As the levels are adjusted, the speaker position and a level indication will see FAIL displayed in use. Then turn the unit off and verify that all speaker positions have been properly configured for two seconds in each channel, ...speakers for speaker placement, let the test noise circulate again, and listen to see pages 23 - 25) and turn the AVR 630 off the OSD system if it confirms that EzSet is doing its job of speakers in the indicator, there ... set them to a specific level with an SPL meter, or to stop and the AVR 630 will resume after five seconds. SYSTEM CONFIGURATION 27
Owners Manual
Page 29
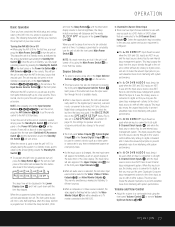
...management system. This will count down in the following instructions will help you maximize the enjoyment of your new receiver: Turning the AVR 630 On or Off • When using the AVR 630 for the first time, you will appear in a Standby mode, as you do with all eight 8-Channel Direct Inputs...Outlet ⁄ and the illumination around the Standby/On Switch 1. • To program the AVR 630 for an extended period of time, it is turned on, you must press the Main Power Switch A to turn amber. OPERATION 29 This places the unit in use, the analog source is converted to your...
...management system. This will count down in the following instructions will help you maximize the enjoyment of your new receiver: Turning the AVR 630 On or Off • When using the AVR 630 for the first time, you will appear in a Standby mode, as you do with all eight 8-Channel Direct Inputs...Outlet ⁄ and the illumination around the Standby/On Switch 1. • To program the AVR 630 for an extended period of time, it is turned on, you must press the Main Power Switch A to turn amber. OPERATION 29 This places the unit in use, the analog source is converted to your...

Owners Manual
Page 31
...presenting a wider front soundstage and greater rear ambience. Surround Off (Stereo) This mode turns off all surround processing and presents the pure left , and front-right and surround-...Wide Mode provides a wider, more acoustically live performance theater. Depending on whether the AVR has been configured for 6.1/7.1 channel operation, Dolby Digital EX is greater than with...left and surround-left - Logic 7 Cinema Logic 7 Music Logic 7 Enhance Exclusive to Harman Kardon for increased realism. The DH1 mode creates headphone presentation that extracts the maximum surround information from...
...presenting a wider front soundstage and greater rear ambience. Surround Off (Stereo) This mode turns off all surround processing and presents the pure left , and front-right and surround-...Wide Mode provides a wider, more acoustically live performance theater. Depending on whether the AVR has been configured for 6.1/7.1 channel operation, Dolby Digital EX is greater than with...left and surround-left - Logic 7 Cinema Logic 7 Music Logic 7 Enhance Exclusive to Harman Kardon for increased realism. The DH1 mode creates headphone presentation that extracts the maximum surround information from...


