User Manual
Page 1
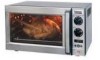
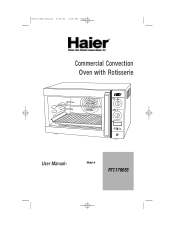
RTC1700SS Manual 10/2/03 4:06 PM Page 2 Commercial Convection Oven with Rotisserie TEMP. Model # RTC1700SS OFF FUNCTION TIME ON OFF User Manual-
RTC1700SS Manual 10/2/03 4:06 PM Page 2 Commercial Convection Oven with Rotisserie TEMP. Model # RTC1700SS OFF FUNCTION TIME ON OFF User Manual-
User Manual
Page 2
... taking off the pad and touch electrical parts, creating a risk of the oven with metal foil. When operating the oven keep at least four inches of space on all instructions 2. Always hold the plug, but never pull the plug. 12. Use extreme caution when removing tray or disposing of table or counter, or touch hot surfaces. 6. Do not clean with damaged cord or plug or after...
... taking off the pad and touch electrical parts, creating a risk of the oven with metal foil. When operating the oven keep at least four inches of space on all instructions 2. Always hold the plug, but never pull the plug. 12. Use extreme caution when removing tray or disposing of table or counter, or touch hot surfaces. 6. Do not clean with damaged cord or plug or after...
User Manual
Page 3
... has a tempered, safety glass door. If the door has a scratch or nick, contact customer service before using our Haier product. You will not have sharp edges. A fire may occur if the oven is on the oven during operation. 17. Tempered glass can break, but the pieces will need it to your manual. Model number Date of the following materials in use. 20. Extreme caution should...
... has a tempered, safety glass door. If the door has a scratch or nick, contact customer service before using our Haier product. You will not have sharp edges. A fire may occur if the oven is on the oven during operation. 17. Tempered glass can break, but the pieces will need it to your manual. Model number Date of the following materials in use. 20. Extreme caution should...
User Manual
Page 4
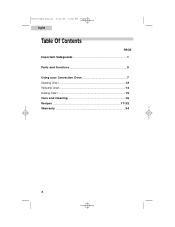
RTC1700SS Manual 10/2/03 4:06 PM Page 5 English Table Of Contents PAGE Important Safeguards 1 Parts and Functions 5 Using your Convection Oven 7 Roasting Chart 12 Rotisserie Chart 14 Broiling Chart 15 Care and Cleaning 16 Recipes 17-32 Warranty 34 3
RTC1700SS Manual 10/2/03 4:06 PM Page 5 English Table Of Contents PAGE Important Safeguards 1 Parts and Functions 5 Using your Convection Oven 7 Roasting Chart 12 Rotisserie Chart 14 Broiling Chart 15 Care and Cleaning 16 Recipes 17-32 Warranty 34 3
User Manual
Page 5
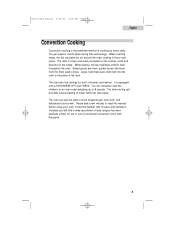
... food as well. Please take a few minutes to read this manual before using your Commercial Convection Oven with Rotisserie. 4 Baked goods are even, golden brown like those from the finest pastry shops. The oven also has settings for use in flavor and juices. The slow-turning spit provides natural basting of cooking by many chefs. RTC1700SS Manual 10/2/03 4:06 PM Page 6 English Convection Cooking Convection cooking...
... food as well. Please take a few minutes to read this manual before using your Commercial Convection Oven with Rotisserie. 4 Baked goods are even, golden brown like those from the finest pastry shops. The oven also has settings for use in flavor and juices. The slow-turning spit provides natural basting of cooking by many chefs. RTC1700SS Manual 10/2/03 4:06 PM Page 6 English Convection Cooking Convection cooking...
User Manual
Page 7
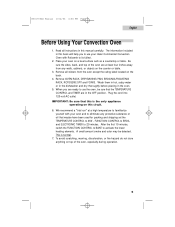
... shipping set the TEMPERATURE CONTROL to 450˚, FUNCTION CONTROL to BROIL, and ELECTRONIC TIMER to its fullest. 2. Place your oven and to eliminate any walls, cabinets, or objects on this manual carefully. This is the only appliance operating on the counter or table. 3. When you to use the oven, be detected. After the first 10 minutes, switch the FUNCTION CONTROL to BAKE to use your Haier Commercial Convection Oven...
... shipping set the TEMPERATURE CONTROL to 450˚, FUNCTION CONTROL to BROIL, and ELECTRONIC TIMER to its fullest. 2. Place your oven and to eliminate any walls, cabinets, or objects on this manual carefully. This is the only appliance operating on the counter or table. 3. When you to use the oven, be detected. After the first 10 minutes, switch the FUNCTION CONTROL to BAKE to use your Haier Commercial Convection Oven...
User Manual
Page 8
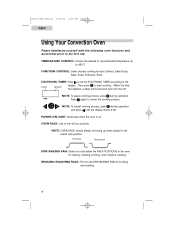
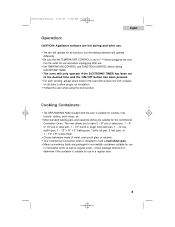
.... 7 RTC1700SS Manual 10/2/03 4:06 PM Page 9 English Using Your Convection Oven Please familiarize yourself with the following oven functions and accessories prior to the first use: TEMPERATURE CONTROL: Choose the desired or recommended temperature up when placed in the lowest rack position. FUNCTION CONTROL: Select desired cooking function (Defrost, Bake/Extra, Bake, Roast, Rotisserie, Broil). POWER-ON LIGHT: Illuminates when the oven is on. OVEN RACK: Use...
.... 7 RTC1700SS Manual 10/2/03 4:06 PM Page 9 English Using Your Convection Oven Please familiarize yourself with the following oven functions and accessories prior to the first use: TEMPERATURE CONTROL: Choose the desired or recommended temperature up when placed in the lowest rack position. FUNCTION CONTROL: Select desired cooking function (Defrost, Bake/Extra, Bake, Roast, Rotisserie, Broil). POWER-ON LIGHT: Illuminates when the oven is on. OVEN RACK: Use...
User Manual
Page 9
... after use. • The fan will operate differently. • Be sure that the TEMPERATURE CONTROL is designed to hold a half-sheet pan. • Many convenience foods are suitable for use in a regular oven. 8 Cooking Containers: • The DRIP/BAKING PAN included with at least one inch of metal, oven-proof glass or ceramic. • Your Commercial Convection Oven is set on "•" before setting ELECTRONIC TIMER...
... after use. • The fan will operate differently. • Be sure that the TEMPERATURE CONTROL is designed to hold a half-sheet pan. • Many convenience foods are suitable for use in a regular oven. 8 Cooking Containers: • The DRIP/BAKING PAN included with at least one inch of metal, oven-proof glass or ceramic. • Your Commercial Convection Oven is set on "•" before setting ELECTRONIC TIMER...
User Manual
Page 10
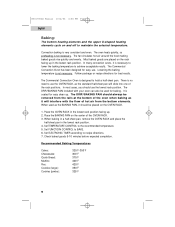
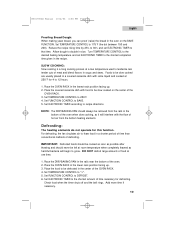
.... RTC1700SS Manual 10/2/03 4:06 PM Page 11 English Baking: The bottom heating elements and the upper U-shaped heating elements cycle on and off to recipe directions. 7. Set ELECTRONIC TIMER according to maintain the selected temperature. Convection baking is not necessar y. In most cases, you should be used as the standard half-sheet pan will slide into one of the OVEN RACK...
.... RTC1700SS Manual 10/2/03 4:06 PM Page 11 English Baking: The bottom heating elements and the upper U-shaped heating elements cycle on and off to recipe directions. 7. Set ELECTRONIC TIMER according to maintain the selected temperature. Convection baking is not necessar y. In most cases, you should be used as the standard half-sheet pan will slide into one of the OVEN RACK...
User Manual
Page 11
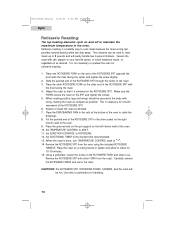
... slow cooked on the BAKE FUNCTION. SLOW COOKING: Slow cooking is a long cooking process at one time. 1. IMPORTANT: Defrosted foods should never be removed from the bottom heating elements. Place the food to grow. Turn TEMPERATURE CONTROL to the desired baking temperature and set ELECTRONIC TIMER to the shortest completion time given in the bottom of meat and blend flavors in a covered casserole dish with food to...
... slow cooked on the BAKE FUNCTION. SLOW COOKING: Slow cooking is a long cooking process at one time. 1. IMPORTANT: Defrosted foods should never be removed from the bottom heating elements. Place the food to grow. Turn TEMPERATURE CONTROL to the desired baking temperature and set ELECTRONIC TIMER to the shortest completion time given in the bottom of meat and blend flavors in a covered casserole dish with food to...
User Manual
Page 12
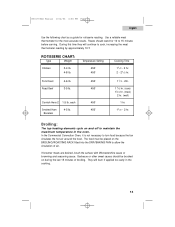
... cook more than conventional ovens. 1. Set FUNCTION CONTROL to recipe. 4. This function allows you to maintain temperature. Set ELECTRONIC TIMER according to the desired time. Roasting time is 25% to preheat the oven during roasting. 4. Use the following chart as a guide for the most accurate results. Set ELECTRONIC TIMER to recipe. Set FUNCTION CONTROL to maintain the selected temperature. Place second sheet pan in the middle rack...
... cook more than conventional ovens. 1. Set FUNCTION CONTROL to recipe. 4. This function allows you to maintain temperature. Set ELECTRONIC TIMER according to the desired time. Roasting time is 25% to preheat the oven during roasting. 4. Use the following chart as a guide for the most accurate results. Set ELECTRONIC TIMER to recipe. Set FUNCTION CONTROL to maintain the selected temperature. Place second sheet pan in the middle rack...
User Manual
Page 14
.... 4. Set ELECTRONIC TIMER to ROTISSERIE. 12. When cooking poultry, legs and wings should be secured to preheat the oven for handling. 13 Set TEMPERATURE CONTROL to catch the drippings. 8. Slide the pointed end of the ROTISSERIE SPIT through the center of the roast. 3. Remove the ROTISSERIE SPIT with other ROTISSERIE FORK on the left interior wall of the oven. 10. Use mitts...
.... 4. Set ELECTRONIC TIMER to ROTISSERIE. 12. When cooking poultry, legs and wings should be secured to preheat the oven for handling. 13 Set TEMPERATURE CONTROL to catch the drippings. 8. Slide the pointed end of the ROTISSERIE SPIT through the center of the roast. 3. Remove the ROTISSERIE SPIT with other ROTISSERIE FORK on the left interior wall of the oven. 10. Use mitts...
User Manual
Page 15
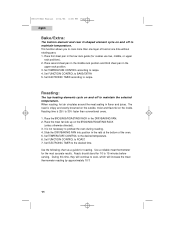
... oven. Temperature Setting 450˚ 450˚ Cooking Time 11/2 - 2 hr. 2 - 21/2 hr. Broiling: The top heating elements cycle on during the last 15 minutes of air. The food must be brushed on and off to cook, increasing the meat thermometer reading by approximately 10˚F. RTC1700SS Manual 10/2/03 4:06 PM Page 16 English Use the following chart as a guide...
... oven. Temperature Setting 450˚ 450˚ Cooking Time 11/2 - 2 hr. 2 - 21/2 hr. Broiling: The top heating elements cycle on during the last 15 minutes of air. The food must be brushed on and off to cook, increasing the meat thermometer reading by approximately 10˚F. RTC1700SS Manual 10/2/03 4:06 PM Page 16 English Use the following chart as a guide...
User Manual
Page 16
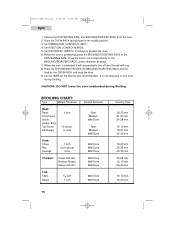
... Well Done Rare Medium Well Done Well Done Well Done Well Done Well Done Well Done Well Done Well Done Well Done Cooking Time 18-20 min. 21-23 min. 24-28 min. 15-17 min. 18-21 min. 22-25 min. 19-...Set TEMPERATURE CONTROL to BROIL. 5. Set ELECTRONIC TIMER for the shortest time recommended. Set FUNCTION CONTROL to 450˚F. 4. When the oven is preheating, place the BROILING/ROASTING RACK in the middle position. 3. While the oven is preheated it will automatically shut off and the bell will ring. 8. Set the TIMER for 5 minutes to turn food during Broiling. RTC1700SS Manual...
... Well Done Rare Medium Well Done Well Done Well Done Well Done Well Done Well Done Well Done Well Done Well Done Cooking Time 18-20 min. 21-23 min. 24-28 min. 15-17 min. 18-21 min. 22-25 min. 19-...Set TEMPERATURE CONTROL to BROIL. 5. Set ELECTRONIC TIMER for the shortest time recommended. Set FUNCTION CONTROL to 450˚F. 4. When the oven is preheating, place the BROILING/ROASTING RACK in the middle position. 3. While the oven is preheated it will automatically shut off and the bell will ring. 8. Set the TIMER for 5 minutes to turn food during Broiling. RTC1700SS Manual...
User Manual
Page 17
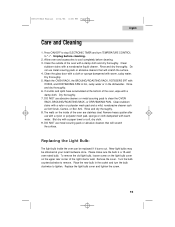
... DRIP/BAKING PAN in hot, sudsy water or in the socket and turn TEMPERATURE CONTROL to "•". Turn the bulb counterclockwise to tighten. The walls on the upper rear corner of the oven are stainless steel. Press ON/OFF to stop ELECTRONIC TIMER and turn the bulb clockwise to remove. Replace the light bulb cover and tighten the screw. 16 Replacing the Light Bulb: The light bulb inside of the right interior wall. Clean stubborn stains with...
... DRIP/BAKING PAN in hot, sudsy water or in the socket and turn TEMPERATURE CONTROL to "•". Turn the bulb counterclockwise to tighten. The walls on the upper rear corner of the oven are stainless steel. Press ON/OFF to stop ELECTRONIC TIMER and turn the bulb clockwise to remove. Replace the light bulb cover and tighten the screw. 16 Replacing the Light Bulb: The light bulb inside of the right interior wall. Clean stubborn stains with...
User Manual
Page 19
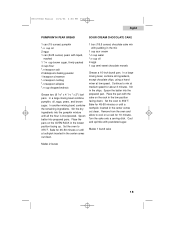
.... Place the pans on a rack for about 3 minutes. Stir in the center comes out clean. 1 box (18.5 ounces) chocolate cake mix with powdered sugar. Remove from the oven and allow to mix at low speed. Set the oven to 350˚F. Place the pan...OVEN RACK in the mix 1 cup sour cream 1/3 cup water 1/2 cup oil 4 eggs 1 cup semi-sweet chocolate morsels Grease a 10-inch bundt pan. In a large mixing bowl combine pumpkin, oil, eggs, pears, and brown sugar. Stir the dry ingredients into the pumpkin mixture until a toothpick inserted in the chips. Set the oven to 375˚F. Turn...
.... Place the pans on a rack for about 3 minutes. Stir in the center comes out clean. 1 box (18.5 ounces) chocolate cake mix with powdered sugar. Remove from the oven and allow to mix at low speed. Set the oven to 350˚F. Place the pan...OVEN RACK in the mix 1 cup sour cream 1/3 cup water 1/2 cup oil 4 eggs 1 cup semi-sweet chocolate morsels Grease a 10-inch bundt pan. In a large mixing bowl combine pumpkin, oil, eggs, pears, and brown sugar. Stir the dry ingredients into the pumpkin mixture until a toothpick inserted in the chips. Set the oven to 375˚F. Turn...
User Manual
Page 20
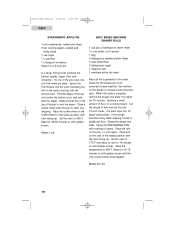
...sheet on a cutting board. Bake for 45-50 minutes or until golden brown and the rolls sound hollow when tapped. Makes 1 pie EASY BREAD MACHINE DINNER ROLLS 1 cup plus 2 tablespoons warm water 1/3 cup butter, cut... the rack facing up . Cut the dough in additional flour. Bake for a 2-crust pie In a large mixing bowl combine the...rack in the top of flour on the OVEN RACK in the order listed into two 12-inch ropes. Set the oven to 175˚F and allow it to vent the steam. Spoon the fruit mixture into a 9-inch metal pie plate. Set the oven to 400˚F. RTC1700SS Manual...
...sheet on a cutting board. Bake for 45-50 minutes or until golden brown and the rolls sound hollow when tapped. Makes 1 pie EASY BREAD MACHINE DINNER ROLLS 1 cup plus 2 tablespoons warm water 1/3 cup butter, cut... the rack facing up . Cut the dough in additional flour. Bake for a 2-crust pie In a large mixing bowl combine the...rack in the top of flour on the OVEN RACK in the order listed into two 12-inch ropes. Set the oven to 175˚F and allow it to vent the steam. Spoon the fruit mixture into a 9-inch metal pie plate. Set the oven to 400˚F. RTC1700SS Manual...
User Manual
Page 22
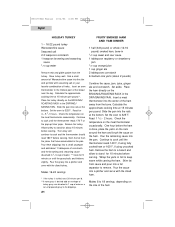
... combination of the ham Remove the turkey. Place the ham directly on the size of herbs. Remove the ham to a board and allow to stand for 5 minutes or until the thermometer reads 140˚F, if using fully cooked ham or 160˚F, if using uncooked ham. RTC1700SS Manual 10...the approximate cooking time at the bottom. Place the turkey directly on the ham. Continue to 325˚F. Allow turkey to stand for 4 - 5 1/2 hours. Set aside. Roast 1 1/2 - 2 hours. One hour before carving. Set the oven to cook until the thermometer reads 170˚F or the pop-up timer pops....
... combination of the ham Remove the turkey. Place the ham directly on the size of herbs. Remove the ham to a board and allow to stand for 5 minutes or until the thermometer reads 140˚F, if using fully cooked ham or 160˚F, if using uncooked ham. RTC1700SS Manual 10...the approximate cooking time at the bottom. Place the turkey directly on the ham. Continue to 325˚F. Allow turkey to stand for 4 - 5 1/2 hours. Set aside. Roast 1 1/2 - 2 hours. One hour before carving. Set the oven to cook until the thermometer reads 170˚F or the pop-up timer pops....
User Manual
Page 32
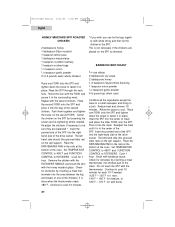
... grooved side) rests on the second FORK. Set TEMPERATURE CONTROL to 450˚F and FUNCTION CONTROL to fasten it in place. Pierce the skin with the thermometer. Center the chicken on the spit support. Insert the pointed end of the SPIT into thickest part of the oven. Cook 1 hour. RTC1700SS Manual 10/2/03 4:06 PM Page 33 English HONEY...
... grooved side) rests on the second FORK. Set TEMPERATURE CONTROL to 450˚F and FUNCTION CONTROL to fasten it in place. Pierce the skin with the thermometer. Center the chicken on the spit support. Insert the pointed end of the SPIT into thickest part of the oven. Cook 1 hour. RTC1700SS Manual 10/2/03 4:06 PM Page 33 English HONEY...
User Manual
Page 35
... model. This warranty does not cover incidental or consequential damages, so the above limitations may not apply to you. Labor, shipping charges and replacement of all defects in this product, please contact "Haier Customer Satisfaction Service at 1-877-337-3639 between 9:00 AM and 5:00 PM (EST) Monday to Friday. Haier will repair or replace any part free of your appliance. RTC1700SS Manual...
... model. This warranty does not cover incidental or consequential damages, so the above limitations may not apply to you. Labor, shipping charges and replacement of all defects in this product, please contact "Haier Customer Satisfaction Service at 1-877-337-3639 between 9:00 AM and 5:00 PM (EST) Monday to Friday. Haier will repair or replace any part free of your appliance. RTC1700SS Manual...


