
Manual
Page 31
To upgrade the BIOS, use either the GIGABYTE Q-Flash or @BIOS utility. • Q-Flash allows the user to quickly and easily upgrade or back up BIOS without entering the operating system. • @BIOS ... - Inadequate BIOS flashing may result in the main menu of BIOS, it with caution. BIOS Setup Its major functions include conducting the Power-On Self-Test (POST) during system startup, saving system parameters and loading operating system, etc. For instructions on using the current version of the BIOS Setup program. Chapter...
To upgrade the BIOS, use either the GIGABYTE Q-Flash or @BIOS utility. • Q-Flash allows the user to quickly and easily upgrade or back up BIOS without entering the operating system. • @BIOS ... - Inadequate BIOS flashing may result in the main menu of BIOS, it with caution. BIOS Setup Its major functions include conducting the Power-On Self-Test (POST) during system startup, saving system parameters and loading operating system, etc. For instructions on using the current version of the BIOS Setup program. Chapter...
Manual
Page 66
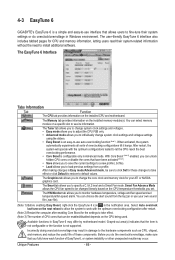
... allows you to save the current settings to a new profile (.txt file). • Load allows you set temperature/fan speed alarm. 4-3 EasyTune 6 GIGABYTE's EasyTune 6 is a simple and easy-to-use interface that can be enabled/disabled depends on the CPU being used. Select Auto overclock last tune on... the next reboot to allow the system to work with the optimum configurations tested to let the CPU reach the best overclocking performance. • Core Boost is configurable only in Windows environment. Before you do ...
... allows you to save the current settings to a new profile (.txt file). • Load allows you set temperature/fan speed alarm. 4-3 EasyTune 6 GIGABYTE's EasyTune 6 is a simple and easy-to-use interface that can be enabled/disabled depends on the CPU being used. Select Auto overclock last tune on... the next reboot to allow the system to work with the optimum configurations tested to let the CPU reach the best overclocking performance. • Core Boost is configurable only in Windows environment. Before you do ...

Manual
Page 67
... Switch (Default:1) (Note 2) 6 Current CPU Power Consumption 7 Meter Time 8 Power Saving (Calculate power savings based on testing method. - 67 - Meter Mode In Meter Mode, GIGABYTE Easy Energy Saver shows how much power they have saved in taskbar) 14 INFO/Help 15 Live Utility Update (Check for ...reference only. Featuring an advanced proprietary software design, GIGABYTE Easy Energy Saver is able to run in a ...
... Switch (Default:1) (Note 2) 6 Current CPU Power Consumption 7 Meter Time 8 Power Saving (Calculate power savings based on testing method. - 67 - Meter Mode In Meter Mode, GIGABYTE Easy Energy Saver shows how much power they have saved in taskbar) 14 INFO/Help 15 Live Utility Update (Check for ...reference only. Featuring an advanced proprietary software design, GIGABYTE Easy Energy Saver is able to run in a ...

Manual
Page 72
... for the SATA2_4/5 connectors, set OnChip SATA Type to RAID and set OnChip SATA Type to enter BIOS Setup during the POST (Power-On Self-Test). Ensure OnChip SATA Controller is enabled under Integrated Peripherals. The BIOS Setup menus described in system BIOS Setup. Step 1: Turn on the motherboard you have...
... for the SATA2_4/5 connectors, set OnChip SATA Type to RAID and set OnChip SATA Type to enter BIOS Setup during the POST (Power-On Self-Test). Ensure OnChip SATA Controller is enabled under Integrated Peripherals. The BIOS Setup menus described in system BIOS Setup. Step 1: Turn on the motherboard you have...

Manual
Page 73
... enter the RAID BIOS setup utility. C. All rights reserved. To delete an array, press to enter FastBuild (tm) Utility" (Figure 2). Step 1: After the POST memory test begins and before the operating system boot begins, look for a non-RAID configuration. To view controller settings, press to enter the Controller Configuration window. Appendix
... enter the RAID BIOS setup utility. C. All rights reserved. To delete an array, press to enter FastBuild (tm) Utility" (Figure 2). Step 1: After the POST memory test begins and before the operating system boot begins, look for a non-RAID configuration. To view controller settings, press to enter the Controller Configuration window. Appendix