
Manual
Page 5
... 57 3-1 Installing Chipset Drivers 57 3-2 Application Software 58 3-3 Technical Manuals 58 3-4 Contact...59 3-5 System...59 3-6 Download Center 60 3-7 New Utilities...60 Chapter 4 Unique Features...BIOS Utility 67 4-3 EasyTune 6...68 4-4 Dynamic Energy Saver Advanced 69 4-5 Q-Share...71 4-6 SMART Recovery 72 Chapter 5 Appendix...73 5-1 Configuring Audio Input and Output 73 5-1-1 Configuring 2/4/5.1/7.1-Channel Audio 73 5-1-2 Configuring S/PDIF In/Out 75 5-1-3 Configuring Microphone Recording 77 5-1-4 Using the Sound Recorder 79 5-2 Troubleshooting 80 5-2-1 Frequently Asked Questions...
... 57 3-1 Installing Chipset Drivers 57 3-2 Application Software 58 3-3 Technical Manuals 58 3-4 Contact...59 3-5 System...59 3-6 Download Center 60 3-7 New Utilities...60 Chapter 4 Unique Features...BIOS Utility 67 4-3 EasyTune 6...68 4-4 Dynamic Energy Saver Advanced 69 4-5 Q-Share...71 4-6 SMART Recovery 72 Chapter 5 Appendix...73 5-1 Configuring Audio Input and Output 73 5-1-1 Configuring 2/4/5.1/7.1-Channel Audio 73 5-1-2 Configuring S/PDIF In/Out 75 5-1-3 Configuring Microphone Recording 77 5-1-4 Using the Sound Recorder 79 5-2 Troubleshooting 80 5-2-1 Frequently Asked Questions...

Manual
Page 73
... Vista as the example operating system.) Step 1: After installing the audio driver, the HD Audio Manager icon will be present on both of the front and back panel audio connections simultaneously. Appendix Chapter 5 Appendix 5-1 Configuring Audio Input and Output 5-1-1 Configuring 2/4/5.1/7.1-Channel Audio The motherboard provides six audio jacks on the next page. woofer speaker out jack, you...
... Vista as the example operating system.) Step 1: After installing the audio driver, the HD Audio Manager icon will be present on both of the front and back panel audio connections simultaneously. Appendix Chapter 5 Appendix 5-1 Configuring Audio Input and Output 5-1-1 Configuring 2/4/5.1/7.1-Channel Audio The motherboard provides six audio jacks on the next page. woofer speaker out jack, you...

Manual
Page 77
...To hear the sound being recorded during the recording process, do not mute the playback volume. 5-1-3 Configuring Microphone Recording Step 1: After installing the audio driver, the HD Audio Manager icon will appear in jack (pink) on Microphone and select Set Default Device. - 77 - Then configure the jack for microphone functionality. ... the Microphone screen. It is recommended that you want to change the current sound input default device to access the HD Audio Manager. Double-click the icon to microphone, right-click on the front panel. If you set the volumes at the same time.
...To hear the sound being recorded during the recording process, do not mute the playback volume. 5-1-3 Configuring Microphone Recording Step 1: After installing the audio driver, the HD Audio Manager icon will appear in jack (pink) on Microphone and select Set Default Device. - 77 - Then configure the jack for microphone functionality. ... the Microphone screen. It is recommended that you want to change the current sound input default device to access the HD Audio Manager. Double-click the icon to microphone, right-click on the front panel. If you set the volumes at the same time.
Manual
Page 80
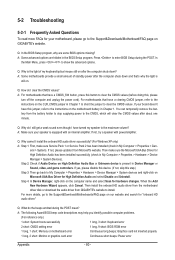
... Manager, right-click on . Q: Why do I clear the CMOS values? Press to enter BIOS Setup during the POST mean? Then install the onboard HD audio driver from the motherboard driver disk or download the audio driver from GIGABYTE's website to show the advanced options. Q: How do I still get a weak sound even though I install the onboard HD...
... Manager, right-click on . Q: Why do I clear the CMOS values? Press to enter BIOS Setup during the POST mean? Then install the onboard HD audio driver from the motherboard driver disk or download the audio driver from GIGABYTE's website to show the advanced options. Q: How do I still get a weak sound even though I install the onboard HD...


