
User Manual
Page 4
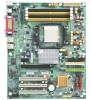
.... 3. Be careful, don't let the screw contact any printed circuit write or parts on the inside. 2. English GA-3PXSL-RH Motherboard Item Checklist The GA-3PXSL-RH motherboard IDE (ATA100 ) cable x 1 / Floppy cable x 1 CD for motherboard driver & utility GA-3PXSL-RH user's manual Serial ATA cable x 4 I/O Shield Kit WARNING! If the motherboard has mounting holes, but they...
.... 3. Be careful, don't let the screw contact any printed circuit write or parts on the inside. 2. English GA-3PXSL-RH Motherboard Item Checklist The GA-3PXSL-RH motherboard IDE (ATA100 ) cable x 1 / Floppy cable x 1 CD for motherboard driver & utility GA-3PXSL-RH user's manual Serial ATA cable x 4 I/O Shield Kit WARNING! If the motherboard has mounting holes, but they...

User Manual
Page 13
... secure the slot bracket of expansion card from BIOS. 8. Power on the card are indeed seated in motherboard. 4. Remove your computer's chassis cover. 7. Install related driver from the computer. 3. Replace your server's chassis cover, necessary screws and slot bracket from the operating system. 13 Press the expansion card firmly into the...
... secure the slot bracket of expansion card from BIOS. 8. Power on the card are indeed seated in motherboard. 4. Remove your computer's chassis cover. 7. Install related driver from the computer. 3. Replace your server's chassis cover, necessary screws and slot bracket from the operating system. 13 Press the expansion card firmly into the...

User Manual
Page 15
... your OS supports USB controller. For more information please contact your OS does not support USB controller, please contact OS vendor for possible patch or driver updated. Hardware Installation Process PS/2 Keyboard and PS/2 Mouse Connector To install a PS/2 port keyboard and mouse, plug the mouse to the upper port (green...
... your OS supports USB controller. For more information please contact your OS does not support USB controller, please contact OS vendor for possible patch or driver updated. Hardware Installation Process PS/2 Keyboard and PS/2 Mouse Connector To install a PS/2 port keyboard and mouse, plug the mouse to the upper port (green...

User Manual
Page 55
... Procedures: 1. The CD auto run program starts, Click on "nVDIA Chipset Driver" to restart your CD-ROM driver, the driver CD-title will auto start the installation. 2. Follow up the wizards to install the drivers. 3.Setup completed, click "Finish" to start and show the installation guide.... Click " nVDIA Chipset Driver" item. 55 Autorun 1. Then, a series of installation wizards appear. If not, please double ...
... Procedures: 1. The CD auto run program starts, Click on "nVDIA Chipset Driver" to restart your CD-ROM driver, the driver CD-title will auto start the installation. 2. Follow up the wizards to install the drivers. 3.Setup completed, click "Finish" to start and show the installation guide.... Click " nVDIA Chipset Driver" item. 55 Autorun 1. Then, a series of installation wizards appear. If not, please double ...

User Manual
Page 57
4. NVDIA IDE SW Driver Information Driver Installation 4. IDE SW Driver Installation Confirmation Dialog 5. Click "Yes". 57 Click "Next" to process the installation. 5.
4. NVDIA IDE SW Driver Information Driver Installation 4. IDE SW Driver Installation Confirmation Dialog 5. Click "Yes". 57 Click "Next" to process the installation. 5.

User Manual
Page 59
Network Access Manager Setup Type Selection Driver Installation 8. Select the setup type and determine the driver destination folder. Network Access Manager Installation Language Preference 9. 8. Click "Next" 9. Select the language, and click "Next". 59
Network Access Manager Setup Type Selection Driver Installation 8. Select the setup type and determine the driver destination folder. Network Access Manager Installation Language Preference 9. 8. Click "Next" 9. Select the language, and click "Next". 59

User Manual
Page 61
... on "nVIDIA VGA Driver" to restart your CD-ROM driver, the driver CD-title will auto start the installation. 2. Click "nDIVIA VGA Driver" item. 61 Follow up the wizards to install the drivers. 3.Setup completed, click "Finish" to start and show the installation guide. Autorun 1. nVIDIA VGA Driver Installation Driver Installation Insert the driver CD-title that came...
... on "nVIDIA VGA Driver" to restart your CD-ROM driver, the driver CD-title will auto start the installation. 2. Click "nDIVIA VGA Driver" item. 61 Follow up the wizards to install the drivers. 3.Setup completed, click "Finish" to start and show the installation guide. Autorun 1. nVIDIA VGA Driver Installation Driver Installation Insert the driver CD-title that came...

User Manual
Page 63
... "My computer", and execute the setup.exe. Follow up the wizards to install the drivers. 3.Setup completed, click "Finish" to start and show the installation guide. Then, a series of installation wizards appear. Marvell LAN Driver Installation Driver Installation Insert the driver CD-title that came with your motherboard into your computer. 1. Click "Marvell LAN...
... "My computer", and execute the setup.exe. Follow up the wizards to install the drivers. 3.Setup completed, click "Finish" to start and show the installation guide. Then, a series of installation wizards appear. Marvell LAN Driver Installation Driver Installation Insert the driver CD-title that came with your motherboard into your computer. 1. Click "Marvell LAN...

User Manual
Page 65
Click "Install" to Install the Program Driver Installation 4. Click "Finish". 4. Installaiton Wizard Completed 4. Installation Completed 65 Ready to start the installation 5.
Click "Install" to Install the Program Driver Installation 4. Click "Finish". 4. Installaiton Wizard Completed 4. Installation Completed 65 Ready to start the installation 5.

User Manual
Page 66
The CD auto run program starts, Double click on "Directx9.0" to restart your CD-ROM driver, the driver CD-title will auto start the installation. 2. If not, please double click the CD-ROM device icon in "My computer... Procedures: 1. Follow up the wizards to install the drivers. 3.Setup completed, click "Finish" to start and show the installation guide. Then, a series of installation wizards appear. Click "DirectX 9.0 Driver" item 66 DirectX 9.0 Driver Installation Insert the driver CD-title that came with your motherboard into your computer. 1. GA-3PXSL-RH Motherboard D.
The CD auto run program starts, Double click on "Directx9.0" to restart your CD-ROM driver, the driver CD-title will auto start the installation. 2. If not, please double click the CD-ROM device icon in "My computer... Procedures: 1. Follow up the wizards to install the drivers. 3.Setup completed, click "Finish" to start and show the installation guide. Then, a series of installation wizards appear. Click "DirectX 9.0 Driver" item 66 DirectX 9.0 Driver Installation Insert the driver CD-title that came with your motherboard into your computer. 1. GA-3PXSL-RH Motherboard D.

User Manual
Page 67
Select "I accept the agreement andclick "Next" to start the installation . 67 Click "Next" to process the installation. 3. License Agreement Driver Installation 3. Start Installaiton 2. 2.
Select "I accept the agreement andclick "Next" to start the installation . 67 Click "Next" to process the installation. 3. License Agreement Driver Installation 3. Start Installaiton 2. 2.


