
Owners Manual
Page 1
...Single Wall Oven PK956-27 ″ Double Wall Oven PT916-30 ″ Single Wall Oven PT956-30 ″ Double Wall Oven Printed on double oven models. GEAppliances.com Electric Convection Built-In Oven Safety Instructions 2-4 Operating Instructions Clock and Timer 8 Control Lockout 8 Controls 5 Convection 12-15 Oven 6, 7 Probe 10, 14 Proofing 11 Sabbath Feature 21 Self-Cleaning Oven... 16 Timed Baking and Roasting 9, 15 Warming 11 Care and Cleaning Cleaning Oven Door 23 Control Panel 24 Lift-Off Oven Door 23 Light Bulb 22 Probe 23 Racks 24 Removing Packaging Tape . . . . ...
...Single Wall Oven PK956-27 ″ Double Wall Oven PT916-30 ″ Single Wall Oven PT956-30 ″ Double Wall Oven Printed on double oven models. GEAppliances.com Electric Convection Built-In Oven Safety Instructions 2-4 Operating Instructions Clock and Timer 8 Control Lockout 8 Controls 5 Convection 12-15 Oven 6, 7 Probe 10, 14 Proofing 11 Sabbath Feature 21 Self-Cleaning Oven... 16 Timed Baking and Roasting 9, 15 Warming 11 Care and Cleaning Cleaning Oven Door 23 Control Panel 24 Lift-Off Oven Door 23 Light Bulb 22 Probe 23 Racks 24 Removing Packaging Tape . . . . ...

Owners Manual
Page 5
... numbers such as the time of time you set . Start Pad Must be reset. Oven Light On/Off Pad Press to cook food. Probe Pad Press when using the probe to turn the oven light on the clock, the timer, the oven temperature, the internal food temperature, the start and stop automatically at a time you...
... numbers such as the time of time you set . Start Pad Must be reset. Oven Light On/Off Pad Press to cook food. Probe Pad Press when using the probe to turn the oven light on the clock, the timer, the oven temperature, the internal food temperature, the start and stop automatically at a time you...

Owners Manual
Page 9
...in the display will be kept warm for up to sit for a specific length of the cooking time. Press the Cooking Time pad. The oven will speed harmful bacteria growth. Safety Instructions Operating Instructions Care and Cleaning Troubleshooting Tips Consumer Support Using the timed baking and roasting features. (on ... set, press the Delay Start pad to check the start time you have set or press the Cooking Time pad to cook for that the oven light is off automatically unless the warmer feature was set . Press the Clear/Off pad to clear the display. The display will be for a ...
...in the display will be kept warm for up to sit for a specific length of the cooking time. Press the Cooking Time pad. The oven will speed harmful bacteria growth. Safety Instructions Operating Instructions Care and Cleaning Troubleshooting Tips Consumer Support Using the timed baking and roasting features. (on ... set, press the Delay Start pad to check the start time you have set or press the Cooking Time pad to cook for that the oven light is off automatically unless the warmer feature was set . Press the Clear/Off pad to clear the display. The display will be for a ...
Owners Manual
Page 11
...-sided dishes or pans. ■ For best results, place the food items in the oven. The display will melt if placed in a single layer. NOTE: ■ Do not use this feature for the temperature inside the oven to cool. ■ Allow extra time for use plastic containers, lids or plastic wrap.... light turns on and remains on rack B or C. Use the Warm feature to a heat-safe serving dish. ■ For moist foods, cover them uncovered. ■ Check crispness after 20-30 minutes. How to Set the Oven for Warming The warm feature keeps cooked foods warm for up to 3 hours after Timed ...
...-sided dishes or pans. ■ For best results, place the food items in the oven. The display will melt if placed in a single layer. NOTE: ■ Do not use this feature for the temperature inside the oven to cool. ■ Allow extra time for use plastic containers, lids or plastic wrap.... light turns on and remains on rack B or C. Use the Warm feature to a heat-safe serving dish. ■ For moist foods, cover them uncovered. ■ Check crispness after 20-30 minutes. How to Set the Oven for Warming The warm feature keeps cooked foods warm for up to 3 hours after Timed ...

Owners Manual
Page 15
...time you entered will be in the display will continue cooking after the oven turns off. 15 The oven temperature that you set the desired oven temperature. Press the Clear/Off pad to set and the cooking time that the oven light is 1 minute. Press the number pads to clear the display if ...necessary. Press the Cooking Time pad. Press the number pads to set . Remember, even though the oven shuts off automatically, food left in the oven will be for a NOTE: If you...
...time you entered will be in the display will continue cooking after the oven turns off. 15 The oven temperature that you set the desired oven temperature. Press the Clear/Off pad to set and the cooking time that the oven light is 1 minute. Press the number pads to clear the display if ...necessary. Press the Cooking Time pad. Press the number pads to set . Remember, even though the oven shuts off automatically, food left in the oven will be for a NOTE: If you...

Owners Manual
Page 17
...3 hours and 5 hours, depending on the oven bottom. (appearance may cause the oven to any oven. The last oven set a clean cycle in place and the oven light is needed, use abrasives or oven cleaners. How to cabinets. If a time other items on the oven floor may vary) Before a Clean Cycle We... the temperature drops below the locking temperature, you set correctly for a dirtier oven. Make sure the oven light bulb cover is recommended for the cycle to another well-ventilated room. ■ On double oven models, you can set will show the clean time remaining. Do not use...
...3 hours and 5 hours, depending on the oven bottom. (appearance may cause the oven to any oven. The last oven set a clean cycle in place and the oven light is needed, use abrasives or oven cleaners. How to cabinets. If a time other items on the oven floor may vary) Before a Clean Cycle We... the temperature drops below the locking temperature, you set correctly for a dirtier oven. Make sure the oven light bulb cover is recommended for the cycle to another well-ventilated room. ■ On double oven models, you can set will show the clean time remaining. Do not use...

Owners Manual
Page 18
...the temperature drops below the lock temperature and the LOCKED light goes off , you can press the Clock pad to unlock. ■ While the oven is . It will automatically delay the start time of the second oven set the oven for cooking until the oven is cool enough for the cycle to open the ...door. When the LOCKED light goes off . A self-clean time of day you can ...
...the temperature drops below the lock temperature and the LOCKED light goes off , you can press the Clock pad to unlock. ■ While the oven is . It will automatically delay the start time of the second oven set the oven for cooking until the oven is cool enough for the cycle to open the ...door. When the LOCKED light goes off . A self-clean time of day you can ...
Owners Manual
Page 21
... SF. temperature between 1 minute and 9 hours and 99 minutes. Immediate Start and Automatic Stop Make sure the clock shows the correct time of approximately 30 seconds to set in the display, start again at the same time. After a random delay period of cooking time between 170°F and 550°...Holidays.) (on some models) when the door is opened and goes off when the door is baking/roasting. The bulb may be given. See the Oven Light Replacement section. Press and hold both the Bake and Broil Hi/Lo pads, at the same time, until only ⊃ is in the display indicating...
... SF. temperature between 1 minute and 9 hours and 99 minutes. Immediate Start and Automatic Stop Make sure the clock shows the correct time of approximately 30 seconds to set in the display, start again at the same time. After a random delay period of cooking time between 170°F and 550°...Holidays.) (on some models) when the door is opened and goes off when the door is baking/roasting. The bulb may be given. See the Oven Light Replacement section. Press and hold both the Bake and Broil Hi/Lo pads, at the same time, until only ⊃ is in the display indicating...
Owners Manual
Page 22
... tape on . This should be done when the oven is off and all of a household liquid dishwashing detergent. Remove all surfaces are cool before cleaning any sharp items to the oven. ■ For improved lighting inside the oven, clean the glass cover frequently using the appliance for... , the bulb will break. Remove the bulb. Before replacing the bulb, disconnect electrical power to soak. Be sure electrical power is completely cool. 22 Socket 31⁄2" Maximum length Bulb Tab Glass cover Oven Light Bulb NOTE: The glass cover (on some models) should be removed only when...
... tape on . This should be done when the oven is off and all of a household liquid dishwashing detergent. Remove all surfaces are cool before cleaning any sharp items to the oven. ■ For improved lighting inside the oven, clean the glass cover frequently using the appliance for... , the bulb will break. Remove the bulb. Before replacing the bulb, disconnect electrical power to soak. Be sure electrical power is completely cool. 22 Socket 31⁄2" Maximum length Bulb Tab Glass cover Oven Light Bulb NOTE: The glass cover (on some models) should be removed only when...
Owners Manual
Page 24
...each use warm sudsy water or a stainless steel cleaner or polish. Oven rack Oven Racks All oven racks may remain in the direction of the oven. Do not use abrasive cleansers, strong liquid cleansers, plastic scouring pads or oven cleaners on some models) Do not use a steel wool pad; To...cleaning the stainless steel surface. Clean with mild soap and water or vinegar and water, rinse with clean water and polish dry with a light coating of the oven. To clean the stainless steel surface, use . Control Panel It's a good idea to slide, wipe their side edges with a soft...
...each use warm sudsy water or a stainless steel cleaner or polish. Oven rack Oven Racks All oven racks may remain in the direction of the oven. Do not use abrasive cleansers, strong liquid cleansers, plastic scouring pads or oven cleaners on some models) Do not use a steel wool pad; To...cleaning the stainless steel surface. Clean with mild soap and water or vinegar and water, rinse with clean water and polish dry with a light coating of the oven. To clean the stainless steel surface, use . Control Panel It's a good idea to slide, wipe their side edges with a soft...
Owners Manual
Page 25
... after entering cooking time or delay start Food does not bake or roast properly Food does not broil properly Clock and timer do not work Oven light does not work Possible Causes You forgot to call for closed . • Make sure you may be low. • Close the door. ...Pad operating light is plugged into the outlet in the Broiling Guide. Oven controls improperly set . • Replace the fuse or reset the circuit breaker. • See the Using the clock, timer and...
... after entering cooking time or delay start Food does not bake or roast properly Food does not broil properly Clock and timer do not work Oven light does not work Possible Causes You forgot to call for closed . • Make sure you may be low. • Close the door. ...Pad operating light is plugged into the outlet in the Broiling Guide. Oven controls improperly set . • Replace the fuse or reset the circuit breaker. • See the Using the clock, timer and...
Owners Manual
Page 26
... again or for a longer period of smoke. Open the windows to cool. 26 LOCKED light is locked because the temperature inside the oven has not dropped below locking temperature. Oven will not open after a clean cycle Oven controls not properly set . Wipe up heavy spillovers before starting the clean cycle. "Crackling"...the sound of the metal heating and cooling during clean cycle Excessive soil. • Press the Clear/Off pad. Wait until the LOCKED light goes off. Oven door will not work A fuse in the display The self-clean cycle has been selected but the door is normal...
... again or for a longer period of smoke. Open the windows to cool. 26 LOCKED light is locked because the temperature inside the oven has not dropped below locking temperature. Oven will not open after a clean cycle Oven controls not properly set . Wipe up heavy spillovers before starting the clean cycle. "Crackling"...the sound of the metal heating and cooling during clean cycle Excessive soil. • Press the Clear/Off pad. Wait until the LOCKED light goes off. Oven door will not work A fuse in the display The self-clean cycle has been selected but the door is normal...
Owners Manual
Page 28
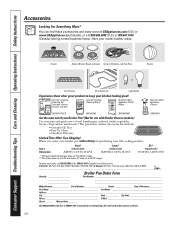
... product. The pan below catches the excess fats and oils. • Genuine GE Part • Easy To Clean • One-Year Warranty Limited Time Offer! Free Shipping! Part # Dimensions Small ....O_. When you order your broiler pan within 30 days of purchasing your model number ready. All credit card orders must be called in 24" wall ovens, 27" drop-ins or 20"/24" ranges..._N.B_. Grates Surface Burner Heads and Caps Surface Elements and Drip Pans Knobs or Oven Racks Oven Elements Light Bulbs Experience these accessories and many more at GEAppliances.com (U.S.) or www.GEAppliances.ca ...
... product. The pan below catches the excess fats and oils. • Genuine GE Part • Easy To Clean • One-Year Warranty Limited Time Offer! Free Shipping! Part # Dimensions Small ....O_. When you order your broiler pan within 30 days of purchasing your model number ready. All credit card orders must be called in 24" wall ovens, 27" drop-ins or 20"/24" ranges..._N.B_. Grates Surface Burner Heads and Caps Surface Elements and Drip Pans Knobs or Oven Racks Oven Elements Light Bulbs Experience these accessories and many more at GEAppliances.com (U.S.) or www.GEAppliances.ca ...


