User Guide
Page 4
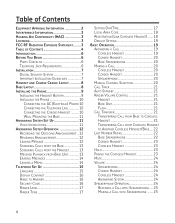
...from Base Unit 13 Erasing Messages 14 Leaving a Memo 14 Telephone Set Up 15 Language 15 Display Contrast 16 Rings to Answer 16 Security Code 16 Ringer Level 17 Ringer Tone 17 Setting Day/Time 17 Local Area Code 18 Registration (Link Cordless Handset)........ 18 Default Setting 19 Basic Operation 19 Answering a Call 19 Cordless Handset 19 Corded Handset 20 Base Speakerphone 20 Making a Call 20 Cordless Handset 20 Corded Handset 20 Speakerphone 20 Manual Channel Selection 20 Call Timer 21 Auto Standby 21 Ringer Volume Control 21 Handset 21 Base Unit 21 Flash 21 Call...
...from Base Unit 13 Erasing Messages 14 Leaving a Memo 14 Telephone Set Up 15 Language 15 Display Contrast 16 Rings to Answer 16 Security Code 16 Ringer Level 17 Ringer Tone 17 Setting Day/Time 17 Local Area Code 18 Registration (Link Cordless Handset)........ 18 Default Setting 19 Basic Operation 19 Answering a Call 19 Cordless Handset 19 Corded Handset 20 Base Speakerphone 20 Making a Call 20 Cordless Handset 20 Corded Handset 20 Speakerphone 20 Manual Channel Selection 20 Call Timer 21 Auto Standby 21 Ringer Volume Control 21 Handset 21 Base Unit 21 Flash 21 Call...
User Guide
Page 5
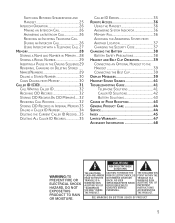
... Call Waiting Caller ID 32 Receiving CID Records 32 Storing CID Records (In CID Memory)..... 32 Reviewing Call Records 32 Storing CID Records in the Dialing Sequence 29 Reviewing, Changing or Deleting Stored ..... Names/Numbers 29 Dialing a Stored Number 30 Chain Dialing from Another Location 37 Changing the Security Code 37 Changing the Battery 38 Battery Safety Precautions 38 Headset and Belt Clip Operation 39 Connecting an Optional Headset to the Handset 39 Connecting the Belt Clip 39 Display Messages 39 Handset Sound Signals 41 Troubleshooting Guide...
... Call Waiting Caller ID 32 Receiving CID Records 32 Storing CID Records (In CID Memory)..... 32 Reviewing Call Records 32 Storing CID Records in the Dialing Sequence 29 Reviewing, Changing or Deleting Stored ..... Names/Numbers 29 Dialing a Stored Number 30 Chain Dialing from Another Location 37 Changing the Security Code 37 Changing the Battery 38 Battery Safety Precautions 38 Headset and Belt Clip Operation 39 Connecting an Optional Headset to the Handset 39 Connecting the Belt Clip 39 Display Messages 39 Handset Sound Signals 41 Troubleshooting Guide...
User Guide
Page 7
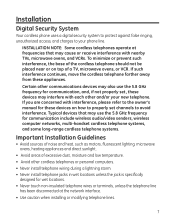
.... Installation Digital Security System Your cordless phone uses a digital security system to protect against false ringing, unauthorized access, and charges to avoid interference. If such interference continues, move the cordless telephone farther away from these devices on top of the cordless telephone should not be placed near or on how to properly set , these devices may cause or receive interference with interference, please refer to the owner's manual...
.... Installation Digital Security System Your cordless phone uses a digital security system to protect against false ringing, unauthorized access, and charges to avoid interference. If such interference continues, move the cordless telephone farther away from these devices on top of the cordless telephone should not be placed near or on how to properly set , these devices may cause or receive interference with interference, please refer to the owner's manual...
User Guide
Page 8
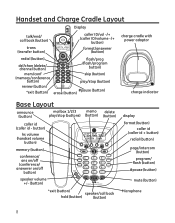
...+/- (button) *exit (button) speaker/call back (button) trans (transfer button) caller ID/vol -/+ (caller ID/volume -/+ button) format/answerer (button) charge cradle with power adaptor redial (button) del/chan (delete/ channel button) flash/prog (flash/program button) mem/conf (memory/conference button) skip (button) play/stop (button) review (button) *exit (button) #pause (button) erase (button) charge indicator Base Layout announce (button) mailbox 1/2/3 play/stop (buttons) memo (button) delete (button) caller id (caller id - Handset and Charge Cradle Layout Display talk...
...+/- (button) *exit (button) speaker/call back (button) trans (transfer button) caller ID/vol -/+ (caller ID/volume -/+ button) format/answerer (button) charge cradle with power adaptor redial (button) del/chan (delete/ channel button) flash/prog (flash/program button) mem/conf (memory/conference button) skip (button) play/stop (button) review (button) *exit (button) #pause (button) erase (button) charge indicator Base Layout announce (button) mailbox 1/2/3 play/stop (buttons) memo (button) delete (button) caller id (caller id - Handset and Charge Cradle Layout Display talk...
User Guide
Page 11
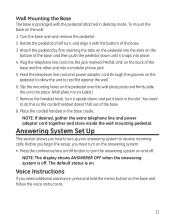
... the telephone line cord and power adaptor cord through the grooves on the pedestal to allow the unit to receive incoming calls. Place the corded handset in desktop mode. Before you begin the setup, you must turn on the answering system. • Press the conference/ans on the bottom of the base, and then push the pedestal down , and put it back in the slot. The default...
... the telephone line cord and power adaptor cord through the grooves on the pedestal to allow the unit to receive incoming calls. Place the corded handset in desktop mode. Before you begin the setup, you must turn on the answering system. • Press the conference/ans on the bottom of the base, and then push the pedestal down , and put it back in the slot. The default...
User Guide
Page 13
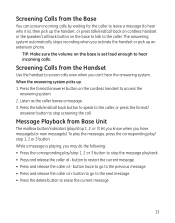
... the delete button to screen calls even when you may do the following: • Press the corresponding play / stop screening the call back button to speak to the caller, or press the format/ answerer button to access the answering system. 2. The answering system automatically stops recording when you have message(s) or new message(s). TIP: Make sure the volume on the cordless handset to stop 1, 2 or 3 button. button to hear incoming calls. Press the format/answerer button on the base is set loud...
... the delete button to screen calls even when you may do the following: • Press the corresponding play / stop screening the call back button to speak to the caller, or press the format/ answerer button to access the answering system. 2. The answering system automatically stops recording when you have message(s) or new message(s). TIP: Make sure the volume on the cordless handset to stop 1, 2 or 3 button. button to hear incoming calls. Press the format/answerer button on the base is set loud...
User Guide
Page 15
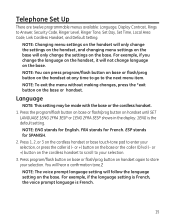
... to Answer, Security Code, Ringer Level, Ringer Tone, Set Day, Set Time, Local Area Code, Link Cordless Handset, and Default Setting. NOTE: You can press program/flash button on base or flash/prog button on the base. FRA stands for English. NOTE: Changing menu settings on the handset will only change the settings on the handset, and changing menu settings on the base will not change the settings on the base or the caller ID/vol (- Telephone Set Up There are twelve programmable menus available: Language, Display Contrast, Rings to...
... to Answer, Security Code, Ringer Level, Ringer Tone, Set Day, Set Time, Local Area Code, Link Cordless Handset, and Default Setting. NOTE: You can press program/flash button on base or flash/prog button on the base. FRA stands for English. NOTE: Changing menu settings on the handset will only change the settings on the handset, and changing menu settings on the base will not change the settings on the base or the caller ID/vol (- Telephone Set Up There are twelve programmable menus available: Language, Display Contrast, Rings to...
User Guide
Page 16
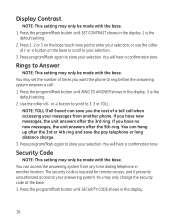
... base. Rings to enter your messages from any tone dialing telephone in the display. 1 is the default setting. 2. or +) button to scroll to store your selection. 3. You may set the number of a toll call . 1. Use the caller id (- Security Code NOTE: This setting may only be made with the base. 1. If you have no new messages, the unit answers after the 3rd or 4th ring and save you the cost of times you want the phone...
... base. Rings to enter your messages from any tone dialing telephone in the display. 1 is the default setting. 2. or +) button to scroll to store your selection. 3. You may set the number of a toll call . 1. Use the caller id (- Security Code NOTE: This setting may only be made with the base. 1. If you have no new messages, the unit answers after the 3rd or 4th ring and save you the cost of times you want the phone...
User Guide
Page 18
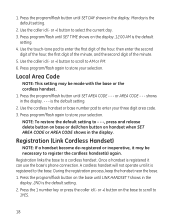
... CODE - - - Press the 1 number key or press the caller id (- Use the caller id (- Press program/flash again to the base. or AREA CODE - - - Press the program/flash button on the display. 12:00 AM is registered to store your selection. 1. NOTE: To restore the default setting to - - -, press and release delete button on base or del/chan button on the base to scroll to register the cordless handset(s) again. Once a handset is the default setting. 2. During the registration process, keep...
... CODE - - - Press the 1 number key or press the caller id (- Use the caller id (- Press program/flash again to the base. or AREA CODE - - - Press the program/flash button on the display. 12:00 AM is registered to store your selection. 1. NOTE: To restore the default setting to - - -, press and release delete button on base or del/chan button on the base to scroll to register the cordless handset(s) again. Once a handset is the default setting. 2. During the registration process, keep...
User Guide
Page 20
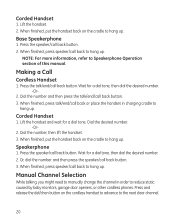
... button on the cordless handset to advance to Speakerphone Operation section of this manual. Making a Call Cordless Handset 1. Corded Handset 1. Press the speaker/call back button. 3. Press the talk/end/call back to hang up . Manual Channel Selection While talking, you might need to manually change the channel in charging cradle to hang up. When finished, press speaker/call back button. When finished, press talk/end/call back to hang up . Dial the number, then lift the handset. 3. Wait for a dial tone...
... button on the cordless handset to advance to Speakerphone Operation section of this manual. Making a Call Cordless Handset 1. Corded Handset 1. Press the speaker/call back button. 3. Press the talk/end/call back to hang up . Manual Channel Selection While talking, you might need to manually change the channel in charging cradle to hang up. When finished, press speaker/call back button. When finished, press talk/end/call back to hang up . Dial the number, then lift the handset. 3. Wait for a dial tone...
User Guide
Page 21
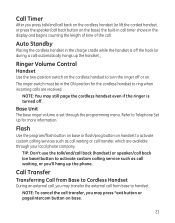
... ring when incoming calls are available through the programming menu. Ringer Volume Control Handset Use the two-position switch on the cordless handset to Telephone Set Up for the cordless handset to activate custom calling services such as call waiting, or you may press *exit button or page/intercom button on base. 21 NOTE: To cancel the call transfer, you 'll hang up the handset. TIP: Don't use the talk/end/call back (handset) or speaker/call back (on base) button...
... ring when incoming calls are available through the programming menu. Ringer Volume Control Handset Use the two-position switch on the cordless handset to Telephone Set Up for the cordless handset to activate custom calling services such as call waiting, or you may press *exit button or page/intercom button on base. 21 NOTE: To cancel the call transfer, you 'll hang up the handset. TIP: Don't use the talk/end/call back (handset) or speaker/call back (on base) button...
User Guide
Page 22
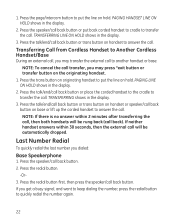
.../end/call back). PAGING LINE ON HOLD shows in the display. 3. If neither handset answers within 2 minutes after transferring the call, then both handsets will be rung back (call back button or trans button on the originating handset. 1. Last Number Redial To quickly redial the last number you may press *exit button or transfer button on handset to Another Cordless Handset/Base During an external call . Transferring Call from Cordless Handset to answer the call , you dialed: Base Speakerphone 1.
.../end/call back). PAGING LINE ON HOLD shows in the display. 3. If neither handset answers within 2 minutes after transferring the call, then both handsets will be rung back (call back button or trans button on the originating handset. 1. Last Number Redial To quickly redial the last number you may press *exit button or transfer button on handset to Another Cordless Handset/Base During an external call . Transferring Call from Cordless Handset to answer the call , you dialed: Base Speakerphone 1.
User Guide
Page 25
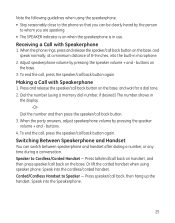
...call, press the speaker/call back, then hang up the handset. Corded/Cordless Handset to Cordless/Corded Handset - Press speaker/call back button again. Speak into the cordless/corded handset. Receiving a Call with Speakerphone 1. Dial the number (using speaker phone. Speaker to Speaker - Or lift the corded handset when using a memory dial number, if desired.) The number shows in the display. -Or- buttons on the base. 3. Making a Call with Speakerphone 1. Speak into the Speakerphone. 25 When the phone rings, press and release the speaker/call back button on the base...
...call, press the speaker/call back, then hang up the handset. Corded/Cordless Handset to Cordless/Corded Handset - Press speaker/call back button again. Speak into the cordless/corded handset. Receiving a Call with Speakerphone 1. Dial the number (using speaker phone. Speaker to Speaker - Or lift the corded handset when using a memory dial number, if desired.) The number shows in the display. -Or- buttons on the base. 3. Making a Call with Speakerphone 1. Speak into the Speakerphone. 25 When the phone rings, press and release the speaker/call back button on the base...
User Guide
Page 27
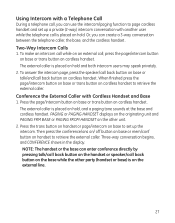
... display. Then press the conference/ans on/ off button on base or mem/conf button on the external line. 27 To make an intercom call while on an external call back button on hold. NOTE: The handset or the base can enter conference directly by pressing talk/call back button on the handset or speaker/call is on handset to retrieve the external caller. Press the trans button on handset or page/intercom on cordless handset. Using Intercom with a Telephone Call During a telephone call...
... display. Then press the conference/ans on/ off button on base or mem/conf button on the external line. 27 To make an intercom call while on an external call back button on hold. NOTE: The handset or the base can enter conference directly by pressing talk/call back button on the handset or speaker/call is on handset to retrieve the external caller. Press the trans button on handset or page/intercom on cordless handset. Using Intercom with a Telephone Call During a telephone call...
User Guide
Page 29
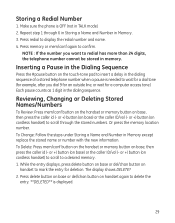
... than 24 digits, the telephone number cannot be stored in TALK mode). 2. To Delete: Press mem/conf button on the handset or memory button on base) or the caller ID/vol (- The display shows DELETE? 2. NOTE : If the number you want to wait for a dial tone (for example, after you dial 9 for an outside line, or wait for deletion. Repeat step 1 through the stored numbers. Press redial to a desired memory. 1. To Change: Follow the...
... than 24 digits, the telephone number cannot be stored in TALK mode). 2. To Delete: Press mem/conf button on the handset or memory button on base) or the caller ID/vol (- The display shows DELETE? 2. NOTE : If the number you want to wait for a dial tone (for example, after you dial 9 for an outside line, or wait for deletion. Repeat step 1 through the stored numbers. Press redial to a desired memory. 1. To Change: Follow the...
User Guide
Page 36
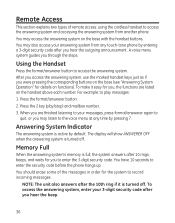
... the answering system is turned off . You may also access your 3-digit security code after 10 rings, beeps, and waits for you were pressing the corresponding buttons on the base (see "Answering System Operation" for details on functions). Press the 2 key (play messages: 1. You should erase some of remote access: using the cordless handset to access the answering system and accessing the answering system from any time by default. To access the answering system, enter your answering system from another phone. Remote Access...
... the answering system is turned off . You may also access your 3-digit security code after 10 rings, beeps, and waits for you were pressing the corresponding buttons on the base (see "Answering System Operation" for details on functions). Press the 2 key (play messages: 1. You should erase some of remote access: using the cordless handset to access the answering system and accessing the answering system from any time by default. To access the answering system, enter your answering system from another phone. Remote Access...
User Guide
Page 41
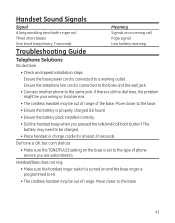
... ring • Make sure the handset ringer switch is turned on and the base ringer is still no dial tone, the problem might be your wiring or local service. • The cordless handset may be out of the base. Handset Sound Signals Signal A long warbling tone (with ringer on) Three short beeps One short beep (every 7 seconds) Meaning Signals an incoming call Page signal Low battery warning Troubleshooting Guide Telephone Solutions No dial tone • Check and repeat installation...
... ring • Make sure the handset ringer switch is turned on and the base ringer is still no dial tone, the problem might be your wiring or local service. • The cordless handset may be out of the base. Handset Sound Signals Signal A long warbling tone (with ringer on) Three short beeps One short beep (every 7 seconds) Meaning Signals an incoming call Page signal Low battery warning Troubleshooting Guide Telephone Solutions No dial tone • Check and repeat installation...
User Guide
Page 44
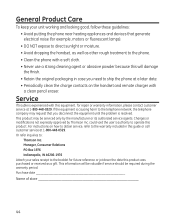
... serviced only by Thomson Inc. Service If trouble is experienced with a clean pencil eraser. Manager, Consumer Relations PO Box 1976 Indianapolis, IN 46206-1976 Attach your unit working and looking good, follow these guidelines: • Avoid putting the phone near heating appliances and devices that you disconnect the equipment until the problem is resolved. For instructions on the handset and remote charger...
... serviced only by Thomson Inc. Service If trouble is experienced with a clean pencil eraser. Manager, Consumer Relations PO Box 1976 Indianapolis, IN 46206-1976 Attach your unit working and looking good, follow these guidelines: • Avoid putting the phone near heating appliances and devices that you disconnect the equipment until the problem is resolved. For instructions on the handset and remote charger...
User Guide
Page 45
... the Battery 38 Changing the Security Code 37 Conference the External Caller with Cordless Handset and Base 27 Connecting an Optional Headset to the Handset 39 Connecting the AC (Electrical) Power 10 Connecting the Belt Clip 39 Connecting the Corded Handset 10 Connecting the Telephone Line 10 D Default Setting 19 Deleting All Caller ID Records 35 Deleting the Current Caller ID Record 35 Dialing a Caller ID Number 34 Dialing a Stored Number 30 Display Contrast 16 Display Messages 39 E Equipment Approval Information 2 Erasing Messages 14 F Flash 21 G General Product Care 43 H Handset and Charge...
... the Battery 38 Changing the Security Code 37 Conference the External Caller with Cordless Handset and Base 27 Connecting an Optional Headset to the Handset 39 Connecting the AC (Electrical) Power 10 Connecting the Belt Clip 39 Connecting the Corded Handset 10 Connecting the Telephone Line 10 D Default Setting 19 Deleting All Caller ID Records 35 Deleting the Current Caller ID Record 35 Dialing a Caller ID Number 34 Dialing a Stored Number 30 Display Contrast 16 Display Messages 39 E Equipment Approval Information 2 Erasing Messages 14 F Flash 21 G General Product Care 43 H Handset and Charge...
User Guide
Page 46
... Base Unit 13 Mute 24 P Paging the Cordless Handset 23 Parts Checklist 6 R Receiving an Incoming Telephone Call During an Intercom Call 26 Receiving a Call with Speakerphone 25 Receiving CID Records 32 Recording the Outgoing Announcement 12 Registration (Link Cordless Handset) 18 Remote Access 36 Reviewing, Changing or Deleting Stored Names/Numbers 29 Reviewing Announcement 12 Reviewing Call Records 32 Ringer Level 17 Ringer Tone 17 Ringer Volume Control 21 Rings to Answer 16 S Screening Calls from the Base 13 Screening Calls from the Handset 13 Security Code 16 Service 44 Setting Day/Time...
... Base Unit 13 Mute 24 P Paging the Cordless Handset 23 Parts Checklist 6 R Receiving an Incoming Telephone Call During an Intercom Call 26 Receiving a Call with Speakerphone 25 Receiving CID Records 32 Recording the Outgoing Announcement 12 Registration (Link Cordless Handset) 18 Remote Access 36 Reviewing, Changing or Deleting Stored Names/Numbers 29 Reviewing Announcement 12 Reviewing Call Records 32 Ringer Level 17 Ringer Tone 17 Ringer Volume Control 21 Rings to Answer 16 S Screening Calls from the Base 13 Screening Calls from the Handset 13 Security Code 16 Service 44 Setting Day/Time...


