

User Manual
Page 1
XHD3000 30-inch Widescreen LCD Monitor USERGUIDE ®
XHD3000 30-inch Widescreen LCD Monitor USERGUIDE ®

User Manual
Page 3
Contents Chapter 1: Using Your Gateway Flat-Panel Monitor 1 Connecting the monitor 2 Connecting video inputs 2 Connecting power 2 Setting up the optional speaker bar 2 Starting the monitor 3 Using the EzTouch menu buttons 3 Turning on the monitor 3 Adjusting monitor settings 3 Using the EzTouch menu buttons 3 Using the shortcut menu 3 Using the main menu 4 ...11 Picture has shadows or "ghosts 12 Color is not uniform 12 Image is not sized or centered correctly 12 The monitor has pixels that are always dark or too bright 12 Speaker bar does not work 12 FAQs 13 General 13 How To...
Contents Chapter 1: Using Your Gateway Flat-Panel Monitor 1 Connecting the monitor 2 Connecting video inputs 2 Connecting power 2 Setting up the optional speaker bar 2 Starting the monitor 3 Using the EzTouch menu buttons 3 Turning on the monitor 3 Adjusting monitor settings 3 Using the EzTouch menu buttons 3 Using the shortcut menu 3 Using the main menu 4 ...11 Picture has shadows or "ghosts 12 Color is not uniform 12 Image is not sized or centered correctly 12 The monitor has pixels that are always dark or too bright 12 Speaker bar does not work 12 FAQs 13 General 13 How To...

User Manual
Page 5
CHAPTER1 Using Your Gateway Flat-Panel Monitor • Connecting the monitor • Setting up the optional speaker bar • Starting the monitor • Adjusting monitor settings • Changing Windows screen settings • Power management • Maintaining • Troubleshooting • FAQs • Specifications 1
CHAPTER1 Using Your Gateway Flat-Panel Monitor • Connecting the monitor • Setting up the optional speaker bar • Starting the monitor • Adjusting monitor settings • Changing Windows screen settings • Power management • Maintaining • Troubleshooting • FAQs • Specifications 1

User Manual
Page 6
...a DVI video cable to the white connector under the back of the display. 3 Make sure that the monitor's power is turned off, then connect the other end of the video cable to the matching video port ... of the display. - CHAPTER 1: Using Your Gateway Flat-Panel Monitor Connecting the monitor Connecting video inputs To connect video sources to your monitor: 1 Position your computer and the monitor so you can reach the back of each. ...power button should be glowing purple. OR If your monitor from www.gateway.com. Setting up the optional speaker bar An optional speaker bar is not connected.
...a DVI video cable to the white connector under the back of the display. 3 Make sure that the monitor's power is turned off, then connect the other end of the video cable to the matching video port ... of the display. - CHAPTER 1: Using Your Gateway Flat-Panel Monitor Connecting the monitor Connecting video inputs To connect video sources to your monitor: 1 Position your computer and the monitor so you can reach the back of each. ...power button should be glowing purple. OR If your monitor from www.gateway.com. Setting up the optional speaker bar An optional speaker bar is not connected.

User Manual
Page 7
...power LED is running, the power LED on the monitor's power button should be blue. For more information on EzTouch buttons, see a display image, check the connections. www.gateway.com Starting the monitor Using the EzTouch menu buttons This monitor features an on-screen display (OSD) and EzTouch... menu buttons that let you turn off the monitor. For adjusting a setting's values, you can press and hold ...
...power LED is running, the power LED on the monitor's power button should be blue. For more information on EzTouch buttons, see a display image, check the connections. www.gateway.com Starting the monitor Using the EzTouch menu buttons This monitor features an on-screen display (OSD) and EzTouch... menu buttons that let you turn off the monitor. For adjusting a setting's values, you can press and hold ...

User Manual
Page 8
...) buttons to adjust the setting or change the option. 6 Press (Back) to return to a previous menu. 7 When you lift your monitor. The main menu opens. CHAPTER 1: Using Your Gateway Flat-Panel Monitor • Press the (Theme Select) buttons to cycle through the preset video themes (brightness, contrast, and temperature configurations): • User •...
...) buttons to adjust the setting or change the option. 6 Press (Back) to return to a previous menu. 7 When you lift your monitor. The main menu opens. CHAPTER 1: Using Your Gateway Flat-Panel Monitor • Press the (Theme Select) buttons to cycle through the preset video themes (brightness, contrast, and temperature configurations): • User •...

User Manual
Page 9
..., where you are able to see through the PIP video display to your Windows desktop, which makes it easier to access your monitor to its factory settings for the currently displayed input. Transparency-Sets the transparency of the PIP window. Size-Sets the size of ...the Picture-in-Picture image. www.gateway.com OSD Menu Description Main menu Auto-Automatically adjusts your computer programs while watching video. Geometry-Opens the Geometry menu, where you can...
..., where you are able to see through the PIP video display to your Windows desktop, which makes it easier to access your monitor to its factory settings for the currently displayed input. Transparency-Sets the transparency of the PIP window. Size-Sets the size of ...the Picture-in-Picture image. www.gateway.com OSD Menu Description Main menu Auto-Automatically adjusts your computer programs while watching video. Geometry-Opens the Geometry menu, where you can...

User Manual
Page 10
... the movie's original aspect ratio, so a standard broadcast or full-frame movie appears with a distortion-free and black bar-free image. CHAPTER 1: Using Your Gateway Flat-Panel Monitor OSD Menu Description Video Adjust menu Unless otherwise indicated, these settings apply only to SD (standard definition) video at the top and bottom. Unlike...
... the movie's original aspect ratio, so a standard broadcast or full-frame movie appears with a distortion-free and black bar-free image. CHAPTER 1: Using Your Gateway Flat-Panel Monitor OSD Menu Description Video Adjust menu Unless otherwise indicated, these settings apply only to SD (standard definition) video at the top and bottom. Unlike...

User Manual
Page 11
...Help For more information and screen components (such as icons and menu bars) can also press the Auto button to suit your monitor. Type adjusting monitor settings in your computer's display resolution, see "Changing Windows screen settings" on your needs. You can be displayed on your ...reminder-If the computer display input (VGA and DVI) is the number of the most basic display settings you should change . www.gateway.com OSD Menu Geometry menu Advanced menu Description H Position-Moves the display image left and right. Clock-Minimizes any horizontal distortion and...
...Help For more information and screen components (such as icons and menu bars) can also press the Auto button to suit your monitor. Type adjusting monitor settings in your computer's display resolution, see "Changing Windows screen settings" on your needs. You can be displayed on your ...reminder-If the computer display input (VGA and DVI) is the number of the most basic display settings you should change . www.gateway.com OSD Menu Geometry menu Advanced menu Description H Position-Moves the display image left and right. Clock-Minimizes any horizontal distortion and...

User Manual
Page 12
... 900 70.635 75 N 19 1680 × 1050 65.29 60 Y 20 1680 × 1050 74.9 75 N 8 Video modes Your monitor supports several seconds. 5 Click OK, then click Yes to the size you cannot click No, the settings return to their previous values after several... or screen resolution: 1 Click (Start), Control Panel, then under Appearance and Personalization, click Adjust Screen Resolution. CHAPTER 1: Using Your Gateway Flat-Panel Monitor To change the screen resolution, drag the Resolution slider to save your changes. The Display Settings dialog box opens. 2 To change the...
... 900 70.635 75 N 19 1680 × 1050 65.29 60 Y 20 1680 × 1050 74.9 75 N 8 Video modes Your monitor supports several seconds. 5 Click OK, then click Yes to the size you cannot click No, the settings return to their previous values after several... or screen resolution: 1 Click (Start), Control Panel, then under Appearance and Personalization, click Adjust Screen Resolution. CHAPTER 1: Using Your Gateway Flat-Panel Monitor To change the screen resolution, drag the Resolution slider to save your changes. The Display Settings dialog box opens. 2 To change the...

User Manual
Page 14
... consumption during periods of non-use. In the Active Off mode the Power LED will then enter the Active Off mode (sleep). CHAPTER 1: Using Your Gateway Flat-Panel Monitor Power management Energy declaration When connected to a computer that supports the VESA Display Power Management Signaling (DPMS) Protocol, the...
... consumption during periods of non-use. In the Active Off mode the Power LED will then enter the Active Off mode (sleep). CHAPTER 1: Using Your Gateway Flat-Panel Monitor Power management Energy declaration When connected to a computer that supports the VESA Display Power Management Signaling (DPMS) Protocol, the...
User Manual
Page 15
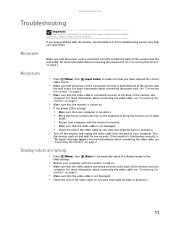
... connecting the video cable, see "Connecting the monitor" on . • Make sure that the video cable is connected securely to bring the monitor out of the video cable for ten seconds. www.gateway.com Troubleshooting Important Make sure that the monitor has warmed up for any pins that might ...be bent or pushed in. • Turn off the monitor and unplug the video cable from the back of the monitor and your computer. For more information...
... connecting the video cable, see "Connecting the monitor" on . • Make sure that the video cable is connected securely to bring the monitor out of the video cable for ten seconds. www.gateway.com Troubleshooting Important Make sure that the monitor has warmed up for any pins that might ...be bent or pushed in. • Turn off the monitor and unplug the video cable from the back of the monitor and your computer. For more information...

User Manual
Page 16
...8226; Use the position controls to adjust the display image position, see "Connecting the monitor" on page 2. • Make sure that are unacceptably numerous or dense on your display, contact Gateway Customer Care to identify whether a repair or replacement is not damaged. • Check... on both jacks at least 30 minutes before making a final judgment about connecting the video cable, see "Adjusting monitor settings" on page 3. CHAPTER 1: Using Your Gateway Flat-Panel Monitor Picture has shadows or "ghosts" • Press (Menu), then (Auto) to automatically adjust the display image ...
...8226; Use the position controls to adjust the display image position, see "Connecting the monitor" on page 2. • Make sure that are unacceptably numerous or dense on your display, contact Gateway Customer Care to identify whether a repair or replacement is not damaged. • Check... on both jacks at least 30 minutes before making a final judgment about connecting the video cable, see "Adjusting monitor settings" on page 3. CHAPTER 1: Using Your Gateway Flat-Panel Monitor Picture has shadows or "ghosts" • Press (Menu), then (Auto) to automatically adjust the display image ...

User Manual
Page 17
... plug (pink) is connected to the microphone jack on the screen. It was initially designed for Directional Correlation De-Interlacing. On Gateway notebooks, this algorithm, DCDi does not simply weave together two fields of video that match. If the audio device's output volume is...no image on your computer. • Your microphone jack may always be distorted. This section contains answers to frequently asked questions. DCDi constantly monitors edge transitions and fills in the Windows taskbar, or click (Start), Control Panel, Sounds and Audio Devices, the Volume tab, then click ...
... plug (pink) is connected to the microphone jack on the screen. It was initially designed for Directional Correlation De-Interlacing. On Gateway notebooks, this algorithm, DCDi does not simply weave together two fields of video that match. If the audio device's output volume is...no image on your computer. • Your microphone jack may always be distorted. This section contains answers to frequently asked questions. DCDi constantly monitors edge transitions and fills in the Windows taskbar, or click (Start), Control Panel, Sounds and Audio Devices, the Volume tab, then click ...
User Manual
Page 18
... further prevent stealing of unique secret device keys to the receiver for the most up -converted) to the Windows System Registry. CHAPTER 1: Using Your Gateway Flat-Panel Monitor How To Technical Setup Why does the image looks stretched or fuzzy when I do not see 1920 × 1200 available in Windows XP, see...
... further prevent stealing of unique secret device keys to the receiver for the most up -converted) to the Windows System Registry. CHAPTER 1: Using Your Gateway Flat-Panel Monitor How To Technical Setup Why does the image looks stretched or fuzzy when I do not see 1920 × 1200 available in Windows XP, see...

User Manual
Page 19
... the audio output of my external video device to allow renegotiation. This is displayed or I see black bars on left and right of the monitor. Restart the video source and re-plug all video cables from S-Video, composite, or component, why does the video look overly compressed? If..., choose Wide, Zoom, or Panoramic modes. What is important that you are unable to watch the movie. See your video device's software. Yes. www.gateway.com What happens if I lose signal to static? For example, while watching a movie on a HDCP-equipped component? However, you read your video device ...
... the audio output of my external video device to allow renegotiation. This is displayed or I see black bars on left and right of the monitor. Restart the video source and re-plug all video cables from S-Video, composite, or component, why does the video look overly compressed? If..., choose Wide, Zoom, or Panoramic modes. What is important that you are unable to watch the movie. See your video device's software. Yes. www.gateway.com What happens if I lose signal to static? For example, while watching a movie on a HDCP-equipped component? However, you read your video device ...

User Manual
Page 20
...; Component Y Pb Pr (supports 480i, 480p, 720p, and 1080i) (two sets of component ports for Gateway and its subsidiaries are subject to Gateway specifications and may vary from similarly marketed products. CHAPTER 1: Using Your Gateway Flat-Panel Monitor Specifications Specifications are custom engineered by our suppliers to change without notice or obligation. Many products...
...; Component Y Pb Pr (supports 480i, 480p, 720p, and 1080i) (two sets of component ports for Gateway and its subsidiaries are subject to Gateway specifications and may vary from similarly marketed products. CHAPTER 1: Using Your Gateway Flat-Panel Monitor Specifications Specifications are custom engineered by our suppliers to change without notice or obligation. Many products...

User Manual
Page 22
CHAPTER 1: Using Your Gateway Flat-Panel Monitor 18
CHAPTER 1: Using Your Gateway Flat-Panel Monitor 18

User Manual
Page 24
...spill anything to rest on it to dry for advice on whether the monitor is safe to turn back on the product and in the monitor case are unable to avoid eating and drinking near water. Call Gateway Customer Care for 24 hours. Such areas include patient care areas of ...to avoid spills is a safety feature. The plug on the system. Replacement parts and accessories Use only replacement parts and accessories recommended by Gateway. 20 Your Gateway product is in use near your system. The voltage selector switch is set up the system on the rating label. ■ If ...
...spill anything to rest on it to dry for advice on whether the monitor is safe to turn back on the product and in the monitor case are unable to avoid eating and drinking near water. Call Gateway Customer Care for 24 hours. Such areas include patient care areas of ...to avoid spills is a safety feature. The plug on the system. Replacement parts and accessories Use only replacement parts and accessories recommended by Gateway. 20 Your Gateway product is in use near your system. The voltage selector switch is set up the system on the rating label. ■ If ...


