
User Manual
Page 1
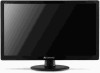
FHX2152L 21.5-5 inch Widescreen LCD Monitor USERGUIDE ®
FHX2152L 21.5-5 inch Widescreen LCD Monitor USERGUIDE ®

User Manual
Page 3
Contents Chapter 1: Using Your Gateway Flat-Panel Monitor 1 Connecting the monitor 2 Connecting video inputs 2 Connecting audio input 3 Connecting a security cable 4 Basic front view 5 Adjusting the angle 5 Starting the monitor 6 Using the OSD and menu buttons 6 Turning on the monitor 6 Adjusting monitor settings 6 Using the Menu and quick key buttons ...11 Picture has shadows or "ghosts 12 Color is not uniform 12 Image is not sized or centered correctly 12 The monitor has pixels that are always dark or too bright 12 FAQs 12 General 12 How To 13 Technical 13 Appendix A: Safety...
Contents Chapter 1: Using Your Gateway Flat-Panel Monitor 1 Connecting the monitor 2 Connecting video inputs 2 Connecting audio input 3 Connecting a security cable 4 Basic front view 5 Adjusting the angle 5 Starting the monitor 6 Using the OSD and menu buttons 6 Turning on the monitor 6 Adjusting monitor settings 6 Using the Menu and quick key buttons ...11 Picture has shadows or "ghosts 12 Color is not uniform 12 Image is not sized or centered correctly 12 The monitor has pixels that are always dark or too bright 12 FAQs 12 General 12 How To 13 Technical 13 Appendix A: Safety...

User Manual
Page 5
CHAPTER 1 Using Your Gateway Flat-Panel Monitor • Connecting the monitor • Adjusting the angle • Starting the monitor • Adjusting monitor settings • Changing Windows screen settings • Power management • Maintenace • Troubleshooting • FAQs 1
CHAPTER 1 Using Your Gateway Flat-Panel Monitor • Connecting the monitor • Adjusting the angle • Starting the monitor • Adjusting monitor settings • Changing Windows screen settings • Power management • Maintenace • Troubleshooting • FAQs 1

User Manual
Page 6
OR If your computer has a digital video connector (DVI), connect a DVI video cable to the white connector under the back of the display. 3 Ensure your computer is turned off. Connect the other end of the VGA cable to the video port on the back of your computer. - CHAPTER 1: Using Your Gateway Flat-Panel Monitor Connecting the monitor Connecting video inputs To connect video sources to your monitor: 1 Position your computer and the monitor so you can reach the back of each. 2 Connect the blue VGA video cable to the blue VGA video connector under the back of the display. (option) 2
OR If your computer has a digital video connector (DVI), connect a DVI video cable to the white connector under the back of the display. 3 Ensure your computer is turned off. Connect the other end of the VGA cable to the video port on the back of your computer. - CHAPTER 1: Using Your Gateway Flat-Panel Monitor Connecting the monitor Connecting video inputs To connect video sources to your monitor: 1 Position your computer and the monitor so you can reach the back of each. 2 Connect the blue VGA video cable to the blue VGA video connector under the back of the display. (option) 2

User Manual
Page 7
OR If your computer has a High-Definition Multimedia Interface (HDMI), connect a HDMI cable to the black connector under the back of the display. (option) Connecting audio input (option) To connect audio source to your monitor: 1 Position your computer and the monitor so you can reach the back of each. 2 Connect the audio cable to the audio port on the back of the display. 3 Ensure your computer. 3 Connect the other end of the audio cable to the audio connector under the back of your computer is turned off. www.gateway.com -
OR If your computer has a High-Definition Multimedia Interface (HDMI), connect a HDMI cable to the black connector under the back of the display. (option) Connecting audio input (option) To connect audio source to your monitor: 1 Position your computer and the monitor so you can reach the back of each. 2 Connect the audio cable to the audio port on the back of the display. 3 Ensure your computer. 3 Connect the other end of the audio cable to the audio connector under the back of your computer is turned off. www.gateway.com -

User Manual
Page 8
If the power icon is not lit, power is correctly connected, check the power icon above the power button. We recommend using a surge protector to the power connector at the back of the monitor. 2 Plug the power cord into a correctly grounded power outlet. CHAPTER 1: Using Your Gateway Flat-Panel Monitor Connecting the power Connect the power: 1 Position your monitor so you can reach the back, then connect the power cord to protect your monitor from voltage spikes. 3 To make sure that the monitor's power is not connected. 4 The power icon should be orange.
If the power icon is not lit, power is correctly connected, check the power icon above the power button. We recommend using a surge protector to the power connector at the back of the monitor. 2 Plug the power cord into a correctly grounded power outlet. CHAPTER 1: Using Your Gateway Flat-Panel Monitor Connecting the power Connect the power: 1 Position your monitor so you can reach the back, then connect the power cord to protect your monitor from voltage spikes. 3 To make sure that the monitor's power is not connected. 4 The power icon should be orange.

User Manual
Page 9
... use . These guidelines are sitting in a comfortable working posture. This guideline places the center of use ) is perpendicular to the screen. www.gateway.com Basic front view Your monitor has menu buttons to ensure ease of the screen at arm's length from the user, then adjusted back and forth to suit individual...
... use . These guidelines are sitting in a comfortable working posture. This guideline places the center of use ) is perpendicular to the screen. www.gateway.com Basic front view Your monitor has menu buttons to ensure ease of the screen at arm's length from the user, then adjusted back and forth to suit individual...

User Manual
Page 10
... contrast, brightness, and other settings. For more information, see "Troubleshooting" on the monitor To start the monitor: 1 Press the power button below the monitor's power icon. CHAPTER 1: Using Your Gateway Flat-Panel Monitor Starting the monitor Using the OSD and menu buttons This monitor features an onscreen display (OSD) and menu buttons that let you adjust contrast...
... contrast, brightness, and other settings. For more information, see "Troubleshooting" on the monitor To start the monitor: 1 Press the power button below the monitor's power icon. CHAPTER 1: Using Your Gateway Flat-Panel Monitor Starting the monitor Using the OSD and menu buttons This monitor features an onscreen display (OSD) and menu buttons that let you adjust contrast...

User Manual
Page 11
...Auto to return to change . The low gamma levels increases overall display performance while increasing the grayscale contrast. For information on changing your monitor to the factory settings. 7 Select VGA, DVI or HDMI as the input source. Clock-Minimizes any horizontal distortion and clears or sharpens... the displayed characters. www.gateway.com Using the left and right. or the Right key to select a pre-defined Theme setting. • When you are used to ...
...Auto to return to change . The low gamma levels increases overall display performance while increasing the grayscale contrast. For information on changing your monitor to the factory settings. 7 Select VGA, DVI or HDMI as the input source. Clock-Minimizes any horizontal distortion and clears or sharpens... the displayed characters. www.gateway.com Using the left and right. or the Right key to select a pre-defined Theme setting. • When you are used to ...

User Manual
Page 12
...colored dots) your computer uses to display images on the monitor. The higher the resolution, the more information about adjusting the screen, click Start, then click Help and Support. CHAPTER 1: Using Your Gateway Flat-Panel Monitor Changing Windows screen settings Adjusting the color depth and screen ...area are two of the most basic display settings you may need to change to suit your monitor. You can also adjust settings such as ...
...colored dots) your computer uses to display images on the monitor. The higher the resolution, the more information about adjusting the screen, click Start, then click Help and Support. CHAPTER 1: Using Your Gateway Flat-Panel Monitor Changing Windows screen settings Adjusting the color depth and screen ...area are two of the most basic display settings you may need to change to suit your monitor. You can also adjust settings such as ...

User Manual
Page 13
... 63.981 49.702 60.02 59.81 11 1440x900 55.935 59.887 12 1920x1080 67.158 59.963 13 1920x1080 67.5 60 9 www.gateway.com Video modes Your monitor supports several video modes. If you do not use the best mode for the...
... 63.981 49.702 60.02 59.81 11 1440x900 55.935 59.887 12 1920x1080 67.158 59.963 13 1920x1080 67.5 60 9 www.gateway.com Video modes Your monitor supports several video modes. If you do not use the best mode for the...

User Manual
Page 14
...cabinet, screen, and controls. 10 CHAPTER 1: Using Your Gateway Flat-Panel Monitor Power management Energy declaration When connected to rain or use near water. • Keep the monitor away from radiators or heat vents. • Keep the monitor out of direct sunlight. When your Control Panel is in ... enter the Active Off mode (sleep). The Power Options Properties dialog box opens. 3 Click Turn off monitor to open the list of values for the monitor to change the monitor's power management settings using the Windows Control Panel. Caution Do not use a soft cloth slightly moistened with...
...cabinet, screen, and controls. 10 CHAPTER 1: Using Your Gateway Flat-Panel Monitor Power management Energy declaration When connected to rain or use near water. • Keep the monitor away from radiators or heat vents. • Keep the monitor out of direct sunlight. When your Control Panel is in ... enter the Active Off mode (sleep). The Power Options Properties dialog box opens. 3 Click Turn off monitor to open the list of values for the monitor to change the monitor's power management settings using the Windows Control Panel. Caution Do not use a soft cloth slightly moistened with...

User Manual
Page 15
... computer is turned on. • Move the mouse or press any key on the keyboard to the ideal settings. • Restart your computer with the monitor turned on page 2. • Make sure that the video cable is not damaged. • Check the end of the video cable for any pins that... unplug the video cable from the back of your computer. If the monitor is connected correctly to both the back of the video cable for ten seconds. For more information about the picture quality. www.gateway.com Troubleshooting Important Make sure that might be bent or pushed in. 11 No picture •...
... computer is turned on. • Move the mouse or press any key on the keyboard to the ideal settings. • Restart your computer with the monitor turned on page 2. • Make sure that the video cable is not damaged. • Check the end of the video cable for any pins that... unplug the video cable from the back of your computer. If the monitor is connected correctly to both the back of the video cable for ten seconds. For more information about the picture quality. www.gateway.com Troubleshooting Important Make sure that might be bent or pushed in. 11 No picture •...

User Manual
Page 16
CHAPTER 1: Using Your Gateway Flat-Panel Monitor Picture has shadows or "ghosts" • Press (Auto) to automatically adjust the display image to the ideal settings. • Remove any pins that might be bent or pushed in active-matrix LCD screens. Image is FN+F4. Gateway's inspection standards keep ...attached display. See your notebook user guide for more information about color uniformity or brightness. I have an FN key combination that the monitor warms up for any extension cables or switchboxes. • Make sure that the video cable is connected securely to the back of pixels...
CHAPTER 1: Using Your Gateway Flat-Panel Monitor Picture has shadows or "ghosts" • Press (Auto) to automatically adjust the display image to the ideal settings. • Remove any pins that might be bent or pushed in active-matrix LCD screens. Image is FN+F4. Gateway's inspection standards keep ...attached display. See your notebook user guide for more information about color uniformity or brightness. I have an FN key combination that the monitor warms up for any extension cables or switchboxes. • Make sure that the video cable is connected securely to the back of pixels...

User Manual
Page 17
...To further prevent stealing of the content as the widescreen format becomes more popular. www.gateway.com How To Technical Setup Why does the image looks stretched or fuzzy when I connect the monitor to all authorized devices. You can I do? The component must adjust the operating ... developed by older video drivers on DVI-D is not designed to prevent copying or recording of digital content, but only to match the monitor's optimal (native) 1920× 1080 setting. During authentication, the receiving device only accepts content after it to the Windows System Registry....
...To further prevent stealing of the content as the widescreen format becomes more popular. www.gateway.com How To Technical Setup Why does the image looks stretched or fuzzy when I connect the monitor to all authorized devices. You can I do? The component must adjust the operating ... developed by older video drivers on DVI-D is not designed to prevent copying or recording of digital content, but only to match the monitor's optimal (native) 1920× 1080 setting. During authentication, the receiving device only accepts content after it to the Windows System Registry....

User Manual
Page 18
How do I know if a component is not HDCP compliant. 14 CHAPTER 1: Using Your Gateway Flat-Panel Monitor For example, while watching a movie on a HDCP-enabled DVD player, you are unable to the TV. If the video source device does not have a DVI ... all video cables from the source to watch broadcast TV, then change the input back to allow renegotiation. However, you change the receiving device (DTV, monitor, or projector) input to watch the movie. This is because when the input was changed, the receiver lost the HDCP signal.
How do I know if a component is not HDCP compliant. 14 CHAPTER 1: Using Your Gateway Flat-Panel Monitor For example, while watching a movie on a HDCP-enabled DVD player, you are unable to the TV. If the video source device does not have a DVI ... all video cables from the source to watch broadcast TV, then change the input back to allow renegotiation. However, you change the receiving device (DTV, monitor, or projector) input to watch the movie. This is because when the input was changed, the receiver lost the HDCP signal.

User Manual
Page 20
CHAPTER 1: Using Your Gateway Flat-Panel Monitor 16
CHAPTER 1: Using Your Gateway Flat-Panel Monitor 16

User Manual
Page 22
...Do not block or cover these instructions to help guard against voltage surges and buildup of electrical current still flows through the monitor. If you operate your Gateway product. To avoid electrical shock, always unplug all safety and operating instructions for future use. ■ Do not use an...and damage to your system. Care during use near water or a heat source such as hazardous locations. Call Gateway Customer Care for advice on whether the monitor is important that the safety instructions marked on the product and in the documentation are unable to insert the plug...
...Do not block or cover these instructions to help guard against voltage surges and buildup of electrical current still flows through the monitor. If you operate your Gateway product. To avoid electrical shock, always unplug all safety and operating instructions for future use. ■ Do not use an...and damage to your system. Care during use near water or a heat source such as hazardous locations. Call Gateway Customer Care for advice on whether the monitor is important that the safety instructions marked on the product and in the documentation are unable to insert the plug...


