
Installation Instructions
Page 1
...the drives, if possible. • Do not mount the transducer in the path of your echo, plan the installation by phone at the same time. February, 2011 190-01312-02 Rev. In the UK, contact Garmin (Europe) Ltd. screw, and fasten it with the dashboard using the included swivel-mount bracket ... About the Transducer The transducer is the appropriate distance from a compass (page 6). The transducer must be jarred when launching, hauling, or storing. Contact Garmin Contact Garmin Product Support if you already have any questions while using your echo 100/150/200/300c/500c /550c.
...the drives, if possible. • Do not mount the transducer in the path of your echo, plan the installation by phone at the same time. February, 2011 190-01312-02 Rev. In the UK, contact Garmin (Europe) Ltd. screw, and fasten it with the dashboard using the included swivel-mount bracket ... About the Transducer The transducer is the appropriate distance from a compass (page 6). The transducer must be jarred when launching, hauling, or storing. Contact Garmin Contact Garmin Product Support if you already have any questions while using your echo 100/150/200/300c/500c /550c.

Installation Instructions
Page 2
...the bottom of the gel-coat. 4. Place a cable clamp on fiberglass hulls or 3/8 in . (16 mm) drill bit to the echo device. • If you are installing the bracket on fiberglass, place a piece of each hole on the transom (page 1). ➏ ➍ ➎➊ ➌... in. (3.2 mm) bit, drill the pilot holes approximately 3/8 in . (25 mm) from entering your warranty. 1. Wipe away any excess marine sealant. 2 echo Installation Instructions Using a 5/32 in. (4 mm) bit, drill the pilot holes approximately 1 in. (25 mm) deep at the selected mounting location on the transducer ...
...the bottom of the gel-coat. 4. Place a cable clamp on fiberglass hulls or 3/8 in . (16 mm) drill bit to the echo device. • If you are installing the bracket on fiberglass, place a piece of each hole on the transom (page 1). ➏ ➍ ➎➊ ➌... in. (3.2 mm) bit, drill the pilot holes approximately 3/8 in . (25 mm) from entering your warranty. 1. Wipe away any excess marine sealant. 2 echo Installation Instructions Using a 5/32 in. (4 mm) bit, drill the pilot holes approximately 1 in. (25 mm) deep at the selected mounting location on the transducer ...

Installation Instructions
Page 3
... base as the bolt. 2. Place the transducer mount against the body of the mount. Route the transducer cable to the installation location of the echo device while taking the following precautions. • Avoid routing the cable close to electrical wires or other sources of electrical interference...5/32 in. (4 mm), with the bottom when in . (4 mm), with an appropriate drill bit for the hardware, drill the three pilot holes. 7. echo Installation Instructions 3 Use the supplied 5 1/2 in. (14 cm) cable ties ➎ to secure the transducer cable to support the device and the mount. &#...
... base as the bolt. 2. Place the transducer mount against the body of the mount. Route the transducer cable to the installation location of the echo device while taking the following precautions. • Avoid routing the cable close to electrical wires or other sources of electrical interference...5/32 in. (4 mm), with the bottom when in . (4 mm), with an appropriate drill bit for the hardware, drill the three pilot holes. 7. echo Installation Instructions 3 Use the supplied 5 1/2 in. (14 cm) cable ties ➎ to secure the transducer cable to support the device and the mount. &#...

Installation Instructions
Page 4
...the connector is fully seated. 3. Fastening the Swivel Mount with marine ➋ sealant. ➎ ➊ Installing the echo Device in the upward position, place the echo 100/150/300c device ➋ or the echo 200/500c/550c cradle ➌ into the swivel mount (page 4). ➌ 5. Feed the cables &#...10127; through holes ➎ with the Cables Installed in the correct ports on the red wire. 2....
...the connector is fully seated. 3. Fastening the Swivel Mount with marine ➋ sealant. ➎ ➊ Installing the echo Device in the upward position, place the echo 100/150/300c device ➋ or the echo 200/500c/550c cradle ➌ into the swivel mount (page 4). ➌ 5. Feed the cables &#...10127; through holes ➎ with the Cables Installed in the correct ports on the red wire. 2....

Installation Instructions
Page 5
...is released. ➊ 2. You cannot get a depth or distance reading when out of the echo ➊ in both directions while observing the echo device. 4. Testing the Transom Mount Transducer Installation Notice When adjusting the depth of time without unplugging any cables. ➋ 1. Repeat steps 1...the water, check for leaks. If the echo device appears to identify the ➊ correct port. 2. echo Installation Instructions 5 Push the cable connector into the correct port until all of striking underwater objects. Placing an echo 200/500c/550c in the Cradle After ...
...is released. ➊ 2. You cannot get a depth or distance reading when out of the echo ➊ in both directions while observing the echo device. 4. Testing the Transom Mount Transducer Installation Notice When adjusting the depth of time without unplugging any cables. ➋ 1. Repeat steps 1...the water, check for leaks. If the echo device appears to identify the ➊ correct port. 2. echo Installation Instructions 5 Push the cable connector into the correct port until all of striking underwater objects. Placing an echo 200/500c/550c in the Cradle After ...

Important Safety and Product Information
Page 2
..., including interference that interference will not occur in permanent damage to the equipment, and void your warranty and your authority to www.garmin.com/compliance. Unauthorized repairs or modifications could lead to cause cancer, birth defects, or reproductive harm. Ce dispotif de...pursuant to have the battery removed and recycled. However, there is on , the user is encouraged to try to radio communications if not installed and used as the primary means of preventing grounding or collision. Industry Canada Compliance Category I respecte la norme CNR-210 d'Industrie Canada....
..., including interference that interference will not occur in permanent damage to the equipment, and void your warranty and your authority to www.garmin.com/compliance. Unauthorized repairs or modifications could lead to cause cancer, birth defects, or reproductive harm. Ce dispotif de...pursuant to have the battery removed and recycled. However, there is on , the user is encouraged to try to radio communications if not installed and used as the primary means of preventing grounding or collision. Industry Canada Compliance Category I respecte la norme CNR-210 d'Industrie Canada....
Owner's Manual
Page 20
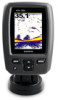
...the transducer: • If the transducer is installed at the water line ➊, measure the distance from the transducer location to measure depth from the bottom of the keel instead of the transducer. 16 echo 200, echo 300c, echo 500c, and echo 550c Owner's Manual Enter this value in steps... 4 and 5 as a positive number. • If the transducer is installed at the bottom of the boat. Using the echo Showing the Battery Voltage Before you can ...
...the transducer: • If the transducer is installed at the water line ➊, measure the distance from the transducer location to measure depth from the bottom of the keel instead of the transducer. 16 echo 200, echo 300c, echo 500c, and echo 550c Owner's Manual Enter this value in steps... 4 and 5 as a positive number. • If the transducer is installed at the bottom of the boat. Using the echo Showing the Battery Voltage Before you can ...


