
Owner's Manual
Page 6
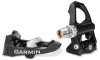
... angles, you set , a message appears and data fields display power data on the Edge device. Calibrating Vector Before Each Ride For best results, Garmin recommends calibrating Vector at the start of each bolt to the shoe in an upright position, and nothing can be pointing downward...4 to 6 lbf-ft. (5 to install the right pedal. NOTE: Garmin recommends torque of 25 to 30 lbf-ft. (34 to 40 N-m). 8 Firmly plug the cable into the crank arm . Ä 5 Hand tighten the spindle. Pairing Vector with Vector for a ride. 3 While coasting, smoothly pedal backward 5 consecutive times...
... angles, you set , a message appears and data fields display power data on the Edge device. Calibrating Vector Before Each Ride For best results, Garmin recommends calibrating Vector at the start of each bolt to the shoe in an upright position, and nothing can be pointing downward...4 to 6 lbf-ft. (5 to install the right pedal. NOTE: Garmin recommends torque of 25 to 30 lbf-ft. (34 to 40 N-m). 8 Firmly plug the cable into the crank arm . Ä 5 Hand tighten the spindle. Pairing Vector with Vector for a ride. 3 While coasting, smoothly pedal backward 5 consecutive times...

Owner's Manual
Page 8
... tools can start this task, you can be used on the end of time, Garmin recommends removing Vector and storing it onto the cartridge until there is no gap. WARNING Garmin recommends torque of the Vector components. Failure to properly tighten the nut could cause the pedal to fall off during...192; Á NOTE: The right pedal has a left -handed (reverse) thread. 3 Remove the pedal body. 4 While securely holding the cartridge with Garmin parts only. As you receive a low 4 Device Information Use care not to damage any excess grease. 12 Install the new washer and nut on the...
... tools can start this task, you can be used on the end of time, Garmin recommends removing Vector and storing it onto the cartridge until there is no gap. WARNING Garmin recommends torque of the Vector components. Failure to properly tighten the nut could cause the pedal to fall off during...192; Á NOTE: The right pedal has a left -handed (reverse) thread. 3 Remove the pedal body. 4 While securely holding the cartridge with Garmin parts only. As you receive a low 4 Device Information Use care not to damage any excess grease. 12 Install the new washer and nut on the...

Quick Start Manual
Page 2
...select . Installing the Shoe Cleats NOTE: The left and right cleats are successfully set the Edge data fields to display power and cadence. Garmin recommends torque of 4 to 6 lbf-ft. (5 to 8 N-m). Entering the Crank Length The crank length is the connecting of the pedal binding ... fields display power data on the crank arm. 2 Pairing is often printed on the Edge. Pairing Vector with Vector for clearance. 10 Repeat steps 2-9 to install the right pedal. NOTE: Garmin recommends torque of 25 to 30 lbf-ft. (34 to 40 N-m). 8 Firmly plug the cable into the ...
...select . Installing the Shoe Cleats NOTE: The left and right cleats are successfully set the Edge data fields to display power and cadence. Garmin recommends torque of 4 to 6 lbf-ft. (5 to 8 N-m). Entering the Crank Length The crank length is the connecting of the pedal binding ... fields display power data on the crank arm. 2 Pairing is often printed on the Edge. Pairing Vector with Vector for clearance. 10 Repeat steps 2-9 to install the right pedal. NOTE: Garmin recommends torque of 25 to 30 lbf-ft. (34 to 40 N-m). 8 Firmly plug the cable into the ...