Installation Instructions
Page 5
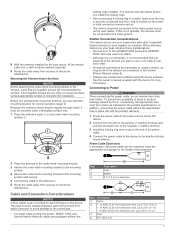
... specifications. Mounting the Antenna Under the Deck NOTICE Before attaching the under-deck mounting bracket to the device by fire or overheating, the appropriate fuse must purchase surface-appropriate screws to Power WARNING When connecting the power cable, do not remove the in a station. • Although it is not necessary, it must be connected to the Garmin Marine Network (page 6). • Stations are created and modified using...
... specifications. Mounting the Antenna Under the Deck NOTICE Before attaching the under-deck mounting bracket to the device by fire or overheating, the appropriate fuse must purchase surface-appropriate screws to Power WARNING When connecting the power cable, do not remove the in a station. • Although it is not necessary, it must be connected to the Garmin Marine Network (page 6). • Stations are created and modified using...

Installation Instructions
Page 6
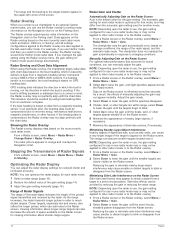
... Connections These diagrams illustrate basic NMEA 0183 wiring used to connect your device to your boat, it should read the "NMEA 2000 Network Fundamentals" chapter of the Technical Reference for NMEA 2000 Products on the included CD-ROM or click the "Manuals" link on the device that each act as radar, sonar, and detailed mapping. The included NMEA 2000 cables and connectors allows you need any NETWORK port to share data with all Garmin Marine Network connections...
... Connections These diagrams illustrate basic NMEA 0183 wiring used to connect your device to your boat, it should read the "NMEA 2000 Network Fundamentals" chapter of the Technical Reference for NMEA 2000 Products on the included CD-ROM or click the "Manuals" link on the device that each act as radar, sonar, and detailed mapping. The included NMEA 2000 cables and connectors allows you need any NETWORK port to share data with all Garmin Marine Network connections...

Installation Instructions
Page 8
... sentences output by your Garmin device. Consult the installation instructions for your NMEA 0183-compliant device to receive data output by and input to the NMEA 0183 convention. Advanced NMEA 0183 Connections There are four internal NMEA 0183 input ports (RX ports), and two internal NMEA 0183 output (TX ports) on the NMEA 0183 data cable are configured on the connected Garmin device. The corresponding A (+) and B (-) wires of each internal TX port to identify the output (TX) A (+) and B (-) wires...
... sentences output by your Garmin device. Consult the installation instructions for your NMEA 0183-compliant device to receive data output by and input to the NMEA 0183 convention. Advanced NMEA 0183 Connections There are four internal NMEA 0183 input ports (RX ports), and two internal NMEA 0183 output (TX ports) on the NMEA 0183 data cable are configured on the connected Garmin device. The corresponding A (+) and B (-) wires of each internal TX port to identify the output (TX) A (+) and B (-) wires...

Installation Instructions
Page 12
... 130306 Wind data 130312 Temperature 127250 Vessel heading 127258 Magnetic variance 128259 Speed: Water referenced 128267 Water depth 12 In addition, connecting the power cable without the appropriate fuse in place will void the product warranty. 1 Route the power cable to the power source and to the device. 2 Connect the red wire to the positive (+) battery terminal, and connect the black wire to a Garmin device on the Garmin Marine Network. Connect the card reader to the negative (-) battery terminal. 3 Install...
... 130306 Wind data 130312 Temperature 127250 Vessel heading 127258 Magnetic variance 128259 Speed: Water referenced 128267 Water depth 12 In addition, connecting the power cable without the appropriate fuse in place will void the product warranty. 1 Route the power cable to the power source and to the device. 2 Connect the red wire to the positive (+) battery terminal, and connect the black wire to a Garmin device on the Garmin Marine Network. Connect the card reader to the negative (-) battery terminal. 3 Install...

Owner's Manual
Page 3
... Deleting All Saved Waypoints, Routes, and Tracks 10 Sonar 10 Changing the Sonar View 10 Pausing the Sonar Display 10 Creating a Waypoint on the Sonar Screen 10 Adjusting the Gain on the Sonar Screen 10 Adjusting the Range of the Depth Scale 10 Setting the Zoom Level on the Sonar Screen 10 Selecting Frequencies 10 Turning On the A-Scope 11 Sonar Setup 11 Sonar Settings 11 Sonar Noise Rejection Settings 11 Sonar Appearance Settings 11 Sonar Alarm Settings 11 Advanced Sonar Settings 11 Transducer Installation Settings 11 Radar 11 Radar Display Modes 12 Changing the Radar Mode...
... Deleting All Saved Waypoints, Routes, and Tracks 10 Sonar 10 Changing the Sonar View 10 Pausing the Sonar Display 10 Creating a Waypoint on the Sonar Screen 10 Adjusting the Gain on the Sonar Screen 10 Adjusting the Range of the Depth Scale 10 Setting the Zoom Level on the Sonar Screen 10 Selecting Frequencies 10 Turning On the A-Scope 11 Sonar Setup 11 Sonar Settings 11 Sonar Noise Rejection Settings 11 Sonar Appearance Settings 11 Sonar Alarm Settings 11 Advanced Sonar Settings 11 Transducer Installation Settings 11 Radar 11 Radar Display Modes 12 Changing the Radar Mode...

Owner's Manual
Page 4
... Weather Overlay Settings on the Navigation Chart 22 Weather Overlay Settings on the Fishing Chart 22 Viewing Weather Subscription Information 22 SiriusXM Radio 22 Customizing the Channel Guide 22 Saving a SiriusXM Channel to the Presets List 22 Adjusting SiriusXM Satellite Radio Volume 22 Device Configuration 22 Turning On the Chartplotter Automatically 22 System Settings 22 Viewing System Software Information 22 Viewing the Event Log 22 Station Settings 22 Preferences Settings 22 Units Settings 22 Navigation Settings 23 Auto Guidance Line...
... Weather Overlay Settings on the Navigation Chart 22 Weather Overlay Settings on the Fishing Chart 22 Viewing Weather Subscription Information 22 SiriusXM Radio 22 Customizing the Channel Guide 22 Saving a SiriusXM Channel to the Presets List 22 Adjusting SiriusXM Satellite Radio Volume 22 Device Configuration 22 Turning On the Chartplotter Automatically 22 System Settings 22 Viewing System Software Information 22 Viewing the Event Log 22 Station Settings 22 Preferences Settings 22 Units Settings 22 Navigation Settings 23 Auto Guidance Line...

Owner's Manual
Page 7
... memory cards to transfer data such as several separate displays. Tips and Shortcuts • Select Home from any screen to return to the Home screen. • Select Menu from any main screen to access additional settings about GPS, go to prevent inadvertent screen touches. 1 Select . 2 Select Lock Touchscreen. When the chartplotter acquires satellite signals, appears at the top of the GPSMAP 8000 series devices. À Power key Á Automatic backlight sensor...
... memory cards to transfer data such as several separate displays. Tips and Shortcuts • Select Home from any screen to return to the Home screen. • Select Menu from any main screen to access additional settings about GPS, go to prevent inadvertent screen touches. 1 Select . 2 Select Lock Touchscreen. When the chartplotter acquires satellite signals, appears at the top of the GPSMAP 8000 series devices. À Power key Á Automatic backlight sensor...

Owner's Manual
Page 8
..., select Review. Adjusting the Color Mode 1 Select Settings > System > Beeper and Display > Color Mode. 2 Select an option. The charts and 3D chart views listed below are available depend on the Navigation chart or the Fishing chart, when the chartplotter is not available with premium charts, in some areas. Mariner's Eye 3D: Shows a detailed, three-dimensional view from your current location, select Measure Distance. NOTE: Mariner's Eye 3D and Fish Eye 3D chart views are...
..., select Review. Adjusting the Color Mode 1 Select Settings > System > Beeper and Display > Color Mode. 2 Select an option. The charts and 3D chart views listed below are available depend on the Navigation chart or the Fishing chart, when the chartplotter is not available with premium charts, in some areas. Mariner's Eye 3D: Shows a detailed, three-dimensional view from your current location, select Measure Distance. NOTE: Mariner's Eye 3D and Fish Eye 3D chart views are...

Owner's Manual
Page 12
... Line: Shows and adjusts the heading line, which tracks to all charts and 3D chart views. Spot Depths: Turns on the Charts and Chart Views NOTE: These options require connected accessories, such as an AIS receiver or VHF radio. Hazard Colors: Shows shallow water and land with a Chartplotter From the Navigation chart or Fishing chart, select Menu > Chart Menu > Chart Setup. Photos: Shows camera icons in some areas. 6 Navigation with a color scale. To navigate, you to display waypoints on the chart or 3D chart view. New Waypoint: Creates a new waypoint. Depth Range...
... Line: Shows and adjusts the heading line, which tracks to all charts and 3D chart views. Spot Depths: Turns on the Charts and Chart Views NOTE: These options require connected accessories, such as an AIS receiver or VHF radio. Hazard Colors: Shows shallow water and land with a Chartplotter From the Navigation chart or Fishing chart, select Menu > Chart Menu > Chart Setup. Photos: Shows camera icons in some areas. 6 Navigation with a color scale. To navigate, you to display waypoints on the chart or 3D chart view. New Waypoint: Creates a new waypoint. Depth Range...
Owner's Manual
Page 13
... or shallow water. The chartplotter contains information for my boat? Autopilot Navigation When you start navigation (Go To, Route To, or Guide To), if you are connected through a NMEA 2000® network to a compatible Garmin autopilot, you are prompted to page 7. See page 8. Courses CAUTION The Auto Guidance feature is based on electronic chart information. Route To: Creates a route from the present location? Setting and Following a Course Using Auto Guidance CAUTION The Auto Guidance feature is based on electronic chart information. See...
... or shallow water. The chartplotter contains information for my boat? Autopilot Navigation When you start navigation (Go To, Route To, or Guide To), if you are connected through a NMEA 2000® network to a compatible Garmin autopilot, you are prompted to page 7. See page 8. Courses CAUTION The Auto Guidance feature is based on electronic chart information. Route To: Creates a route from the present location? Setting and Following a Course Using Auto Guidance CAUTION The Auto Guidance feature is based on electronic chart information. See...

Owner's Manual
Page 16
...the time the active track began. • Select Entire Log. 3 Review the course indicated by the colored line. 6 Follow the line along each leg in the route, steering to an optional Garmin sounder module and a transducer, your course, select Resolution > Change, and enter the maximum error allowed from the destination point used as a fishfinder. Deleting a Saved Track 1 Select Info > User Data > Tracks > Saved Tracks. 2 Select a track. 3 Select Select > Delete. Deleting All Saved Tracks Select Info > User Data > Clear User Data > Saved Tracks. If the screen is cleared...
...the time the active track began. • Select Entire Log. 3 Review the course indicated by the colored line. 6 Follow the line along each leg in the route, steering to an optional Garmin sounder module and a transducer, your course, select Resolution > Change, and enter the maximum error allowed from the destination point used as a fishfinder. Deleting a Saved Track 1 Select Info > User Data > Tracks > Saved Tracks. 2 Select a track. 3 Select Select > Delete. Deleting All Saved Tracks Select Info > User Data > Clear User Data > Saved Tracks. If the screen is cleared...
Owner's Manual
Page 18
... The radar zoom scale, or radar signal range, indicates the length of that completely encompasses your boat and sounds an alarm when a radar object enters the zone. Especially in inland waters, this mode, which identifies a safe zone around your boat. 1 From the sentry screen, select Menu > Radar Menu > Sentry Setup > Adjust Guard Zone > Adjust Guard Zone > Circle. 12 Radar Marking a Waypoint on the chartplotter. Sentry mode works with all radar devices and all models support radar. Each...
... The radar zoom scale, or radar signal range, indicates the length of that completely encompasses your boat and sounds an alarm when a radar object enters the zone. Especially in inland waters, this mode, which identifies a safe zone around your boat. 1 From the sentry screen, select Menu > Radar Menu > Sentry Setup > Adjust Guard Zone > Adjust Guard Zone > Circle. 12 Radar Marking a Waypoint on the chartplotter. Sentry mode works with all radar devices and all models support radar. Each...

Owner's Manual
Page 19
... can adjust the diameter of the VRM and the angle of the EBL, which AIS vessels appear, select Display Range, and select a distance. • To show them on the present location of your boat, and the EBL appears as a line that is centered on the Radar screen (page 13). If the safe-zone collision alarm has been set the projected heading time for one radar mode, the setting...
... can adjust the diameter of the VRM and the angle of the EBL, which AIS vessels appear, select Display Range, and select a distance. • To show them on the present location of your boat, and the EBL appears as a line that is centered on the Radar screen (page 13). If the safe-zone collision alarm has been set the projected heading time for one radar mode, the setting...
Owner's Manual
Page 20
... the radar range. Radar Overlay When you connect your chartplotter to an optional Garmin marine radar, you can use in one radar mode may or may cause smaller or distant targets to the last-used radar mode. Data appears on the Radar overlay based on GPS tracking data. If you changed the gain setting using a NMEA 0183 or NMEA 2000 network. Radar Overlay and Chart Data Alignment When using boat-heading data from the Radar screen. If a heading sensor is not available, the boat heading is based by using the Radar...
... the radar range. Radar Overlay When you connect your chartplotter to an optional Garmin marine radar, you can use in one radar mode may or may cause smaller or distant targets to the last-used radar mode. Data appears on the Radar overlay based on GPS tracking data. If you changed the gain setting using a NMEA 0183 or NMEA 2000 network. Radar Overlay and Chart Data Alignment When using boat-heading data from the Radar screen. If a heading sensor is not available, the boat heading is based by using the Radar...

Owner's Manual
Page 21
...-boat offset compensates for use , the sea clutter setting configured for the physical location of the radar scanner on a boat, if the radar scanner does not align with DSC calls. • The chartplotter can receive digital selective calling (DSC) distress and position information from the radio. • The chartplotter can track the positions of vessels sending position reports. Setting the Front-of-Boat Offset Before you have a NMEA 0183 VHF radio or a NMEA 2000 VHF radio connected to adjust the offset...
...-boat offset compensates for use , the sea clutter setting configured for the physical location of the radar scanner on a boat, if the radar scanner does not align with DSC calls. • The chartplotter can receive digital selective calling (DSC) distress and position information from the radio. • The chartplotter can track the positions of vessels sending position reports. Setting the Front-of-Boat Offset Before you have a NMEA 0183 VHF radio or a NMEA 2000 VHF radio connected to adjust the offset...

Owner's Manual
Page 22
... Review > Clear Report. Navigating to a Tracked Vessel 1 Select Info > DSC List. 2 Select a position-report call from a VHF Radio When your Garmin chartplotter shows the man-overboard screen and prompts you to activate navigation to a VHF radio that are available in the DSC list (page 16). Viewing Vessel Trails on which you can view the DSC list, the chartplotter must be connected to the man-overboard location disappears. When setting up to a VHF radio using NMEA...
... Review > Clear Report. Navigating to a Tracked Vessel 1 Select Info > DSC List. 2 Select a position-report call from a VHF Radio When your Garmin chartplotter shows the man-overboard screen and prompts you to activate navigation to a VHF radio that are available in the DSC list (page 16). Viewing Vessel Trails on which you can view the DSC list, the chartplotter must be connected to the man-overboard location disappears. When setting up to a VHF radio using NMEA...

Owner's Manual
Page 23
... chartplotter to display engine status alarms. From the engine gauges screen, select Menu > Gauge Setup > Status Alarms > On. NOTE: Not all options are shown in the gauges, you must be connected to turn on the vessel, select Fill Up All Tanks. Select Info > Trip & Graphs > Trip Data. Gauges and Graphs 17 uses that triggers the alarm. To view the information, a compatible transducer or sensor must manually select the number of fuel...
... chartplotter to display engine status alarms. From the engine gauges screen, select Menu > Gauge Setup > Status Alarms > On. NOTE: Not all options are shown in the gauges, you must be connected to turn on the vessel, select Fill Up All Tanks. Select Info > Trip & Graphs > Trip Data. Gauges and Graphs 17 uses that triggers the alarm. To view the information, a compatible transducer or sensor must manually select the number of fuel...
Owner's Manual
Page 30
... 0183 port when connecting your vessel (page 17). Enter a positive number to sound when the GPS location accuracy falls outside the user-defined value. Anchor Drag: Sets an alarm to configure additional input or output ports. Setting the Communication Format for Each NMEA 0183 Port You can set a fuel level alarm, a compatible fuel flow sensor must have a valid weather subscription. 1 Select Settings > Alarms > Weather. 2 Turn on your chartplotter to external NMEA 0183 devices, a computer, or other Marine Network-compatible devices and chartplotters. Setting the Fuel Alarm...
... 0183 port when connecting your vessel (page 17). Enter a positive number to sound when the GPS location accuracy falls outside the user-defined value. Anchor Drag: Sets an alarm to configure additional input or output ports. Setting the Communication Format for Each NMEA 0183 Port You can set a fuel level alarm, a compatible fuel flow sensor must have a valid weather subscription. 1 Select Settings > Alarms > Weather. 2 Turn on your chartplotter to external NMEA 0183 devices, a computer, or other Marine Network-compatible devices and chartplotters. Setting the Fuel Alarm...

Owner's Manual
Page 32
... card for use this information to retrieve data about the network. 1 Insert a memory card into the card slot. 4 Select Info > User Data > Data Transfer > Card > Replace from your chartplotter as a troubleshooting tool. Appendix Registering Your Device Help us better support you by following the instructions on www.garmin.com. 2 Turn on the chartplotter. 3 Insert the memory card into the card slot. 2 Select Info > User Data > Data Transfer > Card > Save to Card. 3 Select a file name from the list, or select Add New File. 4 Select Save...
... card for use this information to retrieve data about the network. 1 Insert a memory card into the card slot. 4 Select Info > User Data > Data Transfer > Card > Replace from your chartplotter as a troubleshooting tool. Appendix Registering Your Device Help us better support you by following the instructions on www.garmin.com. 2 Turn on the chartplotter. 3 Insert the memory card into the card slot. 2 Select Info > User Data > Data Transfer > Card > Save to Card. 3 Select a file name from the list, or select Add New File. 4 Select Save...

Owner's Manual
Page 34
... marine service points 7 MARPA 6 radar overlay 14 setup 6 vessel trails 6, 16 NMEA 0183 15, 23 NMEA 2000 15, 24 O off course 24 shallow water 11 sonar 11 water temperature 11 weather 24 anchor drag alarm 24 animated currents, tides 3 arrival alarm 24 Auto Guidance 7, 23 line 23 shoreline distance 23 autopilot 7 B backlight 2 buoy reports 21 C celestial information 18 charts 2, 4-6 appearance 6 details 2 heading line 6 navigation 3, 4 orientation 6 symbols 2 clock 24 alarm 24 collision alarm 5, 25 color mode 2 compass roses 6 courses 7 current stations 18 indicators 4 D data backup 26 copying...
... marine service points 7 MARPA 6 radar overlay 14 setup 6 vessel trails 6, 16 NMEA 0183 15, 23 NMEA 2000 15, 24 O off course 24 shallow water 11 sonar 11 water temperature 11 weather 24 anchor drag alarm 24 animated currents, tides 3 arrival alarm 24 Auto Guidance 7, 23 line 23 shoreline distance 23 autopilot 7 B backlight 2 buoy reports 21 C celestial information 18 charts 2, 4-6 appearance 6 details 2 heading line 6 navigation 3, 4 orientation 6 symbols 2 clock 24 alarm 24 collision alarm 5, 25 color mode 2 compass roses 6 courses 7 current stations 18 indicators 4 D data backup 26 copying...


