Network Guide
Page 8
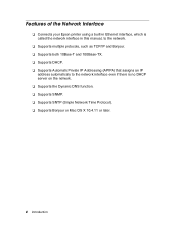
Features of the Network Interface ❏ Connects your Epson printer using a built-in Ethernet interface, which is called the network interface in this manual, to the network. ❏ Supports multiple protocols, such as TCP/IP and Bonjour. ❏ Supports both 10Base-T and 100Base-TX. ❏ Supports DHCP. ❏ Supports ...
Features of the Network Interface ❏ Connects your Epson printer using a built-in Ethernet interface, which is called the network interface in this manual, to the network. ❏ Supports multiple protocols, such as TCP/IP and Bonjour. ❏ Supports both 10Base-T and 100Base-TX. ❏ Supports DHCP. ❏ Supports ...
Network Guide
Page 18
... of the last octet, press r. When you selected PANEL as the IP address setting, press the Pause/ Reset button to set the printer's IP settings manually. 8. For Windows, you would like to exit the printer menu. The printer's IP address will be obtained from the DHCP server whenever the printer is...
... of the last octet, press r. When you selected PANEL as the IP address setting, press the Pause/ Reset button to set the printer's IP settings manually. 8. For Windows, you would like to exit the printer menu. The printer's IP address will be obtained from the DHCP server whenever the printer is...
Network Guide
Page 21
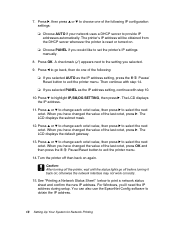
Select LPT1: as the printer port, then click OK. 6. See "Adding the Network Port" on page 23 to the Epson Professional Imaging website on -screen instructions to install all necessary software and manuals, place a link to create a network port for Network Printing 21 Restart your printer. Follow the on your desktop, and register your printer. 7. When you see a screen like this one, click the Manual button. 5. Setting Up Your System for your computer if prompted. 4. When you 're done, click Exit and eject the CD.
Select LPT1: as the printer port, then click OK. 6. See "Adding the Network Port" on page 23 to the Epson Professional Imaging website on -screen instructions to install all necessary software and manuals, place a link to create a network port for Network Printing 21 Restart your printer. Follow the on your desktop, and register your printer. 7. When you see a screen like this one, click the Manual button. 5. Setting Up Your System for your computer if prompted. 4. When you 're done, click Exit and eject the CD.
Network Guide
Page 22
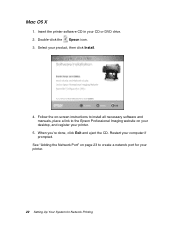
Select your CD or DVD drive. 2. Follow the on your desktop, and register your printer. 5. Insert the printer software CD in your product, then click Install. 4. Mac OS X 1. Restart your printer. 22 Setting Up Your System for your computer if prompted. Double-click the Epson icon. 3. See "Adding the Network Port" on page 23 to the Epson Professional Imaging website on -screen instructions to install all necessary software and manuals, place a link to create a network port for Network Printing When you're done, click Exit and eject the CD.
Select your CD or DVD drive. 2. Follow the on your desktop, and register your printer. 5. Insert the printer software CD in your product, then click Install. 4. Mac OS X 1. Restart your printer. 22 Setting Up Your System for your computer if prompted. Double-click the Epson icon. 3. See "Adding the Network Port" on page 23 to the Epson Professional Imaging website on -screen instructions to install all necessary software and manuals, place a link to create a network port for Network Printing When you're done, click Exit and eject the CD.
Network Guide
Page 29
... address of the network interface directly. See "Printing a Network Status Sheet" on your computer. ❏ TCP/IP must be correctly set the IP address manually, select Manual. Note: ❏ A Web browser must be installed on page 19 for Windows or Macintosh. Select the printer you want to set for details.You can...
... address of the network interface directly. See "Printing a Network Status Sheet" on your computer. ❏ TCP/IP must be correctly set the IP address manually, select Manual. Note: ❏ A Web browser must be installed on page 19 for Windows or Macintosh. Select the printer you want to set for details.You can...

Network Guide
Page 30
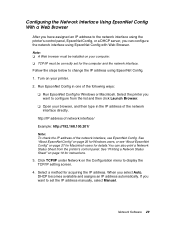
... as a gateway, enter the IP address of the server or the router for Register Network Interface Address to DNS Server if you want to specify manually, enter the host name and the domain name in the text boxes. 9. If you want to get a private address between 169.254.1.1 and 169.254... automatically when an IP address cannot be available on your network. ❏ If the Dynamic DNS function is not supported, we recommend that you select Manual and then enter an IP address. Note: If there is automatically assigned to the network interface even when there are no gateway, leave the default...
... as a gateway, enter the IP address of the server or the router for Register Network Interface Address to DNS Server if you want to specify manually, enter the host name and the domain name in the text boxes. 9. If you want to get a private address between 169.254.1.1 and 169.254... automatically when an IP address cannot be available on your network. ❏ If the Dynamic DNS function is not supported, we recommend that you select Manual and then enter an IP address. Note: If there is automatically assigned to the network interface even when there are no gateway, leave the default...
Network Guide
Page 34
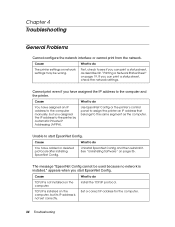
... Config and then reinstall it. Cannot print even if you assigned the IP address to do You have assigned an IP address to the computer manually, but its IP address is installed on the computer. Install the TCP/IP protocol. Set a correct IP address for the computer. 34 Troubleshooting appears when...
... Config and then reinstall it. Cannot print even if you assigned the IP address to do You have assigned an IP address to the computer manually, but its IP address is installed on the computer. Install the TCP/IP protocol. Set a correct IP address for the computer. 34 Troubleshooting appears when...
Quick Reference Guide
Page 6
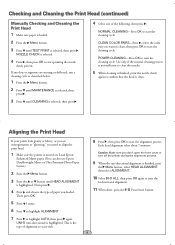
POWER CLEANING-Press OK to start the cleaning cycle. Load Epson Enhanced Matte paper. (You can also use Epson Doubleweight Matte or Ultra Premium Photo Paper Luster.) 2 Press the Menu button. 3 Press the or button until TEST PRINT is selected, then press ....see misregistration or "ghosting," you want to clean, then press OK to start printing the nozzle check pattern. Checking and Cleaning the Print Head (continued) Manually Checking and Cleaning the Print Head 1 Make sure paper is loaded. 2 Press the Menu button. 3 Press until HEAD ALIGNMENT is highlighted. This is clean...
POWER CLEANING-Press OK to start the cleaning cycle. Load Epson Enhanced Matte paper. (You can also use Epson Doubleweight Matte or Ultra Premium Photo Paper Luster.) 2 Press the Menu button. 3 Press the or button until TEST PRINT is selected, then press ....see misregistration or "ghosting," you want to clean, then press OK to start printing the nozzle check pattern. Checking and Cleaning the Print Head (continued) Manually Checking and Cleaning the Print Head 1 Make sure paper is loaded. 2 Press the Menu button. 3 Press until HEAD ALIGNMENT is highlighted. This is clean...
Quick Reference Guide
Page 11
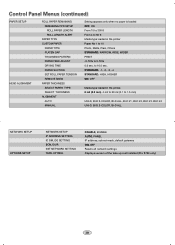
...GAP THICKNESS PATTERN PAPER FEED ADJUST DRYING TIME PAPER SUCTION SET ROLL PAPER TENSION REMOVE SKEW PAPER THICKNESS SELECT PAPER TYPE SELECT THICKNESS ALIGNMENT AUTO MANUAL Setting appears only when no paper is loaded OFF, ON From 15 to 300 ft From 4 to 50 ft Media type loaded in ... REEL DISABLE, ENABLE AUTO, PANEL IP address, subnet mask, default gateway ON, OFF Resets all network settings Displays version of the take-up reel installed (Pro 9700 only) 10 STANDARD, -1, -2, -3, -4 STANDARD, HIGH, HIGHER ON, OFF Media type loaded in the printer Paper No 1 to 10 Photo, Matte, Plain, Others ...
...GAP THICKNESS PATTERN PAPER FEED ADJUST DRYING TIME PAPER SUCTION SET ROLL PAPER TENSION REMOVE SKEW PAPER THICKNESS SELECT PAPER TYPE SELECT THICKNESS ALIGNMENT AUTO MANUAL Setting appears only when no paper is loaded OFF, ON From 15 to 300 ft From 4 to 50 ft Media type loaded in ... REEL DISABLE, ENABLE AUTO, PANEL IP address, subnet mask, default gateway ON, OFF Resets all network settings Displays version of the take-up reel installed (Pro 9700 only) 10 STANDARD, -1, -2, -3, -4 STANDARD, HIGH, HIGHER ON, OFF Media type loaded in the printer Paper No 1 to 10 Photo, Matte, Plain, Others ...
User's Guide
Page 6
...Setting Up Automatic Media Tracking and Identification 61 Placing the Paper in the Printer 62 Loading the Paper for Printing 67 Cutting Paper Manually with the Built-in Cutter 69 Printing Trim Lines 69 Removing Paper from the Printer 70 Using Cut Sheet Paper 73 Loading ... Optimizing the Settings for Your Paper 82 Creating Paper Configurations 82 Printing Your Paper Configurations 84 Selecting Paper Configurations 84 3 Printing With Epson Drivers for Windows Sizing Images for Borderless Printing on Roll Paper 86 Choosing Basic Print Options 87 Selecting the Correct Media Type Setting...
...Setting Up Automatic Media Tracking and Identification 61 Placing the Paper in the Printer 62 Loading the Paper for Printing 67 Cutting Paper Manually with the Built-in Cutter 69 Printing Trim Lines 69 Removing Paper from the Printer 70 Using Cut Sheet Paper 73 Loading ... Optimizing the Settings for Your Paper 82 Creating Paper Configurations 82 Printing Your Paper Configurations 84 Selecting Paper Configurations 84 3 Printing With Epson Drivers for Windows Sizing Images for Borderless Printing on Roll Paper 86 Choosing Basic Print Options 87 Selecting the Correct Media Type Setting...
User's Guide
Page 22
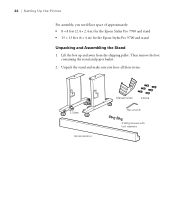
Lift the box up and away from the shipping pallet. Unpack the stand and make sure you need floor space of approximately: • 8 × 8 feet (2.4 × 2.4 m) for the Epson Stylus Pro 7700 and stand • 13 × 13 feet (4 × 4 m) for the Epson Stylus Pro 9700 and stand Unpacking and Assembling the Stand 1. 22 | Setting Up the Printer For assembly, you have all these items. 2 Sides Horizontal strut Manual holder 6 Bolts Hex wrench 2 Wing screws with lock washers 22 Then remove the box containing the stand and paper basket. 2.
Lift the box up and away from the shipping pallet. Unpack the stand and make sure you need floor space of approximately: • 8 × 8 feet (2.4 × 2.4 m) for the Epson Stylus Pro 7700 and stand • 13 × 13 feet (4 × 4 m) for the Epson Stylus Pro 9700 and stand Unpacking and Assembling the Stand 1. 22 | Setting Up the Printer For assembly, you have all these items. 2 Sides Horizontal strut Manual holder 6 Bolts Hex wrench 2 Wing screws with lock washers 22 Then remove the box containing the stand and paper basket. 2.
User's Guide
Page 42
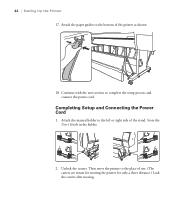
Then move the printer to the left or right side of use. (The casters are meant for moving the printer for only a short distance.) Lock the casters after moving. 42 42 | Setting Up the Printer 17. Continue with the next section to the bottom of the printer as shown: 18. Attach the manual holder to the place of the stand. Store the User's Guide in the holder. 2. Attach the paper guides to complete the setup process and connect the power cord. Completing Setup and Connecting the Power Cord 1. Unlock the casters.
Then move the printer to the left or right side of use. (The casters are meant for moving the printer for only a short distance.) Lock the casters after moving. 42 42 | Setting Up the Printer 17. Continue with the next section to the bottom of the printer as shown: 18. Attach the manual holder to the place of the stand. Store the User's Guide in the holder. 2. Attach the paper guides to complete the setup process and connect the power cord. Completing Setup and Connecting the Power Cord 1. Unlock the casters.
User's Guide
Page 51
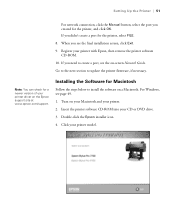
... didn't create a port for the printer, and click OK. Turn on -screen Network Guide. Register your printer model. 51 Click your printer with Epson, then remove the printer software CD-ROM. 10. For Windows, see the final installation screen, click Exit. 9. Setting Up the Printer | 51 ...For network connection, click the Manual button, select the port you created for the printer, select FILE. 8. Insert the printer software CD-ROM into your printer. 2. Note: You can...
... didn't create a port for the printer, and click OK. Turn on -screen Network Guide. Register your printer model. 51 Click your printer with Epson, then remove the printer software CD-ROM. 10. For Windows, see the final installation screen, click Exit. 9. Setting Up the Printer | 51 ...For network connection, click the Manual button, select the port you created for the printer, select FILE. 8. Insert the printer software CD-ROM into your printer. 2. Note: You can...
User's Guide
Page 52
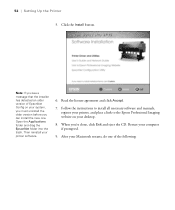
... the Install button. 52 | Setting Up the Printer 5. Then reinstall your desktop. 8. Follow the instructions to install all necessary software and manuals, register your printer, and place a link to the Epson Professional Imaging website on your system, you must uninstall the older version before you can install the new one of EpsonNet...
... the Install button. 52 | Setting Up the Printer 5. Then reinstall your desktop. 8. Follow the instructions to install all necessary software and manuals, register your printer, and place a link to the Epson Professional Imaging website on your system, you must uninstall the older version before you can install the new one of EpsonNet...
User's Guide
Page 55
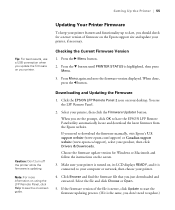
... button until PRINTER STATUS is the same, you don't need to download the firmware manually, visit Epson's U.S. Note: For more information on using the LFP Remote Panel, click Help to see the on your desktop. Click the EPSON LFP Remote Panel 2 icon on -screen guide. If you just downloaded and extracted. ...Click Browse and find the firmware file that you need to update.) 55 If the firmware version of firmware on the Epson support site and update your printer, if necessary. Tip: For best results, use a USB connection when you update the firmware on , its ...
... button until PRINTER STATUS is the same, you don't need to download the firmware manually, visit Epson's U.S. Note: For more information on using the LFP Remote Panel, click Help to see the on your desktop. Click the EPSON LFP Remote Panel 2 icon on -screen guide. If you just downloaded and extracted. ...Click Browse and find the firmware file that you need to update.) 55 If the firmware version of firmware on the Epson support site and update your printer, if necessary. Tip: For best results, use a USB connection when you update the firmware on , its ...
User's Guide
Page 59
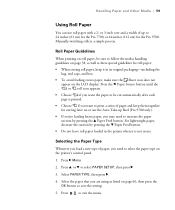
...to print a series of up to select the paper type on or use the Auto Take-up Reel (Pro 9700 only). • If you're loading heavy paper, you are using as these special guidelines for ... 4. Press r Menu. 2. Select the paper that you may need to 24 inches (61 cm) for the Pro 7700, or 44 inches (112 cm) for cutting later on the printer's control panel. 1. Press the l Paper...roll paper with a 2- For lightweight paper, decrease the suction by pressing the u Paper Feed button. Manually switching rolls is printed. • Choose if you need to be sure to follow the media handling ...
...to print a series of up to select the paper type on or use the Auto Take-up Reel (Pro 9700 only). • If you're loading heavy paper, you are using as these special guidelines for ... 4. Press r Menu. 2. Select the paper that you may need to 24 inches (61 cm) for the Pro 7700, or 44 inches (112 cm) for cutting later on the printer's control panel. 1. Press the l Paper...roll paper with a 2- For lightweight paper, decrease the suction by pressing the u Paper Feed button. Manually switching rolls is printed. • Choose if you need to be sure to follow the media handling ...
User's Guide
Page 69
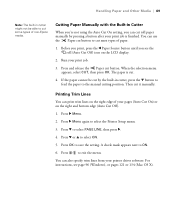
... to select the Printer Setup menu. 3. If the paper cannot be able to cut it manually. Then cut some types of non-Epson media. Press d to exit the menu. Press to select PAGE LINE, then press r. 4. Cutting Paper Manually with the Built-in cutter, press the d button to feed the paper to cut... lines on the LCD display. 2. Printing Trim Lines You can cut . 4. You can also specify trim lines from your print job is cut roll paper manually by the built-in Cutter When you're not using the Auto Cut On setting, you see page 96 (Windows), or pages 121 or 134...
... to select the Printer Setup menu. 3. If the paper cannot be able to cut it manually. Then cut some types of non-Epson media. Press d to exit the menu. Press to select PAGE LINE, then press r. 4. Cutting Paper Manually with the Built-in cutter, press the d button to feed the paper to cut... lines on the LCD display. 2. Printing Trim Lines You can cut . 4. You can also specify trim lines from your print job is cut roll paper manually by the built-in Cutter When you're not using the Auto Cut On setting, you see page 96 (Windows), or pages 121 or 134...
User's Guide
Page 71
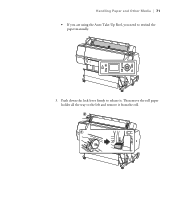
Then move the roll paper holder all the way to the left and remove it . Handling Paper and Other Media | 71 • If you are using the Auto Take-Up Reel, you need to release it from the roll. 71 Push down the lock lever firmly to rewind the paper manually. 3.
Then move the roll paper holder all the way to the left and remove it . Handling Paper and Other Media | 71 • If you are using the Auto Take-Up Reel, you need to release it from the roll. 71 Push down the lock lever firmly to rewind the paper manually. 3.

User's Guide
Page 96
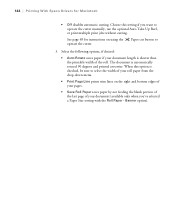
...Single cut sheet paper and select settings for borderless printing. • Single Cut allows images to be printed end-to operate the cutter manually, use the optional Auto Take-Up Reel, or print multiple print jobs without cutting. The document is selected. 96 Select these additional ... image. • Double Cut extends the space between print jobs. • Off disables automatic cutting. 96 | Printing With Epson Drivers for instructions on operating the cutter manually. 9. When you want to -end and saves paper. Choose this section to click Roll Width and select the width of...
...Single cut sheet paper and select settings for borderless printing. • Single Cut allows images to be printed end-to operate the cutter manually, use the optional Auto Take-Up Reel, or print multiple print jobs without cutting. The document is selected. 96 Select these additional ... image. • Double Cut extends the space between print jobs. • Off disables automatic cutting. 96 | Printing With Epson Drivers for instructions on operating the cutter manually. 9. When you want to -end and saves paper. Choose this section to click Roll Width and select the width of...
User's Guide
Page 122
Choose this option is checked, be sure to operate the cutter manually, use the optional Auto Take-Up Reel, or print multiple print jobs without cutting. The document is automatically rotated 90 degrees and printed crosswise. When ... setting with the Roll Paper - See page 69 for Macintosh • Off disables automatic cutting. Banner option). 122 Paper cut button to 3. 122 | Printing With Epson Drivers for instructions on the right and bottom edges of your pages. • Save Roll Paper saves paper by not feeding the blank portion of...
Choose this option is checked, be sure to operate the cutter manually, use the optional Auto Take-Up Reel, or print multiple print jobs without cutting. The document is automatically rotated 90 degrees and printed crosswise. When ... setting with the Roll Paper - See page 69 for Macintosh • Off disables automatic cutting. Banner option). 122 Paper cut button to 3. 122 | Printing With Epson Drivers for instructions on the right and bottom edges of your pages. • Save Roll Paper saves paper by not feeding the blank portion of...


