Creating a Photo Book
Page 33
12 Click the PRINT button. Now you're ready to create your printer documentation for detailed paper loading and printing instructions. Your pages begin to avoid fingerprints. 1 Unwrap the 8 × 10-inch or 5 × 7-inch glossy photo paper that came with the instructions in your digital files, it ...for the progress meter to start another task. Load your paper glossy side down in "Create Your Cover" on the size of the StoryTeller paper as much as possible to print. Note: Avoid touching the glossy surface of your printer's front feeder tray. 3 Adjust the edge...
12 Click the PRINT button. Now you're ready to create your printer documentation for detailed paper loading and printing instructions. Your pages begin to avoid fingerprints. 1 Unwrap the 8 × 10-inch or 5 × 7-inch glossy photo paper that came with the instructions in your digital files, it ...for the progress meter to start another task. Load your paper glossy side down in "Create Your Cover" on the size of the StoryTeller paper as much as possible to print. Note: Avoid touching the glossy surface of your printer's front feeder tray. 3 Adjust the edge...
Creating a Photo Book
Page 36
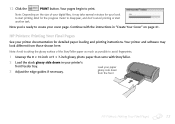
... Print Your Photo Book Pages See the illustration of an Epson printer on page 29 to get an idea of how to avoid fingerprints. 1 Unwrap the 8 × 10-inch or 5 × 7-inch glossy photo paper from the top, like Epson printers. See your printer documentation for the Canon i560;... Canon, Lexmark, or Other Printers: Printing Your Final Pages Canon, Lexmark, and other printers usually load paper from the StoryTeller kit. 2 Load the ...
... Print Your Photo Book Pages See the illustration of an Epson printer on page 29 to get an idea of how to avoid fingerprints. 1 Unwrap the 8 × 10-inch or 5 × 7-inch glossy photo paper from the top, like Epson printers. See your printer documentation for the Canon i560;... Canon, Lexmark, or Other Printers: Printing Your Final Pages Canon, Lexmark, and other printers usually load paper from the StoryTeller kit. 2 Load the ...

Creating a Photo Book
Page 59
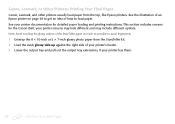
...different. HP Printers: Printing Your Final Cover Page 59 Note: Avoid touching the glossy surface of your printer documentation for example, at the flaps and spine). Printing a Cover for Your 8 × 10-Inch Book on two sheets of the StoryTeller paper as much as possible to avoid fingerprints.... 1 Before loading the StoryTeller cover sheet in your printer, flatten...
...different. HP Printers: Printing Your Final Cover Page 59 Note: Avoid touching the glossy surface of your printer documentation for example, at the flaps and spine). Printing a Cover for Your 8 × 10-Inch Book on two sheets of the StoryTeller paper as much as possible to avoid fingerprints.... 1 Before loading the StoryTeller cover sheet in your printer, flatten...

Creating a Photo Book
Page 65
... Pages for detailed paper loading and printing instructions. Note: Avoid touching the glossy surface of the StoryTeller paper as much as possible to avoid fingerprints. 1 Load two 5 × 7-inch StoryTeller sheets glossy side down 3 Click the PRINT icon at the bottom of the StoryTeller screen. Load two sheets glossy side down in your printer documentation...
... Pages for detailed paper loading and printing instructions. Note: Avoid touching the glossy surface of the StoryTeller paper as much as possible to avoid fingerprints. 1 Load two 5 × 7-inch StoryTeller sheets glossy side down 3 Click the PRINT icon at the bottom of the StoryTeller screen. Load two sheets glossy side down in your printer documentation...

Creating a Photo Book
Page 70
... the glossy surface of the feeder. Note: If your printer loads from the top, as possible to avoid fingerprints. 1 Before loading the StoryTeller cover sheet in your printer, flatten it by gently bending it in the opposite direction (for detailed paper loading and printing instructions. Your printer... may look different. Printing a Full-Length Cover See your printer documentation for example, at the flaps and spine). 2 Load the sheet glossy side up against the right side of the StoryTeller paper as much as described here, and your printer software may not load from...
... the glossy surface of the feeder. Note: If your printer loads from the top, as possible to avoid fingerprints. 1 Before loading the StoryTeller cover sheet in your printer, flatten it by gently bending it in the opposite direction (for detailed paper loading and printing instructions. Your printer... may look different. Printing a Full-Length Cover See your printer documentation for example, at the flaps and spine). 2 Load the sheet glossy side up against the right side of the StoryTeller paper as much as described here, and your printer software may not load from...

Creating a Photo Book
Page 76
Wait for detailed paper loading and printing instructions. Note: Avoid touching the glossy surface of the StoryTeller paper as much as described here, and your paper feeder. Now you want to optimize your printer documentation for the progress meter to print. Note: If your printer loads from the top, as...Your Photo Book" on the size of your printer software may take several minutes for printing, click Yes. Printing Individual Front and Back Cover Pages See your photos for your book together. 14 If you see a message asking if you 're ready to put your covers to start ...
Wait for detailed paper loading and printing instructions. Note: Avoid touching the glossy surface of the StoryTeller paper as much as described here, and your paper feeder. Now you want to optimize your printer documentation for the progress meter to print. Note: If your printer loads from the top, as...Your Photo Book" on the size of your printer software may take several minutes for printing, click Yes. Printing Individual Front and Back Cover Pages See your photos for your book together. 14 If you see a message asking if you 're ready to put your covers to start ...
Creating a Photo Book
Page 92
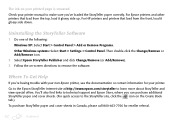
... icon. 2 Select Epson StoryTeller Publisher and click Change/Remove (or Add/Remove). 3 Follow the on-screen directions to the StoryTeller site, click the icon on your printed page is smeared. You'll also find links to technical support and Epson Store, where you 're having trouble with your non-Epson printer, see the documentation or contact information...
... icon. 2 Select Epson StoryTeller Publisher and click Change/Remove (or Add/Remove). 3 Follow the on-screen directions to the StoryTeller site, click the icon on your printed page is smeared. You'll also find links to technical support and Epson Store, where you 're having trouble with your non-Epson printer, see the documentation or contact information...