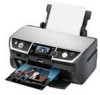
Printer Basics
Page 4
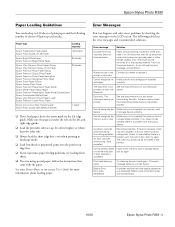
Maintaining Your Printer 48 Checking the Print Head Nozzles 48 Cleaning the Print Head 49 Aligning the Print Head 50 Replacing Ink Cartridges 51 Solving Problems 57 LCD Screen Messages 57 Problems and Solutions 59 Where To Get Help 62 Notices 63 Index 69 4
Maintaining Your Printer 48 Checking the Print Head Nozzles 48 Cleaning the Print Head 49 Aligning the Print Head 50 Replacing Ink Cartridges 51 Solving Problems 57 LCD Screen Messages 57 Problems and Solutions 59 Where To Get Help 62 Notices 63 Index 69 4
Printer Basics
Page 48
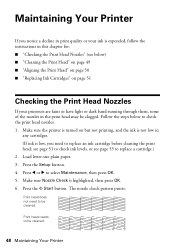
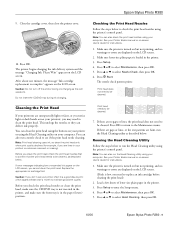
... select Maintenance, then press OK. 5. The nozzle check pattern prints: Print head does not need to replace an ink cartridge before cleaning the print head; Maintaining Your Printer If you need to be cleaned: Print head needs to be clogged. Follow the steps below ) ■ "Cleaning the Print Head" on page 49 ■ "Aligning the Print Head" on page 50 ■ "Replacing Ink Cartridges" on...
... select Maintenance, then press OK. 5. The nozzle check pattern prints: Print head does not need to replace an ink cartridge before cleaning the print head; Maintaining Your Printer If you need to be cleaned: Print head needs to be clogged. Follow the steps below ) ■ "Cleaning the Print Head" on page 49 ■ "Aligning the Print Head" on page 50 ■ "Replacing Ink Cartridges" on...
Printer Basics
Page 49
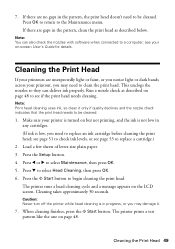
... approximately 30 seconds. Note: You can deliver ink properly. Press the Setup button. 4. Caution: Never turn off the printer while head cleaning is in the pattern, the print head doesn't need to clean the print head. Cleaning the Print Head 49 Load a few sheets of letter-size plain paper. 3. If there are unexpectedly light or faint, or you notice light or...
... approximately 30 seconds. Note: You can deliver ink properly. Press the Setup button. 4. Caution: Never turn off the printer while head cleaning is in the pattern, the print head doesn't need to clean the print head. Cleaning the Print Head 49 Load a few sheets of letter-size plain paper. 3. If there are unexpectedly light or faint, or you notice light or...
Printer Basics
Page 50
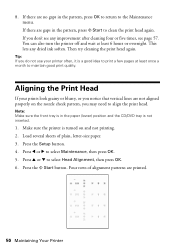
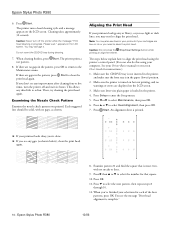
... (lower) position and the CD/DVD tray is in the pattern, press x Start to clean the print head again. Press u or d to select Maintenance, then press OK. 5. If there are printed. 50 Maintaining Your Printer Press the Setup button. 4. Note: Make sure the front tray is not inserted. 1. ...Press the x Start button. Make sure the printer is a good idea to maintain good print quality. You can also turn the printer off and wait at least once a month to print a few pages at least 6 hours or overnight. Then try cleaning the print head again. Four rows of plain, letter-size ...
... (lower) position and the CD/DVD tray is in the pattern, press x Start to clean the print head again. Press u or d to select Maintenance, then press OK. 5. If there are printed. 50 Maintaining Your Printer Press the Setup button. 4. Note: Make sure the front tray is not inserted. 1. ...Press the x Start button. Make sure the printer is a good idea to maintain good print quality. You can also turn the printer off and wait at least once a month to print a few pages at least 6 hours or overnight. Then try cleaning the print head again. Four rows of plain, letter-size ...
Printer Basics
Page 51
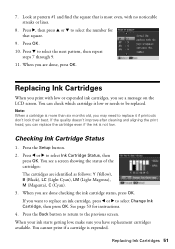
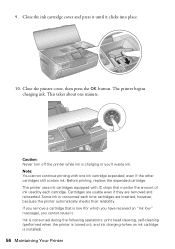
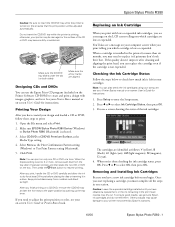
... Setup button. 2. Press d to select Ink Cartridge Status, then press OK. Press l or r to select the next pattern, then repeat steps 7 through 9. 11. You cannot print if a cartridge is low or needs to be replaced. Replacing Ink Cartridges 51 Look at pattern #1 and find the square that square. 9. Press OK. 10... starts getting low, make sure you can check which cartridge is expended. You see a message on the LCD screen. If the quality doesn't improve after cleaning and aligning the print head, you have replacement cartridges available. 7. Replacing Ink Cartridges When you...
... Setup button. 2. Press d to select Ink Cartridge Status, then press OK. Press l or r to select the next pattern, then repeat steps 7 through 9. 11. You cannot print if a cartridge is low or needs to be replaced. Replacing Ink Cartridges 51 Look at pattern #1 and find the square that square. 9. Press OK. 10... starts getting low, make sure you can check which cartridge is expended. You see a message on the LCD screen. If the quality doesn't improve after cleaning and aligning the print head, you have replacement cartridges available. 7. Replacing Ink Cartridges When you...
Printer Basics
Page 56
... ink cartridge expended, even if the other cartridges still contain ink. Before printing, replace the expended cartridge. Caution: Never turn off the printer while ink is installed). 56 Maintaining Your Printer Ink is consumed during the following operations: print head cleaning, self-cleaning (performed when the printer is turned on), and ink charging (when an ink cartridge is...
... ink cartridge expended, even if the other cartridges still contain ink. Before printing, replace the expended cartridge. Caution: Never turn off the printer while ink is installed). 56 Maintaining Your Printer Ink is consumed during the following operations: print head cleaning, self-cleaning (performed when the printer is turned on), and ink charging (when an ink cartridge is...
Printer Basics
Page 58
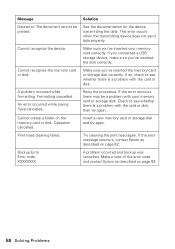
...card or storage disk correctly. If so, check to see whether there is a problem with your memory card correctly. Try cleaning the print head again. Make sure you 've inserted the disk correctly. Insert a new memory card or storage disk and try again. ...Formatting cancelled. A problem occurred and backup was cancelled. Cannot recognize the device. Save cancelled. Print head cleaning failed. Make a note of the error code and contact Epson...
...card or storage disk correctly. If so, check to see whether there is a problem with your memory card correctly. Try cleaning the print head again. Make sure you 've inserted the disk correctly. Insert a new memory card or storage disk and try again. ...Formatting cancelled. A problem occurred and backup was cancelled. Cannot recognize the device. Save cancelled. Print head cleaning failed. Make a note of the error code and contact Epson...
Printer Basics
Page 61
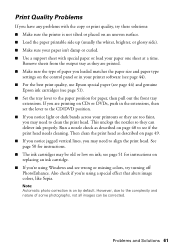
...printer software (see page 44). ■ For the best print quality, use Epson special paper (see page 44) and genuine Epson ink cartridges (see page 51). ■ Set the tray lever to see if the print head needs cleaning. If you are printing... you're using a special effect that alters image colors, like Sepia. Problems and Solutions 61 See page 50...clean the print head as described on page 49. ■ If you notice jagged vertical lines, you may be corrected. Note: Automatic photo correction is not tilted or placed on by default. However, due to align the print head. Print...
...printer software (see page 44). ■ For the best print quality, use Epson special paper (see page 44) and genuine Epson ink cartridges (see page 51). ■ Set the tray lever to see if the print head needs cleaning. If you are printing... you're using a special effect that alters image colors, like Sepia. Problems and Solutions 61 See page 50...clean the print head as described on page 49. ■ If you notice jagged vertical lines, you may be corrected. Note: Automatic photo correction is not tilted or placed on by default. However, due to align the print head. Print...
Printer Basics
Page 64
... in the ink supply port, making covers or plugs unnecessary, but care is needed to clean the LCD panel. However, each time the cartridge is inserted, some ink is damaged, contact Epson as described on this ink cartridge retains a variety of children and do not drink the ... printer or touch any cartridges during printing. ■ Install a new ink cartridge immediately after a thorough flushing, see a doctor immediately. 64 Notices Do not touch the ink cartridge ink supply port or surrounding area. ■ The IC chip on page 62. Leaving cartridges uninstalled can dehydrate the print head...
... in the ink supply port, making covers or plugs unnecessary, but care is needed to clean the LCD panel. However, each time the cartridge is inserted, some ink is damaged, contact Epson as described on this ink cartridge retains a variety of children and do not drink the ... printer or touch any cartridges during printing. ■ Install a new ink cartridge immediately after a thorough flushing, see a doctor immediately. 64 Notices Do not touch the ink cartridge ink supply port or surrounding area. ■ The IC chip on page 62. Leaving cartridges uninstalled can dehydrate the print head...
Printer Basics
Page 69
... Accessories, 62 Adjusting photo quality, 24 to 26 Aligning print head, 50 to 51 All photos, printing, 17 ArcSoft PhotoImpression, 62 B Backing up photos, 46 to 47 Black & White, 25 Borderless expansion, 27 Brightness, 25 Buttons, 6 C Camera connecting to printer, 29 printing from, 28 to 29 Cancelling printing with a computer, 41..., 37 CD-R/RW drive, backing up photos, 46 to 47 CDs adjusting print density, 25 adjusting print position, 35 inserting, 32 to 33 jewel case insert, 37 measuring, 31 printing on, 31 to 35 Cleaning print head, 49 to 50 Color management, turning off, 40, 43 ColorSync...
... Accessories, 62 Adjusting photo quality, 24 to 26 Aligning print head, 50 to 51 All photos, printing, 17 ArcSoft PhotoImpression, 62 B Backing up photos, 46 to 47 Black & White, 25 Borderless expansion, 27 Brightness, 25 Buttons, 6 C Camera connecting to printer, 29 printing from, 28 to 29 Cancelling printing with a computer, 41..., 37 CD-R/RW drive, backing up photos, 46 to 47 CDs adjusting print density, 25 adjusting print position, 35 inserting, 32 to 33 jewel case insert, 37 measuring, 31 printing on, 31 to 35 Cleaning print head, 49 to 50 Color management, turning off, 40, 43 ColorSync...
Printer Basics
Page 71
...26 to 27 printing, 12 to 27 printing all, 17 printing by date, 18 sizing, 26 to 27 storing, 11 viewing and printing, 16 to 17 PictBridge, 28 Premium photo papers, 10 Print head aligning, 50 to 51 cleaning, 49 to 50 Print quality problems, 61 Print settings, 21 to 26 Printing adjusting CD/... using, 6 Sepia, 25 Setup button, 6 Sharpness, 25 Sizing photos, 26 to 27 Software ArcSoft PhotoImpression, 62 Epson Print CD, 31 Stop/Clear Settings button, 6 Stopping printing, 17, 41, 44 Storing prints, 11 T Technical support, 62 Touching up photos, 24 to 26 Troubleshooting, 59 to 61 Type setting, Windows, ...
...26 to 27 printing, 12 to 27 printing all, 17 printing by date, 18 sizing, 26 to 27 storing, 11 viewing and printing, 16 to 17 PictBridge, 28 Premium photo papers, 10 Print head aligning, 50 to 51 cleaning, 49 to 50 Print quality problems, 61 Print settings, 21 to 26 Printing adjusting CD/... using, 6 Sepia, 25 Setup button, 6 Sharpness, 25 Sizing photos, 26 to 27 Software ArcSoft PhotoImpression, 62 Epson Print CD, 31 Stop/Clear Settings button, 6 Stopping printing, 17, 41, 44 Storing prints, 11 T Technical support, 62 Touching up photos, 24 to 26 Troubleshooting, 59 to 61 Type setting, Windows, ...
Product Information Guide
Page 5
... of the packing material. Print head cleaning failed. Make sure the paper is a problem with the paper. Also, make sure you still see this error message, contact Epson. If you 've removed all of the print head. Make sure you 've inserted your Printer Basics or on . Retry... the Contact your dealer to print with your documentation. Insert a new memory card or storage device and try again. The following number of sheets of the error code and contact Epson. 10/06 Epson Stylus Photo R380 - 5 Waste ink pad in the camera. printer is a problem with the ...
... of the packing material. Print head cleaning failed. Make sure the paper is a problem with the paper. Also, make sure you still see this error message, contact Epson. If you 've removed all of the print head. Make sure you 've inserted your Printer Basics or on . Retry... the Contact your dealer to print with your documentation. Insert a new memory card or storage device and try again. The following number of sheets of the error code and contact Epson. 10/06 Epson Stylus Photo R380 - 5 Waste ink pad in the camera. printer is a problem with the ...
Product Information Guide
Page 7
.... 3. To ensure good results, use the Epson Print CD program (included on -screen User's Guide for instructions. Make sure EPSON Stylus Photo R380 Series (Windows) or Stylus Photo R380 (Macintosh) is low or expended. Note: You can also check the ink cartridges using your Printer Basics manual or on -screen User's Guide or Printer Basics book. You'll also see a message...
.... 3. To ensure good results, use the Epson Print CD program (included on -screen User's Guide for instructions. Make sure EPSON Stylus Photo R380 Series (Windows) or Stylus Photo R380 (Macintosh) is low or expended. Note: You can also check the ink cartridges using your Printer Basics manual or on -screen User's Guide or Printer Basics book. You'll also see a message...
Product Information Guide
Page 9
.... Press Setup to see lines in the printer. 3. The nozzle check pattern prints: Print head does not need to clean the print head. Note: Print head cleaning uses ink, so clean the print head only when print quality declines (for instructions. 1. If there are gaps or lines, or the test patterns are incorrect or missing). Epson Stylus Photo R380 9. See your Printer Basics manual or on the LCD screen...
.... Press Setup to see lines in the printer. 3. The nozzle check pattern prints: Print head does not need to clean the print head. Note: Print head cleaning uses ink, so clean the print head only when print quality declines (for instructions. 1. If there are gaps or lines, or the test patterns are incorrect or missing). Epson Stylus Photo R380 9. See your Printer Basics manual or on the LCD screen...
Product Information Guide
Page 10
Epson Stylus Photo R380 6. Caution: Never turn the printer off the printer while the message "Print head cleaning in the pattern, press OK to return to the Maintenance menu. Please wait." Do not insert the CD/DVD tray during cleaning. 7. The printer prints a test pattern. 8. If there are no streaks or lines. 9. Each staggered line should be solid, with no gaps in progress...
Epson Stylus Photo R380 6. Caution: Never turn the printer off the printer while the message "Print head cleaning in the pattern, press OK to return to the Maintenance menu. Please wait." Do not insert the CD/DVD tray during cleaning. 7. The printer prints a test pattern. 8. If there are no streaks or lines. 9. Each staggered line should be solid, with no gaps in progress...
Product Information Guide
Page 11
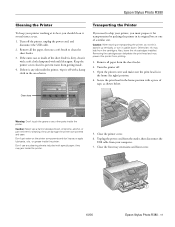
... outlet, then disconnect the USB cable from getting inside the printer, wipe it for cleaning; Epson Stylus Photo R380 Cleaning the Printer To keep your computer. 7. Turn off . 3. Keep the printer cover closed to clean the sheet feeder. 3. If there is dirty, clean it upside down. Caution: When storing or transporting the printer, do not tilt it, stand it up vertically, or...
... outlet, then disconnect the USB cable from getting inside the printer, wipe it for cleaning; Epson Stylus Photo R380 Cleaning the Printer To keep your computer. 7. Turn off . 3. Keep the printer cover closed to clean the sheet feeder. 3. If there is dirty, clean it upside down. Caution: When storing or transporting the printer, do not tilt it, stand it up vertically, or...
Product Information Guide
Page 12
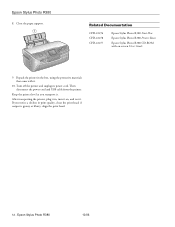
... User's Guide 9. Related Documentation CPD-22276 CPD-22278 CPD-22277 Epson Stylus Photo R380 Start Here Epson Stylus Photo R380 Printer Basics Epson Stylus Photo R380 CD-ROM with it . Repack the printer in print quality, clean the print head; Epson Stylus Photo R380 10/06 if output is grainy or blurry, align the print head. 12 - Epson Stylus Photo R380 8. Close the paper support. Keep the printer level as you notice a decline in the box, using the protective...
... User's Guide 9. Related Documentation CPD-22276 CPD-22278 CPD-22277 Epson Stylus Photo R380 Start Here Epson Stylus Photo R380 Printer Basics Epson Stylus Photo R380 CD-ROM with it . Repack the printer in print quality, clean the print head; Epson Stylus Photo R380 10/06 if output is grainy or blurry, align the print head. 12 - Epson Stylus Photo R380 8. Close the paper support. Keep the printer level as you notice a decline in the box, using the protective...


