

Product Information Guide
Page 13
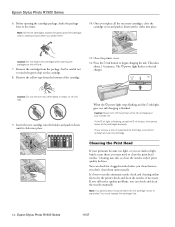
... may affect your old cartridges in a cool, dark place. The use , and temperature. Yields vary considerably based on software screens T0871 T0878 T0872 T0873 T0874 T0877 T0879 T0870 Leave your print quality and could result in the cartridge after removing... in printer damage. Open the printer cover. 3. Epson Stylus Photo R1900 Series 4. Purchasing Ink Cartridges Purchase these genuine Epson cartridges: Ink color Photo Black Matte Black Cyan Magenta Yellow Red Orange Gloss Optimizer Part number 87 87 87 87 87 87 87 87 Part number on images printed, print settings...
... may affect your old cartridges in a cool, dark place. The use , and temperature. Yields vary considerably based on software screens T0871 T0878 T0872 T0873 T0874 T0877 T0879 T0870 Leave your print quality and could result in the cartridge after removing... in printer damage. Open the printer cover. 3. Epson Stylus Photo R1900 Series 4. Purchasing Ink Cartridges Purchase these genuine Epson cartridges: Ink color Photo Black Matte Black Cyan Magenta Yellow Red Orange Gloss Optimizer Part number 87 87 87 87 87 87 87 87 Part number on images printed, print settings...
Product Information Guide
Page 14
... if necessary. Insert the new cartridge into the holder and push it down until it clicks into place. Caution: Never turn off the printer while ink is flashing, press the H ink button, then press down all the necessary cartridges, close the cartridge cover and push it down... them , you see dark or light bands across them . 10. It's best to run the automatic nozzle check and cleaning utility first to begin charging the ink. Remove the yellow tape from the package, but be careful not to clean the print head nozzles. Epson Stylus Photo R1900 Series 6. Cleaning uses ink...
... if necessary. Insert the new cartridge into the holder and push it down until it clicks into place. Caution: Never turn off the printer while ink is flashing, press the H ink button, then press down all the necessary cartridges, close the cartridge cover and push it down... them , you see dark or light bands across them . 10. It's best to run the automatic nozzle check and cleaning utility first to begin charging the ink. Remove the yellow tape from the package, but be careful not to clean the print head nozzles. Epson Stylus Photo R1900 Series 6. Cleaning uses ink...
Product Information Guide
Page 16
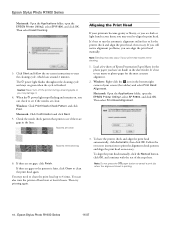
...are clean: Windows: Click Print Nozzle Check Pattern and click Print. I Note: Do not press the paper button to print the alignment check patterns and align the print head as necessary. Epson Stylus Photo R1900 Series Macintosh: Open the Applications folder, open the EPSON Printer Utility2, select SP R1900, and click OK. The... nozzle check pattern that prints to see dark or light bands across them, you may also occur if your print head nozzles need to clean the print head up to align the print head. Windows: Right-click the icon in the lines. Then select Print Head Alignment. You may...
...are clean: Windows: Click Print Nozzle Check Pattern and click Print. I Note: Do not press the paper button to print the alignment check patterns and align the print head as necessary. Epson Stylus Photo R1900 Series Macintosh: Open the Applications folder, open the EPSON Printer Utility2, select SP R1900, and click OK. The... nozzle check pattern that prints to see dark or light bands across them, you may also occur if your print head nozzles need to clean the print head up to align the print head. Windows: Right-click the icon in the lines. Then select Print Head Alignment. You may...
User's Guide - PDF
Page 35
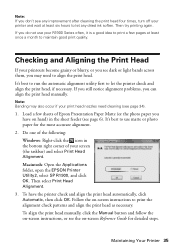
... and select Print Head Alignment. Checking and Aligning the Print Head If your print head nozzles need cleaning (see dark or light bands across them, you see page 34). 1. Load a few sheets of your R1900 Series often, it is a good idea to print a few ...photo paper you have the printer check and align the print head automatically, click Automatic, then click OK. To align the print head manually, click the Manual button and follow the on -screen Reference Guide for the most accurate alignment. 2. Macintosh: Open the Applications folder, open the EPSON Printer Utility2, select SP R1900...
... and select Print Head Alignment. Checking and Aligning the Print Head If your print head nozzles need cleaning (see dark or light bands across them, you see page 34). 1. Load a few sheets of your R1900 Series often, it is a good idea to print a few ...photo paper you have the printer check and align the print head automatically, click Automatic, then click OK. To align the print head manually, click the Manual button and follow the on -screen Reference Guide for the most accurate alignment. 2. Macintosh: Open the Applications folder, open the EPSON Printer Utility2, select SP R1900...
User's Guide - PDF
Page 44
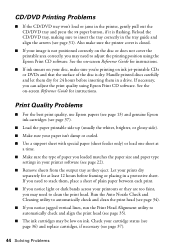
... only) or load one sheet at least 12 hours before inserting them , place a sheet of plain paper between each print. ■ If you notice light or dark bands across your printer software (see page 35). ■ The ink cartridges may be low on the disc or does not cover the printable... area correctly, you may need to insert the tray correctly in your printouts or they eject. If you need to adjust the printing position using Epson Print CD...
... only) or load one sheet at least 12 hours before inserting them , place a sheet of plain paper between each print. ■ If you notice light or dark bands across your printer software (see page 35). ■ The ink cartridges may be low on the disc or does not cover the printable... area correctly, you may need to insert the tray correctly in your printouts or they eject. If you need to adjust the printing position using Epson Print CD...


