ESC/VP Level 21 Communication Manual
Page 1
... prior written consent of the "LICENSE AGREEMENT". I AGREE I DO NOT AGREE EPSON grants you do not agree to as EPSON). LICENSE AGREEMENT 1. Copyright of the user's guide is owned by SEIKO EPSON Corporation (hereinafter referred to the "LICENSE AGREEMENT", please do not utilize this user...in the user's guide before downloading "ESC/VP21 Command User's Guide". Please read carefully the following "LICENSE AGREEMENT" before using the EPSON projector. Downloading the User's Guide indicates your own risk. Please be downloaded until you could use only 1 set of the user's guide...
... prior written consent of the "LICENSE AGREEMENT". I AGREE I DO NOT AGREE EPSON grants you do not agree to as EPSON). LICENSE AGREEMENT 1. Copyright of the user's guide is owned by SEIKO EPSON Corporation (hereinafter referred to the "LICENSE AGREEMENT", please do not utilize this user...in the user's guide before downloading "ESC/VP21 Command User's Guide". Please read carefully the following "LICENSE AGREEMENT" before using the EPSON projector. Downloading the User's Guide indicates your own risk. Please be downloaded until you could use only 1 set of the user's guide...

Installation Guide - ELPMBUNI Universal Mount Assembly
Page 2
... 3 Contact Premier Mounts ...- 3 Warning Statements ...- 4 Parts List ...- 5 Installation Tools ...- 5 ELPMBUNI Universal Mount Assembly ...- 6 Projector Preparation ...- 7 Securing the Bracket to the Projector ...- 9 Leveling the Mounting bracket ...- 14 Securing the Upper Assembly Ceiling Plate...- 15 Low-Profile Installation ...- 16 Securing the... Projector to mounts, adapters, display equipment or personal injury. [email protected] Installation Instructions Page - 3 ...
... 3 Contact Premier Mounts ...- 3 Warning Statements ...- 4 Parts List ...- 5 Installation Tools ...- 5 ELPMBUNI Universal Mount Assembly ...- 6 Projector Preparation ...- 7 Securing the Bracket to the Projector ...- 9 Leveling the Mounting bracket ...- 14 Securing the Upper Assembly Ceiling Plate...- 15 Low-Profile Installation ...- 16 Securing the... Projector to mounts, adapters, display equipment or personal injury. [email protected] Installation Instructions Page - 3 ...

Installation Guide - ELPMBUNI Universal Mount Assembly
Page 3
...INJURY AND PROPERTY DAMAGE. Indicates that the power plug is commercially available). Safety precautions must be disconnected from dropping or mishandling the projector. A secure structure must be confirmed prior to the mounting surface. Recommended mounting surfaces: wooden studs, solid-flat concrete, and...Manual WARNING: THE CEILING STRUCTURE MUST BE CAPABLE OF SUPPORTING A MAX WEIGHT OF 25 LBS., THE WEIGHT OF THE PROJECTOR. IF NOT, THE CEILING MUST BE REINFORCED. PROPER INSTALLATION PROCEDURE BY QUALIFIED PERSONNEL AS OUTLINED IN THE INSTALLATIONS INSTRUCTIONS MUST...
...INJURY AND PROPERTY DAMAGE. Indicates that the power plug is commercially available). Safety precautions must be disconnected from dropping or mishandling the projector. A secure structure must be confirmed prior to the mounting surface. Recommended mounting surfaces: wooden studs, solid-flat concrete, and...Manual WARNING: THE CEILING STRUCTURE MUST BE CAPABLE OF SUPPORTING A MAX WEIGHT OF 25 LBS., THE WEIGHT OF THE PROJECTOR. IF NOT, THE CEILING MUST BE REINFORCED. PROPER INSTALLATION PROCEDURE BY QUALIFIED PERSONNEL AS OUTLINED IN THE INSTALLATIONS INSTRUCTIONS MUST...

Installation Guide - ELPMBUNI Universal Mount Assembly
Page 4
... (Qty 4) M6 x 12mm Security Head Screws (Qty 4) Portable Drill Pencil Level (Supplied) Stud Finder (Commercially Available) M5 Allen Wrench NOTE: Mounting screws will vary by projector. ELPMBUNI Parts List NOTE: This mount is not required for model specific hardware: Pages 10, 11, 12, and 13. Make sure that none of these...
... (Qty 4) M6 x 12mm Security Head Screws (Qty 4) Portable Drill Pencil Level (Supplied) Stud Finder (Commercially Available) M5 Allen Wrench NOTE: Mounting screws will vary by projector. ELPMBUNI Parts List NOTE: This mount is not required for model specific hardware: Pages 10, 11, 12, and 13. Make sure that none of these...

Installation Guide - ELPMBUNI Universal Mount Assembly
Page 5
... Points B Solid Structure Mounting Points C Ceiling Plate D Allen Wrench E Height Adjustment Screws F Tension Knobs G Safety Knob H Security Screws I Leveling Barrels J Universal Mounting Bracket K Leg Assembly L Projector (Not Supplied) M Tri-Lock Opening Option 1 H B D F Combination I Leg Single Leg D Option 2 M NOTE: See the best configuration for filter and lamp access. Page - 6 - ELPMBUNI A NOTE: The... depending on the number of mounting points found on the bottom of single and dual legs together as single leg or any combination C of your projector for your...
... Points B Solid Structure Mounting Points C Ceiling Plate D Allen Wrench E Height Adjustment Screws F Tension Knobs G Safety Knob H Security Screws I Leveling Barrels J Universal Mounting Bracket K Leg Assembly L Projector (Not Supplied) M Tri-Lock Opening Option 1 H B D F Combination I Leg Single Leg D Option 2 M NOTE: See the best configuration for filter and lamp access. Page - 6 - ELPMBUNI A NOTE: The... depending on the number of mounting points found on the bottom of single and dual legs together as single leg or any combination C of your projector for your...

Installation Guide - ELPMBUNI Universal Mount Assembly
Page 6
... important reference information regarding installation dimensions such as outlined in the installation instructions must be adhered to. CAUTION: THE PROJECTOR IS FRAGILE; Adherence to these recommendations during your final image on a smooth flat surface. 2. Identify the number ...of mounting points and screw thread (pitch) size. 3. NOTE: Review the projectors manufacture's operation manual and refer to the ceiling installation instruction. ELPMBUNI Projector Preparation WARNING: Proper installation procedure by qualified personnel as (distance from the screen to the...
... important reference information regarding installation dimensions such as outlined in the installation instructions must be adhered to. CAUTION: THE PROJECTOR IS FRAGILE; Adherence to these recommendations during your final image on a smooth flat surface. 2. Identify the number ...of mounting points and screw thread (pitch) size. 3. NOTE: Review the projectors manufacture's operation manual and refer to the ceiling installation instruction. ELPMBUNI Projector Preparation WARNING: Proper installation procedure by qualified personnel as (distance from the screen to the...

Installation Guide - ELPMBUNI Universal Mount Assembly
Page 7
Next loosen the safety screw knurl knob far enough to allow the two parts to create free play between the bracket tri-lock assembly and the upper section tri-lock assembly points. 5. Installation Manual Separate the upper assembly from the projector mounting bracket by slightly loosening the two tension knurl knobs to be rotated 180° apart and separate. Figure 2 Tri-Lock Opening Rotate 180° To Unlock Tension Knobs Upper Assembly Safety Knob Figure 3 Figure 4 Page - 8 - ELPMBUNI 4.
Next loosen the safety screw knurl knob far enough to allow the two parts to create free play between the bracket tri-lock assembly and the upper section tri-lock assembly points. 5. Installation Manual Separate the upper assembly from the projector mounting bracket by slightly loosening the two tension knurl knobs to be rotated 180° apart and separate. Figure 2 Tri-Lock Opening Rotate 180° To Unlock Tension Knobs Upper Assembly Safety Knob Figure 3 Figure 4 Page - 8 - ELPMBUNI 4.

Installation Guide - ELPMBUNI Universal Mount Assembly
Page 8
... of mounting legs. 2. Page - 9 - Using a Phillips screwdriver, loosely secure the screws to your projector. Locate the mounting points on the base of the projector as shown for a better overall fit to the projector. 1. Use the M3 x 16 Phillips screws with the flat washers attached through the leveling barrel. Select ...: The two-piece mounting legs are designed to allow routing of the legs around critical ventilation screens on the bottom of the projector and use the appropriate number of the mounting bracket. You may also reduce the two-piece leg to the mounting points. FIGURE 6 ...
... of mounting legs. 2. Page - 9 - Using a Phillips screwdriver, loosely secure the screws to your projector. Locate the mounting points on the base of the projector as shown for a better overall fit to the projector. 1. Use the M3 x 16 Phillips screws with the flat washers attached through the leveling barrel. Select ...: The two-piece mounting legs are designed to allow routing of the legs around critical ventilation screens on the bottom of the projector and use the appropriate number of the mounting bracket. You may also reduce the two-piece leg to the mounting points. FIGURE 6 ...

Installation Guide - ELPMBUNI Universal Mount Assembly
Page 9
This mount works with all sub-25 pound projectors. PowerLite 830p, 835p Hardware: M4 x 12mm (Qty 4) Installation Manual ELPMBUNI NOTE: If your projector model is not shown, when arranging the leg combination, simply ensure access to filters and lamp housings when aligning brackets. PowerLite S3, S4, 62C, 76C, 82C, Hardware: M4 x 12mm (Qty 3) Page - 10 -
This mount works with all sub-25 pound projectors. PowerLite 830p, 835p Hardware: M4 x 12mm (Qty 4) Installation Manual ELPMBUNI NOTE: If your projector model is not shown, when arranging the leg combination, simply ensure access to filters and lamp housings when aligning brackets. PowerLite S3, S4, 62C, 76C, 82C, Hardware: M4 x 12mm (Qty 3) Page - 10 -

Installation Guide - ELPMBUNI Universal Mount Assembly
Page 13
Installation Manual Rotate the leveling barrels to the projector then tighten the hex head leg screws with the Allen wrench (supplied) (Figure 8 and Figure 9). When the position desired is achieved tighten the mounting hardware ..., if not all, ventilation points (including lamp & filter access doors). 2. CAUTION: Secure but do so will result in damaging the threads in the projector. Allen Wrench Level Inverted Projector DOWN UP Adjusting the Mount Figure 8 Leveling Barrels Page - 14 - Failure to do not over-tighten the mounting hardware. ELPMBUNI Leveling the Mounting...
Installation Manual Rotate the leveling barrels to the projector then tighten the hex head leg screws with the Allen wrench (supplied) (Figure 8 and Figure 9). When the position desired is achieved tighten the mounting hardware ..., if not all, ventilation points (including lamp & filter access doors). 2. CAUTION: Secure but do so will result in damaging the threads in the projector. Allen Wrench Level Inverted Projector DOWN UP Adjusting the Mount Figure 8 Leveling Barrels Page - 14 - Failure to do not over-tighten the mounting hardware. ELPMBUNI Leveling the Mounting...

Installation Guide - ELPMBUNI Universal Mount Assembly
Page 14
...), please refer to the security kit installation guide before attaching the ceiling plate to the center of the lens as well. 4. Before you mount your projector's distance calculation to determine what distance is normally better to have the top edge of the wood stud. Page - 15 - Secure the ceiling assembly into... parallel with other (commercially available) hardware depending on the screen and no higher then the top image edge of the upper assembly. Locate the inverted projectors top of the lens point to determine the proper placement of the center of the screen). 3.
...), please refer to the security kit installation guide before attaching the ceiling plate to the center of the lens as well. 4. Before you mount your projector's distance calculation to determine what distance is normally better to have the top edge of the wood stud. Page - 15 - Secure the ceiling assembly into... parallel with other (commercially available) hardware depending on the screen and no higher then the top image edge of the upper assembly. Locate the inverted projectors top of the lens point to determine the proper placement of the center of the screen). 3.

Installation Guide - ELPMBUNI Universal Mount Assembly
Page 17
... slot on the mounting bracket (Figure 13). Make sure the three-knurl knobs are loosened to fully expose to the tri-lock, then rotate the projector 180° Universal Mount Page - 18 - The safety knob should line up with the safety knob to lock the mounting bracket to the upper... assembly Insert universal bracket to the "tri-lock" mounting plate in the upper assembly. 4. Carefully lift the projector and insert the mounting bracket mating special tri-lock cutout into the mating portion of the bracket in the base of the upper assembly. 2. Once...
... slot on the mounting bracket (Figure 13). Make sure the three-knurl knobs are loosened to fully expose to the tri-lock, then rotate the projector 180° Universal Mount Page - 18 - The safety knob should line up with the safety knob to lock the mounting bracket to the upper... assembly Insert universal bracket to the "tri-lock" mounting plate in the upper assembly. 4. Carefully lift the projector and insert the mounting bracket mating special tri-lock cutout into the mating portion of the bracket in the base of the upper assembly. 2. Once...

Installation Guide - ELPMBUNI Universal Mount Assembly
Page 18
... Wood Stud Ceiling Tilt Adjusting Screws Allen Wrench Wood Stud Ceiling Figure 16 Page - 19 - ELPMBUNI Final Adjustments 1. To adjust the tilt angle of the projector, slightly loosen the side M8 screws and tilt to the desired angle to the desired angle then firmly tighten the two M8 roll adjustment screws... (Figure 16). With the projector secured in the mount and power on the screen, slightly loosen the front and rear M8 screws and adjust to the screen and firmly tighten...
... Wood Stud Ceiling Tilt Adjusting Screws Allen Wrench Wood Stud Ceiling Figure 16 Page - 19 - ELPMBUNI Final Adjustments 1. To adjust the tilt angle of the projector, slightly loosen the side M8 screws and tilt to the desired angle to the desired angle then firmly tighten the two M8 roll adjustment screws... (Figure 16). With the projector secured in the mount and power on the screen, slightly loosen the front and rear M8 screws and adjust to the screen and firmly tighten...

Product Information Guide
Page 1
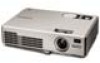
Epson PowerLite 750c/760c Projector Projector Parts Focus ring Zoom ring Control panel Exhaust air vent Foot adjust lever Lens cap Security lock ...) 1024 × 768 pixels (XGA) Color reproduction 24-bit, 16.8 million colors Brightness (ANSI) PowerLite 750c 2000 lumens (High Brightness mode) 1500 lumens (Low Brightness mode) PowerLite 760c 2500 lumens (High Brightness mode) 2000 lumens (Low Brightness mode) Contrast ratio 400:1 Image size 30... (-10 to 60 °C) Humidity Operating: 20 to 80% RH (non-condensing) Storage: 10 to 90% RH 8/05 Epson PowerLite 750c/760c Projector - 1
Epson PowerLite 750c/760c Projector Projector Parts Focus ring Zoom ring Control panel Exhaust air vent Foot adjust lever Lens cap Security lock ...) 1024 × 768 pixels (XGA) Color reproduction 24-bit, 16.8 million colors Brightness (ANSI) PowerLite 750c 2000 lumens (High Brightness mode) 1500 lumens (Low Brightness mode) PowerLite 760c 2500 lumens (High Brightness mode) 2000 lumens (Low Brightness mode) Contrast ratio 400:1 Image size 30... (-10 to 60 °C) Humidity Operating: 20 to 80% RH (non-condensing) Storage: 10 to 90% RH 8/05 Epson PowerLite 750c/760c Projector - 1

Product Information Guide
Page 2
...; 480* 832 × 624* 1024 × 768 1024 × 768 1152 × 870* * The image is directly in a corner, it . Epson PowerLite 750c/760c Projector 8/05 see the following table for compatible formats. Epson PowerLite 750c/760c Projector Safety and Approvals United States FCC 47CFR Part15B Class B (DoC) UL60950 Third Edition Canada ICES-003 Class B CSA C22.2 No...
...; 480* 832 × 624* 1024 × 768 1024 × 768 1152 × 870* * The image is directly in a corner, it . Epson PowerLite 750c/760c Projector 8/05 see the following table for compatible formats. Epson PowerLite 750c/760c Projector Safety and Approvals United States FCC 47CFR Part15B Class B (DoC) UL60950 Third Edition Canada ICES-003 Class B CSA C22.2 No...
Product Information Guide
Page 3
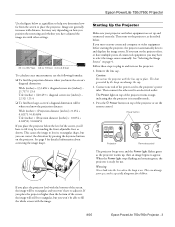
...in place. Warning: Never look into the lens when the lamp is ready for detailed information about correcting the image shape. Epson PowerLite 750c/760c Projector Use the figure below . Image size generally increases with distance, but you won 't have to help you turn on top... to select the image source manually. See page 5 for use the projector with the image. 8/05 Epson PowerLite 750c/760c Projector - 3 If you determine how far from the screen to plug in and turn on the projector. See "Selecting the Image Source" on the remote control. Follow these...
...in place. Warning: Never look into the lens when the lamp is ready for detailed information about correcting the image shape. Epson PowerLite 750c/760c Projector Use the figure below . Image size generally increases with distance, but you won 't have to help you turn on top... to select the image source manually. See page 5 for use the projector with the image. 8/05 Epson PowerLite 750c/760c Projector - 3 If you determine how far from the screen to plug in and turn on the projector. See "Selecting the Image Source" on the remote control. Follow these...

Product Information Guide
Page 4
... Displays. 2. If the Arrange option isn't available, try the following buttons on an external monitor. Epson PowerLite 750c/760c Projector 8/05 Epson PowerLite 750c/760c Projector ❏ If you've connected a Windows®-based computer to the projector, you 're using a Macintosh with a Password" on the projector screen as well as the LCD screen. If you might need to the...
... Displays. 2. If the Arrange option isn't available, try the following buttons on an external monitor. Epson PowerLite 750c/760c Projector 8/05 Epson PowerLite 750c/760c Projector ❏ If you've connected a Windows®-based computer to the projector, you 're using a Macintosh with a Password" on the projector screen as well as the LCD screen. If you might need to the...

Product Information Guide
Page 5
... function will readjust the image again. Epson PowerLite 750c/760c Projector Adjusting the Image Once you see the next section. See "Zooming Your Image" on the projector's control panel or the projector's Setting menu. Press up or down), the projector has an automatic keystone correction function that... the keystone setting, the image retains the corrected shape unless you may need to lock the foot in position. 8/05 Epson PowerLite 750c/760c Projector - 5 Once the image is no longer rectangular after projection starts for instructions. If the image is positioned where you...
... function will readjust the image again. Epson PowerLite 750c/760c Projector Adjusting the Image Once you see the next section. See "Zooming Your Image" on the projector's control panel or the projector's Setting menu. Press up or down), the projector has an automatic keystone correction function that... the keystone setting, the image retains the corrected shape unless you may need to lock the foot in position. 8/05 Epson PowerLite 750c/760c Projector - 5 Once the image is no longer rectangular after projection starts for instructions. If the image is positioned where you...

Product Information Guide
Page 6
...you 're projecting and the environment in the Image menu. Follow these steps to adjust the keystone setting as needed. Epson PowerLite 750c/760c Projector 8/05 Living Room For increased brightness when playing video games or watching TV in the Extended menu under Operation. This automatically ... Signal menu is too bright or not bright enough, do one of the screen. you want . Press the Menu button on the projector. Epson PowerLite 750c/760c Projector ❏ Or press the Menu button, select the Setting menu, and press Enter. Use the pointer button on a green chalkboard (...
...you 're projecting and the environment in the Image menu. Follow these steps to adjust the keystone setting as needed. Epson PowerLite 750c/760c Projector 8/05 Living Room For increased brightness when playing video games or watching TV in the Extended menu under Operation. This automatically ... Signal menu is too bright or not bright enough, do one of the screen. you want . Press the Menu button on the projector. Epson PowerLite 750c/760c Projector ❏ Or press the Menu button, select the Setting menu, and press Enter. Use the pointer button on a green chalkboard (...
Product Information Guide
Page 7
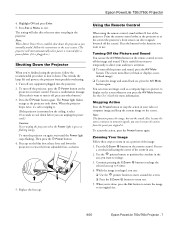
... the button for more information. You see a crosshair indicating the center of the projector. To turn off any other button.) 3. Stopping Action Press the Freeze button to its original size. 8/05 Epson PowerLite 750c/760c Projector - 7 Press the E-Zoom button on the projector or remote control. Then press the P Power button. 4. Using the Remote Control When...
... the button for more information. You see a crosshair indicating the center of the projector. To turn off any other button.) 3. Stopping Action Press the Freeze button to its original size. 8/05 Epson PowerLite 750c/760c Projector - 7 Press the E-Zoom button on the projector or remote control. Then press the P Power button. 4. Using the Remote Control When...


